
How to Clean a Ceiling Fan Without Making a Mess

Sliding an old pillowcase over each blade and wiping backward is the best way to clean reachable ceiling fan blades because it traps every speck of dirt inside the fabric. That technique changes if you have vaulted ceilings, where an extendable curved duster lets you clear both sides safely from the floor. Both methods keep loose debris from showering down across the room.
The right approach also depends on the type of buildup and what sits below the fixture. Dry bedroom dust slips off in seconds, but fans spinning near a kitchen often gather a sticky film of cooking grease that needs a damp cloth with gentle soap. Protecting the metal arms holding the blades matters too, since pressing too hard can bend them and cause an annoying wobble. The following steps show you how to clean any fan safely without dropping a single speck of dust on your furniture.
The Short Version
- For standard ceilings: Slip an old, lightly damp pillowcase over each blade and slide it backward to trap all dust inside the fabric without making a mess on the floor.
- For high or vaulted ceilings: Use a lightweight extendable duster with a curved microfiber head to clean both blade sides safely from the ground without climbing a ladder.
- For sticky kitchen grease: Wipe blades using a well-wrung cloth dipped in warm water and mild dish soap, supporting the blade from below, then dry immediately with a clean towel.
- To avoid wobbles: Support the metal arm holding the blade with your free hand while wiping to prevent bending, and check mounting screws for looseness.
The Zero-Mess Pillowcase Trick for Standard Ceilings
Standing beneath a ceiling fan with a standard dusting cloth usually showers your hair, face, and furniture with debris. As blades spin, friction creates static electricity that bonds dust and pet hair to the leading edges. Sweeping an open rag across the surface acts like a plow, dumping loose clumps straight down.
The pillowcase trick stops this problem by trapping the debris inside a fabric sleeve. If you have a ceiling fan in your master bedroom over a bed, this method lets you clean without needing to wash your bedding afterward.
- Turn off the fan: Shut off the wall switch and wait for the blades to stop spinning completely before setting up your step stool.
- Dampen an old pillowcase: Take an old pillowcase and lightly mist the inside with water or dusting spray. It should feel barely damp, which helps grab fine dust without streaking.
- Position a sturdy step stool: Set up a stable step stool so you can reach the fan comfortably with bent elbows. Avoid balancing on soft mattresses or sofas.
- Slide the case over the blade: Slip the pillowcase over the tip of the blade, gathering the fabric as you slide it toward the central body of the fan.
- Press and pull: Place your hands on the outside of the case, sandwiching the blade between your palms. Press gently on the top and bottom surfaces, then pull the pillowcase back toward yourself in one smooth motion.
- Empty and repeat: The dust stays inside the fabric envelope. Shake the debris into the closed end of the case, rotate the fan, and repeat on the remaining blades.
Cleaning High or Vaulted Ceilings Safely from the Floor
Vaulted ceilings, entryways, and great rooms often place fans ten to twenty feet above the floor. Hauling a heavy extension ladder indoors and climbing with cleaning rags creates an unnecessary fall hazard. An extendable microfiber duster with a curved head lets you do the entire job safely from the ground.
Microfiber uses split synthetic fibers that hold a natural electrostatic charge. Instead of knocking dust loose into the air like a traditional feather duster, the fibers pull particles in and trap them. A curved or circular head wraps around the blade, wiping the top, bottom, and edges at the same time.
To avoid debris falling on your face, stand off to the side of the blade rather than directly underneath it. Extend the handle until the head reaches the blade easily while keeping your hands at chest level. Slide the curved head over the blade tip, guide it toward the motor, and pull it back in one smooth, slow stroke.
Avoid quick back-and-forth scrubbing. Fast motions create air drafts that peel dust away from the fibers and send it floating across the room. After cleaning two blades, inspect the duster head. If it is coated with thick lint, take the tool outside, tap it against a railing or brush it clean, then finish the rest of the fan.
Cutting Through Greasy Kitchen Dust Without Ruining Blade Finishes
Ceiling fans near kitchens collect a sticky, stubborn film that dry dusters cannot remove. Cooking releases aerosolized oils and steam that settle onto fan blades. When airborne dust and pet hair land on this oily layer, they create a tacky residue that smears if wiped dry.
Dissolving this grime requires moisture, but excess liquid can ruin your blades. Most residential fan blades are made from medium-density fiberboard with a thin wood-grain veneer or paint. If liquid seeps into screw holes or raw edges, the wood swells and warps permanently. Harsh chemicals like bleach, ammonia, or heavy degreasers can also strip clear coats and discolor finishes.
- Mix a gentle degreasing wash: Add two drops of mild liquid dish soap to a small bowl of warm water. Dish soap cuts cooking grease without harming protective finishes. For stubborn film, add two tablespoons of distilled white vinegar.
- Wring the cloth thoroughly: Dip a microfiber cloth into the soapy water, then wring it out completely. No water should drip when you squeeze it firmly.
- Support the blade from below: Place your free hand flat beneath the blade to support its weight, protecting the metal arm from bending under pressure.
- Wipe from motor to tip: Wipe along the blade from the motor housing outward using light, steady pressure. For sticky spots, hold the damp cloth on the grease for ten seconds to soften it before wiping.
- Dry immediately: Follow right behind with a clean, dry microfiber towel. Drying the blade immediately prevents moisture from soaking into wood seams or spotting metal hardware.
Protecting Blade Balance and Preventing Annoying Wobbles
A ceiling fan is a carefully balanced machine. When a fan develops an irritating wobble, click, or humming noise after cleaning, the problem is usually caused by bent hardware or loose screws rather than a faulty motor. Pressing down too hard on the blades while wiping can bend the brackets and throw off the alignment.
Use this quick checklist to protect your fan balance and keep it running smoothly while you clean:
- Support the blade iron: The blade iron is the metal arm holding the blade to the motor housing. These arms are often made of cast aluminum or zinc alloys that bend under moderate pressure. Never pull downward on the blade tips. Always cradle the blade with your free hand near the bracket to absorb the wiping force.
- Snug the mounting screws: Everyday motor vibrations loosen hardware over time. While on your step stool, inspect the screws securing the blades to the metal arms and the arms to the motor. Tighten any loose screws with a screwdriver, but avoid overtightening and stripping threads.
- Keep liquids away from the motor: Never spray cleaners directly onto the blades or central motor housing. Liquid entering motor vent slots can damage electrical wiring and cause short circuits.
- Verify seasonal rotation: While checking the motor, check the reverse switch. For summer cooling, blades should spin counterclockwise to push a cooling breeze straight down. In winter, set blades to rotate clockwise at low speed to pull cool air up and redistribute trapped ceiling heat without creating a draft.
Cleaning the Motor Housing, Canopy, and Light Fixtures
Dusting the fan blades handles only part of the chore. Dust gathering on stationary parts looks messy and can shorten the lifespan of your fixture.
The motor housing, which is the central body of the fan, features vent slots designed to keep the internal electrical coils cool. When dust and pet hair clog these vents, trapped heat degrades the motor bearings and causes humming noises. Use a vacuum cleaner with a soft dusting brush attachment to draw dust out of the vent slots. Never poke damp rags, wire brushes, or screwdrivers into these openings.
Next, wipe the canopy, which is the round cup covering the ceiling wires where the hanging rod meets the drywall. Dust and cobwebs gather along the top rim. Wipe this area with a dry microfiber cloth so stray debris does not float down later.
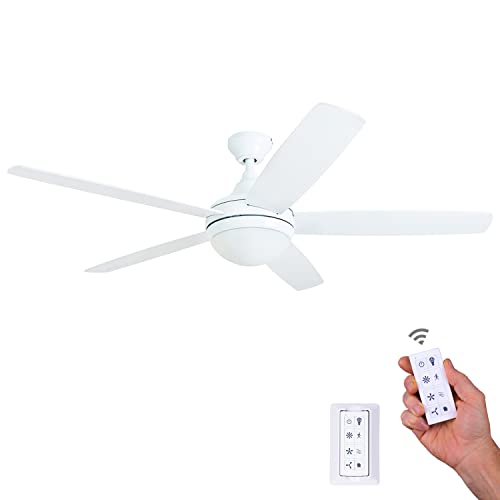
If you have a fixture like a white ceiling fan with light for your bedroom, cleaning the glass shade brings back clear, bright light:
- Turn off the light switch and wait ten minutes for bulbs to cool down before touching them.
- Support the glass globe with one hand while loosening the thumbscrews or gently rotating the shade counterclockwise.
- Wash the glass in warm, soapy water in your sink, rinse it thoroughly, and dry it completely with a soft towel before reinstalling.
- Wipe LED bulbs and the light base with a dry cloth only, keeping moisture away from electrical sockets.
What to Look for in a Ceiling Fan Duster
If your home features vaulted ceilings or fans mounted above large furniture, a dedicated ceiling fan duster makes routine cleaning safe and ladder-free. Choosing the right tool comes down to handle reach, head shape, and fiber quality.
Choose an aluminum extension pole that reaches your ceiling height while keeping your arms at a comfortable chest level. Locking mechanisms that twist or clasp firmly prevent the pole from slipping or collapsing while you reach overhead.
The duster head should feature a curved or looped shape that slides over the blade, cleaning both the top and bottom surfaces in one pass. Bendable wire cores let you customize the head angle to match the pitch and height of your fan blades.
Select high-density microfiber or chenille rather than traditional feathers. Microfiber creates static cling that locks dust in place instead of scattering it into the air. Removable heads that rinse clean under warm tap water allow you to reuse the duster for years without buying disposable replacements.

- LFR Score8.3
LFR Score is a ranking system developed by lightfansreviews.com. LFR Score has no relationship or impact from any manufacturers or sales agent websites. Learn more
- BrandDRQ

- LFR Score8.3
LFR Score is a ranking system developed by lightfansreviews.com. LFR Score has no relationship or impact from any manufacturers or sales agent websites. Learn more
- BrandLOVECO

- LFR Score7.9
LFR Score is a ranking system developed by lightfansreviews.com. LFR Score has no relationship or impact from any manufacturers or sales agent websites. Learn more
- BrandYANLIFY

- LFR Score7.3
LFR Score is a ranking system developed by lightfansreviews.com. LFR Score has no relationship or impact from any manufacturers or sales agent websites. Learn more
- BrandMNWHUC

- LFR Score7.3
LFR Score is a ranking system developed by lightfansreviews.com. LFR Score has no relationship or impact from any manufacturers or sales agent websites. Learn more
- BrandSFIELCAPA

- LFR Score7.4
LFR Score is a ranking system developed by lightfansreviews.com. LFR Score has no relationship or impact from any manufacturers or sales agent websites. Learn more
- BrandClean Beastie

- LFR Score7.8
LFR Score is a ranking system developed by lightfansreviews.com. LFR Score has no relationship or impact from any manufacturers or sales agent websites. Learn more
- BrandSetSail

- LFR Score9.2
LFR Score is a ranking system developed by lightfansreviews.com. LFR Score has no relationship or impact from any manufacturers or sales agent websites. Learn more
- BrandARAINY

- LFR Score8.7
LFR Score is a ranking system developed by lightfansreviews.com. LFR Score has no relationship or impact from any manufacturers or sales agent websites. Learn more
- BrandFONUNO

- LFR Score9.0
LFR Score is a ranking system developed by lightfansreviews.com. LFR Score has no relationship or impact from any manufacturers or sales agent websites. Learn more
- BrandEyliden
Last update on 2026-10-04 / Affiliate links / Images, Product Titles, and Product Highlights from Amazon Product Advertising API
FAQs
How often should I clean my ceiling fan?
Dusting your ceiling fan once every four to six weeks prevents thick debris ridges from building up on the leading edges of the blades. If you run your fan constantly, live in a dusty area, or have shedding pets, a quick dusting every two weeks keeps dust from settling on your furniture below.
Why does so much dust collect on fan blades if they are constantly spinning?
As fan blades spin through the air, friction builds a mild electrostatic charge on the blade surfaces, especially along the leading edge. This charge pulls airborne dust, pet dander, and fabric fibers directly onto the blade. Even at high speeds, a thin layer of still air sits right against the blade surface, allowing dust to stick firmly rather than being blown away.
Can I clean a ceiling fan while it is running?
No, you should never attempt to clean a fan while the blades are turning. Touching moving blades risks hand injuries, and catching a cleaning cloth on a moving blade can bend the mounting bracket or pull the fixture loose. Always turn the wall switch off and wait until the blades come to a complete stop before cleaning.
What should I do if my fan wobbles after I clean it?
If your fan wobbles after cleaning, check each blade screw to confirm it is snug against the metal arm holding the blade. Verify that the ball at the top of the hanging extension rod is locked securely into the ceiling bracket groove. If wobbling continues, a blade bracket may have bent slightly under wiping pressure, which you can correct with an inexpensive fan balancing kit.

Best Quiet Ceiling Fan For Bedroom 2026 Ultimate Comfort Picks

Best Ceiling Fan For Master Bedroom 2026 With Ultimate Comfort

Best White Ceiling Fan With Light For Bedroom 2026 Top Picks

Best Quorum Medallion Ceiling Fan 2026 With Style & Breeze
Best Outdoor Fan For Pergola 2026 Comfort Boost

Best Ceiling Fan For Great Room 2026 With Ultimate Comfort

Best Outdoor DC Ceiling Fans 2026 For Breezy Comfort
Best ceiling exhaust bath fan with light and heater 2026




