How to Put Up LED Strip Lights Without Damaging Walls

Clean the wall first with rubbing alcohol. Most light strips fall down because microscopic dust keeps the factory glue from gripping the wall. Wiping the surface clean and letting it dry completely creates a reliable base. From there, peel the sticky backing off gradually while pressing firmly along the strip, and anchor the plug end with a small clip so gravity never pulls the run down.
The right approach depends on your room setup. Bumpy drywall rarely holds bare adhesive, requiring a strip of painter tape underneath or slim plastic mounting tracks to stay secure. Renters also need that tape barrier so the strong factory glue never tears off drywall paint on moving day. Sharp room corners need gentle curves rather than tight folds, which can snap internal circuits. Here is the step-by-step way to mount your lights cleanly and protect your walls.
The Short Version
- Clean the wall path with standard rubbing alcohol and let it dry completely to clear away invisible dust and oils.
- Peel back the sticky peel-off tape just a few inches at a time, pressing the strip firmly against the wall for ten seconds per section.
- Protect rental walls by laying down blue painter tape first or placing the lights inside a slim plastic mounting track.
- Make gentle rounded slack loops at 90-degree corners instead of creasing the strip, or cut on the marked copper scissor spots and use a snap-on plastic turn joiner.
Prepping Your Walls So the Lights Actually Stay Up
Most strip lights fall off the wall because of invisible dirt, not weak factory glue. Drywall collects a steady layer of powdery dust and airborne grime. If you press sticky peel-off tape onto a dusty wall, the adhesive sticks to the dust particles instead of the paint. Within a few days or weeks, gravity pulls the whole strip down.
Household cleaning sprays make this problem worse. Multi-surface cleaners often leave behind scented oils, waxes, or thin soap films that keep glue from bonding. Rubbing alcohol (isopropyl alcohol) is the best tool because it dissolves grease and evaporates within minutes without leaving any residue.
Follow this quick cleaning checklist before peeling any adhesive:
- Wipe the planned path with a clean, dry microfiber cloth to remove loose wall dust.
- Dampen a lint-free cloth with rubbing alcohol without soaking the drywall.
- Rub along the mounting line with moderate pressure to lift away skin oils and grease.
- Wait five to ten minutes until the surface feels completely dry to the touch.
- Confirm the room is warm, since wall tape bonds poorly in rooms under 60 degrees Fahrenheit.
How to Hang Your Strips Step by Step
Hanging your lights correctly requires patience. Rushing the job or peeling the backing off the entire spool at once leads to tangled ribbons, carpet lint on the glue, and crooked lines.
- Verify the lights first: Unroll the spool and plug the plug-in cord into a wall outlet. Turn the lights on to confirm every section lights up in matching colors, then unplug the power supply before mounting.
- Map the power supply path: Start your run right where the power brick will live. Ensure the cord reaches the outlet easily without pulling tight, since a dangling power brick will yank the strip off the wall.
- Peel back a small section of backing: Expose only six to twelve inches of the sticky peel-off tape at a time so it does not grab the floor or your clothes.
- Align and set the strip: Follow a natural guide line, such as ceiling trim, a baseboard, or a light pencil mark. Keep the ribbon flat without stretching the flexible circuit board.
- Apply firm pressure: Press down along the strip with your thumb or palm for ten to fifteen seconds per segment. The tape uses pressure-sensitive adhesive, so firm pressure is what activates the bond with the paint.
- Work in small steps: Continue peeling, aligning, and pressing until you finish the run. Support the trailing spool with your free hand so its weight does not peel fresh sections down.
Turning Corners Without Snapping the Internal Wires
Turning a 90-degree corner is where many light strips get damaged. An LED strip looks like a flexible ribbon, but it contains thin copper traces that carry electrical current. Folding the strip sharply like a piece of paper snaps those copper traces, cutting off the circuit and leaving the rest of the strip dark.
You have two reliable ways to turn corners safely:
The first method is the gentle pinch loop. Guide the ribbon into the corner and create a small, rounded slack loop that curves outward away from the seam. Press the tape firmly against the wall on both sides of the corner, letting the tiny loop sit freely in mid-air. This keeps the internal copper flat and relaxed while allowing the lights to continue in the new direction.
The second method is using a snap-on plastic turn joiner (a corner connector). This small plastic piece lets you make clean 90-degree turns. Cut the ribbon squarely across the marked copper pads, slide the cut ends into the plastic joiner beneath the metal contact pins, and click the latch shut. This creates a sharp look on flat walls where a looped ribbon might look untidy.
Cutting Your Lights to the Right Length Safely
Light strips rarely match wall dimensions perfectly. Trimming the excess is simple, but cutting in the wrong spot ruins entire lighting sections.
LED strip lights are built in repeated modular circuits of three to six diodes. Current flows through these small groups in a loop. Slicing through the middle of a circuit group breaks the loop and turns those diodes dark permanently.
Look closely at the ribbon. Every few inches, you will find marked copper scissor spots. These look like pairs of shiny copper pads, often with a scissor symbol or a thin line printed between them. These pads mark the safe junctions where one circuit ends and the next begins.
Always unplug the power adapter from the wall outlet before cutting. Use sharp scissors, and make one clean cut straight through the middle of the copper pads. Cutting through the center leaves half of the copper pad on each side, which lets you reconnect the cutoff piece later with a snap-on connector if needed.
Renter Tricks to Protect Your Walls and Deposit
Factory adhesive on strip lights can rip off paint and tear drywall paper during removal. Renters often lose security deposits repairing shredded drywall patches. You can mount your lights securely without exposing walls to harsh permanent glue.
If you are setting up LED strip lights for a dorm room or rental apartment, use the painter tape barrier method. High-quality blue painter tape releases from latex paint without lifting drywall paper. Apply painter tape along your wall first, smoothing it flat with a card. Then stick the peel-off tape of your light strip directly onto the painter tape. The painter tape protects your paint, while the light strip adheres firmly to the tape surface.
Another clean approach is using a slim plastic mounting track. These lightweight tracks mount to walls with removable adhesive strips or tiny finish brads. The light strip sticks inside the channel, while a snap-on frosted cover diffuses the individual bright dots into a soft, smooth glow.
When taking lights down, never rip them straight off the wall. Warm the strip with a hair dryer on low heat for twenty seconds per section. Heat softens the adhesive, allowing you to peel the strip backward at a shallow 45-degree angle without peeling wall paint.
Fixing Sagging Lights When Factory Glue Fails
Even properly mounted strips can sag over time. Heat from the diodes warms the adhesive, summer humidity weakens the bond, and gravity pulls steadily on heavy sections. You can easily fix drooping sections with simple mechanical supports.
- Plastic mounting support clips: Small clear clips that hook over the ribbon and screw or stick to the wall provide dependable support. Place one clip every two to three feet, and add extra clips right at corners.
- Reinforce power connections: The heaviest part of the light strip is the first foot connected to the power cord. Anchor this starting segment with two mounting clips side by side to absorb cord pull.
- Double-sided acrylic foam tape: Flat factory tape struggles on bumpy orange-peel or knockdown drywall. Thick foam tape squishes into the bumps and valleys, bridging air gaps that drop lights.
- Support the power brick: Never let the transformer box dangle mid-air. Mount the power supply to the baseboard or wall with hook-and-loop strips to keep weight off the light ribbon.
What to Look for in an Easy-to-Mount Strip Light Kit
Choosing the right lighting kit makes mounting easier from the start. Look for kits that feature branded acrylic backing tape on the flexible ribbon, which sticks far better than unbranded paper backings. Verify the cord length on the plug-in cord to make sure the power supply reaches your wall outlet without needing an awkward extension cord dangling down the wall.
Check the hardware included in the box. Kits that come with spare mounting clips, snap-on plastic turn joiners, and alcohol cleaning pads save you extra trips to the store when handling corners. If you want convenient lighting schedules, consider voice-controlled strip lights or app-based systems to adjust brightness in lumens and change color tone without wiring an external wall switch.
Pay attention to location ratings as well. Standard dry-rated lights work well for living rooms and bedrooms. If you plan to mount strips under kitchen cabinets near a steamy sink or along a bathroom mirror, pick moisture-resistant strips labeled damp-rated so steam does not degrade the adhesive over time.
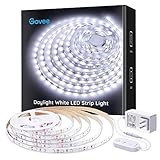
- LFR Score9.7
LFR Score is a ranking system developed by lightfansreviews.com. LFR Score has no relationship or impact from any manufacturers or sales agent websites. Learn more
- BrandGovee
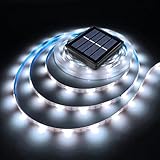
- LFR Score9.0
LFR Score is a ranking system developed by lightfansreviews.com. LFR Score has no relationship or impact from any manufacturers or sales agent websites. Learn more
- BrandOusam Led

- LFR Score8.7
LFR Score is a ranking system developed by lightfansreviews.com. LFR Score has no relationship or impact from any manufacturers or sales agent websites. Learn more
- BrandQZYL

- LFR Score8.5
LFR Score is a ranking system developed by lightfansreviews.com. LFR Score has no relationship or impact from any manufacturers or sales agent websites. Learn more
- BrandDAYBETTER

- LFR Score8.5
LFR Score is a ranking system developed by lightfansreviews.com. LFR Score has no relationship or impact from any manufacturers or sales agent websites. Learn more
- BrandHBOWMDJIA
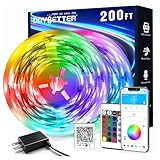
- LFR Score8.4
LFR Score is a ranking system developed by lightfansreviews.com. LFR Score has no relationship or impact from any manufacturers or sales agent websites. Learn more
- BrandDAYBETTER
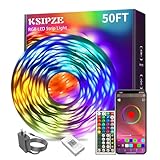
- LFR Score8.2
LFR Score is a ranking system developed by lightfansreviews.com. LFR Score has no relationship or impact from any manufacturers or sales agent websites. Learn more
- BrandKSIPZE
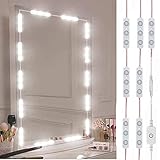
- LFR Score7.3
LFR Score is a ranking system developed by lightfansreviews.com. LFR Score has no relationship or impact from any manufacturers or sales agent websites. Learn more
- BrandLPHUMEX

- LFR Score7.3
LFR Score is a ranking system developed by lightfansreviews.com. LFR Score has no relationship or impact from any manufacturers or sales agent websites. Learn more
- BrandDAYBETTER
Last update on 2026-10-09 / Affiliate links / Images, Product Titles, and Product Highlights from Amazon Product Advertising API
FAQs
Why do my LED strip lights keep falling off the wall?
Lights usually fall because microscopic drywall dust or oils created a barrier between the adhesive and the wall. If the wall was not wiped down with rubbing alcohol before hanging, the sticky backing bonded to loose dust instead of the paint. Textured drywall and the pull of an unsupported power cord also drag strips down over time.
Can I use hot glue or super glue to reattach fallen strip lights?
Avoid hot glue and super glue on bare drywall and light strips. Hot glue can melt the protective plastic coating and ruin the delicate copper circuits inside the ribbon. Super glue forms a brittle bond that tears wall paint down to the brown drywall paper during removal. Use double-sided acrylic foam tape or mounting clips instead.
How do I put up strip lights on heavily textured drywall?
Textured drywall prevents flat factory tape from making full contact, leaving air gaps that cause lights to drop. The easiest fix is applying double-sided foam tape along the wall first, which molds into the bumps and pits. You can also screw a slim plastic mounting track into the wall to create a completely flat surface.
Is it safe to leave LED strip lights plugged in all night?
Standard plug-in strip lights produce very little heat compared to traditional incandescent bulbs and are safe for overnight use. Make sure the power adapter sits in a well-ventilated spot rather than under pillows or heavy curtains. For bedroom use, choose models with dimming controls so you can dial down brightness for sleeping.


Best Lighting For Makeup 2026 Bright Ideas For Flawless Looks

Best Wall Sconces For Staircase 2026 Brighten Your Home

Best Lighting For Computer Desk 2026 For Focused Work

Best Boat Black Lights 2026 For Nighttime Adventure

Best Black 30 Inch Light Bar Reviews – Top Picks of 2026

Best Black Light For Aquarium 2026 For Vibrant Glow

Best Black Light for Authenticating Glass 2026 Top Picks

Best Waterproof Spotlight 2026 That Outshines Expectations