
How to Use LED Strip Lights for a Clean Glare-Free Glow

Achieving a polished look with LED strip lights is much easier than it seems, so there is no reason to worry about messy wires or cheap-looking results. The best approach is to treat them as hidden indirect lighting. Tucking the tape behind cabinet lips, headboards, or furniture frames lets the glow bounce off surrounding surfaces instead of shining bare light dots straight into your eyes.
Where and how you mount them depends on a few everyday factors. Kitchen counters need crisp light pointed down at worktops, while bedrooms call for a gentle, warm hue that feels relaxing. Your line of sight matters just as much, because a strip tucked under a shelf might stay hidden while standing but shine right into your eyes when you sit down. The wall or wood surface also decides how well the tape sticks. Understanding these practical details makes it easy to plan your layout without harsh glare or peeling tape.
Why should you hide the light strip from view?
Bare LED strips look harsh when you stare directly at them. Each tiny light diode acts like an intense pinpoint spotlight. When mounted openly along a ceiling corner or baseboard, those bright dots hit your eye directly, causing eye fatigue, sharp shadows, and a cluttered look that feels unfinished.
The secret to professional interior lighting is indirect illumination. Instead of shining light straight toward you, the strip should wash light against an adjacent surface like a wall, floor, or ceiling. The surface catches the light, diffuses it, and bounces a soft, broad glow back into the room. This bounce hides the individual light points and creates the illusion of floating furniture or built-in architectural features.
Line of sight matters just as much as placement. A strip tucked under an upper kitchen cabinet might look hidden while you stand at the counter, but if you can see bare yellow diodes while sitting at the dining table, the glare ruins the calm mood. Before sticking down any tape, sit in your normal chairs, lie on your bed, and look toward the installation spot. Position the strip behind a face frame, inside a cabinet lip, or angled inward so the light source stays completely out of view from every common angle in the room.
If your space lacks a hidden ledge, use an aluminum channel with a frosted cover. This cover is called a diffuser (a frosted plastic strip that snaps over the lights to blend individual dots into a smooth, solid bar of light). Channels also protect the tape from dust and give bare drywall installations a clean, finished appearance.
Where should you place strips for the best effect?
Placing lights in the right spot turns ordinary furniture into functional focal points. Focus on areas where the glow serves a clear purpose, whether providing practical visibility or relaxing background ambiance:
- Under upper kitchen cabinets: Mount the strip along the bottom front edge behind the face frame lip, facing down or angled slightly toward the backsplash. This puts bright task light directly onto your food prep counter without shining back into your eyes while you chop vegetables.
- Under lower cabinet toe kicks: Place a strip along the recessed bottom base of kitchen or bathroom cabinets. The low glow bounces off the floor, acting as a soft nightlight for late trips to get water without blinding you with bright overhead fixtures.
- Behind bedroom headboards: Running a strip along the back perimeter of a wooden or upholstered headboard casts a gentle, halo-like wash up the wall. It provides calm reading light that will not disturb a sleeping partner.
- Under the bed frame: Tucking lights underneath the frame makes the entire bed appear to float weightlessly. This low light is soothing before sleep and illuminates the floor so you do not stub your toes in the dark.
- Behind desks and computer monitors: Mounting strips to the back of a desk or screen creates bias lighting. Bias lighting balances the contrast between a bright monitor and a dark room, which dramatically reduces eye strain during long work or gaming sessions.
- Along ceiling coves and drop ceilings: If your room features crown molding or a tray ceiling with a recessed pocket, resting the strip inside the channel sends a broad, luxurious ambient glow across the entire ceiling.
How do you stop strip lights from falling down?
The factory adhesive backing on LED strips fails when people stick it to dirty, cold, or textured surfaces. Gravity quickly pulls the heavy power end down, leaving strips drooping across the wall. Follow these steps to ensure a firm, lasting hold without ruining your walls:
- Clean the surface thoroughly: Wipe the mounting area with a clean cloth dampened with isopropyl alcohol. Common household sprays leave behind invisible, slippery soap films that ruin sticky tape. Alcohol strips away grease, cooking oils, and dust, leaving a pristine surface. Let the area dry completely for five minutes before moving forward.
- Preview your layout before peeling: Before removing the adhesive backing paper, temporarily secure the strip in place with blue painter's tape. Turn the lights on to confirm the glow falls evenly and that the power plug easily reaches your chosen wall outlet.
- Warm the strip if the room is cold: Adhesive tape bonds poorly in chilly temperatures. If the room feels cold, hold the strip roll between your hands or let the room warm up to normal room temperature so the sticky backing can bond properly.
- Peel and press inch by inch: Never pull the entire paper backing off at once, as the strip will tangle and collect airborne dust. Peel back six to twelve inches of backing paper at a time. Press the strip firmly against the surface using your thumb, holding firm pressure on each section for at least ten seconds to activate the pressure-sensitive adhesive.
- Support the heavy power plug: The heaviest part of any installation is the cord connecting the strip to the power adapter. That dangling weight will slowly pry the strip off the wall. Secure the power cord with cable clips or heavy-duty mounting tape to relieve tension on the light strip. Renters who want to avoid wall damage can use removable adhesive mounting tabs designed for renter-friendly strip lights to protect your deposit.
How do you cut strips and turn sharp corners?
Flexible LED strips are printed circuit boards. While they bend easily along their flat length, bending them sideways around a flat 90-degree corner can crack the delicate copper traces inside, causing the entire rest of the strip to fail.
To navigate corners safely, use one of two simple methods:
The first method is a gentle pinch loop. Instead of forcing the strip to fold flat like origami, create a small, loose ribbon loop at the corner. Pinch the strip slightly upward or outward so the tape changes direction by 90 degrees without a sharp, creased fold across the circuit line. Secure the loop on both sides with a dab of mounting tape or a plastic clip. This keeps the internal copper pathways safe while turning corners behind a TV or inside a cabinet.
The second method is cutting the strip and using corner connectors. LED strips have designated cutting points every few inches. Look closely at the surface for a pair of small copper solder pads (copper cutting marks on the strip, often marked with a tiny scissor icon). You must cut straight through the exact center of these copper pads with a sharp pair of scissors. If you cut anywhere else between the marks, you break the electrical connection and ruin that segment.
Once you cut the strip cleanly at the copper mark, insert each end into an L-shaped corner connector. Slide the bare copper pads under the tiny metal prongs inside the connector clip, matching positive and negative markings, then snap the plastic door shut. These solderless snap connectors create a clean, square corner with zero risk of broken wiring.
Which color tone works best for your living space?
Choosing the wrong light tone can make an inviting living room feel like a hospital room or leave a kitchen workspace looking dim and murky. Light color tone or warmth is measured on the Kelvin scale, which runs from warm reddish-yellow to crisp cool blue.
Warm white falls between 2200K and 3000K (2700K describes warm soft white). This cozy, golden glow mirrors the relaxing feel of a sunset or traditional incandescent bulb. It is the best choice for bedrooms, living rooms, and dining spaces where your primary goal is relaxation and comfort. Warm light tells your brain to wind down for the evening.
Neutral white sits around 3500K to 4000K. It is clean, balanced, and free of yellow or blue tints. This neutral tone works wonders in kitchens, laundry rooms, and bathrooms because it provides clear visibility without feeling cold or sterile.
Cool daylight ranges from 5000K to 6500K (5000K describes crisp daylight). This bright, blue-tinged light maximizes visual focus and alertness. It is great for garage workbenches, craft desks, and display shelving, but it feels harsh and clinical in bedrooms or cozy living spaces.
Beyond white tones, consider how you use the room. Standard RGB (color-changing light) options let you switch between deep blues, greens, and reds for movie nights or gaming. If you enjoy dynamic lighting that moves along the strip in waves or chasing patterns, strip lights with dynamic chasing effects offer specialized multi-color segments. For everyday domestic spaces, however, tunable white strips (which let you dial anywhere from warm 2700K to cool 6000K throughout the day) offer the most practical value. You get crisp daylight while cooking dinner and cozy warm white when relaxing later that evening. Also check for a color accuracy (CRI) rating of 90 or higher, which ensures that food, paint, and natural wood look rich and true rather than washed out.
What features should you look for before buying?
Before choosing a light strip, verify the layout requirements of your room to pick the right configuration. Look at the total length you need to cover and confirm that the kit includes a power adapter sized to run that distance without causing the far end of the strip to dim.
Check the density of the light dots along the roll. Strips with a high number of diodes per foot produce a smoother, more even sheet of light, making diffusers work far better without visible gaps between dots. If you plan to manage your setup through everyday routines or phone apps, choosing voice-controlled smart strip lights allows you to adjust brightness and set schedules hands-free from the couch.
Pay close attention to location safety ratings. Standard indoor tape is dry-rated for living rooms and bedrooms. If you plan to install strips under bathroom vanities or in humid areas, look for a damp-rated silicone coating that protects the components from steam and moisture. Finally, confirm the dimming controls: an easy-to-use remote, inline dimmer switch, or smart app control lets you turn bright morning task lighting into a mellow nighttime background glow at the press of a button.

- LFR Score9.5
LFR Score is a ranking system developed by lightfansreviews.com. LFR Score has no relationship or impact from any manufacturers or sales agent websites. Learn more
- BrandLepro

- LFR Score9.4
LFR Score is a ranking system developed by lightfansreviews.com. LFR Score has no relationship or impact from any manufacturers or sales agent websites. Learn more
- BrandDAYBETTER
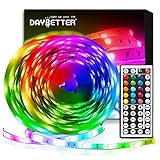
- LFR Score9.4
LFR Score is a ranking system developed by lightfansreviews.com. LFR Score has no relationship or impact from any manufacturers or sales agent websites. Learn more
- BrandDAYBETTER

- LFR Score9.0
LFR Score is a ranking system developed by lightfansreviews.com. LFR Score has no relationship or impact from any manufacturers or sales agent websites. Learn more
- BrandDAYBETTER

- LFR Score8.7
LFR Score is a ranking system developed by lightfansreviews.com. LFR Score has no relationship or impact from any manufacturers or sales agent websites. Learn more
- BrandQZYL

- LFR Score8.5
LFR Score is a ranking system developed by lightfansreviews.com. LFR Score has no relationship or impact from any manufacturers or sales agent websites. Learn more
- BrandDAYBETTER
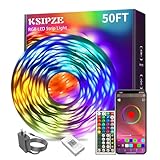
- LFR Score8.2
LFR Score is a ranking system developed by lightfansreviews.com. LFR Score has no relationship or impact from any manufacturers or sales agent websites. Learn more
- BrandKSIPZE

- LFR Score7.9
LFR Score is a ranking system developed by lightfansreviews.com. LFR Score has no relationship or impact from any manufacturers or sales agent websites. Learn more
- BrandGovee

- LFR Score7.2
LFR Score is a ranking system developed by lightfansreviews.com. LFR Score has no relationship or impact from any manufacturers or sales agent websites. Learn more
- BrandPmxary

- LFR Score9.2
LFR Score is a ranking system developed by lightfansreviews.com. LFR Score has no relationship or impact from any manufacturers or sales agent websites. Learn more
- BrandHUALAND

- LFR Score7.3
LFR Score is a ranking system developed by lightfansreviews.com. LFR Score has no relationship or impact from any manufacturers or sales agent websites. Learn more
- BrandChedin
Last update on 2026-10-09 / Affiliate links / Images, Product Titles, and Product Highlights from Amazon Product Advertising API
FAQs
Can you leave LED strip lights on all night?
Yes, quality LED strip lights are safe to leave on all night as long as they have proper ventilation and are not tightly coiled on their plastic reel. LEDs produce very little heat compared to old incandescent bulbs, drawing minimal electricity. However, ensure the power adapter remains in an open area rather than smothered under pillows, blankets, or rugs to prevent heat buildup.
How do you hide the bulky power adapter and wires?
Tuck the power adapter inside a nearby cabinet, underneath a desk, or behind furniture using self-adhesive hook-and-loop straps. For exposed wiring running down a wall toward a baseboard outlet, use paintable cord channels that match your wall color. You can also route thin low-voltage power cords along the backside of table legs or cabinet seams using small adhesive clips.
Do LED strip lights damage wall paint when removed?
Standard adhesive tape on LED strips can peel away dry drywall paper or paint if ripped off quickly. To remove them safely, warm the tape gently with a hairdryer on low heat to soften the sticky glue as you slowly pull the strip away at a flat 45-degree angle. If adhesive residue remains on the wall, rub it off gently with your thumb or a cloth dampened with warm soapy water.
Can you connect two different rolls together safely?
You can connect rolls together only if the power supply is rated to handle the combined length and wattage of both strips. Exceeding the maximum rated length causes voltage drop, which makes the second strip appear noticeably dimmer or flicker. When joining strips, always use matching pin connectors and confirm that both rolls operate on the exact same voltage.


Best Lighting For Makeup 2026 Bright Ideas For Flawless Looks

Best Wall Sconces For Staircase 2026 Brighten Your Home

Best Lighting For Computer Desk 2026 For Focused Work

Best Boat Black Lights 2026 For Nighttime Adventure

Best Black 30 Inch Light Bar Reviews – Top Picks of 2026

Best Black Light For Aquarium 2026 For Vibrant Glow

Best Black Light for Authenticating Glass 2026 Top Picks

Best Waterproof Spotlight 2026 That Outshines Expectations






