
Unfurl Your Creativity: How to Paint a Ceiling Fan
Revealing your creative prowess has never been easier! The seemingly ordinary ceiling fan can become a testament to your individual style when you decide to paint it. Who knew something as common as a ceiling fan could be transformed into a personalized decorative item? This guide on how to paint a ceiling fan is just what you need to inspire and direct your creativity. Make a statement in your home decor with a touch of paint, an inexpensive, but effective way to revamp and recycle. So, don't just look up and see a fan, see potential!
Unmasking the Myth: Can a Ceiling Fan Be Painted?
There is a popular misconception that ceiling fans are only replaceable, not improvable. This isn't entirely accurate. A quick, inexpensive, and surprisingly simple way to give your ceiling fan a new lease on life is by applying a fresh coat of paint. It not only enhances the aesthetics but also can extend the life of the fan. Besides, it provides an excellent opportunity to blend your fan with the room's decor seamlessly.
Many people remain uncertain about the process and the results, hence the question - can I paint a ceiling fan? Well, the short answer is, yes. However, the process involves more than just splashing some paint on the fan blades. It requires a careful approach, meticulous execution, and a dash of creativity to ensure that the fan's performance is not affected and that it looks aesthetically pleasing after the job is done.
Before we dive into the world of painting ceiling fans, it's worth mentioning that the process isn't necessarily difficult, but it can be time-consuming. Therefore, patience is key. If done correctly, the result is a fan that looks brand new and adds to the ambiance of your room.
The journey of painting a ceiling fan might seem overwhelming at first, but with the right guidance, anyone can do it. Let's delve deeper into this topic and learn how you can rejuvenate your ceiling fan by painting it.
The Art of Choosing the Right Paint for Your Ceiling Fan
Selecting the appropriate paint for your ceiling fan is a critical step that shouldn't be overlooked. The type of paint you choose will determine how well the final product turns out. Typically, for metal parts of the fan, oil-based paint is recommended because of its durability and resistance to peeling, chipping, and scratching. As for the fan blades, if they are made of wood, latex-based paint is usually the best choice.
Remember that the color of the paint is equally important. The goal is to make sure the fan complements the room, so consider the color scheme of your space before making a decision. Bright colors can add a fun element to a room, while neutral tones give off a more elegant vibe. The world of color is your oyster when painting your ceiling fan!
Consider the finish of the paint as well. A gloss or semi-gloss finish is typically easier to clean and may be more suitable for a ceiling fan that may gather dust over time. A matte finish, on the other hand, can lend a sophisticated touch to the fan but might be a bit more challenging to keep spotless.
Finally, ensure you purchase a good quality paint. It might be a bit pricier, but a high-quality paint ensures better adhesion, more vibrant color, and longer-lasting results.
Prepping Your Ceiling Fan for a New Hue
The painting process begins with preparation. To ensure that the paint job is successful and long-lasting, it's important to prep your ceiling fan correctly. This involves cleaning, disassembling, and priming the fan.
Start by turning off the power supply and removing the fan from the ceiling. It's important to keep safety in mind. Once removed, clean the fan thoroughly to ensure there's no dust or grease that can interfere with the painting process. Using a mild detergent usually does the trick.
The next step is disassembling the fan. This is essential because it allows you to paint all parts of the fan separately and ensures a neater, more efficient paint job. Be sure to keep track of all screws and pieces to avoid a jigsaw puzzle situation when reassembling.
Priming the fan is an essential step in the preparation phase. A primer ensures better adhesion of the paint, increases paint durability, and provides additional protection for the fan. Choose a primer that is suitable for the material of your fan and the type of paint you've selected.
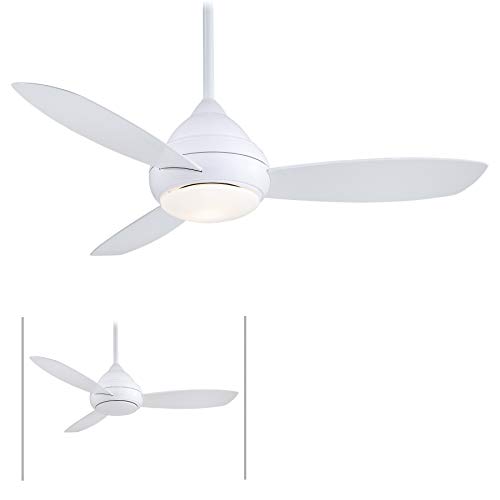
Painting and Reassembling: Giving Your Fan a New Life
With the fan prepped, it's time to paint. Start by painting the edges and tricky parts first, using a brush for precision. For the larger, flat areas, you can use a roller for a smoother finish. It's important to paint thin, even coats to avoid dripping or an uneven appearance. Two or more coats are usually needed for full coverage, but ensure each coat is fully dry before applying the next.
Patience is key during this stage. Allow the paint to dry fully. Rushing this process can lead to smudging and an unsightly finish. Drying time can vary based on the type of paint used and the environmental conditions, so follow the manufacturer's recommendations.
Once the paint is completely dry, it's time to reassemble the fan. This should be done carefully, ensuring all parts are securely fixed. Once reassembled, reattach the fan to the ceiling.
After installation, ensure that the fan operates normally. The balance of the fan shouldn't be disrupted if the paint has been applied evenly to all blades. If you notice a wobble, you may need to balance the fan using a fan balancing kit.
Maintaining Your Newly Painted Ceiling Fan
Maintaining your freshly painted ceiling fan is the last, but certainly not the least important, step in the process. Regular cleaning will help the paint last longer and will keep your fan looking its best. It's best to dust the fan at least once a week to prevent dust build-up. Use a soft cloth or a feather duster for this purpose to avoid scratching the paint.
For deeper cleaning, a damp cloth and mild detergent can be used. However, ensure the cloth isn't too wet to avoid water seeping into the motor. Also, remember to turn off the power supply before cleaning.
Avoid using harsh chemicals or abrasive cleaning tools on your painted ceiling fan. These can damage the paint and cause it to peel or chip. If the fan is situated in a kitchen or a place where it may accumulate grease or grime, a special degreasing cleaner may be needed.
In conclusion, not only can you paint a ceiling fan, but it's a fun, creative, and cost-effective way to refresh an old fan and integrate it into your home's decor.
Continue reading:


Best Small Flush Mount Ceiling Fans 2026 Ultimate Picks

Best Smart Ceiling Fan India 2026 For Effortless Comfort

Best Smart Ceiling Fans with Lights for 2026: Top Picks

Best Smart Home Non Ceiling Fans 2026 For Ultimate Comfort

Best Outdoor Misting Ceiling Fan 2026 For Ultimate Comfort

Best Ceiling Fans With Lights For Vaulted Ceilings 2026 Top Picks

Best Outdoor Ceiling Fans For Porch 2026 With Style And Breeze

Best WiFi Enabled Ceiling Fan 2026 For Effortless Comfort





