
Can You Put a Ceiling Fan in a Can Light?

Standard ceiling fans cannot hang directly from a recessed light fixture because the spinning weight will pull the thin metal housing right out of the ceiling. That answer changes, however, if a tiny screw-in socket fan is enough or if a sturdy conversion kit replaces the old fixture. Lightweight socket fans screw straight into the bulb base with zero rewiring, while a full-size fan requires installing a fan-rated box (a heavy-duty metal box built to hold moving weight) between the ceiling joists.
Choosing between the two comes down to a few practical details: whether a gentle breeze is enough, how wide the metal can is, and whether there is attic access above. Without attic space, an expanding metal brace must slide up through the hole from below to lock between the wood joists. Here is how each option works so you can get air moving safely.
The Short Version
- Never hang a standard ceiling fan directly from a recessed can light: Recessed light fixtures are held in place by lightweight sheet metal or small drywall clips that cannot hold the vibrating, spinning weight of a motor.
- Use a screw-in socket fan for zero-wiring airflow: If you want instant cooling without cutting drywall or pulling wires, a compact socket fan screws directly into a standard screw-in bulb base (E26 medium base) just like a normal bulb.
- Install an expansion brace for a full-size ceiling fan: Hanging a standard fan requires removing the old metal can housing and mounting a fan-rated box (a sturdy metal ceiling box built to hold moving weight) between the ceiling joists.
- Always cut the power at the source: Before touching your ceiling fixture, changing parts, or loosening screws, shut off the circuit breaker at the main electrical panel.
Why Recessed Can Lights Cannot Support a Ceiling Fan
A recessed can (a metal light housing hidden in the ceiling) is built for one job: holding a lightbulb that weighs a few ounces. The metal housing is made of thin sheet metal. It attaches to your ceiling joists with thin sliding metal bars, or it clamps directly onto the edge of your drywall using tiny spring clips. These mountings are safe for a downlight trim and a bulb, but they cannot handle anything heavier.
Ceiling fans create dynamic weight. Unlike a stationary light fixture, a ceiling fan has a motor that spins heavy blades at high speeds. That spinning action produces constant rotational force, side-to-side vibration, and downward torque. Even a perfectly balanced fan wobbles slightly as it pushes air across the room.
If you mount a ceiling fan directly to a recessed can light, that vibration will quickly loosen the mounting screws or tear the sheet metal. The thin metal can will bend, warp, and pull loose from the ceiling framing. In a remodel fixture, the metal clips will chew right through the fragile drywall edge.
The result is dangerous. The entire spinning fixture can tear out of the ceiling and fall into the room. As the fan drops, it can rip apart electrical splices, creating bare wires, electrical arcing, and an immediate fire hazard. Standard electrical codes strictly forbid mounting a paddle fan to anything other than an approved, fan-rated support structure.
The Quick No-Rewiring Fix: Using a Screw-In Socket Fan
If you want a breeze without tearing open your ceiling or rewiring your electrical box, a screw-in socket fan is your best option. These lightweight units combine a compact fan motor with a central light. They are designed to screw directly into an ordinary light socket, making them an easy weekend project for both homeowners and renters.
Before you buy one, check the layout of your recessed fixture to make sure it will operate properly:
- Check the can opening depth: Most recessed cans sit several inches deep inside the ceiling. Because the fan blades need room to spin freely below the ceiling line, you will need a socket extender (a screw-in piece that lowers the bulb base) so the blades clear the metal trim.
- Measure the diameter: Standard recessed openings are 4 to 6 inches across. Make sure the body of the socket fan or its extender can reach the interior socket without catching on the rim of the can.
- Inspect the existing socket: Look inside the empty socket with a flashlight. Verify that the ceramic or plastic socket is firm, free from heat cracks, and does not wobble when you gently press on it.
- Confirm your wall switch type: Socket fans need steady, full voltage to run their internal motors. If your can light is controlled by an older wall dimmer switch, that switch can cause the fan motor to hum, buzz, or overheat. You will need to replace it with a standard toggle switch or leave an LED-compatible dimmer switch turned up to full output.
Converting a Recessed Can to a Full-Size Ceiling Fan Step by Step
If you want a traditional, full-size ceiling fan with 44-inch or 52-inch blades, you cannot use the existing can housing. You must convert the opening to a heavy-duty, fan-rated box. You can complete this project from below the ceiling using an old-work fan brace kit, which expands across the joists without requiring attic access.
- Shut off the power: Go to your electrical service panel and shut off the circuit breaker at the main electrical panel that feeds the ceiling light. Flip the wall switch on and off to confirm the light stays off. Use a non-contact voltage tester inside the socket to verify there is zero electrical current.
- Remove the trim and bulb: Reach up and unscrew the lightbulb. Unhook the trim ring and baffle, which are usually held in place by small metal springs or squeeze clips inside the can.
- Remove the internal can housing: Look inside the metal cylinder. Most can lights have three or four small mounting screws along the lower edge. Remove these screws so you can slide the metal cylinder down out of the ceiling cavity. If it is a remodel can, release the metal locking clips holding the can against the drywall.
- Disconnect the wiring: The can light connects to a junction box (a protective metal container for electrical splices) attached to its mounting frame. Open the junction box cover, untwist the plastic wire nuts, and separate the house electrical wires from the can light wires. Loosen the metal cable clamp and pull the house cable free.
- Cut away the old mounting frame: If the old fixture has metal hanger bars attached to the ceiling joists, bend them back and forth until they snap, or cut them out with metal snips so the ceiling opening is clear. Take your time so you do not damage the surrounding drywall.
- Install the expansion brace: Slide the metal expansion brace through the ceiling hole. Position the feet of the brace flat against the top of the drywall, resting between the two wooden ceiling joists. Turn the central shaft with a wrench to extend the threaded arms outward. The sharp metal prongs on each end will dig deep into the wooden joists until the bar is completely locked in place.
- Mount the fan-rated box: Feed your house electrical cable into the new fan-rated box through a cable clamp. Position the metal box over the center of the brace and tighten the U-bolt hardware securely. Check the box with your hands to make sure it has zero play or wobble.
- Hang the ceiling fan: Screw the ceiling fan mounting bracket directly into the threaded holes on the fan-rated box using the heavy-duty machine screws supplied with the box. You can now wire and assemble your new ceiling fan according to the manufacturer instructions.
Critical Checks Before You Hang Any Fan
Before completing your installation, run through these critical checks to ensure your setup is safe, durable, and comfortable to live with:
- Floor and ceiling clearances: The bottom edge of the fan blades must sit at least 7 feet above the finished floor to prevent accidental head strikes. In rooms with low ceilings, use a flush mount (mounted flat against the ceiling) setup rather than a hanging downrod. Ensure the blade tips have at least 18 inches of clearance from nearby walls, tall furniture, and open cabinet doors.
- Box weight rating: Inspect the inside back wall of your new ceiling box before mounting the motor. It must clearly say "Acceptable for Fan Support." Most fan-rated boxes hold fans weighing up to 35 pounds, while heavy-duty models can support fans up to 70 pounds. Never hang a fan from a plain plastic or round metal light box.
- Wall control compatibility: Never run a ceiling fan motor through an older wall dial dimmer designed only for incandescent bulbs. This starves the motor of current, leading to permanent motor damage and loud buzzing. If you want wall control, install a dedicated fan speed switch or use the handheld remote control that came with the unit.
- Balancing room illumination: Swapping a wide-angle downlight for a ceiling fan can alter the light pattern across the space. Central fan lights tend to cast soft general light rather than directional downlight. If this change leaves lower room corners or display areas too dim, adding grow light strips for indoor plants to nearby shelves can restore focused illumination for indoor greenery while your ceiling fixture handles airflow.
When to Call a Licensed Electrician
Many homeowners can handle installing a screw-in socket fan or mounting an expansion brace from below. But ceiling electrical work sometimes uncovers hidden complications that create serious hazards. Knowing your limits keeps your home safe.
Working with modern wiring inside a standard drywall ceiling is generally safe for an experienced DIY homeowner. If you have clear attic access above the room, confirming joist layout and fastening a fan brace is straightforward. Using an engineered screw-in socket fan requires no wire handling at all, making it completely risk-free from an electrical standpoint.
Call a licensed electrician immediately if you encounter any of the following warning signs:
- Aging or brittle wiring: If you open the old junction box and see cloth-covered wiring, crumbly black insulation, or knob-and-tube wiring, stop working. Moving old wires can crack the insulation and cause internal short circuits.
- Aluminum wiring: Older homes built between the mid-1960s and early 1970s often feature aluminum branch wiring. Aluminum expands and contracts differently than copper, requiring specialized connectors to prevent electrical fires.
- No ground wire: If your ceiling box only has two wires (hot and neutral) and no bare copper or green grounding path, an electrician must run a safe ground or install ground-fault protection.
- Crumbling plaster ceilings: Homes with traditional wood lath and plaster ceilings can crack or sag if you cut into them or force an expansion brace against the lath. A professional can secure the framing without ruining your ceiling finish.
Choosing the Right Socket Fan for Recessed Openings
When selecting a socket fan specifically to fit inside a recessed ceiling opening, design details make a huge difference in performance. Because recessed cans sit up inside the ceiling plane, standard semi-flush (hanging down a few inches on a short stem) light fixtures cannot simply screw in without modifications.
First, look for a model that includes a sturdy socket extender or offers clear clearance between the screw base and the top of the fan blades. The blades must sit completely outside the metal can cylinder so they can draw air from the room without clipping the ceiling trim.
Next, evaluate the light source. Choose a fixture that clearly lists its brightness in lumens rather than wattage alone, because lumens measure actual light output while watts only show energy consumption. For small to medium rooms, look for a unit providing adequate brightness, ideally with dimming options so you can tailor the light level.
Pay attention to color tone or warmth (Kelvin) as well. Units with adjustable warmth let you shift between a warm soft white (around 2700K) for relaxing living spaces and bedrooms, or a crisp daylight (around 5000K) for active kitchens, utility spaces, and work areas.
Finally, check the controls. Look for a socket fan equipped with an independent remote control. This allows you to turn the fan motor on or off, adjust blade speeds, and dim the built-in LED light without needing to walk over to the wall switch or pull physical chains from a high ceiling.

- LFR Score8.0
LFR Score is a ranking system developed by lightfansreviews.com. LFR Score has no relationship or impact from any manufacturers or sales agent websites. Learn more
- BrandHK
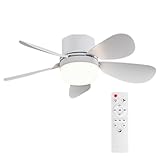
- LFR Score7.1
LFR Score is a ranking system developed by lightfansreviews.com. LFR Score has no relationship or impact from any manufacturers or sales agent websites. Learn more
- BrandASALL
Last update on 2026-10-27 / Affiliate links / Images, Product Titles, and Product Highlights from Amazon Product Advertising API
FAQs
Can I hang a normal ceiling fan straight into a recessed can light?
No, you should never hang a standard ceiling fan directly from a recessed can light fixture. Recessed cans are made of lightweight sheet metal held by small clips that cannot support the dynamic, twisting weight of a spinning motor. The vibration will loosen the housing, leading to damaged drywall, pulled wires, or a falling fan.
Will a screw-in socket fan wobble loose from the ceiling over time?
A properly installed screw-in socket fan will not wobble loose under normal operation. These mini fans are engineered with ultra-lightweight materials and compact blade spans that create very little vibration. As long as your ceramic socket is firmly seated and you screw the base in snugly, the fan remains secure.
Do I need attic access to install a ceiling fan where a can light used to be?
You do not need attic access if you use an old-work ceiling fan brace kit. These kits are designed to slip directly through the 4-inch hole left by your removed can housing. Once inside the ceiling cavity, you turn the central shaft with a wrench to lock the support arms firmly between the wooden ceiling joists.
Why does my fan light buzz or flicker when I turn on the wall switch?
Buzzing or flickering usually happens when a fan fixture is wired to an incompatible wall dimmer switch. Standard dimmers cut the electrical current in ways that starve fan motors and disrupt electronic LED drivers. Replacing the wall dimmer with a standard on/off switch or an LED-compatible dimmer switch will stop the noise.


Best Lighting For Makeup 2026 Bright Ideas For Flawless Looks

Best Wall Sconces For Staircase 2026 Brighten Your Home

Best Lighting For Computer Desk 2026 For Focused Work

Best Boat Black Lights 2026 For Nighttime Adventure

Best Black 30 Inch Light Bar Reviews – Top Picks of 2026

Best Black Light For Aquarium 2026 For Vibrant Glow

Best Black Light for Authenticating Glass 2026 Top Picks

Best Waterproof Spotlight 2026 That Outshines Expectations






