How High Should a Bathroom Vanity Light Be?

Mount it 75 to 80 inches high. An overhead bar works best 75 to 80 inches from the floor, centered just a couple of inches above the mirror frame. If you are hanging sconces on the sides, bring them down to 60 to 65 inches so the light hits your face at eye level. That balance gives you clear, even lighting for morning routines without casting harsh shadows under your eyes or chin.
A few details can nudge those marks up or down. Extra-tall mirrors or low ceilings leave less wall space, which might force an overhead bar closer to the glass. The height of the people using the room also matters, since side lights should align with where your eyes actually rest. Taking a minute to map out your mirror and wall lines helps you drill in the right spot the first time.
Mount Overhead Lights Around 75 to 80 Inches Up
For most bathrooms, the ideal height for a vanity light bar mounted above the mirror is between 75 and 80 inches from the finished floor. This placement positions the light source roughly a foot above your head. It allows light to wash evenly over your face rather than beaming straight down on your forehead.
If you prefer side wall sconces mounted on either side of the glass, mount them between 60 and 65 inches from the finished floor. This height places the center of the bulbs roughly at eye level for an average adult. Placing sconces at eye level creates face-level grooming light, which is the most flattering setup for shaving or applying cosmetics because it completely eliminates under-eye and chin shadows.
When you measure, always measure to the center of the actual light source rather than just the electrical wall box (the metal or plastic housing installed inside the wall). Many fixtures have decorative curved arms. If the arm drops down several inches from the mounting point, an electrical wall box placed at 75 inches could leave the bulbs sitting at 70 inches, which is too low for a tall person.
Your own height matters just as much as the room dimensions. If the primary users of the bathroom are taller than six feet, nudge the fixture height up toward 80 or 82 inches. If the household is shorter, staying closer to 75 inches ensures the light washes across your features instead of escaping over your head.
Light quality also changes how that height feels in daily use. Choose bulbs with a color tone or warmth (Kelvin) between 2700K and 3500K. A rating of 2700K provides a warm soft white glow, while 3000K to 3500K provides a clean white that mimics natural daylight without feeling cold. Look for a color accuracy (CRI) rating of 90 or higher, which ensures skin tones and makeup shades look true to life in the reflection.
Measure From Your Mirror and Center Line in Steps
Getting your tape measure out before you cut into the drywall prevents crooked fixtures and awkward wall patches. Follow these steps to locate the exact center for your fixture:
- Hang or outline your mirror first. Never install the electrical box before you know the exact dimensions of your mirror. If the mirror is not hung yet, use painter tape to map its exact outer edges on the wall above the sink.
- Mark the vertical center line of the sink. Locate the exact center of the sink basin and faucet, then use a level to draw a light pencil line upward past the top of the mirror. Your vanity light should center on the sink basin rather than the entire countertop, especially if you have an offset vanity.
- Measure the gap above the mirror frame. You need 1 to 3 inches of clear wall space between the top edge of your mirror frame and the lowest point of your light fixture. This small gap prevents the fixture from crowding the frame and leaves room for dusting or cleaning the glass.
- Check the fixture wall mounting plate offset. Lay your lighting fixture flat on a table and measure from the center of its wall mounting plate (the flat metal plate that screws to the wall box) to the bottom edge of the glass shades. This measurement tells you how far down the shades will drop below your wall box.
- Mark the electrical wall box center point. Add the shade drop measurement and your desired gap (such as 2 inches) to the height of the top of your mirror. Make a pencil cross on your vertical center line. This mark is where the center of your electrical wall box must sit.
Hold the actual fixture up against the wall at your pencil mark before cutting any holes. Step back a few feet and look at the proportions in the room. Seeing the fixture in place confirms that the glass shades will not bump the mirror frame or sit uncomfortably close to the ceiling line.
Adjust Your Placement for Low Ceilings or Tall Mirrors
Standard guidelines assume a typical ceiling height of eight feet and a standard mirror. When you work with a seven-foot basement ceiling, a sloped attic roof, or an oversized mirror, standard numbers no longer fit the space.
If you have an extra-tall mirror that extends above 75 inches from the floor, mounting an overhead bar above it can push the fixture directly against the ceiling. Squeezing a fixture into a tight ceiling gap traps heat, makes bulb replacement frustrating, and bounces harsh light straight back down into your eyes. In this situation, switching to side sconces mounted alongside the glass is often the cleanest solution.
When side space is too narrow for sconces and the ceiling is low, look for a horizontal fixture with a very slim profile. Choose a fixture where the light bar sits level with the wall mounting plate rather than hanging down on curved decorative stems. This design saves three to five inches of vertical wall space while keeping your light source above the mirror.
Another option for tight vertical spaces is ceiling-mounted illumination. A flush mount (mounted flat against the ceiling) or a semi-flush fixture (hanging down a few inches on a short stem) placed just in front of the vanity counter can cast light downward without crowding the mirror wall. Pair ceiling lights with a mirror that has built-in front lighting to keep shadows from forming under your eyes.
Bathrooms also collect humidity that rises quickly toward low ceilings. If your vanity light sits close to a walk-in shower or a tub in a compact room, verify that the fixture is damp-rated for steamy bathrooms. Fixtures labeled for dry locations only can corrode quickly or suffer electrical shorts when exposed to daily steam.
Point Shades Down for Focus or Up for Soft Glow
Many multi-light vanity fixtures allow you to install the shades pointing either upward toward the ceiling or downward toward the sink. The direction you choose alters both the visual height of the fixture and how the light behaves across your bathroom.
Pointing shades downward directs the light output straight at the sink, countertop, and your face. This setup delivers high brightness in lumens right where you need it for morning routines (lumens measure actual brightness while watts only measure power draw). The drawback is that if the fixture is mounted too low, the bare light bulbs can sit directly in your line of sight, creating an uncomfortable direct glare whenever you look in the mirror.
Pointing shades upward bounces the light off the ceiling first, which diffuses the beam and spreads a softer glow throughout the entire room. This upward bounce softens harsh facial shadows and eliminates direct glare from exposed bulbs. But because the light bounces before reaching you, you may need higher-lumen bulbs to get the same level of grooming clarity, and the open glass bowls will collect dust more quickly.
Shade direction also changes where you need to drill your electrical wall box. When shades point downward, the box usually needs to sit two to four inches higher on the wall so the bottom of the glass does not overlap your mirror frame. When shades point upward, the electrical wall box can sit closer to the mirror frame because the bulk of the fixture rises toward the ceiling.
Whichever direction you choose, install an LED-compatible dimmer switch on the wall. A quality dimmer lets you dial up full brightness for morning grooming and lower the output for relaxing evening baths. Using a dimmer matched specifically to your LED bulbs prevents annoying buzzing, hums, or flickering common with older switches.
Check Wiring and Clearances Before Cutting Your Drywall
Cutting a hole for an electrical wall box is a permanent step. Running through a quick practical checklist before making your cut ensures the fixture fits comfortably and operates safely.
- Shut off power completely. Always shut off the circuit breaker at the main electrical panel before inspecting wires or opening wall boxes. Never rely on just turning off the wall switch, as wiring inside the wall box can remain live.
- Check medicine cabinet door swing. If you have a surface-mounted medicine cabinet rather than a flat mirror, open the door completely. Make sure the top corner of the mirrored door clears the light shades and decorative arms without colliding.
- Scan for hidden wall studs. Use a stud finder along your marked center line. If a wooden wall stud sits directly where your electrical wall box needs to go, you will need a shallow pancake box or an offset mounting bracket rather than a standard deep box.
- Watch for hidden plumbing pipes. Bathroom vanity walls often conceal heavy vent stacks and water supply lines. Check inside the vanity cabinet below to see where pipes enter the wall, and use caution when cutting drywall to avoid damaging wiring behind the wall or nicking copper lines.
- Consider secondary navigation lighting. A bright vanity light bar can be jarring during middle-of-the-night bathroom visits. For low-level nighttime guidance that keeps you from needing full vanity illumination, explore motion sensor lights for indoor hallways and stairs to create gentle pathways.
- Know when to call a professional. If your project involves fishing new wiring behind the wall across studs, adding a new wall switch, or updating an ungrounded system, stop and call a licensed electrician. Professional installation ensures your bathroom meets local building codes and protects your home from electrical fire hazards.
Taking the time to mark your center line, measure your shade drop, and confirm clearances protects your finished walls. When your vanity light sits at the right height, your bathroom mirror provides clear, shadow-free reflection every single day.


Best Lighting For Makeup 2026 Bright Ideas For Flawless Looks

Best Wall Sconces For Staircase 2026 Brighten Your Home
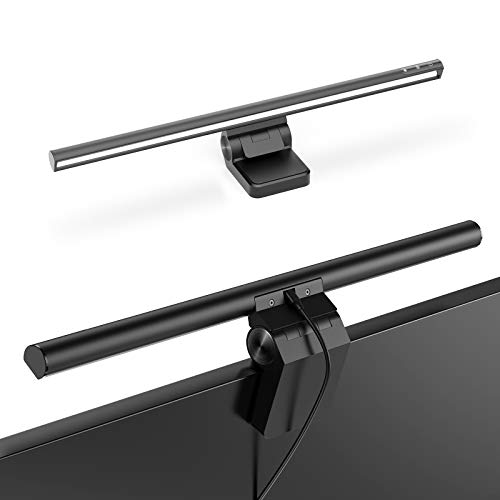
Best Lighting For Computer Desk 2026 For Focused Work

Best Boat Black Lights 2026 For Nighttime Adventure

Best Black 30 Inch Light Bar Reviews – Top Picks of 2026

Best Black Light For Aquarium 2026 For Vibrant Glow

Best Black Light for Authenticating Glass 2026 Top Picks
Best Waterproof Spotlight 2026 That Outshines Expectations