How to Safely Change a Bathroom Light Fitting

Cut the power, then swap three wires. Replacing a bathroom fixture takes less than an hour once you shut off the power switch at your main fuse panel and confirm the lines are dead. After unscrewing the old bracket, simply twist matching colored wires together using fresh plastic caps. Taking your time keeps the entire task calm and safe.
A few bathroom details can alter your setup. Lights mounted close to a shower or tub need a damp-rated seal to handle daily steam without corroding. Heavy multi-bulb vanity bars require a firmly anchored electrical wall box so they do not pull on the drywall. Older houses can also hide faded or brittle insulation that makes wire colors harder to spot. The clear steps below guide you through every wire and screw with total confidence.
Shut off the circuit breaker at the main electrical panel before you touch a tool
Never rely on a wall switch to protect you from an electrical shock. A wall switch only interrupts the hot wire going to the fixture, but power can still be active inside the electrical wall box if the circuit feeds other outlets or lights nearby. The only safe way to begin is to shut off the circuit breaker at the main electrical panel.
Work safely by running through this preparation checklist before loosening a single screw:
- Turn the bathroom light on first: Flip the wall switch on so the fixture is actively glowing. This gives you an immediate visual cue when you find the right breaker.
- Switch off the breaker at the main fuse panel: Open your breaker box and locate the switch marked for your bathroom or lighting circuit. Push the breaker handle firmly to the off position.
- Verify the light went out: Walk back into the bathroom to confirm the room is dark. If the light is still glowing, return to the panel and check another switch until you locate the correct circuit breaker.
- Tape the breaker switch down: Place a piece of bright masking tape over the breaker switch at the panel. This simple step prevents family members or roommates from flipping the power switch on while you work.
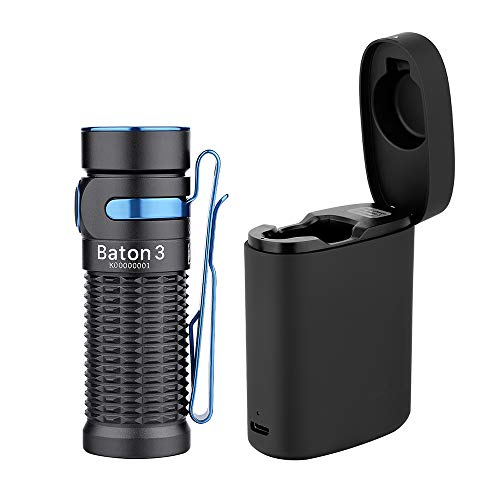
- Set up a battery work light: Bathrooms often lack natural daylight, especially windowless powder rooms. Set a portable battery light or a flashlight on your vanity counter so you can clearly see the wiring. If you want safe night navigation across your home without turning on blinding vanity fixtures, you can also set up indoor motion sensor lights along hallways and bathroom baseboards.
- Check the fixture with a voltage tester: Hold a non-contact voltage sensor (a handheld pen-style wand that chirps and lights up when electrical current is present) near the fixture base. If the tool stays silent, you are ready to remove the old unit.
Strip down and remove the old fixture without cracking the wall
Old bathroom light fixtures are often heavy, awkward to balance, and sealed against the drywall by layers of dried latex paint. Taking a few minutes to strip the fixture down before unbolting it will protect your vanity mirror from falling glass and keep your drywall intact.
- Take off all shades and light bulbs: Unscrew the bulbs and set them aside. Carefully loosen the small thumbscrews or socket rings holding the glass globes in place, then remove every shade. Stripping away the glass cuts down the overall weight and prevents accidental breakage while your hands are busy.
- Score the paint line around the base: Take a sharp utility knife and lightly trace the outline where the metal base meets the bathroom wall. Over time, steam and repeated paint coats create a tight bond between the fixture and the drywall. Scoring this seam prevents the old paint from peeling off large strips of wall paper when you pull the base free.
- Loosen the decorative mounting nuts: Look at the front plate (often called the canopy) covering the wall box. Most vanity fixtures are held against the wall by two small, decorative round cap nuts or side screws. Support the bottom of the fixture with one hand while loosening these nuts with a screwdriver or small pliers.
- Support the fixture weight with a wire hook: Once the mounting nuts are off, pull the fixture gently toward you. Do not let the heavy metal bar hang by its copper wires. Bend an old wire coat hanger into an S-shape, hook one end into the electrical wall box, and hook the other end to the fixture frame to hold the weight while you work.
- Confirm the wires are dead: With the wires exposed, touch your non-contact voltage sensor directly against each wire insulation sleeve and wire connector. Confirm that the tool does not beep or flash before you touch any bare metal.
- Untwist the plastic twist-on wire caps: Turn the plastic twist-on wire caps (often called wire nuts) counterclockwise to free the connected ends. Untwist the fixture wires from the house wires, unhook your support strap, and lower the old fixture to the counter.
- Remove the old mounting bracket: Unscrew the metal crossbar bracket attached to the electrical wall box in the wall. Keep the two machine screws that held the bracket to the box, as you may need them for the new mounting hardware.
Match and secure your wires one connection at a time
Wiring a hardwired fixture (wired directly into a ceiling or wall electrical box) uses a simple color-matching system in modern American homes. The wires coming out of your wall supply electricity, while the wires on your new fixture route that power to the light sockets.
- Screw the new mounting bracket to the wall box: Fasten the universal metal mounting plate that came with your new light to the electrical wall box using the two mounting screws. Use a small bubble level across the top edge of the bracket to make sure your new vanity light will hang straight.
- Identify your wire pairs: Look at the wires emerging from your wall box. In standard home wiring, you will see a black wire (the hot wire that carries power), a white wire (the neutral wire that completes the circuit), and a bare copper or green safety wire (the ground wire). Your new fixture will have matching black, white, and ground wires. If your fixture uses a smooth and ribbed cord instead of colored sleeves, the smooth wire is hot and the ribbed wire is neutral.
- Connect the ground safety wire first: Wrap the bare copper house wire clockwise around the green ground screw on your new mounting bracket, tighten the screw firmly, and leave a few inches of wire extending out. Hold the end of this house ground wire side by side with the fixture ground wire. Twist a plastic twist-on wire cap clockwise over both ends until it feels snug.
- Connect the neutral white wires: Hold the stripped copper end of the white house wire flush against the stripped copper end of the white fixture wire. Twist a plastic twist-on wire cap clockwise over the pair. Give each white wire a gentle tug to verify they are locked tightly inside the cap and cannot pull loose.
- Connect the hot black wires: Pair the black house wire with the black fixture wire. Twist a plastic twist-on wire cap clockwise over the bare copper tips until tight. Tug both wires lightly to verify the mechanical hold. If any bare copper shows below the bottom skirt of the plastic cap, unscrew it, trim the bare copper slightly with a wire cutter, and cap it again.
- Fold the wires gently into the wall box: Push the connected wires back into the electrical wall box using your fingers. Fold them in an accordion shape, tucking the ground wires toward the back and keeping the hot and neutral wire caps separated. Never force or pinch the wires between the metal bracket and the drywall.
Fasten the base securely and verify the right moisture protection
Once your wiring is tucked away, slide the fixture base over the threaded studs on the mounting bracket. Press the base firmly against the wall and spin on the decorative cap nuts. Tighten them by hand first, then give them a quarter-turn with a wrench or pliers until the fixture sits flush and does not wobble. If your light sits in a shared family space where lights turn on automatically, you can also connect the circuit to automated home lighting options to manage schedules or morning brightness.
Every bathroom light must handle water vapor. Steam from daily hot showers rises quickly, and choosing the wrong fixture can lead to internal corrosion or short circuits. Check the safety listing on your new fixture box before finalizing your project:
- Dry-rated fixtures: These units are rated only for dry areas like living rooms and bedrooms. Never install a dry-rated light directly above a bathroom sink or near a tub.
- Damp-rated fixtures: These units are sealed against humidity and are safe for steamy bathrooms and covered patios. Any vanity light mounted above a bathroom mirror, or a ceiling flush mount (mounted flat against the ceiling) located outside the shower stall, should be damp-rated.
- Wet-rated fixtures: These lights feature sealed rubber gaskets and water-tight lenses designed for direct rain and outdoor exposure. If you are placing a light directly inside a shower stall or directly above an open soaking tub where water can splash the surface, the fixture must carry a wet-rated label.
Select light bulbs that suit your bathroom tasks. For brightness, evaluate brightness in lumens rather than wattage, because lumens measure actual brightness while watts only measure power draw. A vanity mirror setup generally needs between 1,500 and 3,000 total lumens combined across all sockets so you can groom clearly without dark shadows across your face.
Pay attention to color tone or warmth (Kelvin). A bulb rated at 2700K produces a warm soft white glow that feels relaxing, while 3000K provides a clean, neutral white that works well for morning routines. Bulbs reaching 5000K produce crisp daylight that can feel harsh or clinical in small bathrooms. For mirror lighting, check the package for color accuracy (CRI), which measures how true skin, paint, or makeup appears. Look for a score of 90+ CRI so your skin tones show naturally in the mirror.
If you control your bathroom light with a dimmer switch, make sure you use an LED-compatible dimmer switch. Older switches built for incandescent bulbs will cause modern built-in LED fixtures or dimmable LED bulbs to produce annoying buzzing, hums, or flickering.
Stop working and call a licensed electrician if you spot these warning signs
Most bathroom light replacements are straightforward DIY projects. However, hidden electrical problems can turn a quick fixture swap into a serious safety hazard. Stop what you are doing, keep the circuit breaker turned off, and contact a licensed electrician if you notice any of these conditions:
- Brittle or crumbling wire insulation: If the protective rubber or fabric coating on your wall wires cracks, flakes away, or exposes bare metal inside the wall cavity, touching them can cause an electrical fire or short circuit.
- Silver-colored aluminum wiring: Some homes built between the mid-1960s and early 1970s contain aluminum wiring instead of copper. Aluminum wire expands and contracts differently than copper, requiring specialized wire connectors and professional handling to avoid fire hazards.
- No electrical wall box behind the light: If removing the old fixture reveals a raw, jagged hole in the drywall with wires simply running through the wall cavity without a metal or plastic junction box, stop. A hardwired fixture must be anchored to an approved electrical wall box to contain heat and spark risks.
- A loose or damaged wall box: If the plastic or metal box inside your wall wobbles, has stripped screw holes, or cracks under the weight of a heavy glass vanity bar, do not mount the light. The box must be securely fastened to a wall stud.
- Burn marks, melted plastic, or scorched smells: Discoloration or melted wire caps indicate that the previous fixture experienced severe overheating or an electrical arc. A professional must inspect the circuit before a new light is powered on.
- Your voltage tester still alerts after flipping the breaker: If your non-contact sensor still beeps after switching off the breaker, the box may share a neutral wire with another circuit, or your electrical panel labels may be incorrect. Never touch wires when current is detected.
FAQs
Can I replace a bathroom light fixture without turning off the main house power?
You do not need to cut power to your entire house, but you must shut off the circuit breaker at the main electrical panel for that specific bathroom circuit. Never rely on the wall switch alone. A wall switch can leave live current inside the electrical wall box, putting you at risk of an electrical shock.
What should I do if my new fixture has only two wires and no ground wire?
Some smaller fixtures with all-plastic internal parts come with only a black hot wire and a white neutral wire. In this situation, connect the black and white wires to your house wires as usual. Take the bare copper ground wire from your wall, loop it securely around the green ground screw on the metal mounting bracket, and tighten the screw down so the metal plate remains grounded.
Can I install a regular dry-rated light fixture in a bathroom?
No, standard dry-rated fixtures are built for living rooms and bedrooms and lack protection against humidity. Bathrooms collect heavy steam from daily showers, which causes internal rust, short circuits, and damaged sockets in dry-rated models. Always choose a fixture that is clearly labeled as damp-rated for bathroom walls, or wet-rated if placed directly inside a shower.
Why does my new bathroom light buzz or flicker after installation?
Flickering or buzzing usually occurs when modern LED bulbs or built-in LED fixtures are connected to an older wall dimmer switch. Traditional dimmers alter voltage in ways that disrupt LED circuitry. Replacing your old wall control with an LED-compatible dimmer switch will stop the noise and keep your light steady.
How do I know if my electrical wall box can support a heavy multi-globe vanity light?
Gently grip the metal or plastic box inside the wall and check for movement. A sturdy box is screwed directly into a wooden wall stud and will not flex or wobble when pulled. If the box is anchored only to drywall with plastic clips, it cannot safely bear the weight of heavy multi-light glass bars and must be reinforced first.


Best Lighting For Makeup 2026 Bright Ideas For Flawless Looks

Best Wall Sconces For Staircase 2026 Brighten Your Home
Best Lighting For Computer Desk 2026 For Focused Work

Best Boat Black Lights 2026 For Nighttime Adventure

Best Black 30 Inch Light Bar Reviews – Top Picks of 2026

Best Black Light For Aquarium 2026 For Vibrant Glow

Best Black Light for Authenticating Glass 2026 Top Picks
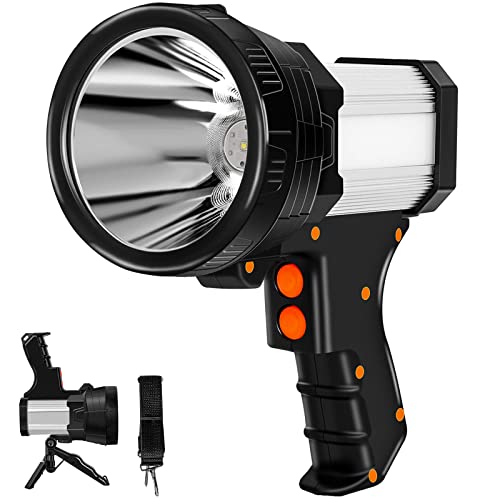
Best Waterproof Spotlight 2026 That Outshines Expectations