
How to Change a Boob Light Fixture Safely and Easily
Changing a boob light fixture might seem like a small task, but it can seriously transform the vibe of your room. Whether you're upgrading to a more modern look or replacing a worn-out fixture, knowing the right steps ensures your project goes smoothly without stress or safety risks. For many DIY enthusiasts and homeowners, the idea of fiddling with electrical parts can be intimidating, but with the right guidance, it’s surprisingly doable. This guide breaks down the key points you need to focus on — from turning off power properly, handling wiring with care, to securing your new fixture with confidence. Plus, it highlights crucial safety tips that often get overlooked, making sure you avoid common pitfalls. By the end, you'll feel ready to tackle this upgrade, add a fresh touch to your space, and save some money by skipping the electrician. If you’re someone who loves hands-on home improvement projects or just want to brighten up your room hassle-free, learning how to change a boob light fixture is a smart skill to have in your toolkit.
Swapping out a boob light fixture can totally refresh a room's look without breaking the bank. But hey, it’s not just about picking a new style — it’s about getting your hands dirty and doing it right. Many shy away from this simple electrical upgrade because it sounds complicated or risky. Truth is, with some basic know-how and a careful approach, it’s a project anyone can handle. Imagine the satisfaction of turning off that old, dull fixture and installing a shiny new one that matches your vibe perfectly! This guide cuts through the confusion, focusing on safe steps and practical tips so you don’t have to worry about sparks flying — literally. So, roll up your sleeves, grab your tools, and get ready to transform your space with a fresh boob light fixture that’s both stylish and safe.
Swapping out a boob light fixture is more than a quick home update — it’s a game changer for your room’s ambiance and safety. Many folks overlook how much a lighting fixture impacts the overall vibe and function of a space. Whether your fixture is outdated, damaged, or just not matching your style, upgrading it can instantly boost aesthetic appeal and improve lighting quality. The right fixture can make a cozy nook feel inviting or transform a dull room into a lively hub.
Another critical point is safety. Old or faulty fixtures can pose electrical hazards if not addressed properly. Knowing how to change your boob light fixture yourself empowers you to keep your home safe and avoid costly repairs down the line. Plus, DIYing this task means you get to choose exactly what fits your needs without relying on expensive professionals.
A lot of people hesitate because they worry about the electrical work involved, but this project breaks down into manageable steps anyone can handle. From shutting off the power correctly to dealing with wiring, it’s a practical skill that once learned, saves tons of time and money. So, if you’re ready to give your space a fresh look while keeping things secure, diving into this project is a smart move.
Before diving into the actual swap, gathering the right tools and materials is crucial to avoid frustrating interruptions. At the very least, you’ll need a screwdriver (both flathead and Phillips), a voltage tester, wire strippers, electrical tape, and of course, your new boob light fixture. Having these on hand upfront makes the process flow seamlessly and prevents last-minute runs to the hardware store.
A voltage tester is particularly important because it ensures the power is off before you touch any wiring, keeping you safe from shocks. Don’t skimp on this tool — safety first! Additionally, electrical tape helps secure wire connections, while wire strippers allow clean, easy removal of insulation for solid connections.
Choosing the right replacement fixture is a key step, too. Consider the size, style, and wattage compatibility with your existing electrical setup. Some fixtures come with extra mounting hardware, but if not, you may need to grab screws or brackets. Checking manufacturer instructions ahead of time saves headaches later.
Having all these items organized before you start is a major time saver and helps keep your project efficient and stress-free. This preparation phase is one of those overlooked yet vital keys to DIY success.
Taking down your old boob light fixture might seem straightforward, but it demands a cautious approach. First, head straight to your breaker box and flip off the power to the room where you’re working. Never trust a switch alone — always test wires with your voltage tester to confirm no current is running.
Once you’re sure the power is off, remove any light bulbs from the fixture to avoid breakage. Next, unscrew the fixture’s canopy or base plate, exposing the wiring inside. Carefully note how the wires are connected — a quick photo with your phone can come in handy for reference later.
Disconnect the wires by loosening the wire nuts or screws and gently pulling apart. Don’t yank or force the wires; if they’re stubborn, a little wiggle usually does the trick. Finally, detach the fixture completely and set it aside. At this point, take a moment to inspect the wiring for any damage or wear, as this may affect your installation.
This removal step is all about patience and care to avoid damaging the ceiling or the wiring and to keep your work area safe.
Dealing with electrical wiring often scares homeowners, but with the right approach, it’s nothing to fear. The main key is to always keep safety on top by making sure power is off and using tools designed for electrical work. Never rush this part.
When connecting wires for your new boob light fixture, identify the black (hot), white (neutral), and green or bare copper (ground) wires. These colors are standard, but if yours differ, double-check with a professional or your local electrical code. Connect matching wires by twisting their ends together and securing them with a wire nut. After that, wrap a bit of electrical tape around the nuts for extra security.
A solid connection is crucial to avoid flickering lights or electrical shorts, which could lead to bigger problems. Make sure no bare wire is exposed once you’ve capped the connections. The grounding wire adds a layer of protection, so don’t skip it.
If you’re ever unsure about the wiring, it’s worth consulting a licensed electrician. But for most, this method is reliable and straightforward — just take your time and double-check everything.
Now that your wires are safely connected, it’s time to mount your new boob light fixture. Start by attaching the fixture’s mounting bracket or plate to the electrical box in the ceiling using screws. This bracket is your fixture’s foundation, so ensure it’s tight and secure to hold the fixture’s weight.
Next, carefully tuck the wires into the electrical box, then position the fixture base or canopy over the bracket. Screw it into place, making sure the fixture sits flush against the ceiling for a clean, polished look. Avoid overtightening, which could crack parts or damage the ceiling.
Finally, install the bulbs recommended for your fixture, respecting wattage limits to prevent overheating. Turn the power back on at the breaker and test your new light. If it flickers or doesn’t turn on, double-check your wire connections or the bulbs themselves.
A well-installed fixture not only looks great but also provides reliable lighting that lasts for years — the satisfaction of a job well done!

Even simple projects like changing a boob light fixture can hit snags if you’re not careful. One of the biggest pitfalls is neglecting to turn off the power properly. This is a non-negotiable step that protects you from electric shock and prevents damage to your home wiring.
Another common mistake is mixing up wire connections or failing to secure wire nuts tightly. Loose connections can cause flickering, buzzing, or even fires, so double-check that everything is snug and well-insulated. Also, avoid using bulbs with higher wattage than the fixture recommends, as this can cause overheating.
Overlooking the weight support of your mounting bracket is another error. Some fixtures are heavier than others, so if your electrical box isn’t rated for the fixture’s weight, you’ll need additional support. Installing without it risks the fixture falling and causing damage or injury.
By steering clear of these mistakes, you ensure your project is not only stylish but safe and durable, which is the ultimate goal.
Picking the right boob light fixture can feel overwhelming with so many styles and options out there. The main key is to focus on your room’s size, ceiling height, and existing décor. A bulky fixture might overwhelm a small space, while a tiny one could look lost in a large room. Balance is everything.
Consider the lighting needs as well. If you want a bright, functional light, fixtures with multiple bulbs or those compatible with LED bulbs are a great pick. For softer ambiance, look for fixtures with diffusers or frosted glass shades. Also, keep energy efficiency in mind to save on your electric bill while still enjoying excellent lighting quality.
Style-wise, there’s no shortage of choices—from sleek modern to vintage glam or rustic charm. The key factor is to pick a fixture that complements your personality and the room’s vibe. Don’t forget to check the fixture’s ease of installation, especially if you’re doing this yourself.
Finally, check reviews or ask for recommendations to avoid fixtures that are tricky to install or poorly made. Your new boob light fixture should be both eye-catching and hassle-free.
Once your new fixture is installed, keeping it clean and well-maintained is crucial for it to stay looking sharp and working properly. Dust and grime can build up quickly, especially on exposed bulbs and glass shades, dulling the light output and overall look.
Regularly wipe the fixture with a soft cloth or microfiber duster to keep it bright. For stubborn dirt, a damp cloth with mild soap usually does the trick—but avoid harsh chemicals that could damage finishes. Turn off the light and allow bulbs to cool before cleaning to avoid burns or damage.
Check periodically for any loose screws or wire nuts and tighten them as needed to prevent flickering or hazards. Replacing bulbs promptly when they burn out also keeps the lighting consistent and prevents strain on the fixture’s wiring.
A little upkeep goes a long way in preserving the beauty and safety of your boob light fixture, making sure it serves you well for years.
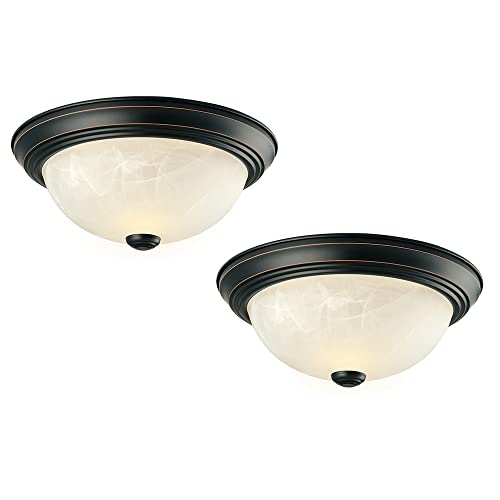
A great way to enhance your new boob light fixture is by upgrading your lighting controls. Installing a dimmer switch allows you to adjust brightness levels, creating mood lighting or saving energy when full brightness isn’t needed. It’s a simple upgrade with a big impact on comfort and utility.
If you’re into smart home gadgets, smart switches compatible with voice assistants or smartphone apps bring convenience and modern flair. Imagine turning your light on or off without leaving the couch or setting schedules to match your daily routine. These features add a high-tech touch that can boost your home’s value and appeal.
Be sure to check your fixture’s compatibility with dimmers or smart switches, as some bulbs like certain LEDs may not work with all dimmer types. Consulting product specs or professionals ensures smooth integration.
Incorporating these upgrades makes your lighting system more flexible, energy-efficient, and tailored to your lifestyle.
Even with thorough prep, you might hit a few bumps while changing your boob light fixture. For example, old wiring that’s brittle or frayed needs careful inspection and possibly replacement. If you spot any damage, it’s smart to pause and call in a pro instead of risking electrical faults.
Sometimes, the mounting bracket doesn’t line up perfectly with the new fixture’s holes. Don’t force it; instead, use adjustable brackets or slightly modify mounting hardware for a snug fit without damaging ceiling materials.
If the new fixture feels loose or wobbly after installation, double-check that all screws are tightened and that the electrical box is secure. Using additional support brackets may be necessary for heavier fixtures.
Facing and troubleshooting these issues head-on helps you avoid bigger problems later and ensures your fixture is both stable and safe.
Taking on the task of changing a boob light fixture yourself can save you a significant chunk of cash. Professional electricians charge for labor, which can add up quickly even for straightforward jobs. Doing it yourself means those savings stay right in your pocket.
Beyond money, completing this project builds confidence and opens the door to more home improvement ventures. It’s empowering to know you can tackle electrical upgrades safely and successfully. This skill adds value not just to your home but also to your personal toolkit.
Plus, DIY gives you complete control over style choices, timing, and quality. You’re not dependent on someone else’s schedule or preferences, which can make the whole process smoother and more satisfying.
So, swapping your boob light fixture isn’t just about better lighting — it’s a chance to grow your abilities and make your home uniquely yours.

Before you flip the breaker back on and admire your handiwork, a few last-minute checks go a long way. Ensure all wire nuts are tight, wires are neatly tucked into the electrical box, and the fixture is firmly mounted with no loose parts.
Check that the bulbs you’re using meet the fixture’s wattage recommendations. Overpowering bulbs can cause overheating, which is a serious safety hazard. Also, confirm that the ground wire is connected properly for shock protection.
Take a moment to scan the area for any tools or debris you might have left behind — keeping your workspace clean reduces the risk of accidents or fire hazards.
When you turn the power back on, if the fixture doesn’t light up immediately or shows flickering, shut off the breaker and re-check your wiring connections. Better safe than sorry.
This careful attention to detail ensures your new boob light fixture shines brightly and safely for years to come.


Best Boat Black Lights 2026 For Nighttime Adventure

Best Black 30 Inch Light Bar Reviews – Top Picks of 2026

Best Black Light For Aquarium 2026 For Vibrant Glow

Best Black Light for Authenticating Glass 2026 Top Picks

Best Waterproof Spotlight 2026 That Outshines Expectations

Best Solar Spotlight For Yard 2026 Brighten Outdoor Spaces With Ease
Best Led Spotlight Rechargeable 2026 Bright Picks

Best Rechargeable Spotlight For Boat 2026 That Cuts Through Darkness





