
How to Change a Chandelier Light Bulb Safely and Easily
Changing a chandelier light bulb might seem straightforward, but it often comes with a handful of challenges, especially if the fixture is high up or delicate. Many people struggle with accessing the bulb safely, selecting the right replacement, and avoiding damage to their beautiful chandeliers. The good news? With the right approach, changing a chandelier light bulb can be quick, safe, and even satisfying. Whether you're a homeowner looking to freshen up your lighting or a renter wanting to maintain your space, this guide highlights key points like proper safety precautions, choosing the right bulb, and tips to avoid fixture damage. It's all about keeping your space bright without the stress or fear of accidents. You'll also learn clever tricks to reach those tricky spots, and the importance of turning off power to prevent mishaps. Say goodbye to fumbling or risking harm to your elegant lighting and hello to confident, easy bulb replacement. By the end of this, you'll be ready to handle any chandelier bulb swap with ease and peace of mind.
Lighting plays a huge role in setting the mood and style of your home, and nothing quite matches the charm of a well-lit chandelier. But let’s face it — changing a bulb up there isn’t always a walk in the park. The combination of height, fragile components, and electrical safety can make it a daunting task. That’s why knowing how to change a chandelier light bulb properly isn’t just handy — it’s essential. Whether you’re dealing with a grand dining room centerpiece or a smaller fixture in your foyer, this guide is packed with smart, easy-to-follow tips to help you tackle the job like a pro. From safety measures to choosing the perfect bulb, you’ll get the lowdown on everything you need to keep your chandelier glowing bright. Ready to bring back that sparkling light without breaking a sweat? Let’s dive in!
Changing a bulb in a chandelier isn’t your average lightbulb swap — it requires a mix of safety awareness, preparation, and the right tools. First things first, power off the chandelier at the circuit breaker, not just the wall switch. This step is critical because even if the light is off, electricity might still be flowing, putting you at risk of shocks. Wearing non-slip shoes and using a sturdy ladder or step stool gives you the confidence and stability needed to work at heights.
Next, gather your supplies: the correct replacement bulb, gloves to avoid fingerprints on the bulb, and a soft cloth for handling. Make sure the bulb matches the wattage and base type recommended for your fixture. This protects the chandelier’s wiring and prevents overheating. Many forget that using the wrong bulb can damage your fixture or shorten its lifespan.
For chandeliers with intricate designs, it’s wise to have a helper. Someone to steady the ladder or pass tools can make the process safer and quicker. Taking a moment to inspect the fixture for loose parts or dust buildup is also smart. Cleaning with a microfiber cloth before changing the bulb can improve the chandelier’s glow and prevent dust from causing damage. These preparation steps set the stage for a smooth and safe bulb replacement.
Picking the perfect bulb isn’t just about brightness; it’s about the right fit, longevity, and energy efficiency. Chandeliers often require bulbs with specific bases like candelabra (E12) or intermediate (E17), and ignoring this detail can lead to frustrating returns or fixture damage. LED bulbs are highly recommended since they offer long-lasting life and use less energy compared to incandescent or halogen bulbs.
Color temperature plays a huge role in ambiance. A warm white (2700K to 3000K) gives that cozy, inviting glow, perfect for dining rooms or living spaces. Going too cool or daylight white can make the room feel sterile and harsh. Another big plus of modern LED chandelier bulbs is their low heat emission, which protects delicate crystals and metal finishes from heat damage.
Consider dimmability if your chandelier has a dimmer switch. Not all bulbs support this feature, so choosing a dimmable LED bulb ensures you keep full control over lighting mood. When in doubt, check the packaging or manufacturer specs. Your choice here greatly impacts both the look and the lifespan of your chandelier’s lighting.
One of the trickiest parts about how to change a chandelier light bulb is reaching the bulb itself, especially in tall or elaborate fixtures. Before climbing, position your ladder securely—on flat ground and close enough to avoid overreaching. Always have a spotter if possible to minimize accidents.
If your chandelier has glass covers or shades, remove these carefully first to prevent breakage. It’s helpful to place a soft towel underneath while working as an extra precaution against dropped pieces. When removing the old bulb, avoid forcing it out. Turn it slowly counterclockwise until it loosens. Some bulbs might be stuck due to age or heat expansion, but patience and gentle wiggling pay off here.
If the bulb is a halogen type or looks fragile, wear gloves to protect your hands and keep oils off the bulb’s surface. Oily residues can cause hotspots, reducing bulb life or causing premature failure. This step also shows respect for your fixture’s delicate parts and helps maintain the chandelier’s pristine look.

Installing the new bulb demands just as much care as removal. Align the bulb’s base with the socket properly and screw it in clockwise, turning gently but firmly. Over-tightening can crack glass sockets or strip threads, leading to expensive repairs. If your fixture has covers or shades, reinstall them with the same gentleness you used to remove them.
If the chandelier has multiple bulbs, replace them one by one to keep track of your progress and avoid confusion. This method also gives you a chance to clean any dust on the sockets or inside the fixture. When all bulbs are in place, do a final check for any loose parts or misaligned elements before restoring power.
Turning the power back on at the circuit breaker rather than the wall switch ensures the entire fixture is safely energized. Then, flip your light switch and admire the fresh glow. If a bulb doesn’t light up, double-check the installation or bulb type. Sometimes, even a brand-new bulb can be defective or not compatible.
Many stumble through changing chandelier bulbs because they overlook important safety or technical details. One classic mistake is skipping the circuit breaker step and relying solely on the wall switch. This can lead to electric shocks or short circuits. Always make power-off your first step.
Another blunder is grabbing any bulb without confirming size, base type, or wattage. Using incorrect bulbs can cause overheating, flickering, or even fixture damage. A third frequent error is neglecting to wear gloves, especially with halogen bulbs. Fingerprints create hot spots that burn out bulbs faster, wasting money and effort.
Trying to rush the job or balancing unsafely on furniture can cause falls or breakage. Take your time, get a steady ladder, and, if possible, have someone assist you. Lastly, not inspecting your chandelier for dust or loose parts before and after changing the bulb can affect performance and safety. A quick cleanup and check help keep your lighting in top shape.
Keeping your chandelier in tip-top shape goes beyond just swapping out bulbs. Regular maintenance plays a crucial role in extending the life of your bulbs and the fixture itself. Dust and grime can settle on bulbs and sockets, causing poor contact or reducing light output. Wiping down your chandelier gently with a microfiber cloth every few months keeps it sparkling and functional.
Check for any signs of corrosion or loose wiring, which can lead to flickering lights or safety hazards. If you notice any wear and tear, it’s best to call in a professional electrician rather than risk damage or injury. A well-maintained chandelier not only looks stunning but also saves you the hassle of frequent bulb replacements.
Additionally, consider upgrading to energy-efficient LED bulbs if you haven’t already. They generate less heat, which means your fixture stays cooler and your bulbs last significantly longer. This upgrade is an investment that pays off with both lower energy bills and reduced maintenance costs.
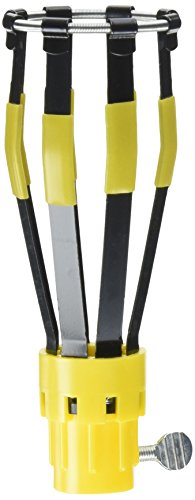
If your chandelier hangs high in a grand foyer or over a staircase, changing bulbs can be intimidating. The key here is having the right tools and strategies. Extendable poles with bulb-changing attachments are game-changers, letting you swap bulbs without climbing dangerous heights.
Alternatively, a professional lighting service can ensure the job gets done safely and efficiently. Hiring experts is especially wise for delicate, antique, or unusually large chandeliers where any misstep could cause serious damage. Remember, safety always trumps saving a few bucks.
If you prefer DIY, ensure your ladder is tall enough, stable, and ideally has a platform for tools. Having a helper to steady the ladder is another important safety step. Taking the extra time to prepare properly can save you headaches and accidents down the line.
Knowing when to replace your bulbs helps avoid sudden dark spots or flickering that disrupt your space’s vibe. If your chandelier bulbs are dimmer than usual, flicker frequently, or take longer to light up, these are clear red flags. Bulbs nearing the end of their lifespan can also emit a faint buzzing or produce uneven light.
Ignoring these signs can put extra strain on your fixture’s wiring and reduce overall efficiency. Keeping an eye on bulb performance allows you to replace them before they fail completely, preventing inconvenience or unsafe electrical issues.
Keep track of how long your bulbs typically last and mark replacement intervals on your calendar. This simple habit ensures your chandelier always shines bright, creating the right atmosphere without unexpected surprises.
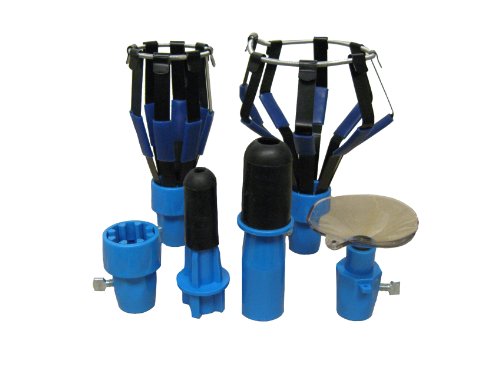
The market is flooded with bulb options, and it’s easy to get overwhelmed. The main choices for chandeliers include incandescent, halogen, CFL, and LED bulbs. Incandescent bulbs offer warm light but burn out quickly and use more energy. Halogens are brighter and last longer but generate a lot of heat.
Compact Fluorescent Lamps (CFLs) are energy savers but often don’t fit the delicate look of chandeliers and sometimes take time to warm up. LEDs dominate the scene now, with their energy efficiency, long life, and versatility in color temperatures. Plus, they stay cool to the touch, protecting your fixture and reducing fire risk.
When upgrading or replacing, consider not just initial cost but the total value over time. LEDs may cost more upfront but pay off with lower energy bills and less frequent changes. Understanding these differences helps you pick the best bulb for your specific chandelier and lifestyle.
To get the most mileage out of your bulbs, avoid turning your chandelier on and off repeatedly in short periods, as this stresses the filament or electronics inside. If you use a dimmer, choose bulbs compatible with dimming to prevent flickering and premature burnout.
Keeping your chandelier clean reduces dust buildup that can trap heat and shorten bulb life. Always handle bulbs with clean gloves or a cloth to prevent oils from your skin causing hotspots. When installing bulbs, make sure they’re snug but not overtightened — this avoids damage to the socket.
Lastly, think about investing in a smart lighting system that allows you to control brightness and timing. This not only adds convenience but helps maintain optimal bulb performance by avoiding excessive use.



Best Boat Black Lights 2026 For Nighttime Adventure

Best Black 30 Inch Light Bar Reviews – Top Picks of 2026

Best Black Light For Aquarium 2026 For Vibrant Glow

Best Black Light for Authenticating Glass 2026 Top Picks

Best Waterproof Spotlight 2026 That Outshines Expectations

Best Solar Spotlight For Yard 2026 Brighten Outdoor Spaces With Ease
Best Led Spotlight Rechargeable 2026 Bright Picks

Best Rechargeable Spotlight For Boat 2026 That Cuts Through Darkness





