
How to Safely Change an Outdoor Light Bulb

Cut the power and let everything cool. Swapping an outdoor bulb comes down to shutting off the switch, removing the outer weather cover, and gently twisting the old bulb counterclockwise. Outdoor fixtures work under tough conditions, so using a bulb built for moisture keeps the new light from failing early or cracking when temperatures swing.
The exact steps depend on your fixture and where it sits. A covered entryway only needs a damp-rated bulb, but an exposed floodlight facing direct rain requires a wet-rated bulb to stay safe. Tight glass lanterns might need a small screwdriver to loosen rusty thumb screws, and outdoor humidity can cause older metal bases to stick inside the socket. Here is how to open the housing safely, loosen stubborn bulbs, and seat the right replacement without damaging your fixture.
Cut the Power and Stabilize Your Ladder First
Outdoor fixtures face rain, dirt, and wind, making bulb replacement riskier than swapping an indoor table lamp. The first step is cutting electrical power. Do not rely solely on the wall toggle switch. Someone indoors might flip the switch while your hands are on the fixture, or an automatic photocell (a small sensor that turns light on at dark and off at sunrise) might keep the socket energized. Head to your main electrical panel and shut off the specific circuit breaker powering that exterior light. Confirm the power is dead by checking the wall switch before climbing.
Once power is off, secure your ladder. Outdoor surfaces are rarely level. Porch decking gets slick with morning moisture, while flowerbeds and grass are often soft or uneven. Use a sturdy stepladder or extension ladder that lets you reach the fixture without standing on the top rungs. If you must place the ladder on soil or mulch, slide a wide, flat wooden board under the feet so they do not sink under your weight.
Keep your setup safe with this quick checklist before going up:
- Shut off the circuit breaker at your main electrical panel.
- Wait ten minutes for old incandescent or halogen bulbs to cool completely so they do not burn your skin.
- Clear the ground beneath you of garden hoses, tools, or decorative rocks that could cause a fall.
- Wear work gloves with rubber palms and clear safety glasses to shield your eyes from falling dirt or flaking metal.
Open the Fixture Housing Without Dropping Fragile Glass
Outdoor lights come in several common styles. Open-bottom lanterns allow you to reach straight up to grab the bulb. Sealed lanterns, hanging globes, and security floodlights use enclosed glass to keep out wind and insects. To reach the bulb inside an enclosed fixture, you must open the housing without damaging the glass panels or dropping tiny mounting hardware.
Inspect the top hood and side panels for decorative threaded caps, thumb screws, or small metal retaining clips. Because exterior fixtures endure rain and temperature changes, these screws often freeze in place with rust. Never force a stuck screw with heavy pliers, which can snap soft brass threads. Instead, put a drop of penetrating oil on the threads, let it sit for a few minutes, and turn it gently with a manual screwdriver.
Before loosening the final screw, support the glass panel or bottom globe with your free hand. Glass panels can slip out instantly once retaining brackets release. Lower the glass carefully and set it on the ground away from your ladder. Never rest loose glass on top of the ladder steps while you work.
Keep small screws in a magnetic tray or your pocket so they do not get lost in dark grass or garden mulch. While the housing is open, take a moment to wipe out spiderwebs and insect nests with a dry rag.
Twist Out the Old Bulb and Free Stuck Bases
With the fixture open and the breaker off, you can remove the old bulb. Under normal conditions, grasp the bulb firmly and turn it counterclockwise until it releases. Outdoor bulbs, however, often seize inside their sockets. Outdoor moisture causes galvanic corrosion, where the metal bulb base bonds directly to the threaded metal socket.
If the bulb does not turn under moderate hand pressure, do not force or crush the glass envelope. Breaking the glass while the base remains stuck leaves a hazardous metal rim inside the socket. If you work around fragile glass or hot capsules, handle them with the care detailed in our guide on how to change a halogen light bulb safely at home.
To safely free a stuck outdoor bulb, use these practical steps:
- Put on thick work gloves and protective eye wear before applying extra twisting force.
- Wrap a rubber jar opener, silicone grip pad, or a strip of duct tape around the glass to stop your fingers from slipping.
- Apply firm, steady counterclockwise pressure. If it resists, twist a millimeter clockwise to break the crust of corrosion, then turn counterclockwise again.
- If the glass breaks away from the socket, confirm the breaker is off. Insert the tips of needle-nose pliers into the empty metal base, spread the plier jaws against the inner rim, and turn counterclockwise to unscrew the metal shell.
- If the rim is bent, grip the edge with your pliers, fold it slightly inward, and rotate the base free.
Choose an Outdoor Rated Bulb With the Right Specs
Never install an ordinary indoor bulb in an exterior fixture. Indoor bulbs cannot handle moisture, freezing temperatures, or summer heat. When cold rain hits hot glass on an indoor bulb, thermal shock can shatter it, and moisture entering the base can short-circuit the fixture.
Check the fixture label for base size, wattage limits, and shape. Most porch lights use an E26 base, which is the standard medium screw base found in household lamps. Smaller lanterns may use an E12 base, also called a candelabra or small screw base. Bulb shapes also matter. A standard household teardrop bulb (an A19 shape) fits most enclosed lanterns comfortably.
Always respect the maximum wattage listed on the fixture socket, like "Max 60W." Modern LEDs use far less electrical power (watts) to produce high brightness (lumens). A 9-watt LED can produce 800 lumens, matching the light of an old 60-watt incandescent bulb. Shop by lumens to pick the right brightness:
- 450 lumens provides soft accent light, matching a 40-watt bulb.
- 800 lumens gives balanced illumination for standard entryways, matching a 60-watt bulb.
- 1,100 lumens lights up wide driveways and patios, matching a 75-watt bulb.
- 1,600 lumens delivers high visibility for security floodlights, matching a 100-watt bulb.
Verify the weather exposure rating printed on the bulb box:
- Damp rated bulbs work well in covered outdoor spots protected from rain, such as screened porches and covered patio ceilings.
- Wet rated bulbs handle direct rain, snow, and splashing water, making them necessary for open lamp posts and exposed spotlights.
- Enclosed fixture rated bulbs are built to operate inside sealed glass boxes without overheating, preventing the internal LED driver from failing early.
Select your color temperature based on comfort. A 2700K soft warm white bulb produces a cozy, amber glow that looks welcoming and attracts fewer insects. A 5000K daylight white bulb provides a cool, bluish light suitable for garage task areas. For clear glass lanterns where the bulb is visible from the yard, choosing the best bulb for exposed light keeps the porch bright without harsh glare.
Thread the New Bulb and Reseal the Fixture
Once you have an exterior-rated bulb that matches your fixture specs, installing it takes only a few minutes. Follow these steps to secure the bulb and keep moisture out:
- Check the socket interior using a flashlight. If you see spiderwebs, dead bugs, or chalky white corrosion on the brass threads, brush the socket clean with a dry nylon brush or dry cloth. Never use liquid cleaners inside an electrical socket.
- Align the bulb base straight into the socket. Screw it clockwise by hand. It should turn smoothly without resistance. If it binds immediately, back it out and realign it to avoid stripping the threads.
- Turn the bulb until it rests snug against the central contact. Do not over-tighten, which can flatten the metal contact pin at the bottom of the socket and ruin the connection for future bulbs.
- Inspect the rubber weather gasket sealing the glass panels or fixture frame. This flexible seal stops driving rain from getting into the electrical wiring. Straighten any pinched spots, and wipe away loose grit so the gasket seals flush.
- Reattach the glass cover or protective cage. Thread the mounting screws or decorative nuts evenly by hand, tightening each side gradually so you do not put uneven stress on the glass.
- Step down from your ladder, turn the circuit breaker back on at the main panel, and flip the wall switch to verify that your light works.
Pick Dusk to Dawn Sensors for Automatic Porch Lighting
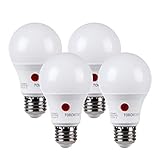
Replacing a burnt-out bulb is a great time to upgrade your home to automatic exterior lighting. Installing an LED bulb with a built-in photocell (a small daylight sensor) turns your light on automatically at sunset and shuts it off at dawn. This gives you consistent porch security and convenience without wasting power during the day.
When shopping for automatic outdoor lighting hardware, verify these basic features before buying:
- Photocell clearance: A bulb with a built-in daylight sensor must be able to detect natural sunlight. If your fixture has dark-tinted, heavily frosted, or painted glass, the sensor may think it is night and stay lit all day.
- Sensor socket adapters: If you want to keep your current standard household teardrop bulbs, a screw-in dusk-to-dawn sensor adapter can turn any regular socket into an automatic light. Check your fixture height first, because an adapter adds two to three inches to the socket and may push a bulb against the glass roof of a short lantern.
- Weather and fixture ratings: Check that any automatic bulb or sensor adapter is damp rated or wet rated to match your fixture location. For sealed carriage lanterns, always confirm the bulb is enclosed fixture rated so trapped heat does not destroy the sensor electronics.

- LFR Score9.4
LFR Score is a ranking system developed by lightfansreviews.com. LFR Score has no relationship or impact from any manufacturers or sales agent websites. Learn more
- BrandILC
- LFR Score9.2
LFR Score is a ranking system developed by lightfansreviews.com. LFR Score has no relationship or impact from any manufacturers or sales agent websites. Learn more
- BrandTORCHSTAR

- LFR Score9.2
LFR Score is a ranking system developed by lightfansreviews.com. LFR Score has no relationship or impact from any manufacturers or sales agent websites. Learn more
- BrandGE

- LFR Score9.2
LFR Score is a ranking system developed by lightfansreviews.com. LFR Score has no relationship or impact from any manufacturers or sales agent websites. Learn more
- BrandSUNNEST

- LFR Score9.2
LFR Score is a ranking system developed by lightfansreviews.com. LFR Score has no relationship or impact from any manufacturers or sales agent websites. Learn more
- BrandSETEN

- LFR Score9.0
LFR Score is a ranking system developed by lightfansreviews.com. LFR Score has no relationship or impact from any manufacturers or sales agent websites. Learn more
- BrandDroiee

- LFR Score8.8
LFR Score is a ranking system developed by lightfansreviews.com. LFR Score has no relationship or impact from any manufacturers or sales agent websites. Learn more
- BrandVicstone

- LFR Score8.4
LFR Score is a ranking system developed by lightfansreviews.com. LFR Score has no relationship or impact from any manufacturers or sales agent websites. Learn more
- BrandDEWENWILS

- LFR Score7.4
LFR Score is a ranking system developed by lightfansreviews.com. LFR Score has no relationship or impact from any manufacturers or sales agent websites. Learn more
- BrandTupkee
Last update on 2026-10-02 / Affiliate links / Images, Product Titles, and Product Highlights from Amazon Product Advertising API


Best Bulb For Exposed Light 2026 That Shines Bright

Best Industrial Light Bulb Reviews: Top Picks for 2026

Best Outdoor Light Bulb Reviews: Top-Rated Picks for 2026

Best LED Reading Light Bulb Reviews - Top Picks for 2026

Best Vintage Light Bulb 2026 With Style And Glow

Best Yellow Fog Light Bulb 2026 For Clearer Night Drives

Best Z Wave Light Bulb 2026 Top Picks For Smart Control

Best Light Bulb For Vanity Mirror 2026 Brightness Boost






