How to Safely Change a Bathroom Light Fixture

Head straight to the electrical panel and flip off the switch that controls the bathroom. Doing this cuts the electricity at the source so nobody gets shocked while working on the wall. Swapping the fixture is straightforward once you confirm the power is completely off with a handheld voltage detector. From there, the whole project comes down to safely disconnecting the old hardware and matching the wires color to color.
A few details can change the job. Heavy vanity fixtures require a sturdy wall electrical box that can hold the weight without sagging. Older houses sometimes hide faded, cloth-wrapped wires without clear colors, which take an extra minute to label before disconnecting. Any light placed right next to a shower also needs a damp-location safety rating to withstand moisture. Here is how to handle the entire swap safely from start to finish.
The Short Version
- Cut the power completely: Always shut off the circuit breaker at the main electrical panel, not just the wall switch, and verify the wires have zero electrical charge before you touch them.
- Document before disconnecting: Remove the old glass shades and light bulbs, take a clear smartphone photo of the existing wire connections, and label any unusual wires before untwisting them.
- Match wires by color: Connect the live black wire to black, the white return wire to white, and the bare copper safety wire to the ground screw or wall grounding wire using twist-on wire caps.
- Secure and inspect: Fasten the mounting bracket to the wall electrical box, attach the light base without pinching any insulation, fit damp-rated bulbs, and switch the breaker back on to confirm operation.
Shutting Off Power and Confirming the Circuit Is Dead
Working with electricity can make anyone nervous, but danger only exists when power flows through the wires while you handle them. Turning off the light switch on your bathroom wall is never enough. A wall switch only interrupts one side of the circuit, leaving live voltage sitting right behind the switch plate. If someone walks past and flips the switch, or if the original builder wired the switch backward, current will still travel directly into your hands.
Walk to your home breaker panel (the metal service box usually located in a basement, garage, or utility closet). Find the electrical panel switch that controls the bathroom lighting circuit and push it firmly into the off position. If your panel switches are poorly labeled, switch on the bathroom light first, then flip the most likely switch until the room goes dark. If you live in an older home with unlabeled fuses, you must unscrew the correct fuse completely to break the connection.
Never assume the circuit is dead just because the room is dark. Outlets and wall lights in the same bathroom are sometimes wired on two entirely separate electrical panel switches. Use a non-contact voltage detector (a handheld plastic pen tool that lights up and beeps when it senses active electrical current). First, touch the tip of the tool against a known live cord or working outlet in another room to confirm the tool works properly. Next, bring the tip of the tool right up against the bathroom light fixture and the wall plate. If the tool stays silent and dark, the circuit is dead and safe to handle.
Removing the Old Fixture and Inspecting the Wall Box
Taking down an old wall light takes about ten minutes if you work methodically. Rushing this stage can crack the drywall or drop heavy glass onto your sink basin.
- Strip the old fixture down to lighten its weight: Lay a thick bath towel across the bathroom sink to catch any falling hardware. Unscrew the light bulbs and set them aside. Carefully remove glass shades, decorative rings, or metal cages so you are left handling only the lightweight metal frame.
- Unscrew the mounting plate screws: Look closely at the metal canopy (the decorative base plate covering the wall hole). You will usually see two small decorative nuts or screws on the front face, or tiny set screws on the top and bottom rims. Back these screws out with a screwdriver, holding the body of the light with your free hand so it does not drop forward.
- Pull the fixture away gently to reveal the wiring: Ease the metal base a few inches off the wall. Never let the heavy metal light hang unsupported by the thin copper wires, because that can stretch the copper or rip wire jackets inside the wall. Prop the light on a small box or have a helper support it while you work.
- Inspect the wall electrical box: The wall electrical box is the round or octagonal metal or plastic box anchored inside your wall that holds wire connections. Check that this box is screwed tightly into a wall stud and does not wobble. If your old light was screwed straight into hollow drywall with plastic anchors, stop immediately. A hardwired fixture must screw directly into an approved electrical box to keep fire risks contained.
- Photograph the original wiring layout: Use your phone to snap two or three clear photos of how the builder originally connected the wires. Note which wire connects to which screw. If you have older wiring where colors have faded to gray, wrap a small piece of blue painter tape around the wire coming from the switch so you remember its role later.
- Untwist the twist-on wire caps: A twist-on wire cap is the small plastic cone that twists over bare copper ends to bind them securely. Turn each plastic cap counterclockwise until it comes off in your fingers. Untangle the braided fixture wires from the solid house wires, then lift the old fixture down and set it on the floor.
Connecting the New Fixture Wires Safely
Modern fixtures use standard, color-coded wires designed to connect directly to your household wiring. When you connect wires, your goal is a firm, uninterrupted mechanical contact that will never shake loose or spark.
- Install the new mounting bracket: Your new light comes with a flat circular or cross-shaped metal plate called a mounting bracket. Screw this bracket directly into the two threaded screw holes on your wall electrical box using the machine screws provided in the box. Use a small bubble level across the top edge of the bracket to make sure your new vanity light will hang straight.
- Connect the ground wire first: Safety wiring goes together first to protect against shocks. Find the bare copper safety wire (or green insulated wire) emerging from your wall. Wrap it around the green ground screw on your new metal bracket, tighten that screw down, and connect the remaining wire tail to the green or bare copper wire coming from the new fixture. Twist a twist-on wire cap clockwise over the joined copper ends until it is snug.
- Join the white return wires: Take the white return wire from the wall (often called the neutral wire, which carries electrical current back to the panel to complete the circuit). Hold its stripped copper tip evenly alongside the white wire coming from your new light fixture. Place a twist-on wire cap over both exposed ends and twist clockwise until the cap grips tightly and the wires begin to twist together just below the plastic rim.
- Join the live black wires: Take the live black wire from the wall (which brings electricity from the panel to the fixture). Hold it side by side with the black wire from the new light. Thread another twist-on wire cap over the pair and spin it clockwise until it locks down firmly.
- Perform a gentle tug check on every connection: Hold the plastic cap in one hand and give each connected wire an individual, gentle tug. If a wire slides out even a fraction of an inch, unscrew the cap, align the bare copper tips so they are completely flush, and twist the cap back on with greater firm pressure. Never leave exposed bare copper sticking out below the plastic cap skirt; if bare wire shows, trim a quarter-inch off the copper with wire cutters and reattach the cap.
- Wrap the caps for peace of mind: While properly fitted wire caps do not technically require tape, wrapping two tight wraps of black electrical vinyl tape around the base of each cap and over the wires helps keep connections secure against bathroom moisture and vibration.
Mounting the Base and Restoring Power
With your electrical splices secured, you can now close up the wall and check your work. Care taken during this final step prevents pinched wires that could short out the circuit.
- Tuck the wires into the wall electrical box: Gently fold the insulated wires back inside the wall electrical box using an accordion pattern, pushing the black wires to one side and the white return wires to the opposite side. Never shove or mash the wires inward. Ensure no bare metal or insulated loops get trapped between the metal mounting bracket and the light canopy.
- Fasten the fixture canopy: Push the light canopy flush against the wall surface, aligning the mounting holes with the threaded studs on the bracket. Thread the decorative cap nuts onto the studs and tighten them down with your fingers. Use a wrench or screwdriver only if necessary, taking care not to overtighten and crack your bathroom drywall or tile.
- Fit your bulbs and shades: Reattach your glass shades using the provided retaining rings. Screw in fresh bulbs matching the wattage ratings printed on the fixture socket sticker. If you are upgrading other areas of your home at the same time, pairing reliable vanity lighting with indoor motion sensor lights in hallways can create smooth nighttime paths without blinding morning glare.
- Turn the circuit breaker on: Walk back to your service panel and switch the electrical panel switch back to the on position. Return to the bathroom and flip the wall switch. The light should turn on instantly, with steady output, zero flickering, and no buzzing sounds.
Choosing Safe Specifications for Bathroom Lighting
Bathrooms present unique moisture and visual challenges that ordinary living room lights do not encounter. When picking your replacement fixture and light bulbs, look beyond basic styling and confirm the following technical marks on the packaging.
First, always check the damp-rating on the box. Lights installed in bathrooms must be damp-rated for steamy bathrooms, which certifies that moisture, steam, and humidity will not penetrate the internal wiring connections or cause corrosion. If your fixture will sit directly inside a shower stall or directly above an enclosed bathtub, standard damp-rated fixtures are not enough; building codes require wet-rated fixtures designed to withstand splashing water.
Second, select brightness in lumens rather than wattage. Watts only measure the power draw of the light, while lumens measure actual brightness. For a primary bathroom vanity where you shave, groom, or apply makeup, aim for a total output between 1,500 and 2,500 lumens across all sockets. Choose a color tone or warmth (Kelvin) that flatters skin tones. A rating of 2700K produces a warm, soft white light reminiscent of traditional incandescent bulbs, while 3000K offers a clean, neutral white that keeps bathrooms bright without looking cold or clinical. Avoid 5000K crisp daylight bulbs at the vanity mirror, as their sharp blue spectrum can make skin look pale and washed out.
Third, verify color accuracy (CRI), which describes how true skin, paint, and clothing appear under illumination. Seek fixtures or bulbs with 90+ CRI for vanity mirrors so colors appear natural. If you connect your light to an adjustable wall control, always use an LED-compatible dimmer switch. Older dimmer switches made for incandescent bulbs often cause modern LEDs to emit an annoying buzzing hum or flash intermittently when dimmed. If you enjoy automated routines, integrating vanity fixtures into wider smart home lighting setups allows lights to power down automatically when the room is vacant.
Warning Signs That Mean You Should Call an Electrician
While swapping a standard wall light is well within the reach of a beginner, certain wiring conditions indicate hidden fire or shock hazards. Stop your work, leave the electrical panel switch turned off, and call a licensed electrician if you notice any of these five red flags:
- Scorched, melted, or crumbling insulation: If the plastic jacket on the wall wires looks blackened, brittle, or cracked, past overheating has damaged the circuit. Touching brittle wires can cause the insulation to flake away completely, creating exposed live metal inside the wall.
- Silvery aluminum wiring: Homes built between the mid-1960s and mid-1970s often feature aluminum wiring instead of copper. Aluminum requires special wire connectors and anti-oxidant paste. Standard twist-on wire caps can loosen over time on aluminum, creating a severe fire hazard.
- No wall electrical box present: If removing the old fixture reveals wires emerging straight out of a raw hole in the drywall with no plastic or metal box behind them, you cannot safely hang a new light. An electrician must cut the drywall and install an approved remodel box secured to a stud.
- The circuit breaker trips immediately upon restoration: If the electrical panel switch snaps open with a loud click or sparks the moment you restore power, you have an active short circuit. This usually means a live black wire is touching grounded metal or the white return wire. Do not keep resetting the switch.
- Missing ground wires with no metal conduit: If your wall contains only two wires with no bare copper safety wire and the box is plastic, the circuit lacks an equipment grounding path. A professional can determine whether the circuit can be grounded safely or protected with a ground-fault circuit interrupter.
FAQs
How do I know if my bathroom light requires a damp-location rating?
Any light fixture installed in a bathroom subject to condensation, steam from hot showers, or high humidity must carry an official damp-location rating. You can confirm this rating on the fixture packaging or on the UL or ETL certification sticker inside the canopy. If the light will be placed directly above a shower basin or enclosed bathtub where water droplets could splash onto the glass, you must choose a wet-rated fixture instead.
What should I do if my wall wires are both the same color?
Older homes or modified circuits sometimes contain two wires that look identical because of aged insulation or white paint overspray. Do not guess which wire is live. Use a non-contact voltage detector while the electrical panel switch is turned on temporarily to identify which specific wire carries current, turn the breaker off again, and mark that live wire with black electrical tape before connecting your new fixture.
Can I replace a bathroom vanity light without shutting off the main panel?
No, you should never attempt to change a hardwired bathroom light by only flipping off the room wall switch. Wall switches can be wired on the neutral side of the circuit, leaving active current waiting at the fixture, or someone in the house might accidentally turn the switch back on while you work. Always shut off the circuit breaker at the main electrical panel and verify the wires have zero power before touching any bare metal.
Why does my new bathroom light flicker or buzz when I turn it on?
Flickering or buzzing usually points to an incompatible wall dimmer switch or loose wire connections inside the wall electrical box. Older dimmer switches struggle with the low electrical draw of modern LED bulbs, producing electrical hums and stuttering light. Verify that your wall switch is an LED-compatible dimmer switch, make sure all screw-in bulb bases are seated firmly, and confirm that your twist-on wire caps are tightly twisted around the bare copper wire ends.


Best Lighting For Makeup 2026 Bright Ideas For Flawless Looks

Best Wall Sconces For Staircase 2026 Brighten Your Home
Best Lighting For Computer Desk 2026 For Focused Work

Best Boat Black Lights 2026 For Nighttime Adventure

Best Black 30 Inch Light Bar Reviews – Top Picks of 2026

Best Black Light For Aquarium 2026 For Vibrant Glow

Best Black Light for Authenticating Glass 2026 Top Picks
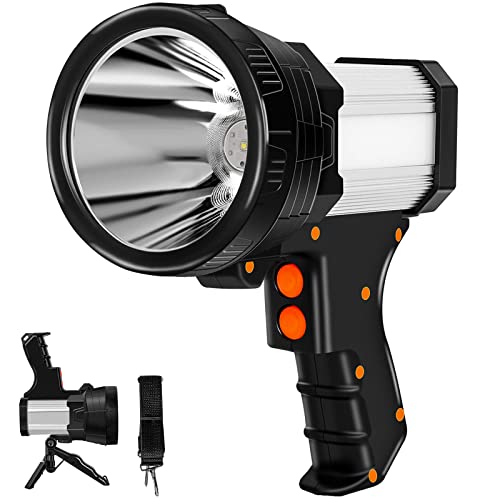
Best Waterproof Spotlight 2026 That Outshines Expectations