
How to Change Bearing in Ceiling Fan Efficiently
Replacing a ceiling fan bearing may seem daunting, but tackling it head-on saves both frustration and money. Worn-out bearings lead to wobbling, noise, and uneven airflow, making even the simplest fan an annoyance. Understanding the mechanics and the right tools transforms this task from a chore into a manageable DIY project. Start by safely disconnecting the fan from power, removing blades, and accessing the motor housing to reveal the bearings. Observing how the fan components interact helps prevent mistakes during reassembly, ensuring smooth operation.
Choosing quality replacement bearings is vital. Inferior parts can wear out quickly, negating your efforts. Lubricating the new bearings correctly prevents future squeaks and extends the life of the fan. Attention to detail, like cleaning dust and debris from the housing, ensures optimal performance and reduces strain on the motor. Step-by-step, the process becomes a rhythm, making each rotation feel effortless once the fan is back together.
Patience pays off. Rushing through removal and installation risks misaligning the motor or damaging wiring. Taking your time guarantees that each bearing sits correctly, the fan spins evenly, and the room enjoys consistent airflow. Proper handling also minimizes stress on other fan parts, such as blades and mounts. The end result is a quieter, smoother, and more efficient fan that feels almost like new.
Maintenance goes beyond simple replacement. Inspect bearings periodically for signs of wear, keep lubrication fresh, and check for unusual noise or wobble. A little preventative care avoids major repairs and extends the life of the fan. With confidence and the right approach, changing a ceiling fan bearing is no longer intimidating but a rewarding, practical skill that keeps your home comfortable and your fan humming silently.
How to Change Bearing in Ceiling Fan
Nothing disrupts a peaceful evening like a squeaky, wobbling ceiling fan. The uneven rotation or persistent noise often hints at a worn-out bearing, but tackling the repair isn't as intimidating as it seems. With the right approach, tools, and a bit of patience, restoring smooth motion is entirely doable. This guide dives into practical steps and key considerations for anyone facing the challenge of replacing a ceiling fan bearing.
Fan Bearing Basics
Every ceiling fan relies on a set of bearings to allow the blades to spin freely. Over time, dust, grime, and mechanical wear can degrade these components, resulting in wobbling, noise, and decreased efficiency. Recognizing early signs, such as subtle squeaks or resistance while spinning manually, is crucial. Addressing the problem promptly prevents further stress on the motor and blades, saving both time and repair costs.
Bearings come in different types, from ball bearings to sleeve bearings, each with unique performance characteristics. Ball bearings generally offer durability and smoother motion under heavy usage, while sleeve bearings are quieter initially but may wear faster. Knowing the type inside your fan helps in selecting the correct replacement and ensuring long-term reliability. This knowledge prevents trial-and-error frustrations during maintenance.
Inspecting the fan assembly carefully exposes the bearing housing and provides insights into potential complications. Any sign of rust, cracks, or uneven wear suggests immediate replacement rather than temporary fixes. A clean, well-maintained housing ensures the new bearing fits snugly and functions optimally, reducing wobble and operational noise. Proper preparation sets the stage for a smoother repair experience.
Failing bearings can also affect the motor's efficiency, drawing more power and reducing airflow. Addressing the bearing issue improves overall fan performance, enhances comfort, and prevents long-term damage. A small investment in parts and time delivers significant returns in fan longevity and user satisfaction.
Essential Tools and Preparation
Before diving in, gather the right tools to make the process seamless. You'll need a screwdriver set, pliers, a wrench, lubricant, and, crucially, the correct replacement bearing. Ensuring all tools are within reach minimizes interruptions and frustration. A flashlight or headlamp aids in inspecting the motor housing, especially in dimly lit rooms or ceiling-mounted fixtures.
Safety is paramount. Turn off the circuit breaker controlling the fan and confirm no power reaches the unit. This simple precaution prevents electric shock and allows confident maneuvering around delicate fan components. Using a sturdy ladder or step stool ensures secure access to the ceiling fixture, reducing strain on arms and back. Comfort and stability here prevent errors and accidental damage during the process.
Organize the fan parts as you disassemble them, noting the placement of screws, blade orientation, and any washers. Photographing each step provides a visual reference, reducing guesswork during reassembly. A meticulous approach saves time and preserves the integrity of the fan, ensuring that all components return to their proper positions. Treating each part with care reduces the risk of lost pieces or misalignment.
Checking the replacement bearing specifications is also critical. Match dimensions, load capacity, and bearing type to your fan's original design. Installing an incompatible bearing leads to repeated noise, wobbling, or even motor strain. Paying attention to these key factors guarantees a long-lasting, smooth-running fan.
Disassembling the Fan Motor
Accessing the old bearing requires careful removal of the fan blades, light kit, and motor housing. Begin by removing each blade systematically, marking positions to maintain balance during reassembly. The motor cover often hides the bearing assembly, so gently unscrew and set aside protective panels. Avoid forcing components apart, as this can damage delicate wires or the motor casing.
While the motor is exposed, inspect the shaft and surrounding components for rust or wear. Residue or debris can hinder the new bearing’s operation, so clean thoroughly with a dry cloth or mild solvent. Smooth, contaminant-free surfaces ensure optimal bearing function and minimize future friction. Attention to these details pays off with a quieter, more efficient fan.
Handle internal wires with care, noting their connections for accurate reconnection later. Unplug or mark connectors to prevent confusion. Miswiring can lead to operational failure or even electrical hazards. Maintaining a methodical approach preserves both safety and fan performance.
At this stage, you can remove the old bearing. Depending on the design, it may slide off or require a gentle tap with a rubber mallet. Resist excessive force to avoid bending the shaft or damaging the motor casing. A smooth removal sets the stage for successful installation of the new bearing without complications.
Installing the New Bearing
Lubrication is crucial before installing the new bearing. Apply a thin layer of high-quality grease to reduce friction and prevent early wear. This small step ensures long-lasting smooth operation and reduces noise. Properly lubricated bearings are the cornerstone of reliable fan performance, preventing unnecessary stress on the motor and blades.
Slide the bearing carefully onto the shaft, ensuring alignment with the housing. Misaligned bearings lead to wobble, noise, and reduced lifespan. Secure the housing panels, making sure the bearing sits firmly without gaps or tilt. Attention to these alignment details prevents recurring problems and enhances efficiency.
Recheck all screws, washers, and clips to confirm they are tightened correctly. Loose components can negate all your effort, causing vibration or safety hazards. Testing the fit by gently spinning the fan manually reveals smooth motion or any friction points that require adjustment. This precaution ensures the repair yields optimal results.
Once satisfied, reattach the blades, light kit, and decorative elements. Maintaining original blade positions preserves balance, which is crucial for quiet, stable operation. With all components back in place, the fan is ready for a controlled test. A properly installed bearing restores smooth rotation, eliminates noise, and extends the lifespan of your ceiling fan.
Common Mistakes to Avoid
Skipping safety measures is a frequent misstep. Working on a live fan risks electric shock and accidental damage to sensitive components. Always disconnect power and confirm no voltage before touching wires or metal parts. This simple step prevents serious injury and protects the fan from shorts.
Using the wrong bearing type or size is another prevalent issue. Even minor differences in dimensions or load ratings can create imbalance, noise, or rapid wear. Confirm specifications against the fan manual or existing bearing before installation. Matching the correct bearing type ensures smooth, long-lasting operation.
Over-lubrication is a subtle mistake that can attract dust and grime. Apply grease sparingly and evenly to maximize bearing life without introducing debris. Excess lubricant can seep into other parts, creating mess and reducing efficiency. Precision here maintains a clean, well-functioning fan.
Neglecting the motor shaft and housing condition can also compromise results. Any rust, burrs, or debris should be cleaned before installing the new bearing. A pristine interface ensures optimal alignment, smooth rotation, and minimal noise. Addressing these hidden issues upfront guarantees lasting performance.
Testing Fan Performance
After reassembly, a careful test run is crucial. Turn on the fan at low speed first, listening for unusual sounds or wobble. Observe the rotation; it should be smooth and steady. Any vibration indicates misalignment or loose components that require immediate adjustment.
Check operation at different speeds. Bearings under load reveal subtle friction points or imbalances that might not appear at low speed. Adjust blade positions or retighten screws as needed to achieve optimal airflow and silence. Multiple speed tests ensure reliability across all settings.
Observe for consistent noise reduction. A well-installed bearing reduces squeaks, grinding, or rattling significantly. Compare the sound to previous operation to confirm effectiveness. Proper testing validates the repair and enhances user satisfaction.
Finally, monitor the fan for several hours of operation. Any emerging irregularities should be addressed promptly. Continuous observation guarantees that the bearing replacement meets expectations for smooth, quiet, and efficient performance.
Maintenance Tips for Longevity
Regular cleaning extends the life of ceiling fan bearings. Dust and debris in the motor housing accelerate wear. Wipe down blades and the motor exterior monthly to minimize buildup. Preventive care reduces friction and keeps the fan running efficiently for years.
Lubricate bearings periodically to sustain smooth operation. Even high-quality bearings benefit from light maintenance, especially in high-humidity or heavily used environments. Small, routine attention prevents squeaks and wobbling from developing unexpectedly.
Inspect blade alignment and secure all screws. Balanced blades reduce stress on bearings, motors, and mounts. Loose or uneven blades accelerate wear and create unwanted noise. Maintaining alignment preserves fan performance and user comfort.
Replacing or servicing bearings at the first sign of wear prevents cascading issues. Worn bearings can strain the motor, reduce airflow, and create vibrations. Timely maintenance keeps the fan quiet, efficient, and long-lasting.

Signs of Bearing Wear and Tear
Recognizing worn bearings early avoids larger problems. Squeaking, grinding, or wobbling are clear indicators. Subtle changes, like minor noise increases over time, often signal the onset of wear. Attentive observation preserves fan health and comfort.
Check for uneven blade motion. If blades don’t spin uniformly, bearings may be misaligned or deteriorating. Even a small tilt can cause persistent vibration. Detecting these early prevents further strain on the fan assembly.
Temperature rise is another clue. Bearings under stress generate heat, affecting motor efficiency. Warm housings or slightly overheated motors suggest friction that needs addressing. Timely replacement safeguards the fan and home environment.
Visual inspection sometimes reveals wear. Rust, debris, or metal fatigue indicates bearing failure. Addressing these problems early ensures minimal downtime and efficient repair. Proactive action maintains a stable, smooth-spinning fan.
Maintaining Smooth Operation After Ceiling Fan Bearing Replacement
Even after installing a new bearing, sustained performance requires attention to routine care. Regular cleaning and inspection prevent dust buildup, which can lead to squeaks and increased friction. Ensuring blades remain balanced and fasteners tight maintains optimal airflow and prevents stress on the motor. Small, consistent efforts extend the lifespan of the fan and preserve quiet, efficient operation.
Routine Inspection Strategies
Visual checks for wobbling blades or unusual vibrations reveal early signs of wear. Noticeable deviations indicate that screws or bearings may need tightening or adjustment. Observing these subtle changes ensures that key components stay aligned and the fan operates silently. Using a flashlight helps detect hidden dust or minor rust on the shaft and housing.
Regularly spin the fan manually to gauge smoothness. Resistance or roughness signals potential lubrication issues or improper bearing seating. Addressing these promptly avoids more extensive repairs. Proper rotational performance prevents strain on the motor and extends its operational life.
Maintaining a log of inspection dates and actions allows easy tracking of patterns. Recording noise levels or wobble intensity can pinpoint recurring problems. This systematic approach supports timely maintenance decisions and preserves fan efficiency. Consistency in monitoring significantly reduces unexpected failures.
Combining inspection with cleaning ensures bearings remain in peak condition. Wiping dust off the blades and motor housing prevents contamination. Attention to these details safeguards the new bearing and enhances overall fan performance.
Lubrication and Bearing Care
Periodic lubrication keeps the bearing spinning effortlessly. Apply manufacturer-recommended grease sparingly to avoid attracting dust. Smooth lubrication reduces operational noise and friction. Consistent attention here is a simple but effective way to maintain quiet performance.
Use high-quality lubricants suited for ceiling fan bearings. Inferior oils can dry out quickly, leading to squeaks and increased wear. Investing in the right lubricant ensures the strength and durability of the replacement bearing. Proper lubrication directly impacts long-term fan efficiency.
Inspect lubricated areas for residue buildup. Excess grease can trap dust or debris, causing unwanted friction. Cleaning and reapplying a thin layer maintains optimal performance. This attention to detail prevents recurring issues and preserves smooth rotation.
For fans exposed to high humidity or extreme temperatures, more frequent lubrication may be necessary. Environmental stressors can accelerate wear, making careful maintenance a crucial factor. Adapting routine care to conditions keeps the fan reliable and quiet.
Blade Alignment and Balance
Properly aligned blades are essential for stable, wobble-free operation. Even slight misalignment can amplify noise and stress on the new bearing. Check blade angles and spacing carefully during reassembly. Balanced blades contribute to smooth rotation and energy efficiency.
Use a level or measuring tool to verify symmetry. Blades should sit evenly around the motor hub to distribute weight uniformly. Any deviation affects the mechanical integrity of the fan and increases wear on bearings. Correcting alignment early prevents larger problems.
Tighten all fasteners securing blades and mounts to prevent looseness. Loose screws cause vibration and reduce fan lifespan. Ensuring each component is secure protects both the bearing and motor. Minor adjustments here dramatically improve performance.
Periodically revisit blade alignment, especially after seasonal temperature shifts. Materials expand or contract slightly, potentially altering balance. Maintaining consistent precision ensures continued quiet, efficient operation year-round.
Electrical Connections and Motor Care
While the focus is often on the bearing, the motor’s health is equally critical. Inspect wiring for wear, loose connections, or signs of overheating. Securing and cleaning connections prevents electrical issues that could affect fan rotation or cause intermittent noise. Maintaining electrical integrity safeguards the overall system.
Test motor operation at various speeds to ensure consistent performance. Variations can indicate alignment or bearing friction issues. Early detection of anomalies preserves fan longevity and prevents unexpected failures. Observing motor behavior complements physical bearing maintenance.
Keep the motor housing free of dust and debris. Accumulation can trap heat and reduce efficiency. A clean environment ensures the bearing operates under optimal conditions. Regular motor upkeep aligns with smooth fan function and quiet operation.
Consider installing surge protection if the fan operates in areas prone to voltage fluctuations. Protecting the motor from spikes preserves both the bearing and electrical components. Preventive measures here extend fan life and performance reliability.
Outdoor Fan Considerations
For fans installed in outdoor areas, extra care is needed. Exposure to moisture, dust, and temperature swings accelerates bearing wear. Verify if your fan can withstand wet conditions and inspect for corrosion regularly. Proper protection ensures longevity in challenging environments.
Check the fan’s housing seals and use moisture-resistant lubricants to mitigate environmental effects. Maintaining tight seals preserves the bearing’s strength and prevents wobble caused by expansion or rust. Small adjustments here make a significant difference for outdoor operation.
Ensure blades are designed for outdoor use; some materials may warp with humidity or direct sun. Warped blades stress the motor and bearing, causing noise and uneven airflow. Choosing the right materials preserves consistent performance and durability.
To enhance performance, consider protective covers during off-season periods. Shielding the fan reduces accumulation of debris and environmental wear. These simple actions maintain the key factors of fan stability, quiet operation, and efficiency over time.
Integrating Accessories Safely
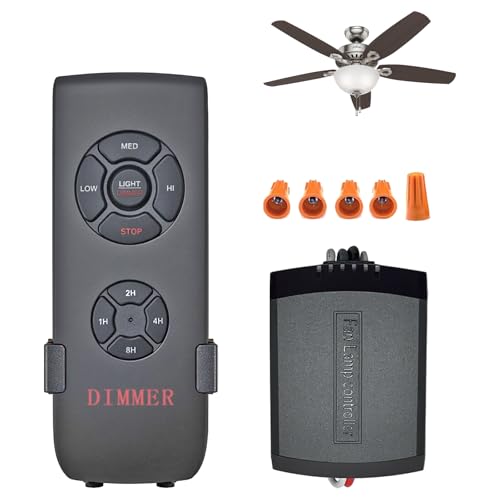
Adding lighting or smart features to the fan must not interfere with the bearing operation. Excessive weight or poorly mounted attachments can introduce wobble or noise. Verify installation and compatibility to maintain mechanical integrity. Ensuring accessories complement rather than hinder the fan protects both motor and bearing.
Use proper mounting hardware and avoid over-tightening. Stress from mismatched components can affect rotation and lifespan. Maintaining balance ensures smooth operation even with added features. Small adjustments prevent unnecessary strain on the fan assembly.
Check electrical connections for any new attachments. Secure and insulated wiring reduces risks of shorts or uneven power delivery. Protecting both the bearing and motor ensures safe, efficient use with additional components.
Periodically test fan operation with accessories installed. Observe for vibrations, noise, or uneven rotation. This ongoing verification ensures the key factors of quietness and smooth airflow remain intact despite modifications.
Long-Term Maintenance Schedule
Set a consistent schedule for inspection, cleaning, and lubrication. Frequent checks prevent unnoticed wear on the bearing and other components. Routine maintenance preserves fan efficiency and comfort for the household. Following a schedule ensures predictable performance and longevity.
Rotate the fan through different speeds periodically. This prevents uneven wear and ensures bearings are lubricated evenly. Variable operation enhances durability and keeps airflow consistent. A systematic approach reduces unexpected issues over time.
Replace worn parts proactively. Ignoring minor signs of damage may escalate into costly repairs or replacement. Timely action maintains bearing health and prevents motor strain. Preventive replacements safeguard the fan’s function.
Document maintenance actions. Keeping records of inspections, lubrication, and part replacements aids in troubleshooting. Knowing the history of a fan helps make informed decisions about future care and ensures continued reliable performance. Organized upkeep supports long-term satisfaction.
Upgrading for Efficiency and Comfort
Over time, replacing older fans with more efficient models can enhance comfort while maintaining proper bearing performance. Modern designs often feature improved bearings, aerodynamic blades, and quieter motors. Upgrading can reduce noise, wobble, and energy consumption simultaneously.
Consider models compatible with smart controls for convenience and optimization. Remote adjustments allow precise speed control, reducing stress on the bearing and enhancing overall airflow. Technological integration improves user experience and fan longevity.
Evaluate blade span and motor capacity to match room size. Correct sizing prevents excessive strain on bearings and ensures consistent airflow. Choosing suitable specifications preserves key factors of fan stability and quiet operation. Proper planning enhances both performance and comfort.
For outdoor installations, select weather-resistant models. These fans maintain bearing integrity and prevent corrosion, moisture ingress, or imbalance. Properly designed outdoor fans provide reliable operation in diverse conditions, ensuring long-term satisfaction. Explore options for can outdoor ceiling fans get wet to protect performance.
Smart Lighting Integration
Incorporating lighting features adds ambiance without compromising the bearing. Choose lightweight fixtures to prevent wobble or strain. Proper installation maintains smooth fan rotation and optimal airflow.
Use programmable lighting to align with fan operation for energy efficiency. Timed schedules reduce unnecessary runtime, minimizing wear on the bearing and motor. Smart control enhances comfort and reduces maintenance frequency.
Ensure electrical compatibility to prevent voltage fluctuations or shorts. Stable power supports both fan and lighting longevity. Preserving mechanical and electrical integrity avoids premature component failure.
Lightweight, well-mounted accessories maintain balance and quiet performance. Check operation periodically to confirm that added features do not introduce wobble or noise. Consistent monitoring preserves the key benefits of the fan and its components.
Environmental Impact on Bearing Performance
Temperature and humidity significantly influence bearing life. Extreme heat can cause expansion, while moisture accelerates corrosion. Monitoring environmental conditions and adjusting maintenance frequency keeps performance consistent.
For areas prone to high humidity, sealant sprays or protective coatings extend bearing life. These measures prevent rust and maintain smooth rotation. Protecting against environmental stress ensures reliability and comfort.
Seasonal checks after winter or summer shifts help identify wear caused by temperature swings. Timely intervention prevents further damage and preserves airflow efficiency. Observing environmental effects on the bearing safeguards long-term operation.
Fans installed in outdoor or semi-outdoor areas should prioritize materials designed for resilience. Using corrosion-resistant metals and moisture-resistant components maintains performance across challenging conditions. Explore options like best programmable outdoor christmas lights for compatible seasonal additions without affecting fan function.


Best Small Flush Mount Ceiling Fans 2026 Ultimate Picks

Best Smart Ceiling Fan India 2026 For Effortless Comfort

Best Smart Ceiling Fans with Lights for 2026: Top Picks

Best Smart Home Non Ceiling Fans 2026 For Ultimate Comfort

Best Outdoor Misting Ceiling Fan 2026 For Ultimate Comfort

Best Ceiling Fans With Lights For Vaulted Ceilings 2026 Top Picks

Best Outdoor Ceiling Fans For Porch 2026 With Style And Breeze

Best WiFi Enabled Ceiling Fan 2026 For Effortless Comfort





