How to Safely Change a Bulb in a Flush Mount Ceiling Light

A flick of the hallway switch produces a quiet snap, leaving the ceiling completely dark. Getting the light back on starts by shutting off the wall switch and freeing the glass cover so you can reach the socket inside. Most covers drop free once you release a center knob, loosen small side screws, or turn the glass rim slightly counterclockwise.
The exact steps depend on how your fixture holds its dome. Metal spring clips can hide above the rim, and old ceiling paint often glues glass edges in place after years of heat. Some modern fixtures do not even use traditional bulbs, revealing a flat, built-in light board that requires a different fix entirely. Identifying what sits on your ceiling keeps the glass from slipping while you work.
How should you prepare before climbing up?
Working on a ceiling fixture requires two hands in the air, which means your footing must be completely secure before you touch the glass. Never stand on a swivel desk chair, a soft mattress, or a stack of plastic storage bins. Set up a sturdy stepladder directly beneath the fixture so you can reach the dome comfortably without leaning your body over the ladder rails.
Safety starts at the electrical box. Always shut off the circuit breaker at the main electrical panel, never just the wall light switch. Someone else in the house could easily walk into the room and flip a wall switch while your fingers are near the wiring. If working at night leaves your room pitch black, set up battery powered motion sensor lights for hallways and stairs on nearby baseboards so you have a clear path to your work area.
Give the ceiling dome time to cool down before you touch it. Older incandescent and halogen bulbs trap intense heat inside enclosed ceiling glass, making the dome hot enough to burn your skin or crack if handled abruptly. Wait at least ten to fifteen minutes after the power is cut before reaching up.
Keep a clean, dry microfiber cloth and a pair of rubber-dipped household gloves next to your ladder. Rubber gloves give your palms grip on smooth, dusty glass so the dome will not slide out of your hands. Clear a wide, soft spot on a table or counter below with a folded towel where you can rest the heavy glass bowl as soon as it comes down.
How do you tell how the cover opens?
A flush mount sits flat against the ceiling with no visible gap, while a semi-flush hangs down a few inches on a short stem. Both styles use glass shades to diffuse the light, but the way that shade attaches to the base depends on one of four common mechanical designs. Looking closely at the fixture from below will tell you exactly which mechanism holds the cover in place.
The first design is a center decorative nut, also called a finial (a small decorative nut holding the glass in the center). This is a round metal knob or cap sitting at the very bottom center of the glass bowl. A threaded metal rod runs through the glass, and this single center nut holds the entire weight of the bowl against the ceiling canopy.
The second design uses side thumbscrews. Walk your eyes around the outer metal collar where the glass meets the ceiling. If you see two, three, or four small metal screw heads sticking out horizontally through the metal frame, those screws press against an outer lip on the glass shade to hold it up.
The third design is a twist-and-lock rim. From below, you will see a smooth glass dome with no center nut and no screws on the metal rim. This cover has molded glass grooves or small metal tabs that slide into slots inside the fixture frame, requiring a short counterclockwise turn to unlock.
The fourth design relies on hidden spring clips. You will see a flat or shallow glass shade pressed tight against the metal base with no hardware in sight. Inside the frame, two or three spring-loaded metal arms push outward against the inner lip of the glass shade, holding it in place through tension alone.
What are the steps to replace the bulb?
Once you identify how your shade mounts, follow these steps to remove the cover, swap the bulb, and reassemble the fixture safely.
- Support the glass with your steady hand: Place your non-dominant palm flat against the lowest point of the glass dome before you touch any hardware. Never loosen fasteners with both hands while letting the glass balance on its own.
- Release the cover mechanism: If your fixture has a center decorative nut, hold the glass firmly and turn the nut counterclockwise with your free hand. If your fixture has side screws, loosen each screw a couple of turns at a time in a circle. Do not remove the screws completely, because they can easily drop and bounce across the floor. If your fixture is a twist-lock dome, grip the outer edges with both hands and rotate the glass about an inch counterclockwise until the tabs line up with the release notches. If it uses spring clips, pull straight down gently on one side of the glass rim until one clip clears the edge.
- Lower the glass shade safely: Tilt the shade slightly to clear the mounting hardware or central rod. Bring the glass down with both hands and place it onto the towel you laid out on the table.
- Remove the dead bulb: Reach into the fixture and grip the old bulb. Turn the bulb counterclockwise to unscrew it from the socket (the threaded cup where the bulb screws in). If the bulb feels stuck, apply steady, gentle pressure around its base rather than squeezing the thin glass bulb neck.
- Check the fixture label: Look at the white safety sticker placed near the socket base. This label lists the maximum wattage allowed for the fixture and the base size. Most standard home fixtures use a standard screw-in bulb base (E26 medium base). Never exceed the maximum power rating listed on this sticker.
- Screw in the replacement bulb: Line up the threads of your new bulb with the socket and turn it clockwise. Tighten the bulb until it is snug and makes firm contact with the brass tab inside the socket, but do not crank it hard, which can crush the contact tab or strip the socket threads.
- Reinstall the glass cover: Lift the glass shade back into place. For center-rod designs, guide the rod through the hole in the glass, slip the washer back on, and spin the center nut clockwise until finger-tight. For side screws, hold the glass level inside the metal ring and tighten each screw evenly until all tips catch the glass lip. For twist-lock domes, raise the glass into the channels and rotate clockwise until it stops.
- Restore power and verify: Step down from the ladder, head to the main electrical panel, and turn the circuit breaker back on. Flip the wall switch to verify that your new light operates smoothly without any hum or hesitation.
What if the glass dome is completely stuck?
It is common for a twist-lock dome or a metal rim to refuse to move, even when you apply firm force. This problem almost always comes down to two culprits: old wall paint overlapping the fixture edge or rubber gaskets that have melted from years of trapped bulb heat.
When painters roll a ceiling, paint often bleeds across the thin gap between the drywall and the metal collar, effectively gluing the fixture shut. If the glass rim sits flush with a painted trim ring, take a thin utility knife and gently score around the outer circumference where the metal meets the ceiling. Cutting through that dried paint film breaks the bond and allows the metal ring to release.
If the glass itself sits against an internal rubber gasket, the heat from old high-wattage bulbs can degrade that rubber into a sticky glue. Do not use metal pry bars, screwdrivers, or kitchen knives to pry the glass loose. Metal tools create pinpoint stress points that will shatter tempered ceiling glass in an instant.
Put on clean rubber work gloves or use a pair of silicone jar openers. Rubber provides strong friction without needing heavy squeezing pressure that could crush fragile glass. Place both palms flat against opposite sides of the glass dome, press upward slightly to take the pressure off the locking tabs, and twist counterclockwise with a quick, firm pulse. If it still refuses to budge, use the padded heel of your hand to gently tap the rim around its perimeter. Those light vibrations break the micro-bonds of dried rubber or trapped dust.
What if there is no bulb inside at all?
When you lower the glass cover and look inside, you might expect to see a standard threaded socket, but instead find a flat metal plate covered in small yellow squares and tiny electronic wires. This setup is a built-in LED fixture, which uses factory-mounted light chips rather than a screw-in bulb.
Built-in LED fixtures are designed as single sealed units. They do not have replaceable bulbs. When these lights stop turning on, the issue is usually a failed internal power driver or a burned-out chip on the circuit board. You cannot purchase a replacement bulb at a hardware store to resolve this failure.
If your built-in LED ceiling light fails, confirm first whether the fixture is still covered by a manufacturer warranty. Many brands cover their integrated electronic drivers for three to five years. If the warranty is expired, you will need to replace the entire fixture. Because a full replacement requires disconnecting house wiring from a hardwired fixture (wired directly into a ceiling or wall electrical box), shut off the circuit breaker at the main electrical panel and hire a licensed electrician if you are not comfortable handling electrical wire nuts and mounting brackets yourself.
What should you look for in a replacement bulb?
Finding the right bulb for an enclosed ceiling dome comes down to matching four basic traits: physical dimensions, light output, color appearance, and dimmer switch compatibility.
Always verify brightness in lumens rather than wattage. Watts measure the amount of electrical power a bulb consumes from your wall, while lumens measure the actual brightness delivered into the room. For example, an older fixture label might state a maximum limit of 60 watts. A modern energy-saving bulb uses only 9 to 10 watts of power while delivering 800 lumens of brightness, giving you full room illumination well below the fixture heat limit.
Next, consider the color tone or warmth (Kelvin) to match the purpose of your room. Bulbs rated at 2700K produce a warm soft white glow that feels relaxing and cozy, making them an ideal fit for bedrooms and living spaces. Bulbs rated around 5000K produce a crisp daylight tone with a slight blue edge, which works well in utility rooms, walk-in closets, and laundry areas where you need sharp contrast.
Check the color accuracy (CRI), which describes how true skin, paint, or furnishings appear under the light. Look for a rating of 90+ CRI if your fixture illuminates a bathroom vanity, craft area, or hallway art display where natural color representation matters.
Make sure the bulb is physically compact enough to fit inside the dome. Standard household bulbs use the classic A19 pear shape, but shallow ceiling bowls may require a smaller globe or compact profile so the glass cover does not press directly against the hot bulb surface.
Verify whether your room uses a wall dimmer. If your ceiling fixture connects to a dimmer, verify that the replacement packaging clearly states it is dimmable. Pair the bulb with a modern LED-compatible dimmer switch. Older wall switches designed only for incandescent filaments often send erratic voltage pulses, causing new bulbs to emit annoying buzzing sounds, audible hums, or visible flickering across the room.
Finally, confirm location safety ratings. Fixtures in dry living rooms and bedrooms need standard indoor bulbs, but fixtures in steamy bathrooms or covered outdoor porches need damp-rated or wet-rated components to withstand moisture buildup inside the glass cover.

- LFR Score9.7
LFR Score is a ranking system developed by lightfansreviews.com. LFR Score has no relationship or impact from any manufacturers or sales agent websites. Learn more
- BrandMCGOR

- LFR Score9.2
LFR Score is a ranking system developed by lightfansreviews.com. LFR Score has no relationship or impact from any manufacturers or sales agent websites. Learn more
- BrandGovee

- LFR Score7.9
LFR Score is a ranking system developed by lightfansreviews.com. LFR Score has no relationship or impact from any manufacturers or sales agent websites. Learn more
- BrandGovee

- LFR Score7.7
LFR Score is a ranking system developed by lightfansreviews.com. LFR Score has no relationship or impact from any manufacturers or sales agent websites. Learn more
- BrandL LOHAS LED

- LFR Score7.4
LFR Score is a ranking system developed by lightfansreviews.com. LFR Score has no relationship or impact from any manufacturers or sales agent websites. Learn more
- BrandAirlonv
Last update on 2026-10-28 / Affiliate links / Images, Product Titles, and Product Highlights from Amazon Product Advertising API
FAQs
Why does a new bulb flicker or buzz?
Flickering or buzzing usually occurs when a dimmable bulb is paired with an older wall dimmer switch that is not rated for low-power electronic bulbs. Older wall dimmers chop electrical current in ways that confuse modern internal power drivers. Replacing your wall switch with a modern LED-compatible dimmer switch will stop the noise and keep the light output smooth.
Can you put a brighter bulb in the fixture?
You can safely increase light output by choosing a bulb with higher brightness in lumens, as long as its actual power draw in watts remains below the maximum rating on the fixture label. Modern bulbs use very few watts to generate substantial light, so an 11-watt bulb that puts out 1,100 lumens easily replaces a dim 60-watt bulb without overheating the socket.
Do you need an electrician to replace the bulb?
Changing a standard screw-in bulb does not require an electrician as long as you shut off power at the main electrical panel and use a stable ladder. However, you should call a qualified licensed electrician if you notice charred wiring, melted socket plastic, loose ceiling junction boxes, or if your dead fixture has a built-in LED board that requires rewiring the ceiling box.
How do you clean the glass dome safely?
Once the glass bowl is resting safely on your table, wash it by hand using warm water and a few drops of mild dish soap with a soft microfiber rag. Avoid abrasive scouring pads or harsh chemical sprays, which can strip decorative frosted coatings or leave hazy streaks. Let the glass dry completely before lifting it back onto the ceiling fixture so moisture does not get trapped near electrical sockets.


Best Lighting For Makeup 2026 Bright Ideas For Flawless Looks

Best Wall Sconces For Staircase 2026 Brighten Your Home
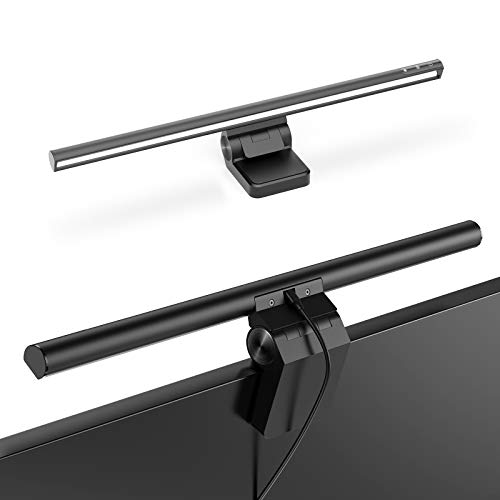
Best Lighting For Computer Desk 2026 For Focused Work

Best Boat Black Lights 2026 For Nighttime Adventure

Best Black 30 Inch Light Bar Reviews – Top Picks of 2026

Best Black Light For Aquarium 2026 For Vibrant Glow

Best Black Light for Authenticating Glass 2026 Top Picks
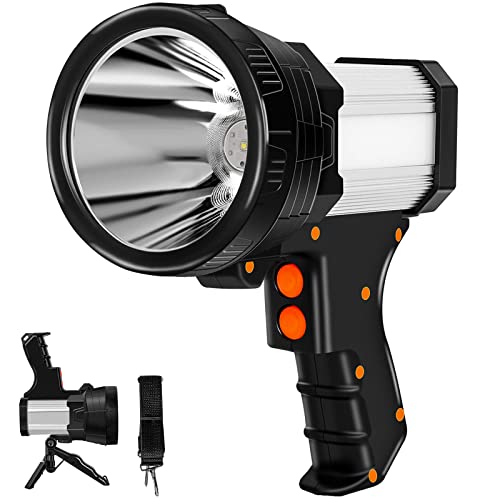
Best Waterproof Spotlight 2026 That Outshines Expectations