
How to Change Light Bulb in Outdoor Ceiling Fan Easily
Changing a light bulb in an outdoor ceiling fan might seem like a mundane task, but it can quickly become frustrating without the right approach. Weather exposure, tricky heights, and the unique construction of outdoor fans make this chore more complicated than indoor fixtures. Knowing the right steps and precautions ensures safety and efficiency, preventing common mishaps like broken bulbs or short circuits. Planning your work, gathering proper tools, and understanding your fan’s assembly can save time and effort, letting you enjoy bright, well-lit outdoor spaces.
Safety is key. Ensuring power is completely off before starting avoids accidents, while using stable ladders and non-slip footwear minimizes risk during installation. Selecting the correct bulb type, wattage, and fitting prevents damage and maintains the fan’s functionality. Some fans have protective covers or glass enclosures, requiring careful removal to access the bulb without breaking delicate components. Each step, from unscrewing the old bulb to inserting the new one, benefits from a methodical, patient approach.
Practical tips matter, too. For fans exposed to elements, consider bulbs designed for outdoor use to withstand moisture and temperature changes. Cleaning or dusting the fixture before installing the new bulb improves brightness and extends bulb life. Ensuring the bulb is securely fastened and that covers are replaced properly enhances safety and appearance. Over time, familiarizing yourself with your fan’s design makes future bulb changes quicker and less stressful, reinforcing confidence in handling outdoor lighting tasks.
Ultimately, mastering the technique of changing a light bulb in an outdoor ceiling fan improves both safety and convenience. Whether for evening gatherings, night security, or simple ambiance, having bright, reliable lighting contributes to a welcoming outdoor environment. Following structured steps, using proper tools, and applying practical tips ensures the task is smooth and effective. Bright, safe, and hassle-free lighting becomes a reality with consistent care and attention.
How to Change Light Bulb in Outdoor Ceiling Fan
Nothing ruins an evening outdoors faster than a dimly lit patio or porch. Flickering or dead bulbs on an outdoor ceiling fan not only hamper ambiance but also cause frustration when you try to fix them without the right approach. Safety hazards, awkward angles, and exposure to weather elements can turn a simple task into a hassle. Tackling this properly ensures both bright lighting and minimal stress, making every night outdoors enjoyable and safe.
Quick Bulb Assessment
Before grabbing a ladder, inspect the fan fixture and bulb type. Some outdoor ceiling fans use standard A19 bulbs, while others require specialty outdoor-rated bulbs to resist moisture. Knowing the exact bulb strength and wattage prevents mismatched replacements that could cause overheating or shorten bulb lifespan. Checking for visible damage like cracks or corrosion in the socket improves safety and performance.
Look for signs of water intrusion or wear on the fixture. Even small amounts of moisture can lead to electrical issues or corrosion over time. Confirming the fan’s condition ensures the new bulb will operate efficiently without risk. Skipping this step often leads to repeat replacements and extra frustration. Identifying these risks upfront makes the process smoother.
Examine how the bulb is mounted. Screw-in globes or protective covers often require careful removal to avoid breaking glass. Bulbs sealed in tight enclosures might need specialized tools or techniques. Planning for these minor challenges saves time and keeps the fixture intact. Always prioritize protection of both hands and fixture to maintain functionality.
Check whether the fan has an easy-access design. Some models feature hinged or detachable covers for quick swaps, while older fans might have recessed or awkward sockets. Knowing this design detail allows for an organized approach and reduces the risk of accidents. Proper preparation ensures your new bulb installation is hassle-free.
Safety Precautions
Turn off power at the breaker to prevent electrical shock. Even if a wall switch is off, residual current in outdoor circuits can be dangerous. Using insulated gloves adds another layer of protection, keeping you safe from unexpected sparks. Safety should always be the top priority when handling outdoor electrical fixtures.
Use a sturdy, non-slip ladder to reach the fan. Uneven surfaces, such as patios or decks, increase the risk of falls. Ensuring the ladder is level and secure gives confidence while replacing bulbs. Combining ladder safety with a firm grip on the fixture minimizes accidents. This careful setup is a key step to successful maintenance.
Avoid handling bulbs when wet or during rain. Outdoor fans may accumulate condensation, making surfaces slippery. Dry the area and your hands thoroughly before attempting to remove or insert bulbs. A simple precaution like this reduces breakage and prevents electrical mishaps. Respecting these safety measures keeps the process smooth.
Plan for disposal of the old bulb. Some outdoor bulbs may contain delicate filaments that shatter easily. Wrapping them in newspaper or a plastic bag prevents injury during removal and disposal. Thinking ahead ensures safety extends beyond installation to cleanup. Proper disposal is part of maintaining efficient outdoor lighting.
Removing Old Bulbs
Start by carefully removing any glass globes or protective covers. Twist or unscrew them slowly to avoid cracking. Some fans have spring clips or screws; using the right tool reduces the chance of damage. Protecting the fixture’s integrity is crucial for both safety and long-term functionality.
Grip the old bulb firmly and turn it counterclockwise. For tight or stuck bulbs, gentle wiggling helps, but avoid excessive force. If the bulb is broken, use needle-nose pliers carefully to extract remnants from the socket. Handling broken glass cautiously prevents injuries and preserves the fan’s socket for the new bulb.
Clean the socket if dust or debris is present. Moisture or residue can affect contact and reduce bulb lifespan. A quick check with a dry cloth or compressed air ensures a clean, reliable connection. Maintaining clean sockets contributes to consistent brightness and safe operation. Attention to detail here improves the performance of the new bulb.
Inspect the globe or cover before reassembly. Cracks or scratches may reduce light output or compromise safety. Replacing or repairing damaged covers preserves both aesthetics and functionality. Ensuring all components are in good condition makes installation easier and longer-lasting.
Selecting the Right Replacement
Choose a bulb specifically rated for outdoor use. Weatherproof or damp-rated bulbs handle temperature shifts and moisture better. Using the correct wattage and fitting prevents overheating and ensures optimal brightness. Ignoring these factors can shorten the bulb’s lifespan and risk the fixture.
Consider LED options for efficiency and longevity. They produce less heat, reducing the chance of damage to the fan’s motor or fixture. Bright, energy-saving LEDs maintain outdoor ambiance while cutting electricity costs. Their durability is a key benefit for long-term use.
Match the bulb’s color temperature to your outdoor lighting preference. Warm white bulbs create a cozy atmosphere, while cooler tones enhance visibility. Selecting the right hue improves comfort and aesthetics, enhancing the enjoyment of your patio or porch. Attention to these lighting nuances elevates the overall experience.
Verify bulb size fits within the globe or cover. Oversized bulbs can crack the enclosure, while undersized ones may rattle or reduce light efficiency. Ensuring the proper fit protects the fixture and maintains even illumination. Correct sizing is a small detail with big impact.
Installing the New Bulb
Turn off the breaker again and set your ladder securely. Hold the new bulb by the base, avoiding fingerprints on the glass. Insert carefully and turn clockwise until snug. Over-tightening can crack the bulb, so a firm but gentle touch is essential. Proper handling ensures safe, secure installation.
Reattach the globe or cover. Align any clips or screws correctly, making sure the cover is seated evenly. This protects the bulb and enhances visual appeal. Securing the cover firmly prevents rattling and extends the lifespan of the fixture. Cover integrity is a vital factor for reliable outdoor lighting.
Check for even illumination once the breaker is restored. The new bulb should light smoothly without flicker. Any irregularities may indicate loose connections or moisture in the socket. Addressing issues promptly preserves performance and safety.
Adjust any directional settings if your fan has multiple bulbs or spotlights. Balancing light distribution improves visibility and ambiance. Fine-tuning ensures that the lighting serves both functional and aesthetic purposes. Attention to these details enhances outdoor experience.
Maintenance Tips for Longevity
Clean bulbs and covers regularly to maximize brightness. Dust, pollen, and debris can reduce light output over time. Wiping surfaces with a dry or slightly damp cloth maintains performance. This simple practice extends the life and efficiency of the outdoor fan lighting.
Inspect sockets and wiring periodically. Corrosion, loose wires, or water damage can cause flickering or outages. Early detection prevents bigger problems and improves safety. Routine checks are a proactive measure for consistent operation.
Replace bulbs before they fail completely. Preventing burnout reduces strain on the fan’s electrical system and avoids sudden darkness. Keeping spare bulbs handy ensures quick replacements without stress. Planning ahead safeguards both function and convenience.
Consider upgrading to energy-efficient options like LEDs or smart bulbs. They handle temperature swings, save energy, and often have longer lifespans. Investing in quality replacements minimizes maintenance frequency. The long-term benefits far outweigh the initial cost.
Common Mistakes to Avoid
Don’t force bulbs into tight sockets; this can break glass and damage threads. Gentle insertion ensures a secure fit without harm. Recognize the fixture’s limitations and strength before attempting replacements. Misjudged force leads to frustration and safety risks.
Avoid using indoor bulbs outdoors. Exposure to moisture and temperature swings can cause early failure or fire hazards. Outdoor-rated bulbs maintain reliability and safety. Ignoring this difference is a common pitfall that is easily preventable.
Neglecting power shutdown is dangerous. Always confirm the breaker is off to prevent shocks. Electrical safety is a critical factor often overlooked during quick fixes. Simple precautions protect both installer and fixture.
Forgetting to clean globes and sockets reduces brightness and longevity. Routine care enhances performance and prevents dust buildup. Maintaining components is a key habit for hassle-free lighting.
Tips for Hard-to-Reach Fans
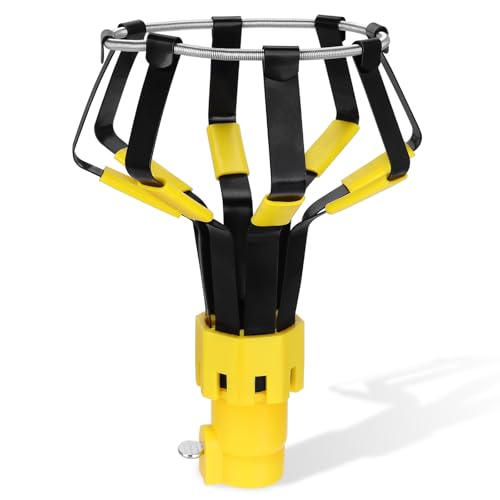
Use an extendable bulb changer for fans beyond safe ladder reach. These tools allow precise handling without climbing into risky positions. They reduce strain and minimize accidents, ensuring safe replacement. Considering ergonomic approaches simplifies the process and improves confidence.
Secure a spotter or assistant when possible. Extra hands help stabilize ladders and hand tools, enhancing safety. Coordinated teamwork prevents mishaps and allows smoother bulb swaps. Supportive setups are a smart practice for high or awkward fixtures.
Take advantage of built-in safety features. Some fans have quick-release covers or easy-access sockets designed for maintenance. Recognizing and using these features saves time and reduces stress. Maximizing fixture-friendly design benefits ensures efficient maintenance.
Document bulb types and wattages for future replacements. Keeping a log avoids repeated guesswork and improves preparedness. Organized notes streamline maintenance and prevent unnecessary trial-and-error. Staying informed about component specifics makes future changes simple.
Lighting Optimization and Energy Savings
Maintaining outdoor lighting isn’t just about replacing bulbs it’s about maximizing efficiency. Choosing bulbs with optimal wattage, energy ratings, and color temperature ensures vibrant illumination while keeping costs in check. Thoughtful selections enhance ambiance without excessive consumption, giving both functional and aesthetic benefits. A well-planned setup balances brightness with energy efficiency seamlessly.
Maintenance and Upgrades for Outdoor Ceiling Fan Bulbs
Keeping outdoor ceiling fan bulbs running smoothly goes beyond just swapping them out. Consistent maintenance and monitoring ensures brightness and longevity while avoiding frequent interruptions. Dust, moisture, and temperature swings can silently degrade performance over time. Staying proactive with cleaning and inspection minimizes the need for sudden replacements and improves overall safety.
Regular Cleaning Techniques
Start with the fan turned off and completely cool. Dust the globes and bulbs gently with a microfiber cloth to prevent scratches. For stubborn dirt, a damp cloth lightly applied keeps the glass clear without risking moisture inside the fixture. Regular attention to these cleaning routines preserves brightness and prevents filament stress.
Cleaning the sockets and metal components also matters. Wipe away corrosion or dirt that may affect contact, ensuring steady illumination. A quick routine inspection before or after bulb replacement helps catch early signs of wear. These small steps boost long-term performance and prevent frustrating flickers or outages.
Consider using protective covers or weather shields for fans in exposed areas. They limit dust accumulation and shield bulbs from rain or wind. Maintaining a barrier reduces frequent cleaning needs and safeguards the fixture. Simple protective measures enhance durability and reliability.
Keep spare bulbs on hand to replace any dim or faulty ones immediately. Quick swaps maintain consistent lighting and prevent downtime. Planning for replacements as part of regular maintenance ensures smooth operation without surprises.
Upgrading Bulbs for Efficiency
Replacing old bulbs with LED alternatives can cut energy use while boosting lifespan. LED bulbs handle outdoor conditions better, reducing heat and resisting moisture. They provide consistent brightness and a strong energy-saving advantage for long-term cost management. Transitioning to efficient options is a small effort with noticeable benefits.
Choose bulbs with the appropriate color temperature to complement outdoor ambiance. Warm tones create cozy spaces, while cooler tones offer better visibility. Selecting the right hue enhances both functionality and comfort, emphasizing lighting quality. Subtle improvements elevate the outdoor experience substantially.
For fans with multiple bulbs, matching brightness ensures even light distribution. Uneven illumination can create awkward shadows and reduce visual appeal. Paying attention to wattage and lumens keeps lighting consistent. Balanced brightness is a key feature for pleasant outdoor settings.
Consider bulbs designed for longevity in damp or variable conditions. Their resilience reduces the frequency of replacements and prevents sudden failures. Prioritizing durability and environmental tolerance provides a strong maintenance benefit.
Electrical Checkups
Inspect wiring periodically for wear or loose connections. Outdoor fans are exposed to the elements, so regular electrical checks prevent shorts or flickering. Ensuring stable contacts improves reliability and safety. Routine examination of the fan’s electrical components is essential for uninterrupted lighting.
Look for signs of moisture in sockets and housings. Even small amounts of water can affect performance and safety. Drying and sealing vulnerable areas strengthens overall functionality. Addressing these issues early safeguards electrical integrity.
Check the wall switch and breaker for proper operation. Faulty switches or tripped circuits may mimic bulb problems. Understanding this reduces unnecessary replacements and avoids confusion. Attention to all electrical aspects supports efficient maintenance.
Document any irregularities or repairs performed. Keeping a log aids future troubleshooting and ensures consistent care. Well-kept records enhance long-term reliability and simplify future maintenance.
Optimizing Fan Lighting
Adjusting bulb placement or coverage can improve both brightness and ambiance. Some fans allow repositioning of internal reflectors or multiple bulb angles. Fine-tuning improves illumination in high-use areas and complements outdoor furniture layout. Proper placement emphasizes optimal lighting distribution and user comfort.
Use dimmable bulbs if compatible, to control intensity and save energy. Gradual light adjustments prevent harsh glare and enhance relaxation. Dimming features are a functional upgrade that adds flexibility and style. Thoughtful control over light intensity enhances outdoor experiences.
For areas with mixed lighting needs, consider combining warm and bright bulbs strategically. This balance creates both ambiance and task lighting where needed. Coordinating colors and brightness strengthens visual effectiveness. Well-planned lighting contributes to both function and aesthetics.
Pairing lighting with sensors or timers adds convenience and energy efficiency. Automated control reduces unnecessary usage and ensures lights operate when required. Incorporating smart solutions is a modern upgrade that enhances control and efficiency.

Improving Fan Accessibility and Safety
High or awkwardly mounted fans require extra attention to safety during bulb replacements. Stable ladders, spotters, and proper tools reduce the risk of accidents. Addressing accessibility challenges ensures maintenance is safe and straightforward. Planning for reach and comfort is essential for hassle-free upkeep.
Use of Tools and Accessories
Extendable bulb changers allow safe handling without overreaching. They reduce strain and provide precise control during installation. Leveraging such tools improves efficiency and lowers accident risk. Well-chosen accessories enhance installation safety.
Soft-grip gloves protect hands and improve grip on glass or metal. Handling bulbs with care prevents breakage and personal injury. Attention to small equipment choices reflects a strong safety awareness. Minor tools have a big impact on the overall experience.
Secure ladder setups with leveling blocks on uneven surfaces. Stability minimizes wobbling, supporting confidence when working overhead. Combining proper tools and stable setups is a practical safety measure. Proper planning keeps both installer and fixture safe.
Keep a small toolkit nearby with screwdrivers and cloths. Quick access allows smooth adjustments and protects components. Having the right implements ensures efficiency and reduces frustration. Well-prepared setups reinforce maintenance confidence.
Documenting Bulb Types
Record bulb specifications including type, wattage, and color temperature. Quick reference prevents guesswork for future replacements. A simple log saves time and ensures consistent lighting quality. This small step maintains clarity and preparedness over repeated maintenance cycles.
Include notes on compatibility with dimmers or timers. Ensuring future bulbs match previous setups avoids performance issues. Documentation aids consistency and reduces troubleshooting. Organized records reinforce efficient upkeep.
Track performance over time, noting flickers or failures. Early detection allows timely replacement before disruption occurs. Monitoring trends enhances planning for durable replacements. Observing long-term patterns maintains reliable illumination.
Share documentation if multiple people handle maintenance. Clear instructions reduce mistakes and preserve safety and efficiency. Collaboration ensures smooth operation of outdoor lighting systems. Consistency across users strengthens long-term performance.
Training and Guidance
Simple tutorials or diagrams help first-time users perform replacements safely. Clear visual guidance minimizes errors and prevents accidents. Resources like how to draw a ceiling fan provide helpful context for locating components and understanding mechanisms. Well-informed users maintain safe and effective operation.
Practice handling spare bulbs with protective gloves before approaching live fixtures. This builds confidence and reduces mishandling risks. Hands-on familiarity emphasizes accuracy and safety. Practiced techniques improve efficiency during actual replacement.
Provide checklists for essential steps: power off, ladder setup, glove use, bulb removal, cleaning, and reinstallation. Following structured steps ensures nothing is overlooked. Checklists serve as a reliable reference and reduce mistakes. Consistency in steps boosts safety and performance.
Combine guidance with visual markers on fan components to speed recognition. Labels or color codes make future maintenance intuitive. This thoughtful setup is a practical improvement for repeatable safety and efficiency. Simplified recognition supports smooth bulb changes.
Enhancing Long-Term Reliability
Use bulbs designed for durability and environmental resistance. Weatherproof LEDs or damp-rated bulbs handle fluctuations in temperature and moisture. Investing in strong, resilient options reduces frequent replacements. Prioritizing long-lasting components enhances outdoor lighting reliability.
Seal fixtures and covers properly after replacements. Tight seals prevent dust, insects, and moisture from affecting performance. Proper sealing is a simple yet critical factor for longevity. Attention to assembly extends the service life of your fan lighting.
Schedule routine maintenance checks. Periodic inspections catch early wear and potential issues. A proactive approach ensures sustained performance and safety. Consistent oversight protects investment and enhances user experience.
Upgrade older fixtures gradually. Integrating modern bulbs, covers, and smart features improves efficiency and durability. Incremental updates maintain brightness and convenience while avoiding total overhauls. Thoughtful upgrades deliver lasting benefits and resilience.


Best Small Flush Mount Ceiling Fans 2026 Ultimate Picks

Best Smart Ceiling Fan India 2026 For Effortless Comfort

Best Smart Ceiling Fans with Lights for 2026: Top Picks

Best Smart Home Non Ceiling Fans 2026 For Ultimate Comfort

Best Outdoor Misting Ceiling Fan 2026 For Ultimate Comfort

Best Ceiling Fans With Lights For Vaulted Ceilings 2026 Top Picks

Best Outdoor Ceiling Fans For Porch 2026 With Style And Breeze

Best WiFi Enabled Ceiling Fan 2026 For Effortless Comfort





