
How to Change the Bulb in a Pot Light Safely
How to change the bulb in a pot light is one of those home tasks that looks intimidating until you actually understand what’s going on above your ceiling. Pot lights are designed to sit flush, so there’s no obvious bulb staring back at you, which makes many people hesitate. That hesitation often leads to living with dim light longer than necessary, even though the fix is surprisingly straightforward. Once you know the logic behind the housing and trim, the process starts to feel manageable.
The key is understanding that most pot lights rely on tension clips or springs rather than screws. That small detail changes everything, because it means gentle pressure and control matter more than force. With the right approach, you can remove the trim, access the bulb, and reinstall everything without scratching the ceiling or breaking the fixture. It’s less about strength and more about patience and awareness.
Another important factor in how to change the bulb in a pot light is choosing the correct replacement bulb. Pot lights often require specific sizes, bases, or heat ratings, and using the wrong one can shorten bulb life or affect light quality. Paying attention to these details helps ensure even lighting and prevents repeated replacements. A little care upfront saves frustration later.
Once you’ve done it once, the task becomes routine, almost automatic. What felt awkward at first quickly turns into a quick maintenance habit you can handle confidently. Knowing you can maintain your own lighting gives a sense of control over your space. And honestly, it’s satisfying to flip the switch and see clean, bright light again.
Why pot lights feel tricky but really aren’t
How to change the bulb in a pot light often feels harder than it should because the fixture doesn’t look like it opens at all. There’s no obvious cover, no screws staring back at you, and no hint of where to start. That visual silence makes people second-guess themselves, worried they’ll crack drywall or pull down wiring. In reality, most pot lights are designed for quick access once you know the hidden logic.
The confusion usually comes from the trim design, not the bulb itself. Pot lights rely on spring clips or tension arms that hold the trim snug against the ceiling. These clips are strong enough to stay put but flexible enough to release with steady pressure. Once that mental hurdle is gone, the task stops feeling risky and starts feeling routine.
Another reason this job feels intimidating is the ceiling factor. Working overhead triggers caution, especially if you’ve had a bulb shatter or fixture wobble before. Still, pot lights are engineered to handle repeated bulb changes without loosening the housing. That design choice exists precisely so homeowners can maintain their own lighting without calling for help.
What really flips the switch is realizing that pot lights are modular by nature. The trim comes down, the bulb twists out, and everything goes back the same way. Once you’ve done it once, the mystery disappears. After that, every future bulb swap feels far less daunting.
Safety steps that prevent damage and frustration
Before touching anything, power control is the first non-negotiable step. Turning off the light switch alone isn’t always enough, especially in older homes with shared circuits. Flipping the breaker removes doubt and protects both you and the fixture. That small pause upfront saves a lot of anxiety later.
Heat is another sneaky issue people underestimate. Pot light bulbs, especially halogen or older incandescent types, can hold heat long after the light goes off. Giving the fixture time to cool avoids burns and reduces the risk of cracking the bulb. Patience here isn’t wasted time, it’s self-preservation.
Hand placement matters more than tools in this process. Using clean, dry hands gives better grip and control than gloves that might slip. Applying even pressure on the trim keeps the ceiling intact and prevents sudden releases. Jerky movements are usually what cause scuffs or bent clips.
Finally, keep your footing stable. A solid step stool positioned directly under the light lets you work comfortably without overreaching. Overstretching leads to rushed movements and dropped bulbs. Stability turns a nervous task into a controlled one.
Removing the trim without harming the ceiling
The trim is where most people hesitate, but it’s also where the process truly begins. Most trims are held in place by two or three spring clips tucked inside the housing. Gently pulling the trim straight down reveals these clips without tearing the ceiling edge. The key is slow, consistent pressure.
As the trim lowers, you’ll feel resistance from the springs. That resistance is normal and expected, not a sign that something’s stuck. Pinching the springs inward releases them from the housing slots. This controlled motion keeps both the trim and the ceiling intact.
Some newer pot lights use friction-fit trims instead of springs. These rely on snug tension rather than clips, which means a gentle twist combined with a pull usually does the trick. Knowing which style you have prevents unnecessary force. Force is almost never the right answer here.
Once the trim is free, let it hang slightly if it’s attached to the socket, or support it with one hand if detached. Avoid letting it dangle by the wiring alone. Treating the trim with care ensures it snaps back cleanly later. That clean fit is what keeps the light looking seamless.
Choosing the right replacement bulb matters more than you think
Swapping bulbs isn’t just about brightness, it’s about compatibility. Pot lights often require specific bulb sizes and base types, such as GU10 or medium base. Installing the wrong bulb can lead to flickering, overheating, or uneven lighting. Matching the original bulb specs is a simple way to avoid repeat work.
Wattage plays a big role in fixture health. Using a bulb with higher wattage than recommended can trap heat inside the housing. Over time, that heat shortens bulb life and stresses wiring. Staying within rated limits protects both performance and safety.
Light color also changes how a room feels. Warm white creates a relaxed atmosphere, while cool white sharpens focus. Thinking about where the pot light is installed helps guide that choice. For example, task areas often benefit from clearer tones.
In some cases, pot lights are tied into other lighting needs nearby. A garage entry pot light might share visual space with fixtures like those discussed in best light bulb for garage door opener setups. Keeping color temperature consistent avoids a patchy look. Consistency is subtle, but it shows.
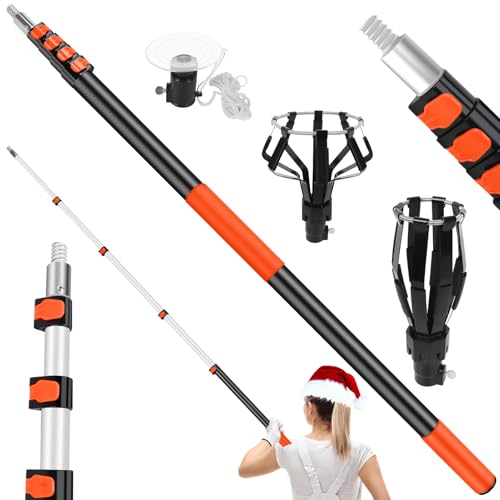
Twisting out the bulb without breaking it
Once exposed, the bulb itself is usually the easiest part. Most pot light bulbs use a simple twist-and-release mechanism. Turning the bulb counterclockwise with gentle pressure disengages it from the socket. If it resists, a slight wiggle often helps.
For recessed bulbs with smooth faces, grip can be tricky. Pressing upward slightly before twisting improves contact and control. Avoid squeezing too hard, especially with glass bulbs. Controlled movement beats brute strength every time.
If a bulb breaks during removal, stop immediately. Power should already be off, but caution still matters. Use needle-nose pliers to carefully turn the base out once the glass is removed. This scenario is rare but manageable with patience.
After removal, inspect the socket briefly. Look for discoloration or loose contacts. Catching these signs early prevents future flickering or failures. A quick glance now avoids troubleshooting later.
Installing the new bulb for a clean, secure fit
Installing the replacement is essentially the reverse, but attention still matters. Align the bulb pins or base properly before twisting it in. A smooth clockwise turn should seat it firmly without resistance. If it doesn’t seat easily, back off and realign.
Avoid overtightening, especially with LED bulbs. Tightening until snug is enough to ensure good contact. Overdoing it can damage the socket or make future removal harder. Balance is the goal here.
Once installed, give the bulb a gentle nudge to confirm stability. It shouldn’t wobble or feel loose. This small check prevents flickering later on. Secure seating equals reliable lighting.
In rooms where lighting appearance matters, such as offices or studios, consistency is key. Some people pair pot lights with fixtures like those highlighted in desk lamp for video calls setups to maintain balanced lighting. Matching tone and brightness keeps the space visually comfortable. Lighting harmony makes a real difference.
Reinstalling the trim so it sits flush and clean
Putting the trim back is where how to change the bulb in a pot light either looks professional or sloppy. The goal is a flush fit that blends into the ceiling without gaps or tilt. To get there, align the springs or tension arms with the housing before pushing upward. Rushing this step often leads to uneven edges that catch the eye later.
Spring-loaded trims need deliberate control, not speed. Compress each spring gently and guide it back into its slot, one at a time. This keeps pressure even and avoids bending the clips. A bent spring is a common cause of trims that never sit right again.
Friction-fit trims rely on equal pressure around the rim. Press upward evenly with both hands until the trim settles into place. If one side feels higher, pull it back down and reset rather than forcing it. Resetting saves the ceiling from unnecessary marks.
Once installed, step back and look at the light from a few angles. A properly seated trim should disappear into the ceiling line. That clean look is the quiet reward of doing the job carefully. Small details here make a big visual difference.
Common mistakes that cause repeat bulb failures
Repeated burnouts often trace back to avoidable errors. One major issue is using bulbs not rated for enclosed fixtures. Pot lights trap heat, and heat management is critical for bulb lifespan. Ignoring this shortens life expectancy fast.
Another frequent mistake is touching halogen bulbs with bare fingers. Oils from skin create hot spots on the glass, which weakens the bulb over time. Even with LEDs, residue can interfere with heat dissipation. A clean bulb performs better, plain and simple.
Loose seating is another silent culprit. A bulb that isn’t fully engaged can flicker and fail early. This isn’t always obvious at first glance. Taking a second to confirm a snug fit prevents recurring issues.
Some homeowners also mix bulb types across rooms without realizing it. In spaces where recessed lighting supports plants or accent greenery, people sometimes look toward options discussed in best small led grow lights guides. Mixing specialty bulbs into standard pot lights without checking ratings can cause problems. Matching the bulb to the fixture always matters.
When pot light housings signal deeper issues
Sometimes the bulb isn’t the real problem. Discoloration inside the housing can indicate excessive heat or wiring stress. If you notice scorch marks or warped metal, it’s time to pause. These signs suggest the fixture needs attention beyond a bulb swap.
Flickering after replacement can point to loose wiring or a failing socket. This isn’t something to ignore, especially in older homes. Repeated flicker stresses bulbs and increases failure rates. Addressing it early avoids bigger repairs later.
Buzzing sounds are another red flag. While faint noise can come from certain LED drivers, loud or persistent buzzing isn’t normal. It often means the bulb and fixture aren’t compatible. Compatibility matters more than brightness alone.
If multiple pot lights in the same circuit show similar issues, the problem may be upstream. At that point, replacing bulbs won’t fix the root cause. Recognizing these patterns helps you act before damage spreads. Awareness here saves time and money.

Matching pot light bulbs with room aesthetics
Lighting isn’t just functional, it shapes how a room feels. The bulb you choose influences mood, texture, and perceived space. Warm tones soften edges, while cooler tones sharpen detail. Light temperature plays a bigger role than many expect.
In traditional living spaces, recessed lighting often works alongside classic fixtures. Coordinating pot lights with elements like those seen in best lamp shade for traditional floor lamp selections keeps the room cohesive. Mismatched tones can make even a well-decorated room feel off. Harmony between fixtures matters.
Beam spread also affects visual comfort. Narrow beams create focused pools of light, while wider spreads feel more open. Choosing the wrong spread can leave dark corners or harsh hotspots. Matching beam angle to room size improves balance.
Dimming capability is another overlooked factor. Not all bulbs dim well in pot lights, especially older dimmer switches. Ensuring compatibility avoids flicker and uneven brightness. Smooth dimming adds flexibility to everyday lighting.
Building confidence through repetition and routine
The first attempt at how to change the bulb in a pot light often feels slow and cautious. That’s normal, and it’s not a weakness. Each repetition builds muscle memory and confidence. Over time, the task becomes second nature.
Routine maintenance helps spot issues early. Replacing bulbs before total failure reduces stress and keeps lighting consistent. It also minimizes sudden dark spots in key areas. Proactive habits pay off quietly.
Confidence grows when you trust the process. Knowing how the trim releases, how the bulb seats, and how the fixture responds removes guesswork. That familiarity makes future replacements smoother. Familiarity is its own kind of efficiency.
Eventually, pot light maintenance becomes just another small win in home care. No hesitation, no second-guessing, just steady execution. That sense of capability extends beyond lighting. Small skills build bigger confidence over time.


Best Outdoor Light Bulb Reviews: Top-Rated Picks for 2026

Best Yellow Fog Light Bulb 2026 For Clearer Night Drives

Best Z Wave Light Bulb 2026 Top Picks For Smart Control

Best Vintage Light Bulb 2026 With Style And Glow

Best LED Reading Light Bulb Reviews - Top Picks for 2026

Best Light Bulb to Mimic Sunlight - Top Picks 2026

7 best light bulb to heat dog house picks that work

Best Bluetooth Speaker Light Bulb 2026 With Style And Power





