
How to Change the Tail Light: Easy Steps for Every Driver
Changing a tail light might seem like a small task, but it’s a crucial part of car safety that many drivers overlook until it’s too late. Whether your tail light is dim, flickering, or completely out, knowing how to fix it yourself saves you time, money, and hassle from unexpected repairs or tickets. This guide walks you through the simple yet essential steps to replace your tail light quickly and safely. From identifying the right bulb to handling tricky screws, you’ll gain confidence to tackle this task without feeling overwhelmed. Plus, keeping your tail lights in tip-top shape means better visibility for you and other drivers, especially at night or in poor weather. No need to wait for a mechanic or struggle with confusing manuals , this is a straightforward approach designed for everyday drivers. Along the way, you’ll also learn tips on preventing future issues and maintaining your car’s lighting system for smooth, stress-free drives. Dive in and empower yourself with this must-know skill that keeps your vehicle road-ready and safe.
Ever glanced in the rearview mirror only to realize your tail light isn’t shining bright like it should? It’s a little nagging issue that can quickly turn into a safety hazard or even a ticket. The good news? Changing the tail light yourself is easier than you think, no wrenching expertise required! Whether you’re dealing with a burnt-out bulb or a cracked lens, this quick fix can get you back on the road with confidence. By rolling up your sleeves and following a few clear-cut steps, you’ll save money and dodge the stress of last-minute repair shop visits. Tail lights aren’t just about style, they’re your car’s way of communicating with drivers behind you, so keeping them in perfect shape is a must. Let’s dive into how you can easily change your tail light, make your ride safer, and stay in control behind the wheel.
Driving with a faulty or broken tail light isn’t just a minor inconvenience, it’s a serious safety hazard that can put you and others at risk. Tail lights are your vehicle’s silent communication tool, letting drivers behind you know when you're slowing down, stopping, or turning. Without a bright, working tail light, other drivers might misjudge your movements, especially in poor weather or nighttime driving conditions. In fact, studies show that accidents caused by poor vehicle lighting contribute significantly to rear-end collisions each year. That’s why making sure your tail lights are fully operational is one of the most important maintenance steps you can take.
Moreover, driving with a broken tail light can land you a ticket and fines in many places. Law enforcement pays close attention to lighting issues because it directly affects road safety. If you get pulled over, the hassle of dealing with citations and potential court fees can be far more frustrating than simply swapping out a bulb yourself. Taking control of this task empowers you to keep your car street-legal while avoiding unnecessary expenses. The great news? Changing a tail light is often straightforward and well within the reach of most drivers , no fancy tools or mechanic visits required.
Before jumping under the tail light assembly, it’s smart to gather the right tools and parts to get the job done smoothly. Typically, you’ll need a replacement bulb that matches your vehicle’s make and model. Most cars use standard bulbs, but it’s crucial to check your owner’s manual or the existing bulb to confirm the correct type. Having the wrong bulb on hand can lead to wasted trips and extra expenses. Alongside the bulb, a few simple tools like a screwdriver (usually Phillips or flathead) and possibly a socket wrench will make the removal process easier.
Don’t overlook gloves or a cloth to handle the bulb; this keeps oils from your skin off the glass, which can reduce bulb life. Also, if the tail light lens is cracked or damaged, consider buying a replacement lens or assembly rather than just the bulb, damage like this can cause moisture to get in and ruin the electrical system over time. Preparing your workspace with a flashlight or working in daylight ensures you won’t miss any important steps. Having everything ready upfront cuts down on frustration and speeds up your fix.
Gaining access to your tail light assembly is the crucial first step after prepping your tools and replacement parts. Usually, tail lights are housed behind a panel inside your trunk or hatchback area. Removing the panel carefully will expose the screws or bolts holding the light assembly in place. Be gentle when pulling off interior panels, they often snap in with plastic clips that can break easily if forced. If you’re uncertain, look for any visible screws securing the panel or consult your vehicle’s manual for detailed instructions.
Once the panel is off, take note of how the tail light assembly is fixed. Some models require you to unscrew several bolts, while others simply twist the assembly out. Keep track of screws and small parts to avoid losing them during the process. Disconnecting the electrical connector should be done carefully, some connectors have a tab or clip that must be pressed or pulled gently to release. If you’re fumbling around blindly, it increases the risk of damaging wires or connectors, so patience and a steady hand are vital here.
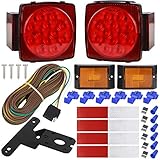
Now that you’ve got the assembly out and the bulb accessible, swapping out the old bulb for a new one is the highlight of the process. Start by twisting or pulling out the old bulb socket carefully. Avoid yanking on the wires, apply pressure only to the base of the bulb or socket. Once removed, inspect the bulb for any signs of blackening or broken filaments, which indicate it’s time for a replacement. Matching the new bulb to the original one is key; even bulbs that look similar may have different wattage or socket sizes that can cause improper fit or electrical issues.
When inserting the new bulb, hold it by the base or wear gloves to keep the glass clean. Slide or twist the bulb back into the socket firmly but without forcing it. Reconnect the electrical connector and give the bulb a quick test before putting the assembly back in place. Switch on your car lights and make sure the new bulb glows bright and steady, no flickering or dimness allowed. If the light doesn’t come on, double-check connections and the bulb type before proceeding.
After the new bulb is confirmed working, the final step is putting everything back together properly. Slide or screw the tail light assembly into its original position, making sure it fits snugly without gaps where moisture can sneak in. Reattach any screws, bolts, and interior panels exactly as they were. Skipping or loosening any fastening can cause rattling noises or reduce the water resistance of your light assembly. A tight, secure fit is a small but critical detail that ensures your repair lasts.
Once reassembled, turn on your vehicle’s lights one more time to ensure everything is working flawlessly. Test the brake lights, turn signals, and reverse lights if they’re part of the same cluster. Also, take a quick walk around your vehicle to see if the light beam is clear and consistent from all angles. A good tip is to ask a friend to help you press the brakes or activate the signals while you observe the lights. Proper testing confirms that your tail light replacement is not only complete but safe, giving you peace of mind every time you hit the road.

Sometimes, changing a tail light isn’t as smooth as the steps suggest. One of the most frequent headaches is dealing with stubborn screws or bolts that refuse to budge. Over time, these can rust or corrode, making removal tricky. Using a bit of penetrating oil and letting it soak in for a few minutes can loosen things up. If you’re armed with the right screwdriver or socket size, you’ll avoid stripping the heads, which could turn a simple job into a nightmare. Remember, forcing parts can cause cracks or breaks, which may require costly replacements.
Another challenge is when the tail light assembly itself is stuck, either because of dirt buildup or minor warping. Gently wiggling it while pulling can help, but be cautious not to apply excessive force. If the electrical connectors are tight, using a small flathead screwdriver as a lever to gently pry can save your fingers from injury. Sometimes the bulb socket might seem fused with the assembly, rotating carefully back and forth is usually the way to go. These small patience-powered tricks make a big difference in avoiding damage and frustration.
Not all tail light problems are fixed by swapping a bulb. If your tail light lens is cracked, faded, or foggy, it may be time to replace the whole assembly. A damaged lens not only looks bad but can let moisture seep in, which can corrode wiring or cause bulbs to burn out faster. Plus, a cracked lens doesn’t reflect light properly, which cuts down on your visibility to other drivers, defeating the whole purpose of the tail light.
Replacing the entire assembly is a bit more involved but still manageable with some care. Be sure to buy an OEM (Original Equipment Manufacturer) part or a high-quality aftermarket equivalent to ensure fit and longevity. Poorly fitting assemblies can rattle loose or cause leaks. When installing a new assembly, take extra care to seal all edges properly to keep water out. This proactive approach saves money on future repairs and keeps your car looking sharp and safe on the road.

Once you’ve got your tail light shining bright again, the goal is to keep it that way as long as possible. Regularly inspecting your tail lights for cracks, moisture, or dimming bulbs is a simple but powerful habit. Cleaning the lenses with mild soap and water removes dirt and grime that can dull light output. Avoid harsh chemicals that might degrade plastic or the seals around your lights.
Parking in shaded or covered areas whenever possible helps protect your tail lights from sun damage, which can cause plastic to yellow and weaken over time. If you live in regions with heavy rain or snow, check your tail lights more frequently for signs of moisture build-up or corrosion. Investing in quality bulbs with longer lifespans and good heat resistance is another savvy move. These small steps keep your tail lights reliable and reduce how often you need replacements.
Tail lights have come a long way from simple incandescent bulbs. Today, many vehicles sport LED tail lights, which offer brighter light, faster response times, and greater durability. If you own an older car, upgrading to LED bulbs or assemblies can boost visibility and safety while reducing energy consumption. LEDs also tend to last longer, saving you money in the long run.
However, switching to LEDs requires making sure the bulbs and electrical systems are compatible. Some cars need additional resistors or adapters to prevent flickering or error codes. Researching your specific vehicle model and consulting with professionals or online forums can help ensure a smooth upgrade. Taking advantage of modern lighting tech not only enhances safety but can add a stylish edge to your ride, combining function with flair.
Before hitting the road after your repair or upgrade, it’s crucial to perform a final comprehensive check of your tail lights and other signals. Ensuring your brake lights, turn signals, and running lights function flawlessly prevents accidents and keeps you compliant with traffic laws. Don’t forget to test them under various conditions like during the day and at night.
Also, be aware of local regulations regarding tail light colors, brightness, and modifications. Some jurisdictions have strict rules on what type of lights are street-legal. Installing aftermarket parts that don’t meet these standards could result in fines or vehicle inspection failures. When in doubt, sticking to certified parts and adhering to manufacturer recommendations is the safest bet. Keeping your tail lights roadworthy is about more than just function, it’s about staying on the right side of the law while protecting yourself and others.



Best Boat Black Lights 2026 For Nighttime Adventure

Best Black 30 Inch Light Bar Reviews – Top Picks of 2026

Best Black Light For Aquarium 2026 For Vibrant Glow

Best Black Light for Authenticating Glass 2026 Top Picks

Best Waterproof Spotlight 2026 That Outshines Expectations

Best Solar Spotlight For Yard 2026 Brighten Outdoor Spaces With Ease
Best Led Spotlight Rechargeable 2026 Bright Picks

Best Rechargeable Spotlight For Boat 2026 That Cuts Through Darkness





