How to Change a Vanity Light Fixture Safely

Replacing a bathroom vanity light comes down to shutting off power at the electrical panel, matching three colored wires together, and securing the new base to the wall. The whole job stays remarkably simple as long as the wires inside your wall use standard modern colors and connect to a sturdy wall box. There is no need to hire an expensive professional for what is mostly a straightforward cosmetic swap. With a screwdriver and a few plastic twist-on wire caps, swapping the fixture takes less than an hour.
A few wall conditions can change what you need to do. Older houses sometimes hide brittle wires wrapped in cloth rather than clean black and white casing, which demands extra care so nothing cracks. A much heavier fixture may also need a sturdier mounting bracket to hold the weight safely above the mirror. Here is how to walk through every step safely, from cutting the power to flicking on the switch.
Shut off the circuit breaker before touching any wires
Flipping the wall switch on the bathroom wall does not make the area safe to work on. Wall switches often cut power only to one leg of the circuit, leaving active electrical current waiting right inside the wall box. Someone walking past can also accidentally flip the switch back on while you hold bare metal. Always walk to your electrical panel and switch off the circuit breaker that supplies power to the bathroom.
Bathroom circuits are sometimes mislabeled or shared across multiple rooms. Turn the existing vanity light on before you head to the panel box. Flip the breaker switch you believe controls the bathroom, then walk back to confirm the light went out. If your panel directory is unclear or faded, flip switches one by one until the vanity light shuts off completely.
Confirm the circuit has zero voltage before touching any copper. A simple non-contact voltage sensor (a pen-shaped tool that chirps and lights up red near active voltage) provides quick peace of mind. Hold the tip of the sensor against the wall switch and around the base of the fixture to confirm no electricity is running through the lines.
Prepare the bathroom workspace to prevent accidents and lost hardware. Lay a thick bath towel across the sink counter and push the drain stopper down securely. Tiny mounting screws and plastic caps bounce easily off slick porcelain and drop straight down the plumbing. A folded towel also cushions any accidental slips if a screwdriver drops from your hand.
Gather your equipment beside the sink before taking anything apart. You will need a standard Phillips screwdriver, a flathead screwdriver, your non-contact voltage sensor, wire strippers, and a reliable battery work light. Because you turned off the room lighting, keeping a portable work lamp or headlamp handy ensures you can see clearly inside the wall opening.
Take down the old fixture one piece at a time
Start by removing all detachable, fragile parts from the old light. Unscrew the light bulbs by hand and place them away from the edge of the counter. Loosen the thumbscrews or retaining rings that secure the glass shades, gently slide each glass globe free, and set them onto a soft surface in an adjoining room.
Locate the fasteners holding the fixture canopy (the decorative metal plate covering the wall electrical box) against the wall. Most wall fixtures use two small decorative ball nuts on the front face, while others use small set screws positioned on the top or bottom edges of the metal canopy. Use your screwdriver to loosen these fasteners while keeping one hand on the center of the fixture frame.
Never let a metal light fixture hang unsupported from its electrical wires. Dropping the weight of a heavy metal bar puts sudden strain on connection points and can strip the insulation right off your house wiring. Use an old wire coat hanger bent into an S-hook to hang the frame from the metal mounting bracket, or ask a partner to hold the frame steady.
Hold your non-contact voltage sensor directly against each wire behind the canopy before untwisting anything. Touch the sensor tip to the black wire, the white wire, and the bare copper safety wire. The sensor should remain silent and show no active warning lights. If the tool beeps or flashes, stop immediately, leave the wires untouched, and locate the correct breaker switch at your panel.
Once you confirm the wires are dead, remove the plastic twist-on wire caps (the cone-shaped plastic thimbles that cover connected wire ends) by turning them counterclockwise. Untwist the fixture wires from the house wires using your fingers, keeping the house wires separated from each other. Unhook the fixture from your support hanger and set the old unit aside.
Unscrew the old mounting bracket from the wall electrical box using a screwdriver. Keep the two long machine screws that secured the bracket to the box, as replacement screws included with new light fixtures sometimes have different thread pitches. Check the wall electrical box with your hand to make sure it feels rock solid and does not wobble inside the drywall cutout.
Match wire colors together using twist caps for safety
A hardwired fixture (a light connected directly into a wall electrical box rather than plugged into a standard wall socket) depends on three basic connections to work safely. In standard residential wiring, the black power wire brings incoming voltage from the panel, the white return wire carries current back to complete the electrical circuit, and the bare copper safety wire directs dangerous stray current harmlessly into the earth if a fault develops.
Install the new universal mounting bracket onto the wall electrical box. Position the bracket so the mounting studs or threaded screw holes align horizontally with the slots on your new vanity backplate. Drive the mounting screws through the bracket into the threaded ears of the wall box, and check the bracket with a small bubble level before tightening down the screws.
Support the new fixture near the wall using your bent wire hook so your hands remain free for wiring. Always make your ground connection first. Wrap the bare copper safety wire from the wall clockwise around the green grounding screw on the mounting bracket and tighten the screw down with your screwdriver. If your new light fixture includes its own bare copper or green wire, join the house ground wire, the fixture ground wire, and a short pigtail under a single plastic twist-on wire cap.
Connect the white neutral wires together next. Align the bare stripped copper ends of the white house wire and the white fixture wire evenly side by side. Twist a plastic twist-on wire cap clockwise over the paired bare ends until the cap feels firm and begins twisting the insulated wire jackets together. Tug firmly on each wire individually to confirm neither copper strand slips out of the cap.
Repeat the connection process with the black power wires. Pair the black house wire with the black fixture wire, twist a new plastic cap clockwise over the bare ends, and perform the same gentle pull check. If your new vanity fixture uses a smooth and ribbed cord instead of black and white jackets, remember that the smooth wire acts as the hot wire, while the wire with fine ridges or white lettering functions as the neutral wire.
Older homes built before the mid-1980s may present two wires with darkened, discolored cloth jackets instead of clear black and white plastic. If you encounter two wires of the same color, inspect the metal wall box itself. Metal boxes fed by flexible metal conduit often serve as the grounding path; however, if you cannot clearly determine which house wire supplies hot voltage, stop before making connections and seek professional guidance.
Carefully tuck the connected wires back into the wall electrical box. Push the neutral white wires toward one side of the box and the hot black wires toward the opposite side to keep them separated. Fold the wires in a gentle accordion pattern rather than stuffing them straight in, ensuring no bare copper slips out from underneath the plastic twist caps.
Secure the mounting plate and restore your household power
Align the fixture canopy over the mounting bracket protruding from the wall. Ensure no loose wires are pinched between the metal edge of the canopy and the surrounding drywall, as a pinched wire can cut through plastic insulation and trip the breaker. Thread the decorative finish nuts onto the mounting studs by hand, then snug them down firmly with a screwdriver without warping the metal backplate.
Select the correct light bulbs for your bathroom environment. Bathrooms generate steam and humidity every day, so choose fixtures and bulbs listed as damp-rated for steamy bathrooms rather than units dry-rated for living rooms and bedrooms. Pay close attention to brightness in lumens rather than wattage ratings, because lumens measure actual brightness while watts only measure power draw. For comfortable grooming at a vanity mirror, aim for roughly 1,500 to 2,500 total lumens across the whole fixture.
Pick a color tone or warmth (measured in Kelvin) that flatters your space. Bulbs rated at 2700K produce a warm soft white glow that feels relaxing, while bulbs rated around 3000K offer a clean, neutral clarity that works well for morning grooming without feeling icy. Avoid 5000K crisp daylight bulbs in small bathrooms, as they can cast sharp, clinical shadows. Look for a color accuracy rating of 90+ CRI (color rendering index) on the bulb packaging so makeup, skin tones, and paint colors appear natural in the mirror.
Check the socket type before buying replacement bulbs. Most traditional vanity bars use a standard screw-in bulb base (E26 medium base), while slim modern designs feature a built-in LED array that requires no separate bulbs at all. If you plan to operate your vanity from a wall dimmer, verify that you have an LED-compatible dimmer switch installed. Incompatible older dimmer switches cause annoying hums, low buzzes, or visible flickering across modern LED bulbs.
Reattach the glass shades carefully, securing them with the retaining rings or thumb screws provided in the box. Screw in your bulbs, checking that they sit straight in each socket. Many homeowners pair updated bathroom task fixtures with home automation lights for dependable routines so morning lighting rises gently with their alarm. If you also want automated navigation at night without flipping bright vanity lights, adding motion sensor lights for hallways and stairs keeps pathways visible without waking the rest of the house.
Walk back to your main electrical panel and push the circuit breaker firmly to the on position. Return to the bathroom and flip the wall switch. The new vanity fixture should turn on instantly with steady, flicker-free light. Let the fixture operate for several minutes while watching for flickering, buzzing sounds, or unusual odors.
Call an electrician if you find damaged wires or boxes
Certain wiring conditions turn a simple cosmetic fixture swap into a serious safety hazard. If you pull away an old vanity plate and find crumbling, brittle insulation that flakes off when touched, do not attempt to twist new caps onto the wires. Brittle insulation exposes bare live copper inside the wall cavity and creates a direct short circuit or house fire risk.
Another major red flag is a missing wall electrical box. In older renovations, previous owners sometimes poked bare wires straight through a jagged hole in the drywall and screwed the fixture directly into the plaster. Building codes require every hardwired fixture to terminate inside an approved electrical box to contain heat and sparks. If no metal or plastic box exists inside your wall, an electrician must install an approved remodel box before you can hang the light.
Loose or damaged mounting boxes also require professional repairs. If the electrical box wobbles freely inside the wall cutout, it cannot support the physical weight of a heavy glass-and-metal vanity bar. Electricians have specialized expanding support brackets that clamp tightly between wall studs through small openings to create a rigid anchor.
Stop work immediately if you discover dull silver aluminum wiring instead of reddish copper strands. Aluminum wiring, common in homes built between the late 1960s and mid-1970s, requires specialized connectors and anti-oxidant paste. Standard wire nuts cause aluminum to expand, overheat, and loosen over time. If your house wiring is silver, or if the circuit breaker trips instantly the moment you turn the power back on, keep the breaker off and bring in a licensed professional.


Best Lighting For Makeup 2026 Bright Ideas For Flawless Looks

Best Wall Sconces For Staircase 2026 Brighten Your Home
Best Lighting For Computer Desk 2026 For Focused Work

Best Boat Black Lights 2026 For Nighttime Adventure

Best Black 30 Inch Light Bar Reviews – Top Picks of 2026

Best Black Light For Aquarium 2026 For Vibrant Glow

Best Black Light for Authenticating Glass 2026 Top Picks
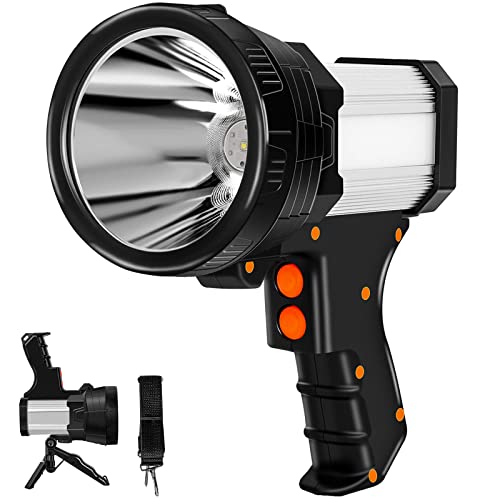
Best Waterproof Spotlight 2026 That Outshines Expectations