
How To Clean An Enclosed Ceiling Fan Without The Mess
How To Clean An Enclosed Ceiling Fan sounds simple until dust starts clinging to the inner cage, sticky grime settles on the blades, and every wipe sends debris floating across the room. That’s where frustration kicks in. Plenty of people ignore enclosed fans for months because they look tricky to open, awkward to reach, and honestly, kind of intimidating. Still, dirty fan blades can push stale air around, collect grease faster than expected, and leave rooms feeling stuffy even with the fan running nonstop.
Ceiling fans with enclosed housings tend to trap more buildup than open-blade designs. Kitchen spaces usually deal with greasy residue, while bedrooms and living rooms gather thick layers of dust mixed with pet hair and lint. Yikes, it sneaks up fast. A quick surface wipe rarely fixes the real issue because hidden areas inside the enclosure keep collecting grime that eventually affects airflow and balance.
Proper cleaning habits help the fan stay quieter and reduce that annoying wobble many people notice over time. Loose debris inside the cage can also create rattling sounds that get worse at night when everything else is quiet. Nobody wants to lie awake listening to a clicking fan overhead. Gentle cleaning paired with careful drying keeps the motor area safer while helping the fan maintain steady airflow.
Another overlooked issue involves light fixtures attached to enclosed ceiling fans. Dust-coated covers can dim brightness more than expected, especially in smaller rooms where overhead lighting does most of the heavy lifting. Smudges and trapped bugs inside the glass enclosure make the entire fixture look dull even if the rest of the room stays spotless. Regular cleaning restores both airflow and lighting without needing replacement parts or expensive tools.
How To Clean An Enclosed Ceiling Fan also depends heavily on the fan material and cage design. Metal enclosures often collect fingerprints and sticky buildup, while wooden accents require gentler handling to avoid moisture damage. Some models twist open easily, though others need screws removed carefully to avoid bending the frame or scratching finishes. Paying attention to those details prevents accidental damage and saves a headache later.
Small maintenance steps make a noticeable difference. Soft microfiber cloths help trap dust instead of spreading it around, while mild soap solutions remove residue without leaving streaks behind. Vacuum attachments can help loosen debris inside tight spaces where fingers barely fit. Also, letting every piece dry completely before turning the power back on helps avoid moisture problems around electrical components.
Clean airflow changes the feel of a room more than most people expect. Fresh circulation helps rooms feel cooler, lighter, and less dusty overall. Once the enclosure shines again and the blades move freely, the fan stops looking like an ignored corner fixture and starts feeling like part of a well-kept home. Funny enough, many people realize how dirty their enclosed fan was only after seeing the difference a proper cleaning session makes.
How To Clean An Enclosed Ceiling Fan Safely
A dusty fan can make a clean room feel oddly stale, especially once the hidden blades start pushing old lint back into the air. The tricky part is that how to clean an enclosed ceiling fan usually involves a cage, light cover, screws, tight gaps, and a motor area that shouldn't get soaked. Rush the job, and dust drops everywhere like confetti nobody asked for. Slow down a bit, and the whole fixture becomes easier to clean without turning the room into a mess.
Enclosed Fan Cleaning Basics
Enclosed ceiling fans collect dust differently than open-blade fans because the cage traps debris inside the fixture instead of letting it fall away naturally. That sounds convenient until the buildup starts clinging to the blade edges, inner grille, and light cover. A quick swipe across the outside might look better from the floor, but the hidden grime keeps affecting airflow. That’s why the cleaning routine needs to reach both the visible cover and the tucked-away blade area.
Safety comes first, even if the fan looks harmless while it’s off. Turn off the wall switch, shut off the breaker if the fixture is hardwired, and let the blades stop completely before touching anything. Nobody needs a surprise spin while balancing on a step stool. For dim rooms or enclosed hallways, keep a charged work light nearby, and for backup lighting during household fixes, use a reliable option like charge a coast flashlight before starting.
Dust control saves the floor, furniture, and your mood. Spread an old sheet or towel below the fan before opening the cage, especially if the fan sits over a bed, couch, dining table, or kitchen island. A vacuum with a brush attachment helps catch loose dust before it drifts around the room. Then use a slightly damp microfiber cloth to grab the sticky layer that dry dusting leaves behind.
Gentle tools beat aggressive scrubbing for this job. A microfiber cloth, soft brush, mild dish soap, bowl of warm water, and small screwdriver usually cover the basics. Skip harsh sprays near the motor and avoid soaking the cage or light housing. The goal is simple: clean the dirty surfaces while keeping electrical parts dry and undisturbed.
Why The Cage Gets So Dirty
Enclosed fan cages act like dust nets. Air moves through the grille, but lint, pet hair, pollen, and tiny household particles settle on the bars. In kitchens, the problem gets stickier because cooking grease grabs dust and turns it into a dull film. That film doesn’t just look bad, it can make the fan feel weaker even while the motor runs normally.
Blade buildup tends to hide behind the enclosure until the fan starts wobbling, rattling, or moving less air. Even a thin layer of grime along the blade edge can throw off balance over time. The fan may still spin, but it works harder than it should. That means more noise, more vibration, and a fixture that feels older than it really is.
Light covers on enclosed ceiling fans often collect another kind of mess. Dust dims the glass or plastic shade, while bugs and fine debris settle inside the cover. A room can start looking yellowish or gloomy without anyone realizing the fan fixture is partly to blame. Cleaning the cover restores brightness without changing bulbs or buying new parts.
Moisture mistakes create the biggest risk during cleaning. Spraying cleaner straight into the cage can push liquid toward wiring, sockets, or the motor housing. Soak-and-scrub habits belong on washable household items, not ceiling fixtures. Use damp cloths, not dripping ones, and keep the motor area as dry as possible.
Tools That Make The Job Easier
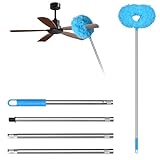
Microfiber cloths do the heavy lifting because they trap dust instead of smearing it across the cage. Keep one dry cloth for loose debris and one damp cloth for sticky residue. That small split makes the work cleaner and less annoying. Paper towels can tear on grille edges, so save them for the floor, not the fan.
A soft brush helps loosen dust from narrow cage gaps where fingers don’t fit well. An old clean paintbrush works nicely around screw heads, decorative trim, and blade brackets. A vacuum hose held nearby catches falling debris before it lands on the sheet below. This little two-hand method feels awkward at first, but it keeps the mess from spreading.
Mild soap handles most grime without damaging finishes. Mix a few drops of dish soap into warm water, dampen the cloth, and wring it out well. For greasy kitchen fans, let the damp cloth sit against the sticky spot for a few seconds instead of scrubbing hard right away. Patience loosens residue better than elbow grease in tight spaces.
Comfort matters during overhead cleaning because neck strain sneaks up fast. Use a stable step ladder, keep your shoulders relaxed, and move the ladder instead of leaning too far. If back discomfort makes overhead chores rough, compare recovery-friendly options like red light therapy for back pain separately from the cleaning task itself. A safer stance keeps the fan clean and keeps you from paying for it the next morning.
Step By Step Cleaning Method
Start with the outside cage before opening anything. Wipe the outer grille with a dry microfiber cloth to remove loose dust, then follow with a lightly damp cloth for stuck-on grime. Work from top to bottom so falling dust doesn’t land on areas you already cleaned. Use slow strokes because fast wiping can fling debris through the cage.
Remove the cover carefully only after checking how it attaches. Some enclosed ceiling fans use screws, some use clips, and others twist loose with gentle pressure. Place screws in a small bowl so they don’t vanish into the rug like they’ve got somewhere better to be. If the cover resists, stop and inspect it instead of forcing the frame.
Clean the blades with a damp cloth wrapped around each blade edge. Hold the blade steady with one hand and wipe with the other so you don’t bend brackets or strain the motor. For sticky grime, use mild soapy water on the cloth, then wipe again with a clean damp cloth. Finish with a dry pass because moisture left behind can attract dust faster.
Wash removable covers away from the fixture if the manual allows it. A plastic or glass shade can usually be cleaned with warm soapy water, then rinsed and dried completely. Metal cage pieces may need hand wiping instead of soaking, especially if they have painted, aged, or decorative finishes. Reinstall every piece only after it feels fully dry to the touch.
Handling Grease Dust And Tight Gaps
Kitchen ceiling fans need a slower approach because grease changes the whole cleaning game. Dry dusting alone won’t cut it once residue feels tacky. Use warm water with a tiny bit of dish soap, then press the cloth onto the greasy area before wiping. That softens the buildup without scratching the finish.
Tight grille gaps can hold stubborn lines of lint. Wrap a microfiber cloth around a butter knife or plastic spatula, then slide it gently between bars. Don’t use bare metal against painted surfaces because scratches show up fast under ceiling lights. A cotton swab also works around screw holes and decorative corners.
Airflow problems often come from hidden blade edges, not just visible dust on the cage. After opening the fan, inspect the leading edge of each blade because that’s where residue usually gets thickest. Wipe both sides of every blade, not just the bottom surface. Balanced cleaning helps reduce wobble and keeps the fan from sounding tired.
Room comfort changes after a proper clean, especially in compact spaces where air circulation matters. Enclosed ceiling fans in small bedrooms, offices, and apartments need clear airflow to feel useful. For separate cooling needs in tight rooms, compare a practical option like best tower fan under 100 instead of overworking a dirty ceiling fixture. Clean blades first, then decide whether extra airflow equipment is even needed.
How To Deep Clean An Enclosed Ceiling Fan
Dusty blades aren’t always the biggest problem hiding inside a ceiling fan. Strange rattling sounds, weak airflow, stale odors, and dim lighting usually point toward buildup trapped deeper inside the enclosure. That’s why how to deep clean an enclosed ceiling fan matters more than people expect, especially once dirt starts collecting near the motor housing and inner vents. A fan may still spin normally while quietly circulating old dust around the room every single day.
Signs Your Fan Needs More Than Dusting
Weak airflow usually appears long before visible grime becomes obvious. A fan might run at full speed but still leave the room feeling warm and stagnant. Dust buildup along blade edges changes how air moves through the enclosure, especially in compact bedrooms or low ceilings. That sluggish circulation often tricks people into thinking the fan motor is failing.
Clicking noises can also point toward hidden debris stuck near blade brackets or inside the cage. Small lint clumps sometimes wedge themselves into narrow spaces where airflow pushes them around while the fan spins. The sound may come and go randomly, which makes the issue even more irritating. Cleaning those tight sections carefully often solves the problem without replacing parts.
Lighting changes inside enclosed fans deserve attention too. A cloudy glass cover reduces brightness slowly, so many people don’t notice the difference until the fixture finally gets cleaned. Dust and tiny insects collect near bulbs and reflective surfaces, creating a dull yellow glow instead of crisp overhead lighting. Rooms instantly feel fresher once that grime disappears.
Air quality shifts noticeably in smaller rooms with neglected fans. Pet hair, pollen, and lint circulate repeatedly instead of getting filtered out naturally. Bedrooms especially start feeling stuffy overnight because enclosed fans trap debris close to the airflow path. Soft furnishings nearby usually collect extra dust as a result.
How To Clean Fan Blades Without Damage
Blade finishes scratch more easily than people think. Painted surfaces, faux wood coatings, and glossy finishes can lose their appearance after aggressive scrubbing. A damp microfiber cloth handles most grime without stripping the surface or leaving streaks behind. Gentle pressure works better than fast back-and-forth wiping.
Balanced blades help the fan stay quieter and reduce wobbling over time. Clean each blade evenly instead of focusing only on the dirtiest spots. Heavy residue left on one side can slightly affect rotation balance, especially in older enclosed fans. Slow, consistent cleaning keeps the fixture running smoother.
Moisture control matters during deep cleaning because enclosed designs hold humidity longer than open-blade fans. Dry every blade fully before reinstalling covers or turning power back on. Damp surfaces attract new dust surprisingly fast, particularly in humid climates. A dry microfiber cloth after cleaning makes a big difference.
Air circulation problems sometimes continue after cleaning because the fan speed setting isn’t optimized for the room size. Before assuming the motor is failing, compare airflow adjustments and maintenance habits through guides like make ceiling fan faster. Clean blades combined with proper speed settings usually restore stronger circulation without replacing the fan.

Cleaning Around Lights And Glass Covers
Glass shades collect fingerprints, grease haze, and fine dust faster than most people expect. Kitchen ceiling fans often develop a cloudy layer that dims the room little by little. Warm water with mild dish soap removes that film without damaging the finish. Harsh cleaners can leave streaks that become obvious once the light turns back on.
Bulb areas should stay dry during cleaning. Moisture near sockets creates unnecessary risk, especially if water drips behind the housing. Remove bulbs first if possible, then wipe the surrounding surfaces carefully with a lightly damp cloth. Let everything air dry fully before reinstalling components.
Decorative trims around enclosed fan lights trap dust in tiny corners and grooves. A soft detailing brush or cotton swab reaches those narrow areas without scratching metal finishes. Slow cleaning works better than aggressive rubbing because decorative coatings can fade unevenly. Patience keeps the fixture looking consistent instead of patchy.
Bedroom lighting comfort also depends on the surrounding setup, not just the ceiling fan itself. Dim overhead lighting often pushes people to add softer nighttime lighting near the bed. For focused evening reading without blasting the whole room with brightness, explore practical setups like wall mounted bedroom reading lights alongside a freshly cleaned ceiling fixture.
Common Mistakes That Make Fans Dirtier
Spraying cleaner directly into the enclosure causes more problems than it solves. Liquid can slip behind the motor housing, settle near wiring, or leave streaks inside hard-to-reach areas. Spray the cloth first, not the fan itself. That tiny habit keeps moisture under control and prevents accidental drips.
Skipping the top side of the blades leaves half the dust untouched. Plenty of people clean only the visible underside because that’s what they notice from the floor. Meanwhile, the upper blade surface keeps collecting thick layers of lint that continue circulating through the room. A deep clean means reaching both sides evenly.
Using rough tools damages finishes faster than most realize. Abrasive pads, stiff brushes, and strong chemical sprays can dull paint or scratch decorative metal cages. Soft cloths and mild cleaners usually remove grime just fine with a little patience. The fan stays cleaner longer when the finish remains smooth instead of scuffed.
Ignoring routine maintenance leads to heavier cleanups later. Dust buildup thickens gradually, so the fixture may still seem functional even while airflow weakens. Waiting too long turns a quick wipe-down into a full disassembly project. Smaller cleaning sessions every few weeks feel much easier than tackling months of trapped grime.
Keeping An Enclosed Fan Cleaner Longer
Regular dusting helps prevent sticky buildup from forming inside the enclosure. Even a quick wipe every couple of weeks keeps debris from settling into thick layers along the cage and blades. Fans in kitchens or pet-friendly homes usually need attention more often because grease and fur collect faster there. Light maintenance saves time later.
Humidity control changes how quickly dust sticks to surfaces. Moist rooms often develop grime that clings instead of floating away naturally. Bathrooms, kitchens, and poorly ventilated bedrooms tend to create this problem. Running exhaust fans or improving airflow can help reduce residue inside ceiling fixtures.
Air filters also affect how dirty enclosed ceiling fans become over time. Clogged HVAC filters allow more dust and lint to circulate through the house, which eventually settles inside fan cages. Replacing filters consistently helps reduce buildup on blades and light covers. Cleaner household air means less overhead cleaning later.
Consistent upkeep keeps enclosed ceiling fans from turning into frustrating weekend projects. A few careful cleaning habits protect airflow, reduce noise, and help the fixture look brighter without much effort. Fresh circulation changes the feel of a room in subtle ways, especially once the hidden dust stops blowing back into the air every day.


Best Small Flush Mount Ceiling Fans 2026 Ultimate Picks

Best Smart Ceiling Fan India 2026 For Effortless Comfort

Best Smart Ceiling Fans with Lights for 2026: Top Picks

Best Smart Home Non Ceiling Fans 2026 For Ultimate Comfort

Best Outdoor Misting Ceiling Fan 2026 For Ultimate Comfort

Best Ceiling Fans With Lights For Vaulted Ceilings 2026 Top Picks

Best Outdoor Ceiling Fans For Porch 2026 With Style And Breeze

Best WiFi Enabled Ceiling Fan 2026 For Effortless Comfort





