
How To Connect A Ceiling Fan With A Light Easily
How To Connect A Ceiling Fan With A Light sounds straightforward until a pile of wires starts hanging from the ceiling and every color suddenly looks suspicious. One loose connection can leave the fan humming, the light flickering, or worse, the breaker tripping nonstop. Plenty of people hit that wall halfway through installation, stare at the wiring diagram, and think, “Well, this escalated quickly.” A clean setup depends on understanding the purpose behind each wire instead of blindly matching colors and hoping for the best.
Ceiling fans with integrated lighting create a different kind of challenge compared to standard fixtures. Separate wall switches, remote receivers, grounding wires, and ceiling box compatibility all play a role in whether the installation feels smooth or turns into a headache. Proper wire organization matters more than most expect because cramped wiring inside the canopy can create connection issues later. Tight spaces, awkward ladder angles, and outdated household wiring only add fuel to the fire.
Then there’s the balancing act between convenience and safety. Some setups allow independent control for the fan and light, while others combine everything onto one switch. That choice changes the entire wiring process. Electrical compatibility also becomes a major factor in older homes where ceiling boxes weren’t designed to support the extra weight and vibration from a ceiling fan.
Little details tend to separate a reliable installation from one that causes ongoing frustration. Secure wire nuts, correct grounding, and proper mounting brackets keep the fan stable and reduce annoying wobbling sounds during operation. Nobody wants a ceiling fan rattling overhead at midnight like a loose shopping cart wheel. Attention to small connections usually saves hours of troubleshooting later.
Remote-controlled ceiling fans add another layer to the process. Receiver modules must fit properly inside the canopy without pinching wires or interfering with airflow. Some remote kits also require specific wire arrangements that don’t match older fan models. Understanding switch configurations helps prevent situations where the fan works but the light doesn’t, or vice versa.
Lighting choices influence the setup more than expected too. LED compatibility, dimmer switches, and wattage limits can affect performance immediately after installation. Certain dimmers simply don’t cooperate with modern ceiling fan lights, leading to buzzing noises or inconsistent brightness. Sorting out those details before installation prevents unnecessary rewiring later.
Plenty of installations go sideways because the mounting box gets ignored. Standard light fixture boxes often aren’t rated to support a moving ceiling fan. A fan-rated electrical box keeps the fixture stable and prevents long-term ceiling damage. Structural support may not sound exciting, but it’s one of those behind-the-scenes details that quietly protects the entire setup.
Anyone tackling How To Connect A Ceiling Fan With A Light usually wants the finished result to feel seamless, quiet, and dependable without calling an electrician halfway through the process. A properly wired fan improves airflow, reduces stuffiness, and adds practical lighting without cluttering the room. Once the wiring finally clicks into place, the entire room feels more comfortable almost instantly.
How To Connect A Ceiling Fan With A Light Safely
A ceiling fan project can go sideways fast once the old fixture drops and the wires don’t match the diagram in the box. The room needs better airflow, the light needs to work from the switch, and nobody wants a buzzing motor or a flickering bulb after the ladder gets folded away. That’s where how to connect a ceiling fan with a light becomes less about guessing colors and more about building a safe, steady, clean connection. Get the basics right, and the fan feels like it belonged there all along.
Ceiling Box Check
The ceiling box deserves attention before any wire gets touched because fan support is not the same as light fixture support. A standard light box may hold a lightweight fixture just fine, but a ceiling fan adds movement, vibration, and steady downward weight. That small difference matters more than people expect. A fan-rated electrical box gives the motor and blades a safer foundation instead of leaving everything hanging on wishful thinking.
Loose boxes create annoying problems even when the wiring is technically correct. The fan can wobble, the canopy can rattle, and the motor may sound louder than it should. Stable mounting helps prevent those little noises that make a new fan feel cheap, even if the fan itself is solid. Before wiring begins, the box should feel firmly attached to a joist or rated brace.
Older homes can be sneaky here. A box that looks metal and sturdy from below may still not be rated for fan movement. Box rating is usually stamped or labeled, and that label is worth finding before the installation moves forward. Skipping this step can turn a simple upgrade into a ceiling repair later.
Room layout also plays into the decision. A fan in a bedroom, kitchen, or living room needs enough clearance around blades, walls, cabinet doors, and tall furniture. Blade clearance keeps the fan useful instead of awkward. For another airflow situation where placement changes the whole result, compare the logic behind the best position bathroom ceiling extractor fan and notice how location affects comfort, noise, and performance.
Wire Colors And What They Usually Mean
Wire color helps, but it should never be treated like a magic rule. Most ceiling fan light kits use black for fan power, blue for light power, white for neutral, and green or bare copper for ground. House wiring may follow the same pattern, or it may throw in a red wire for separate switch control. That’s why the wiring diagram matters more than memory.
The black wire usually feeds the fan motor. The blue wire usually feeds the light kit. If the fan and light share one wall switch, black and blue fan wires often connect together to the house hot wire. That setup lets one switch power both, while the fan pull chain or remote decides what actually runs.
A red ceiling wire often points to a second wall switch. In that setup, the fan motor can connect to the black switched hot, while the light connects to the red switched hot. Separate switch control feels cleaner because the fan and light can operate independently. It also helps avoid the daily irritation of tugging chains just to change one function.
White wires are the neutral path, and they should connect together neatly. The ground wire connects to the fan bracket, fan body, and house grounding wire where required. Grounding protects the metal parts from becoming dangerous if a fault happens. It’s not decorative, and it’s not optional.
Turn Off Power The Right Way
The wall switch is not enough protection. Someone can bump it, a switch loop can surprise you, or the wiring may not behave the way the switch plate suggests. Breaker-level shutoff is the safer move before touching any ceiling wires. The few extra steps beat getting shocked while balancing on a ladder.
A non-contact voltage tester helps confirm the power is off before the wire nuts come apart. It’s a simple tool, but it saves a lot of second-guessing. Testing before touching matters because older wiring can be mislabeled, shared, or changed by someone who did a “good enough” repair years ago. Trust the tester, not the switch position.
Lighting circuits can also share neutral wires with nearby fixtures. That doesn’t always create a problem, but it does make careless wiring riskier. Neutral safety matters because an open or loose neutral can cause flickering, weak light output, or unpredictable behavior. Clean, tight connections prevent a lot of weird symptoms after installation.
Working slowly is not a weakness here. Spread the wires out, keep the ladder stable, and avoid standing under the fan body while trying to hold everything at once. Safe positioning makes the job less clumsy and reduces the chance of damaging the fixture. A rushed ceiling fan install has a way of creating two jobs instead of one.
Single Switch Wiring Setup
A single switch setup is common in bedrooms and older homes. The wall switch sends power to the ceiling, and the fan decides how to use that power. For how to connect a ceiling fan with a light on one switch, the fan’s black and blue wires usually join the house hot wire. The white fan wire joins the house neutral, and the ground wires connect together securely.
This setup keeps things simple, but it does come with a tradeoff. The wall switch may turn both fan and light power on or off together, while pull chains or a remote control handle separate functions. One-switch control can feel a little old-school, especially in rooms where the fan runs at night but the light needs to stay off. Still, it’s reliable when wired correctly.
Wire nuts should twist on firmly without exposed copper showing below the connector. A gentle tug on each wire helps confirm the connection is secure. Tight wire connections prevent flickering, heat buildup, and random shutoffs. If a wire slips loose during that tug test, it wasn’t ready to be tucked into the canopy.
Canopy space gets cramped fast. Fold wires carefully instead of jamming them upward like tangled headphones. Neat wire placement protects connections from strain when the canopy screws tighten. Separately, if a room also needs controlled decorative lighting for an event or display, explore what is a gobo light for a different kind of focused light effect.

Dual Switch Wiring Setup
A dual switch setup gives the fan and light their own controls. The ceiling often has black, red, white, and ground wires in this arrangement. Independent control usually means the fan motor connects to one switched hot wire, and the light connects to the other. This layout feels more polished because the wall controls do the everyday work.
The fan’s black wire commonly connects to the ceiling black wire for motor power. The fan’s blue wire commonly connects to the ceiling red wire for light power. Red wire function can vary by home, so testing and diagram checking still matter. The white wires connect together as neutrals, and all grounds tie together properly.
This setup shines in bedrooms, offices, and living rooms where light and airflow don’t always need to run together. Late-night airflow feels better without a bright ceiling light snapping on. Separate fan and light control also reduces wear on pull chains because wall switches handle the basic job. Small convenience, big daily difference.
Dimmer switches need extra care. A regular light dimmer should not control the fan motor because it can cause humming, overheating, or motor damage. Fan-rated speed controls are designed differently from light dimmers. If dimming the light matters, use a control rated for the specific fan light setup and bulb type.
Remote Receiver Wiring
Remote-controlled fans add a small receiver between the house wiring and fan wiring. That receiver acts like the traffic cop for the motor, light, speed settings, and sometimes dimming. Receiver wiring must match the fan manual because wire labels can vary between brands. Guessing here can make the remote useless or leave one function dead.
Most receivers have input wires that connect to the house power and output wires that connect to the fan. The house hot and neutral feed the receiver first. Then the receiver sends separate power to the fan motor and light kit. Input and output wires should never be mixed up just because the colors look familiar.
The receiver also needs room inside the canopy. Forcing it into place can pinch wires or loosen connections. Canopy clearance matters because a squeezed receiver may create intermittent problems after the fan starts vibrating. If the receiver barely fits, slow down and rearrange the wiring before tightening the cover.
Remote setups are handy in rooms without dual wall switches, but they are not always the cleanest choice for every home. Wall switches may need to stay on so the remote can operate properly. Remote control convenience feels great until someone flips the wall switch off and the fan stops responding. That little quirk is worth knowing before blaming the remote.
Light Kit And Bulb Compatibility
The light kit should match the fan model, especially if it attaches through a plug, harness, or built-in connector. Some fans accept add-on light kits, while others don’t. Light kit compatibility keeps the installation clean and avoids awkward wiring modifications. A forced fit can create electrical and mechanical problems.
LED bulbs are common now, but not every fan light behaves well with every LED. Flickering, delayed startup, and buzzing can happen when dimmers, receivers, or bulbs don’t get along. LED compatibility depends on the fan control system and the bulb rating. The bulb package and fan manual usually tell the story before the problem starts.
Wattage limits matter too. A ceiling fan light kit may have a maximum wattage that should not be exceeded. Heat control protects the socket, wiring, lens cover, and surrounding parts. More brightness sounds nice, but the wrong bulb can shorten the life of the fixture or create unsafe heat buildup.
Outdoor and damp-rated fans need extra attention if the fan sits on a covered porch, patio, or humid area. Moisture changes the rules for fixtures, bulbs, and installation hardware. Damp-rated components help prevent corrosion and electrical issues. For comfort outside the house, compare airflow planning with a portable fan amusement parks setup where heat, movement, and practical cooling all collide.
Common Wiring Mistakes
The most common mistake is connecting wires by color without confirming function. Color helps, but wiring history inside a home can be messy. Function beats color because a previous repair, switch loop, or old cable can change what each wire does. A tester and diagram prevent a lot of “Why won’t this work?” moments.
Loose wire nuts cause plenty of trouble. The light may flicker, the fan may stop randomly, or the breaker may trip after the canopy gets closed. Secure connections should feel firm before wires are tucked away. Exposed copper outside the connector should be trimmed or reworked so nothing touches the metal box or bracket.
Another mistake is burying the ground wire or leaving it disconnected because the fan “works anyway.” The fan might run, but that doesn’t make the setup safe. Ground protection is there for fault conditions, not normal operation. Ignoring it removes an important safety layer from a metal fixture hanging overhead.
People also forget to match the switch type to the fan. A light dimmer on a fan motor is asking for noise and trouble. Correct control pairing keeps the motor healthier and the room quieter. Fan speed controls, remote receivers, and dimmable light systems each need parts that are meant to work together.
How To Connect A Ceiling Fan With A Light And Switches
After the main wiring choices are clear, the next headache usually shows up at the wall switch, the breaker panel, or the canopy where every wire has to fit without turning into a cramped mess. A fan can be wired correctly on paper and still act stubborn if the switch setup, wire size, or control style doesn’t match the room. That’s why the final stretch of how to connect a ceiling fan with a light needs more patience than muscle. The goal is simple: safe power, quiet operation, steady lighting, and controls that don’t make daily use feel like a puzzle.
Match The Wire Size To The Circuit
Wire size isn’t the flashy part of a ceiling fan installation, but it quietly keeps the whole setup safe. Most residential lighting circuits use either 14-gauge wire on a 15-amp breaker or 12-gauge wire on a 20-amp breaker. Mixing wire sizes without checking the breaker can create heat risks and code problems. For a deeper wiring check before closing the canopy, compare the practical details in what gauge wire ceiling fan so the circuit matches the load correctly.
A ceiling fan with a light doesn’t usually draw a huge amount of power, but the circuit still has to be treated with respect. The fan motor, light kit, receiver, and switch control all depend on clean electrical flow. A weak splice or wrong wire size can show up later as flickering, humming, or random shutoffs. Those symptoms often get blamed on the fan, even though the wiring is the real troublemaker.
Older homes can make this step a little messy. Cloth-covered wire, crowded boxes, and unmarked switch loops can hide surprises behind the ceiling plate. Old wiring conditions don’t always mean the fan can’t be installed, but they do mean the job needs more careful testing. If the insulation looks brittle or the box feels packed tight, pushing ahead blindly is asking for grief.
The safe move is to keep each connection matched to the circuit and device rating. Don’t force larger wire into tiny connectors, and don’t trim copper so short that the wire nut barely grabs. Solid copper contact keeps resistance down and helps the fan run quietly. Little details here separate a neat install from one that needs troubleshooting a week later.
Plan The Switch Control Before Closing The Canopy
The switch setup decides how the fan feels in real life. A single wall switch can power both the fan and light, while pull chains or a remote handle separate functions. Single-switch wiring keeps the installation simpler, but it can feel clunky if the room needs airflow without overhead light. That tradeoff matters most in bedrooms, offices, and nurseries.
Two switches give cleaner control because the fan and light respond separately from the wall. The fan motor usually connects to one switched hot wire, while the light kit connects to another. Dual-switch control reduces everyday annoyance because nobody has to tug chains in the dark. It also makes the room feel more finished, like the fan was planned instead of patched in.
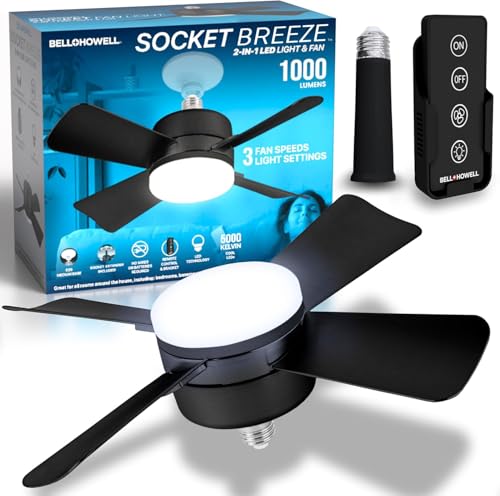
Remote systems sit somewhere in the middle. They can add separate fan speed and light control even when the wall only has one switch. Remote receiver wiring works well if the receiver fits inside the canopy and the wall switch stays on during normal use. The downside is simple: if someone flips the wall switch off, the remote suddenly looks broken.
Smart switches and fan controllers need extra care. A regular smart light switch may not safely control a fan motor. Fan-rated controls are built for motor loads, while regular dimmers are usually built for lighting only. Matching the control to the fan avoids buzzing, overheating, and that irritating motor hum that makes a quiet room feel cheap.
Secure The Canopy Without Crushing Wires
The canopy is where a neat wiring job often gets ruined. Everything may test correctly while hanging loose, then one pinched wire changes the behavior after the cover goes on. Canopy wire management matters because tight bends and squeezed connectors can loosen over time. Folding wires gently is better than forcing them upward like a packed suitcase.
Keep the ground wires tucked where they won’t press against the receiver or switch leads. Keep the neutral bundle away from sharp bracket edges. Protected wire placement reduces vibration wear once the fan starts spinning. A ceiling fan moves more than a normal light fixture, so every wire needs breathing room.
Wire nuts should face upward or sideways in a way that doesn’t strain the splices. A connector pointing downward can still work, but it may crowd the canopy and make future service annoying. Accessible connections help if the light kit needs replacement later. Nobody enjoys undoing a knot of wires overhead while holding a flashlight between their teeth.
Receiver modules need a snug but not crushed fit. Some fan canopies are shallow, especially with low-profile designs. Receiver clearance prevents signal issues and loose output wires. If the canopy fights back, rearrange the wires rather than tightening screws harder.
Test Fan And Light Functions In The Right Order
Testing should happen in stages, not all at once. Restore power only after the fan is mounted, the canopy is secure, and the blades are clear. Controlled testing helps catch problems without creating a risky mess. Start with the wall switch, then test the fan speed, light, pull chains, and remote functions one by one.
If the fan runs but the light doesn’t, the blue wire or receiver light output is the first place to check. If the light works but the motor doesn’t, look at the black fan lead or fan output from the receiver. Function-based troubleshooting beats random rewiring because each symptom points to a likely connection. Guessing can create new problems faster than it solves old ones.
Flickering usually points to a loose neutral, incompatible bulb, weak socket contact, or dimmer mismatch. Humming often points to the wrong control type, especially if a standard dimmer is feeding the motor. Quiet operation depends on both wiring and control compatibility. A fan can be brand new and still sound bad if the switch is wrong.
Remote fans should be tested with the wall switch left on. Then check speed changes, light on and off, and dimming if the model supports it. Remote pairing may require a reset or battery check before assuming the wiring failed. Small things like dip switch settings or pairing buttons can save a lot of unnecessary disassembly.
Fix Wobble, Buzzing, And Flickering Early
A wobbling fan isn’t always a wiring problem, but it can make wiring problems worse over time. Loose blade brackets, uneven blade pitch, or a weak ceiling box can shake the whole fixture. Fan stability protects the wire connections inside the canopy. A steady fan is quieter, safer, and less annoying during long use.
Buzzing deserves attention because it can come from several places. The motor may buzz from an incompatible speed control, while the light may buzz from an incompatible dimmer or bulb. Buzz source tracking helps narrow the fix before replacing parts that aren’t broken. Turn the light off while the fan runs, then reverse the test to separate the symptoms.
Flickering light can be as simple as a loose bulb, but ceiling fan lights also dislike certain LED and dimmer combinations. Some bulbs flicker only at lower brightness levels. Dimmable bulb matching matters if the fan uses a remote receiver or wall dimmer. Cheap fixes sometimes work, but the correct bulb type usually saves repeated frustration.
Style also matters after the mechanics are settled. A fan should fit the room instead of looking like a last-minute hardware store grab. For design direction beyond wiring, explore ceiling fans joanna gaines use to see how blade finish, light shape, and room style can work together without making the ceiling feel crowded.
Know When The Job Needs An Electrician
Some warning signs shouldn’t be brushed off. Burn marks, melted insulation, hot switches, repeated breaker trips, or a ceiling box that moves under light pressure all deserve professional attention. Electrical warning signs are not normal installation hiccups. They point to conditions that can damage the fan or create real safety risks.
A missing ground wire can also complicate the job. Some older homes don’t have the same grounding setup as modern wiring, and the fix depends on the circuit. Grounding safety should be handled correctly rather than hidden behind the canopy. The fan might turn on without it, but working power is not the same as safe wiring.
Aluminum wiring needs special handling too. Standard copper-only connectors may not be suitable, and careless mixing of metals can create heat at the splice. Aluminum wiring compatibility requires the right connectors and technique. This is one of those jobs where saving a service call can cost more later.
High ceilings, sloped ceilings, and heavy fans add another layer of risk. Holding a motor housing overhead while sorting wires is awkward even on a normal ladder. Safe installation conditions matter just as much as the wiring diagram. If the setup feels unstable, cramped, or confusing, stopping before something breaks is the smarter move.
Keep The Setup Serviceable For Later
A clean ceiling fan installation should be easy to inspect later. Wires should be grouped logically, connectors should be secure, and the canopy should open without a fight. Serviceable wiring saves time if the light kit, receiver, or switch ever needs replacement. Future-you will appreciate every neat fold and labeled lead.
Keep the manual, remote instructions, and any receiver notes in a drawer or taped inside a safe storage folder. Fan wiring can look obvious on installation day and weird six months later. Documentation helps with bulb changes, remote resets, and part replacements. It also helps anyone else who works on the fixture later.
Dust and vibration affect ceiling fans over time. Tighten blade screws occasionally, clean the blades evenly, and listen for new sounds after speed changes. Routine maintenance keeps small movement from turning into loose hardware. A fan that stays balanced puts less stress on the ceiling box and wiring connections.
The best finished setup feels boring in the best way. The switch works, the light stays steady, the fan spins quietly, and nothing rattles above your head. Safe wiring, proper support, and matched controls make how to connect a ceiling fan with a light feel less like a gamble and more like a room upgrade that actually behaves the way it should.


Best Small Flush Mount Ceiling Fans 2026 Ultimate Picks

Best Smart Ceiling Fan India 2026 For Effortless Comfort

Best Smart Ceiling Fans with Lights for 2026: Top Picks

Best Smart Home Non Ceiling Fans 2026 For Ultimate Comfort

Best Outdoor Misting Ceiling Fan 2026 For Ultimate Comfort

Best Ceiling Fans With Lights For Vaulted Ceilings 2026 Top Picks

Best Outdoor Ceiling Fans For Porch 2026 With Style And Breeze

Best WiFi Enabled Ceiling Fan 2026 For Effortless Comfort





