
How To Connect A Ceiling Fan With Two Switches Right
How To Connect A Ceiling Fan With Two Switches sounds simple at first glance, yet one crossed wire or unclear connection can turn a quick project into a long, frustrating afternoon. Plenty of people stare at black, white, red, and ground wires thinking, “Alright... now what?” That hesitation usually starts after removing the old fixture and realizing the wall controls don’t match the fan wiring diagram exactly. A clean setup matters because nobody wants a fan that spins while the light flickers like an old movie scene.
Separate switches create a smoother daily setup. One switch controls the fan motor while the other handles the light kit, giving better comfort and flexibility throughout the day. Hot summer nights feel less annoying when airflow stays on without blasting overhead light into the room. Small conveniences like that often make the entire wiring project feel worth the effort.
Ceiling fan wiring also tends to expose hidden problems inside older electrical boxes. Loose wire nuts, faded insulation, cramped junction boxes, or missing ground wires can slow everything down fast. Still, spotting those issues early helps prevent overheating, buzzing sounds, or random breaker trips later on. A steady, organized wiring approach usually beats rushing through the installation with guesswork.
Plenty of confusion comes from the red wire. Some homes include it for independent light control, while others don’t use one at all. That’s where people get tripped up and start second-guessing every connection. Understanding what each wire actually does removes a huge chunk of stress from the process.
Electrical safety deserves attention before touching a single wire. Turning off the breaker isn’t enough unless the power is tested properly afterward. A non-contact voltage tester helps confirm everything is dead before hands move near the wiring. Skipping that step might save two minutes, but it’s a risky shortcut nobody enjoys learning the hard way.
Wall switch layouts vary more than people expect. Some setups use a dual switch in one gang box, while others separate the fan and light controls across different switches. Then things get even trickier with remote receivers or smart fan systems mixed into the wiring. Understanding the layout before connecting anything keeps the installation from spiraling into trial-and-error territory.
How To Connect A Ceiling Fan With Two Switches also becomes easier once wire organization improves. Labeling wires, grouping connections carefully, and tightening wire nuts properly can save serious frustration during reassembly. Nobody likes balancing a ceiling fan overhead while trying to remember which wire went where five minutes ago. Clean prep work pays off big time once the fan blades finally start spinning smoothly.
How To Connect A Ceiling Fan With Two Switches
A ceiling box full of wires can make a calm weekend project feel like a pop quiz with no answer key. One switch is supposed to run the fan, the other should control the light, yet the wires rarely look as neat as the diagram in the manual. That is where how to connect a ceiling fan with two switches becomes less about guessing colors and more about reading the circuit with patience. A clean setup gives you separate fan and light control, fewer pull-chain annoyances, and a room that behaves the way it should.
Two Switch Ceiling Fan Wiring
A two-switch ceiling fan setup usually depends on having two switched hot wires running from the wall box to the ceiling box. In many homes, the black wire powers the fan motor while the red wire powers the light kit. The white wire usually works as the neutral, and the bare copper or green wire handles grounding. That sounds tidy on paper, but older homes can throw a wrench into the plan with switch loops, repurposed wires, or faded insulation colors.
The real win with this setup is daily control. You can run the fan without turning on the light, which feels pretty nice during warm nights or early mornings. You can also turn on the light without starting the blades, which helps when you just need quick visibility. That small split in control makes the room feel less clunky and more intentional.
Before touching anything, shut power off at the breaker and verify it with a non-contact voltage tester. A wall switch being off does not guarantee the ceiling box is safe. Some switch boxes carry power in unexpected ways, especially if previous repairs were done in a hurry. Respect the wiring like it is live until testing proves otherwise.
Wire colors help, but they are not courtroom evidence. A red wire often signals a second switched hot, but it can have another purpose depending on the circuit. A black wire is often hot, yet it may be part of a switch loop. That is why testing, labeling, and checking the fan manual matter more than trusting color alone.
Check The Box Before Wiring
The ceiling electrical box needs to be rated for a fan, not just a light fixture. A ceiling fan adds motion, vibration, and weight, so a regular light-duty box can loosen over time. Look for markings that show the box is fan-rated or securely attached to a proper brace. If the box wiggles, creaks, or looks shallow and old, stop there and fix that problem first.
A cramped box also makes wiring harder than it has to be. Ceiling fan canopies already feel tight once the mounting bracket, receiver wires, and wire connectors start stacking up. Neatly folded wires reduce stress on the connections and help the canopy sit flush. Shoving everything upward like a junk drawer can loosen wire nuts and create future flickers.
Grounding deserves more attention than it usually gets. The fan’s green or bare ground wire should connect to the house ground and the mounting bracket if required by the manufacturer. That ground path helps reduce shock risk if a fault happens. It will not make the fan spin better, but it does make the installation safer.
Small signs tell big stories inside a ceiling box. Brittle insulation, scorch marks, loose copper strands, or mystery splices are not things to shrug off. A damaged wire can turn a simple fan install into a safety issue. For unrelated dashboard warning headaches around the home garage, compare practical fixes through turn off door ajar light before chasing random electrical symptoms in the wrong place.
Identify Each Ceiling Wire
Start by separating the ceiling wires carefully after power is confirmed off. You will usually see white neutral wires, one or two hot wires, and a ground wire. In a two-switch setup, the most useful clue is whether both black and red wires come from the switch cable. If they do, there is a good chance each one is controlled by a different wall switch.
Testing should happen before final connections. With the wires safely separated and capped, power can be turned on briefly so a voltage tester or multimeter can confirm which wire responds to which switch. Then power goes off again before any connection is made. That extra step saves you from wiring the fan light to the wrong switch and muttering at the ceiling later.
Labeling wires sounds fussy until you are standing on a ladder with your arms tired. A small strip of painter’s tape marked fan hot, light hot, or neutral can keep the process calm. Ceiling fan wiring often happens overhead, which makes simple mistakes easier than people expect. Good labels turn the job from a guessing game into a checklist.
The fan wires usually follow a predictable pattern. The fan’s black wire often connects to the ceiling wire assigned to the motor, while the fan’s blue wire often connects to the ceiling wire assigned to the light. The fan’s white wire connects to the house neutral, and the ground wires tie together. Always check the included wiring diagram because fan wire colors can vary by model.
Connect Fan And Light Leads
Once the wires are identified, the connections become more straightforward. Connect the ceiling neutral to the fan neutral, usually white to white. Connect the ceiling ground to the fan ground and bracket ground as directed. Then connect the fan motor lead to one switched hot and the light kit lead to the other switched hot.
Many fans use a black lead for the motor and a blue lead for the light. In that common setup, ceiling black might connect to fan black, while ceiling red connects to fan blue. That arrangement lets one wall switch run the blades and the other run the light. Still, the exact assignment can be swapped if you prefer the opposite switch layout, as long as each switched hot feeds the correct fan function.
Wire nuts need a firm, clean twist. Bare copper should be fully covered by the connector, and no loose strands should poke out. Tug each connection gently after tightening because loose splices are a common cause of flickering, buzzing, and intermittent operation. A connection that slips loose during that tug was never ready to be tucked into the canopy.
Light style also changes the feel of the finished room. A ceiling fan with separate switches gives better control, but nearby fixtures can still shape the mood and brightness. For rooms where the fan light feels too harsh or too plain, compare shade ideas through best pendant chandelier lamp shade to soften the space without rewiring the fan circuit.
Handle Switch Box Details
The wall box may look simple from the outside, but inside it can get crowded fast. A two-switch ceiling fan often uses one incoming hot feed that gets split to both switches. Each switch then sends power out through its own switched leg. That creates independent fan control and independent light control from the same wall location.
A pigtail connection is common in this layout. The incoming hot wire connects to two short wires, and each short wire feeds one switch. That setup keeps the power supply clean instead of jamming multiple wires under one screw. Proper pigtails make the box easier to service later, which is a quiet little blessing nobody appreciates until the next repair.
Switch terminals matter more than they look. The hot feed goes to the line side, while the outgoing switched wires go to the load side. On simple single-pole switches, this is usually easy, but smart switches and dimmers can add neutral requirements. A fan motor should not be placed on a standard light dimmer because motor control needs the right type of switch.
Label the switches before closing the wall plate. It sounds almost too basic, but it helps catch crossed connections before the ladder gets put away. Flip one switch and confirm only the fan responds, then flip the other and confirm only the light responds. That quick check prevents the annoying surprise of discovering the wrong switch behavior after everything is buttoned up.
Avoid Common Wiring Mistakes
The most common mistake is tying the fan and light together on the same switched hot. That makes both functions turn on from one switch and leaves the second switch doing nothing useful. It may technically power the fan, but it defeats the whole reason for installing two-switch control. Separate leads need separate switched wires to work as intended.
Another problem is ignoring the neutral bundle. The neutral wires often stay tucked in the back of the box, and people sometimes mistake them for unused wires. The fan and light both need a proper neutral return path. A loose or missing neutral can cause strange behavior, including dim lights, humming, or inconsistent fan operation.
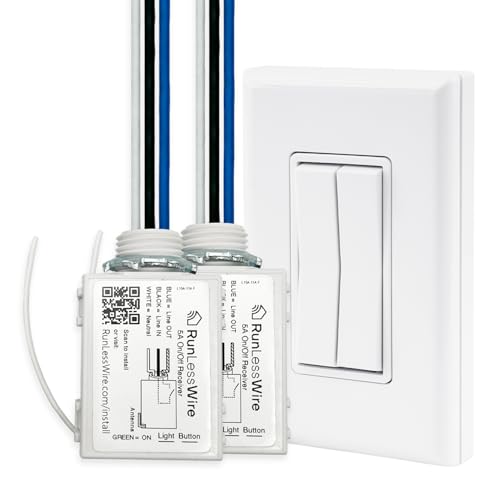
Remote receivers can complicate the job. Some fans with remotes are designed to receive constant power while the remote controls both fan speed and lighting. If you wire those models like a traditional two-switch fan, the remote functions may not behave correctly. Read the manual closely because remote-controlled fans often need a different wiring plan.
Bathroom installations add another layer of caution. Moisture, small spaces, and ventilation needs make fan selection more specific than a regular bedroom install. To keep airflow practical in a tight damp area, compare options through best ceiling fan for small bathroom before forcing a standard room fan into the wrong environment.
Test The Fan Before Final Assembly
Testing before full assembly saves time and shoulder strain. Once the main wiring connections are made and safely capped, restore power and test each switch. The fan switch should start the motor without turning on the light. The light switch should turn on the light without moving the blades.
Listen closely during the first test. A soft motor sound is normal, but loud buzzing, snapping, or crackling is not. Turn the breaker off immediately if anything smells hot or sounds wrong. Those warning signs point to loose wiring, mismatched controls, or a possible issue inside the fan itself.
Fan direction and speed controls should also be checked before the canopy is fully secured. Some models use pull chains, some use wall controls, and others use remote receivers. Make sure the control method matches the wiring setup you chose. A two-switch layout gives power separation, but it does not automatically replace a proper speed controller.
After testing, tuck wires gently into the ceiling box. Keep the wire connectors facing upward where possible, and avoid pinching wires between the bracket and canopy. A clean final tuck helps prevent vibration from rubbing insulation over time. That small bit of care protects the connection stability long after the fan is installed.
Ceiling Fan With Separate Light And Fan Switch Wiring
Nothing drags down a room faster than a ceiling fan that behaves unpredictably. One switch turns on both the blades and the light, the fan hums without spinning properly, or the light flickers every time the motor changes speed. Those little annoyances pile up quickly, especially after spending hours on installation. A properly wired ceiling fan with separate switch control keeps the room comfortable without constant fiddling with pull chains or remote buttons.
Older Homes Create Extra Wiring Confusion
Older houses rarely play fair with modern wiring diagrams. A ceiling box may contain faded cloth wiring, missing grounds, or switch loops that were common decades ago. That makes wire identification one of the most important steps before connecting anything. Guessing can leave you staring at a dead fan while wondering why the breaker keeps tripping.
Some older switch loops send power to the ceiling first and then down to the switch. Others bring power into the wall box before sending switched power upward. Those setups change how the wires behave inside the box, even if the colors look familiar. A voltage tester and a little patience usually reveal the truth faster than trying to memorize diagrams online.
Ceiling boxes in older homes also tend to feel cramped. Once wire connectors, mounting brackets, and fan hardware are packed into the space, there is barely room to fold the conductors cleanly. Tight bends and crushed insulation can eventually create electrical connection problems. Careful wire placement matters more than people expect.
Some wiring problems hide until the old fixture comes down. A loose neutral tucked into the back of the box might explain years of flickering lights or inconsistent switch behavior. If the existing fan needs replacement before sorting out the switch layout, compare removal tips through remove hunter ceiling fan to avoid damaging the mounting hardware or ceiling box.
Fan Speed Controls Need The Right Switch
A regular light dimmer should never control a ceiling fan motor unless the dimmer is specifically rated for fans. Light dimmers regulate power differently, and fan motors can react badly to that mismatch. Buzzing sounds, overheating, or unstable blade movement often follow. A proper fan speed controller handles the motor load more safely.
Some people try to reuse old dimmer switches because the wall plate already looks nice or matches the room. That shortcut can quietly damage the fan motor over time. Fan-rated controls use different internal components that handle motor speed adjustments more consistently. The fan runs smoother and usually stays quieter too.
Dual-function wall controls can simplify the setup in smaller rooms. One side controls fan speed while the other handles dimming or light power. Those combo switches save wall space, but they also require enough room inside the electrical box for additional wiring. Crowded boxes become frustrating fast once thicker control wires enter the mix.
Switch compatibility matters with smart fans too. Some modern fans rely on internal receivers and expect constant power from the wall switch. In those situations, separate switches may partially defeat the smart features unless configured correctly. Reading the manual carefully helps avoid control conflicts that leave the fan behaving strangely.
Remote Receivers Change The Wiring Layout
Remote-controlled fans often confuse people because the wiring looks different from a traditional two-switch fan. Many receivers sit inside the canopy and intercept the incoming power before it reaches the motor and light kit. Instead of separate switched wires controlling each function, the receiver handles those commands internally. That changes how wall switches should be used.
Some receivers only want a single constant hot wire. If both wall switches feed power separately into the receiver, the electronics may not respond correctly. Lights can flicker, remotes may lose pairing, or the fan might reset every time the switch changes position. Those issues are surprisingly common with retrofit installations.
One practical solution is using a single wall switch for constant power while letting the remote control fan and light functions independently. Another option involves bypassing the receiver entirely if the fan supports direct two-switch wiring. The best route depends on the fan model and how much manual control you prefer. A simple setup often proves more reliable long term than stacking too many controls together.
People sometimes assume every ceiling fan uses the same internal wiring design. That is about as risky as assuming every animated race car follows the same storyline. For a lighter break from electrical troubleshooting, explore character details through lighting mcqueen car before climbing back onto the ladder with another handful of wire nuts.

Ceiling Fan Blade Direction Still Matters
Correct wiring gets the fan running, but blade direction affects how comfortable the room actually feels. During warmer months, most fans should rotate counterclockwise to push airflow downward. That creates the familiar breeze effect people expect from a ceiling fan. Flip the direction switch during colder months and the airflow changes completely.
A clockwise winter rotation pulls cooler air upward while gently circulating warmer air trapped near the ceiling. The airflow feels softer, yet the room often stays more balanced. That simple seasonal adjustment can reduce how often the heating or cooling system cycles on. Small changes like that make the fan feel more useful year-round.
Direction switches are usually located on the motor housing just below the blades. Always turn the fan off completely before changing directions. Trying to flip the switch while the blades are moving can damage the mechanism or leave it stuck halfway. A stuck direction switch often causes inconsistent motor performance.
Fan balance matters too. Wobbling blades place stress on the mounting hardware and motor bearings over time. If the fan shakes noticeably after installation, check blade alignment, tighten mounting screws, and use the balancing kit if one is included. Stable airflow feels smoother and keeps motor strain lower over the years.
Ceiling Height Changes Fan Performance
Ceiling height changes how effective the airflow feels in daily use. A fan mounted too high may circulate air poorly near the seating area, while a fan mounted too low can feel intrusive or unsafe. Most rooms benefit from blades sitting roughly eight to nine feet above the floor. That spacing usually provides the best mix of comfort and clearance.
Downrods help adapt the fan height for taller ceilings. A vaulted ceiling often needs a longer downrod so the fan does not end up floating awkwardly near the roofline. Without the correct extension, airflow may barely reach the occupied part of the room. Taller rooms especially benefit from proper blade positioning.
Flush-mount fans work better in lower ceilings where head clearance becomes important. Those compact mounts keep the fan closer to the ceiling while still allowing airflow circulation. The tradeoff is slightly reduced airflow efficiency compared to a properly dropped fan. Tight spaces usually demand practical compromises.
Room layout changes airflow perception too. Large furniture, tall shelving, or narrow hall-like rooms can interrupt circulation patterns. A fan that feels weak in one room may perform perfectly in another with a more open layout. Paying attention to air movement patterns helps explain why some installations feel dramatically better than others.
Noise Problems Usually Trace Back To Installation
A quiet ceiling fan feels almost invisible in daily life. A noisy one turns into a constant irritation that steals attention during sleep, reading, or watching television. Clicking, rattling, or humming noises usually point toward installation issues rather than a defective fan. Loose screws and uneven blade alignment are frequent culprits.
Blade screws deserve a second inspection after the fan has run for a while. Vibration can loosen hardware slightly during the first few hours of operation. Tightening the screws evenly helps reduce wobble and noise without overcompressing the blade brackets. Tiny adjustments often create surprisingly noticeable improvements.
The canopy can also produce annoying sounds if wires are crammed too tightly behind it. A loose wire connector tapping against the canopy may sound like motor trouble even though the fan itself is fine. Reopening the canopy and rearranging the wiring usually solves that issue quickly. Organized wiring supports both safety and quieter performance.
Some motor hum is normal, especially on lower speeds, but sharp buzzing or grinding sounds are different. Those noises may indicate improper controls, damaged bearings, or unstable mounting hardware. Ignoring unusual sounds rarely makes them disappear. Early troubleshooting helps prevent bigger repair headaches later.
Maintenance Keeps Wiring And Controls Reliable
Ceiling fans collect dust faster than most people realize. Dust buildup on the blades changes balance slightly over time and can increase wobble. Cleaning the blades regularly keeps airflow smoother while reducing strain on the motor. A microfiber cloth or pillowcase method usually keeps the mess manageable.
Switches and pull chains also wear down gradually. A sticky pull chain or delayed wall switch response may point toward worn contacts inside the controls. Replacing a weak switch early is easier than waiting for it to fail completely. Reliable controls help preserve consistent fan operation.
Seasonal checks make a difference in long-term performance. Tightening visible screws, inspecting blade brackets, and listening for new noises can catch small issues before they turn into frustrating repairs. Most ceiling fan problems start quietly. A few minutes of maintenance every season helps avoid unexpected surprises later.
Electrical connections themselves usually stay stable if installed properly from the beginning. Loose wire nuts, overloaded dimmers, or poorly grounded brackets create most long-term trouble. Solid wiring paired with occasional maintenance gives the fan a much better chance of staying reliable through years of daily use. The payoff is simple: steady airflow, separate switch control, and fewer moments standing beneath the fan asking why the light suddenly stopped working.


Best Small Flush Mount Ceiling Fans 2026 Ultimate Picks

Best Smart Ceiling Fan India 2026 For Effortless Comfort

Best Smart Ceiling Fans with Lights for 2026: Top Picks

Best Smart Home Non Ceiling Fans 2026 For Ultimate Comfort

Best Outdoor Misting Ceiling Fan 2026 For Ultimate Comfort

Best Ceiling Fans With Lights For Vaulted Ceilings 2026 Top Picks

Best Outdoor Ceiling Fans For Porch 2026 With Style And Breeze

Best WiFi Enabled Ceiling Fan 2026 For Effortless Comfort





