
How to Connect a Hunter Ceiling Fan Remote Right
How to connect a hunter ceiling fan remote sounds simple until wires start crossing paths, the receiver refuses to fit inside the canopy, or the fan suddenly ignores every button press. Plenty of homeowners hit that wall halfway through installation and think something’s broken. Usually, though, the problem comes down to tiny setup details people overlook while rushing through the process. One misplaced dip switch or loose wire nut can turn a quick project into a long evening of frustration.
Ceiling fan remotes have become almost expected in modern rooms because nobody wants to keep pulling chains every single day. A properly connected remote makes it easier to control fan speed, lighting, airflow direction, and comfort without getting up constantly. Still, older wiring setups, cramped ceiling boxes, and confusing receiver diagrams can make the installation feel way more complicated than it actually is. That’s where clear guidance matters, especially before someone accidentally wires the receiver incorrectly.
Most issues start with compatibility confusion. Some Hunter ceiling fans already include built-in receivers, while others require a separate receiver unit tucked inside the mounting bracket. Mixing incompatible remotes or skipping the frequency pairing step often leads to flickering lights or random signal dropouts. Honestly, that’s the kind of thing that drives people nuts because everything appears connected correctly at first glance.
Electrical safety also plays a bigger role than many expect. Turning off the breaker isn’t just a suggestion buried in a manual somewhere. Loose live wires, overloaded wall switches, and incorrect grounding can create problems that linger long after installation day. A careful setup protects both the ceiling fan and the remote system from unnecessary wear or electrical faults later on.
Room layout affects remote performance too, oddly enough. Thick walls, nearby wireless devices, or metal ceiling brackets sometimes interfere with signal strength, causing delayed response times. Smaller bedrooms usually don’t struggle much, but larger open spaces can expose weak receiver placement pretty quickly. Paying attention to receiver orientation and antenna placement can prevent those annoying “Why isn’t this working now?” moments.
People also underestimate how important organized wiring can be. Stuffing tangled wires into a tight canopy often leads to pinched connections or unstable remote communication later. A cleaner installation not only looks better during maintenance but also reduces the chance of overheating or loose wire movement over time. Little details matter more than flashy features here.
How to connect a hunter ceiling fan remote becomes far less intimidating once the wiring logic, receiver setup, and pairing process all click together. Instead of trial and error, a smoother approach helps avoid repeat installations, annoying resets, and constant troubleshooting. A well-connected remote should feel seamless, almost invisible in daily life, letting airflow and lighting work exactly how they should without extra hassle.
How To Connect A Hunter Ceiling Fan Remote Without Wiring Guesswork
A fan remote feels like a small upgrade until the canopy is open, the receiver barely fits, and the wire colors look like they were chosen during a coffee break. A clean setup for how to connect a hunter ceiling fan remote starts with patience, safe power control, and a clear plan before any wire nut comes off. The real goal isn’t just making the fan spin once, either. The goal is steady speed control, reliable light response, and a remote that doesn’t act moody a week later.
Start With Power Safety And Compatibility
Kill the power at the breaker first, not just at the wall switch, because ceiling fan wiring can carry power in ways that don’t look obvious from below. A wall switch may control only the light leg, the fan leg, or a shared hot feed, so guessing is asking for trouble. Use a non-contact voltage tester before touching anything inside the box. That little check protects the receiver, the fan motor, and, yeah, your fingers.
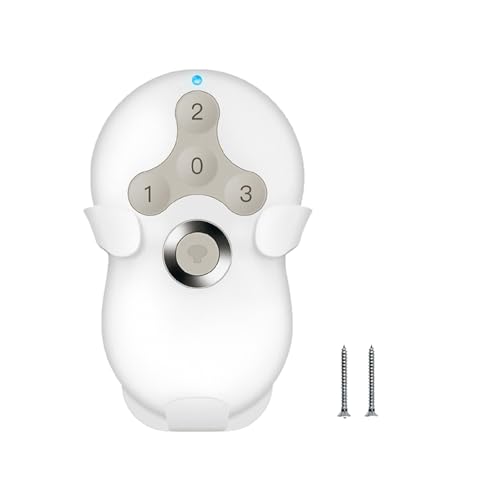
Hunter fans don’t all use the same remote setup, so compatibility matters before the canopy comes down. Some Hunter models include an integrated receiver, while others need a separate receiver placed between the house wiring and fan wiring. A universal remote may work with many AC motor fans, but it may not behave well with DC motor models or fans that already have built-in electronics. Matching the remote kit to the fan type keeps the project from turning into a guessing game.
The ceiling box deserves a hard look too, especially in older homes where the fan was swapped in after the house was built. A fan-rated box should be anchored properly because motor vibration can loosen weak mounting over time. Remote wiring won’t fix a shaky bracket or a box that was meant only for a lightweight light fixture. A stable mount makes the fan safer and helps prevent annoying rattles after installation.
Read the remote receiver labels before disconnecting anything, even if the diagram looks simple at first glance. Most receiver kits mark wires for AC input, fan motor output, and light output, but the order can vary between models. A common safety line from fan manuals is plain for a reason: “Turn power off before installation.” That warning may sound boring, but it’s the one step that saves the whole job from going sideways.
Map The Wires Before You Touch Them
A clear wire map keeps the job calm. Most ceiling fan remote receivers need the house hot and neutral connected to the receiver input, then the receiver output connected to the fan’s motor and light wires. The house ground wires still need to be bonded to the mounting bracket and fan ground, because grounding is not optional. Taking a phone photo before removing the old connections can save a ton of head-scratching later.
Common colors help, but they don’t replace checking the labels. Black usually handles fan power, blue often handles light kit power, white is typically neutral, and green or bare copper is ground. Still, older wiring, previous repairs, or switched loops can make colors misleading. Trust the receiver diagram and the actual circuit behavior over assumptions.
The receiver usually sits inside the canopy above the fan, and that tight space can make neat wiring feel like stuffing a sleeping bag into a coffee mug. Keep the antenna wire straight and away from bundled power wires if the kit includes one. Don’t pinch the receiver between the mounting bracket and canopy cover. A crushed receiver or bent antenna can lead to weak signal response even if the wiring is technically correct.
Wire nuts need firm, clean connections because loose splices cause flickering lights, random shutdowns, or a fan that works only when the canopy is bumped. Tug each connected wire gently after tightening the connector. No copper should stick out below the nut, and no insulation should be trapped where bare wire needs contact. This is where slow hands beat fast hands every time.
Separate side projects deserve separate tools, so don’t force an unrelated fix into the same ceiling fan job. To keep airflow handy outside the house instead of dragging a fan cord around, compare rechargeable golf cart fan choices for patios, carts, garages, and warm-weather errands.

Install The Receiver Without Crowding The Canopy
The receiver is the middleman, and how to connect a hunter ceiling fan remote depends on placing that middleman correctly. The house wiring feeds the receiver first, then the receiver sends controlled power to the fan motor and light kit. That’s why bypassing the receiver or mixing input and output wires usually creates dead buttons or strange fan behavior. Keep the receiver labels facing outward until everything is connected and checked.
Start with the input side of the receiver. Connect the house hot wire to the receiver’s line input, then connect the house neutral to the receiver’s neutral input. Ground wires stay together with the fan bracket and ceiling box ground where required. This part is less glamorous than pairing the remote, but it’s the foundation of the entire setup.
Next, connect the receiver output wires to the fan. The receiver’s fan output usually connects to the fan motor lead, while the receiver’s light output connects to the light kit lead if the fan has one. The fan neutral connects with the receiver neutral output as shown in the kit diagram. A fan without a light kit may have one unused output wire, and that capped wire should be secured safely instead of left floating loose.
Canopy space can get ugly fast, so fold wires with intention instead of jamming everything upward. Place wire nuts to the sides, keep the receiver flat, and avoid sharp bends near the connectors. Airflow inside the canopy isn’t the point, but preventing stress on connections absolutely is. A packed canopy can push wires loose when the cover screws tighten.
Ceiling comfort often depends on room size, blade span, and where the bed sits below the airflow. For a separate bedroom upgrade that keeps comfort quiet and practical, compare ceiling fans for bedroom models before replacing the whole fixture instead of only changing the remote.
Pair The Remote And Fix Signal Issues
Remote pairing is where many people think the wiring failed, but the problem is often a code, frequency, or reset step. Some Hunter remotes use dip switches, while newer models may use a learn button or auto-pairing sequence. The remote and receiver need to speak the same signal language before the fan responds. Skipping that step can make a perfectly wired fan look completely dead.
Set matching dip switches before closing the canopy if your receiver uses them. Tiny switches can shift while handling the receiver, so double-check them with good lighting. A mismatched pattern means the receiver will ignore the remote no matter how many times the buttons get mashed. That’s frustrating, sure, but it’s usually easy to fix once you know where to look.
Battery condition matters more than it should. A weak battery can send a signal just strong enough to work sometimes, which creates the classic “It worked yesterday” headache. Replace the remote battery before blaming the receiver or fan motor. A fresh battery plus a clean pairing process removes one easy variable from the troubleshooting pile.
Signal placement also matters in rooms with metal brackets, thick ceiling materials, or lots of wireless devices nearby. Keep the receiver antenna extended inside the canopy if the design allows it. Don’t wrap the antenna around power wires or tuck it under a metal bracket. Reliable remote response often comes from one tiny placement detail nobody notices during the first install.
Outdoor lighting projects can run into their own fuel, flame, and setup quirks, especially during camping season. For a separate lighting job away from ceiling fan wiring, follow light coleman lantern guidance before handling fuel or mantles.
Test Fan Speed, Light Control, And Wall Switch Behavior
Turn the breaker back on only after the canopy is secured enough that no wires can drop or touch the bracket. Test the remote one function at a time, starting with fan power, then speed levels, then light control. Slow testing helps isolate problems instead of creating a blur of symptoms. A fan that works on one speed but not another may point to receiver settings or fan motor compatibility.
The wall switch should usually stay on so the receiver has constant power. Turning the wall switch off cuts power to the receiver, which means the remote can’t wake the fan until power returns. That behavior is normal, but it catches plenty of people off guard. For smoother daily use, treat the remote as the main control after installation.
Light kits can be picky if dimming is involved. Some remote kits support dimmable bulbs, while others only provide simple on and off control. Non-dimmable LED bulbs may flicker, buzz, or refuse to respond correctly if the receiver sends a dimming signal. Matching the bulb type to the remote features saves a lot of annoying trial and error.
Fan direction controls may live on the remote, the motor housing, or a physical switch depending on the Hunter model. Don’t assume every remote reverses airflow. If the fan has a manual reverse switch, adjust it only when the blades have fully stopped. That small habit protects the motor components and keeps the fan from making rough mechanical noises.
Common Mistakes That Make The Remote Fail
The most common mistake is wiring the receiver backward. Input wires must connect to house power, while output wires must connect to the fan. Mixing those sides can prevent operation or damage the receiver. Receiver direction matters because it controls how power reaches the fan motor and light kit.
Another headache comes from cramming the receiver into a canopy that’s too tight. Pressure on the receiver case can stress solder joints, bend the antenna, or loosen wire connectors. The fan may run fine during the first test, then fail after the canopy is tightened. A few extra minutes of wire organization can prevent that sneaky problem.
Using the wrong wall control can cause strange behavior too. Some fan remotes don’t play nicely with older dimmer switches or variable fan speed wall controls. A receiver usually wants steady full power, not chopped or reduced voltage from a wall dimmer. Swapping to a basic on-off switch may be needed for stable remote performance.
People also forget to cap unused wires properly. An unused light output, second switch leg, or extra remote lead should be capped and tucked safely. Loose unused wires can create shorts or intermittent contact inside the canopy. Clean endings matter just as much as active connections.
Troubleshooting Before Taking Everything Apart
Start simple before reopening the entire fan. Check the breaker, the wall switch, the remote battery, and the pairing sequence first. Those four checks solve more remote problems than most people expect. Basic troubleshooting keeps you from tearing apart good wiring for no reason.
If the fan hums but won’t spin, stop testing and turn the power off. Humming can point to a motor issue, capacitor problem, stuck blade assembly, or incompatible receiver. Forcing repeated starts may heat the motor unnecessarily. A quiet, careful reset is better than button-mashing the remote in frustration.
If the light works but the fan doesn’t, the fan output wire or motor lead deserves attention. If the fan works but the light doesn’t, check the light output wire, bulb type, and light kit connector. Split symptoms usually mean one output path has a problem, not the entire installation. That clue makes troubleshooting much less random.
Random operation can suggest signal interference or shared frequency with another nearby fan remote. Changing dip switch settings on both the receiver and remote may solve the problem. Apartment buildings, duplexes, and rooms with multiple ceiling fans can create unexpected overlap. A new frequency pattern gives your fan a cleaner lane to follow.
How To Fix Hunter Ceiling Fan Remote Problems After Installation
Everything can look finished from the floor while the remote still refuses to cooperate. The blades may twitch once, the light may blink randomly, or the fan could ignore speed commands like it has a mind of its own. Those moments frustrate people fast because how to connect a hunter ceiling fan remote sounds like a quick project until real-world wiring issues show up. Most problems, though, come from a handful of small setup details that are easier to fix than they first appear.
Check Receiver Placement Before Rewiring Everything
People often assume the receiver is defective the second the fan stops responding properly. In reality, poor receiver placement causes a surprising number of remote issues. A receiver squeezed tightly beside metal brackets or packed behind tangled wires may struggle to maintain a steady signal. Pulling the canopy down and adjusting the receiver position can solve problems without touching a single wire connection.
The antenna deserves more attention than most people give it. A bent antenna wire stuffed behind the bracket weakens signal strength and causes delayed response times. Keep the antenna extended naturally instead of twisting it into the wire bundle. That tiny detail can improve remote reliability almost immediately.
Ceiling height matters too. Taller ceilings sometimes reduce remote range if the receiver sits too deep inside dense metal housing. Open layouts with multiple electronics nearby can also create signal confusion. Wi-Fi routers, LED drivers, and nearby remotes occasionally interfere with older ceiling fan remote frequencies.
Don’t rush into replacing the receiver before testing simple adjustments first. Pull the receiver slightly forward, straighten the antenna, and retest every fan speed. A few small changes often restore consistent communication between the fan and remote without buying extra parts.
Wall Switch Problems That Confuse Remote Operation
Wall switches create a lot of hidden confusion after remote installation. A remote receiver usually expects full-time power, so an older dimmer switch can interfere with how the receiver behaves. Flickering lights, weak fan speeds, or random shutdowns often point toward the switch instead of the remote itself. Replacing old dimmers with a basic on-off switch usually improves stable power delivery.
Shared wall controls can also complicate things. Some older homes wired ceiling fans and lights together on one switch leg, while others separated them years later during remodeling. That patchwork wiring sometimes leaves capped wires hidden in the ceiling box that no longer behave logically. A quick wire trace with the breaker off helps reveal what’s actually feeding the fan.
Double-switch setups deserve extra caution. One switch may feed constant power while the second switch no longer connects correctly after the remote receiver gets installed. That mismatch can leave people thinking the remote is defective even though the wiring path is the real issue. Organized troubleshooting saves a ton of unnecessary frustration.
Electric bills also push people to rethink how they use ceiling fans every day. For a closer look at power consumption and long-term energy habits, explore are ceiling fans expensive to run before leaving fans spinning constantly in every room.
Fan Speed Problems And Motor Response Delays
A fan that runs only on one speed usually points toward either a receiver issue or a capacitor problem inside the fan housing. Remote receivers control how voltage reaches the motor, so weak connections can interrupt specific speed settings. Low speed often fails first because the motor requires steady electrical control to maintain slower rotation. That’s why fan speed consistency matters during testing.
Blade balance can also create strange behavior that feels electrical at first. Wobbling blades put stress on the motor housing, which sometimes causes intermittent shutoffs or humming noises. Tightening blade screws and balancing the blades may reduce strain enough for smoother operation. Mechanical issues and electrical issues love pretending to be each other.
Some fans react slowly after a speed change, especially older AC motor models paired with modern universal remotes. That delay doesn’t always mean something is wrong. Certain receivers intentionally step through speeds gradually to reduce motor stress. Waiting a few seconds before pressing another button prevents accidental command overlap.
Heat buildup inside crowded canopies creates another hidden problem. Receivers trapped against insulation or tightly packed wiring can warm up during extended use. Excess heat sometimes causes temporary shutdowns or delayed response. Cleaner wire organization helps preserve receiver performance over time.
Light Kit Flickering And LED Compatibility Issues
LED bulbs create headaches with some remote kits because not every receiver handles dimming the same way. Non-dimmable LEDs connected to dimming remotes often flicker, pulse, or stay faintly glowing after shutoff. Matching bulbs to the receiver’s control style prevents most of those weird lighting behaviors. Bulb compatibility matters just as much as the wiring itself.
Cheap LED bulbs can behave unpredictably with ceiling fan electronics. One bulb may flicker while another works perfectly in the exact same fixture. Swapping bulb brands sometimes fixes the issue faster than replacing the receiver. Testing with a basic LED or incandescent bulb helps isolate the real source of the problem.
Loose light kit connectors also deserve attention. Many Hunter fans use quick-connect plugs between the motor housing and light assembly, and those plugs occasionally loosen during installation. A partially connected plug can cause intermittent lighting or complete light failure. Re-seating the connector often restores stable light control.
Some people overload the light kit without realizing it. Older fan models may support lower wattage limits than newer LED-heavy setups suggest. Exceeding the fixture’s rating can create heat buildup and shorten receiver life. Keeping wattage within safe limits protects both the lighting circuit and the receiver electronics.
Remote Reset Steps That Actually Work
Resetting the system sounds simple, but timing matters more than people expect. Many Hunter remote kits require power cycling at the breaker followed by a quick pairing sequence within a specific window after power returns. Missing that timing can make the reset appear useless even though the process itself is correct. Reading the receiver instructions closely helps avoid repeated failed resets.
Start by turning the breaker off for a full minute instead of flipping it back immediately. That pause helps discharge leftover electrical energy inside the receiver. Once power returns, press the pairing or learn button according to the receiver instructions. A rushed reset often leaves the receiver stuck in the same confused state.
Remote batteries deserve another check during resets. Weak batteries may send incomplete pairing signals, especially during the first few seconds after power restoration. Installing a fresh battery removes one more variable from the troubleshooting process. Small steps create surprisingly big improvements in remote synchronization.
Nearby fans using similar frequencies can interfere with pairing attempts too. Apartment buildings and multi-fan homes sometimes trigger neighboring fans accidentally during setup. Changing dip switch combinations or resetting one fan at a time keeps the signals separated cleanly. That approach makes troubleshooting far less chaotic.
Noise Issues After Remote Installation
A new humming sound after installing the remote doesn’t always mean the motor is failing. Some receivers naturally create a faint electronic hum at lower fan speeds. Loud buzzing, though, usually signals either loose wiring, an overloaded receiver, or incompatible dimming components. Paying attention to the sound pattern helps narrow the problem faster.
Loose wire nuts inside the canopy can vibrate slightly during operation. That vibration sometimes creates clicking or buzzing noises that seem like motor trouble from below. Rechecking every wire connection with the breaker off often solves the noise completely. Tight connections support smooth electrical flow and quieter operation.
Blade alignment also affects perceived noise levels. Uneven blades create wobble that echoes through the mounting bracket and ceiling box. Tightening screws and checking blade spacing reduces unnecessary vibration. Mechanical balance matters just as much as electrical setup for long-term comfort.
Receiver placement can amplify sound too. A receiver pressed tightly against the canopy or bracket may transfer vibration directly into the metal housing. Repositioning the receiver slightly away from contact points often softens the noise noticeably. Tiny adjustments make a room feel calmer during everyday use.
Outdoor Conditions And Seasonal Ceiling Fan Problems
Humidity creates extra stress for remote receivers installed near patios, covered porches, or coastal areas. Moisture buildup inside the canopy can weaken electrical connections over time, especially if the fan wasn’t rated for damp conditions. A fan labeled for indoor use may struggle badly outdoors even if the area feels partially protected. Matching the fan to the environment protects receiver lifespan.
Seasonal temperature swings can loosen wire connections gradually. Expansion and contraction inside metal boxes sometimes affect older wire nuts or aging insulation. Rechecking connections once or twice a year helps prevent surprise failures during heavy summer use. Preventive maintenance beats emergency troubleshooting every time.
Power surges during storms occasionally damage sensitive receiver electronics. If the fan stopped responding after lightning or unstable power events, the receiver may have taken the hit even if the motor still works. Surge protection helps reduce that risk, especially in areas with frequent electrical fluctuations.
Even lighting schedules can shape how ceiling fans fit into a room’s comfort routine. Holiday gatherings, dinners, and evening events often change how airflow and lighting work together indoors. For seasonal timing references tied to home lighting habits, check what time is candle lighting in miami before planning evening room setups and lighting schedules.
Signs The Receiver Needs Replacement
Some receiver problems simply won’t disappear no matter how carefully the wiring gets checked. Burn marks, melted insulation smells, or visible heat damage around the receiver point toward internal failure. A receiver that randomly loses pairing every few days may also be wearing out internally. Replacing the receiver becomes the safer move once those symptoms appear repeatedly.
Intermittent operation is one of the hardest problems to diagnose because the fan may behave perfectly during testing. Then a few hours later the light flickers or the fan ignores commands again. That inconsistency often points toward weakened receiver components rather than bad wiring. Electrical parts sometimes fail gradually instead of all at once.
Replacement receivers should match both the fan type and motor style. Universal receivers may work fine with many Hunter AC motor fans, but certain integrated systems need model-specific parts. Installing the wrong receiver can create new issues instead of fixing the old ones. Compatibility remains one of the most important parts of long-term remote stability.
A fresh receiver installation should feel predictable instead of stressful. Buttons should respond consistently, fan speeds should transition smoothly, and the light should react without flickering or delay. Once the wiring, receiver setup, and signal pairing all work together correctly, the remote finally fades into the background the way it’s supposed to.


Best Small Flush Mount Ceiling Fans 2026 Ultimate Picks

Best Smart Ceiling Fan India 2026 For Effortless Comfort

Best Smart Ceiling Fans with Lights for 2026: Top Picks

Best Smart Home Non Ceiling Fans 2026 For Ultimate Comfort

Best Outdoor Misting Ceiling Fan 2026 For Ultimate Comfort

Best Ceiling Fans With Lights For Vaulted Ceilings 2026 Top Picks

Best Outdoor Ceiling Fans For Porch 2026 With Style And Breeze

Best WiFi Enabled Ceiling Fan 2026 For Effortless Comfort





