
How To Connect Ceiling Fan To Wall Switch Right
How to connect ceiling fan to wall switch sounds simple at first glance, yet plenty of people hit a wall halfway through the project. One loose wire, one mismatched connection, and suddenly the fan won’t spin, the light flickers, or the breaker keeps tripping. That frustration creeps in fast, especially after standing on a ladder for what feels like forever. A clean wiring setup changes everything, though, making the fan easier to control while keeping the room safer and far more comfortable.
Messy switch wiring often causes more headaches than the fan itself. Some homes have older electrical boxes with faded wire colors, while newer setups may include separate controls for fan speed and lighting. That’s where understanding wire identification, switch compatibility, and power flow becomes a big deal. Skipping those details can lead to buzzing sounds, inconsistent speeds, or a fan that simply refuses to respond.
Plenty of ceiling fans include remote systems now, but wall switches still hold their ground because they’re reliable and easy to access. Nobody wants to dig through couch cushions for a missing remote after a long day. A properly connected wall switch gives direct control without extra gadgets cluttering the room. Also, smoother operation helps reduce wear on the fan motor over time.
Electrical projects can feel intimidating, especially with exposed wires hanging overhead. Still, the process becomes much less stressful once the switch wiring layout starts making sense. Understanding hot wires, neutral connections, grounding, and load handling helps prevent costly mistakes before they happen. Little details matter here, and rushing the installation usually creates bigger problems later.
Older ceiling fans sometimes complicate things with outdated wiring configurations. Pull chains, dual switches, or mixed wire colors can leave anyone second-guessing every connection. That confusion often leads to trial-and-error fixes that waste time and test patience. A straightforward wiring approach keeps the setup cleaner and helps avoid unnecessary rewiring later.
Wall switch placement matters more than people expect, too. A poorly positioned switch becomes annoying fast, especially in bedrooms or large living spaces where convenience counts. Smooth access paired with stable wiring creates a much more comfortable daily routine. Small upgrades like this quietly improve the entire feel of a room.
Ceiling fan speed control also deserves attention because not every switch handles fan motors correctly. Standard light dimmers can damage certain fan systems or create irritating humming noises. Using the right fan-rated wall switch helps maintain airflow consistency while protecting internal components. That tiny decision often saves expensive repairs down the road.
Safety sits at the center of every wiring project, plain and simple. Turning off breaker power, testing wires properly, and securing all connections help prevent shocks and overheating risks. Loose wire nuts or overcrowded electrical boxes can create hidden issues that grow worse over time. A stable installation keeps the fan running smoothly without unexpected surprises later.
How To Connect Ceiling Fan To Wall Switch Safely
A fan that only works from a pull chain gets old fast, especially in a bedroom where the switch sits right by the door doing nothing useful. The whole point of how to connect ceiling fan to wall switch is simple: make daily control easier without creating loose wiring, motor humming, or a breaker that trips every other Tuesday. A clean wall-switch setup gives the room a more finished feel, but it also demands patience because ceiling fan wiring can hide a few curveballs behind that canopy.
Ceiling Fan Switch Basics
Ceiling fan wiring usually starts with two places that matter most: the ceiling electrical box and the wall switch box. The switch interrupts or sends power through the hot wire, while the fan assembly depends on secure neutral and ground connections to run safely. That sounds tidy on paper, but older homes often bring faded insulation, crowded boxes, or mystery wires that make the job feel like a guessing game. Slow down there, because guessing with house wiring is where small mistakes turn into real electrical risk.
The most common setup uses a black hot wire, a white neutral wire, and a bare or green ground wire. Many ceiling fans also include a blue wire for the light kit, which can be tied with the fan’s hot wire or separated for independent wall control. A single wall switch can control both fan and light together, but a dual-switch setup gives separate control if the wiring supports it. That difference matters because forcing separate controls into a box without the right conductors creates a messy, unsafe workaround.
Power location changes the whole wiring path, too. Sometimes power enters the switch box first, then runs up to the fan. Other times power enters at the ceiling box, and the switch leg carries controlled power back and forth. That’s why a non-contact voltage tester, a clear wiring diagram, and careful labeling beat “I think this wire goes here” every single time.
Electrical codes exist because overheated wires and poor grounding don’t always announce themselves right away. The National Fire Protection Association has long tied home electrical problems to a meaningful share of residential fire risk, so tight connections and proper box ratings aren’t just picky details. A ceiling fan also needs a fan-rated ceiling box, not a light-only box, because the moving motor adds vibration and weight. That one overlooked piece can make a nice installation feel shaky, noisy, and unsafe.
Tools And Safety Checks
Breaker power comes first, no debate. Flip the correct breaker off, then test the switch and ceiling wires before touching anything with bare hands. A wall switch can look dead while another live feed still sits inside the same box, especially in older or multi-gang switch setups. That’s the kind of surprise nobody wants while balanced on a ladder with a screwdriver in hand.
A basic toolkit usually includes a voltage tester, wire strippers, screwdrivers, wire connectors, electrical tape, and a sturdy ladder. A flashlight helps more than people expect because ceiling boxes turn into shadowy little caves once the old fixture comes down. Keep the fan manual nearby, too, since wire colors can vary slightly by brand or model. For nearby household repairs that also involve visibility and safety, handle small exterior fixes with fix cracked tail light before the damage spreads or lets moisture sneak in.
Loose wire connectors cause a lot of fan headaches. A connection that feels “mostly snug” can loosen after weeks of motor vibration, creating flickers, buzzing, or heat inside the box. Twist wires evenly, use the right connector size, and tuck everything back without cramming sharp bends against the switch terminals. Neat wiring isn’t about looking pretty; it reduces strain and makes future troubleshooting less painful.
Grounding deserves its own moment because it protects the metal fan body and switch assembly if a fault occurs. The bare copper or green ground wire should connect to the fan bracket, the electrical box if it’s metal, and the switch ground screw where required. Skip that step and the setup may still run, but “it turns on” isn’t the same as safe operation. As electricians often say, “The ground is quiet until something goes wrong,” and that’s exactly why it matters.
Single Switch Wiring Flow
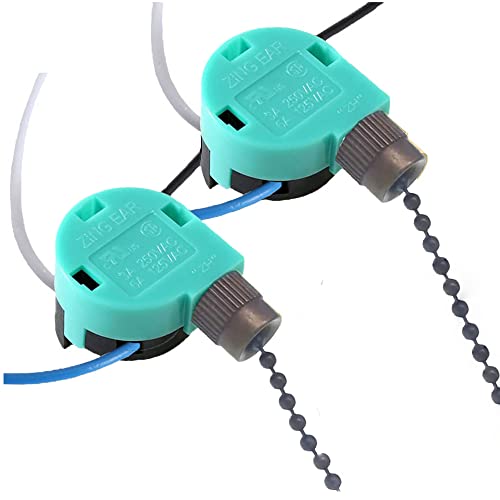
A single wall switch setup keeps things simple because one switch controls power to the entire fan assembly. In this layout, the wall switch sends controlled hot power to the fan’s black wire, and often the blue light wire joins that same connection if the fan has a light kit. The white fan wire connects to the house neutral, while all grounds tie together securely. This creates a straightforward on-off control, though fan speed may still depend on pull chains or a fan-rated wall control.
The tradeoff is convenience. One switch means the fan and light may turn on together unless the pull chains are set the way you like them. That’s fine in a guest room or hallway area, but it can feel clunky in a main bedroom where airflow and lighting need different moods. A single switch ceiling fan setup works best where simple control matters more than separate adjustments.
Pay close attention to switch type because regular dimmer switches are not made for most ceiling fan motors. A standard light dimmer can cause motor hum, heat buildup, or speed issues that make the fan feel cheap even if it isn’t. Use a fan-rated speed control if you want wall-based speed changes. For airflow upgrades in warm rooms, compare options with rechargeable stand fan philippines if a ceiling install isn’t practical in a rental or tight space.
Box space also matters during a single-switch connection. Newer fan controls can be bulkier than a basic toggle switch, and an overcrowded switch box makes wire folding difficult. If wires press hard against the device, the terminals may loosen later. A proper fit supports clean installation, stable switching, and easier maintenance if the fan needs service down the road.
Dual Control Wiring Choices
A dual-switch setup feels much more convenient because one switch controls the fan motor and the other controls the light kit. This usually requires separate switched hot wires running from the wall box to the ceiling box. The fan’s black wire connects to the fan switch leg, and the blue wire connects to the light switch leg. Done correctly, this layout gives separate fan and light control without relying on pull chains every day.
The catch is wire availability. Some rooms only have one switched wire at the ceiling, which means separate wall control may require running new cable. That’s not a tiny tweak; it can involve opening walls, fishing cable, and following local electrical rules. So yes, dual control is handy, but it needs the right wiring path before it makes sense.
Fan-rated wall controls add another layer because some models require a neutral wire in the switch box. Smart fan switches are especially picky about this, since many need constant power to maintain wireless functions. Older switch boxes may not have a neutral tucked inside, even if white wires appear elsewhere in the circuit. Wire color alone doesn’t prove function, so testing and tracing matter more than assumptions.
A dual-control setup also pairs nicely with the right fan size and blade design. Larger rooms often need better air movement, while low ceilings need careful clearance. To match airflow expectations with blade style, compare best 5 blade ceiling fan choices before locking in the switch plan. Switch layout, fan type, and room size should work together instead of being treated like separate decisions.
How To Wire Ceiling Fan And Wall Switch Correctly
Nothing ruins a quiet evening faster than a ceiling fan that clicks, wobbles, or ignores the wall switch half the time. A lot of frustration tied to how to wire ceiling fan and wall switch correctly comes from rushed installations, loose wire connections, or switches that were never meant for fan motors in the first place. The wiring itself usually isn’t wildly complicated, but hidden issues inside the ceiling box can turn a simple project into a long night of second-guessing every wire.
Fan Speed Control Problems
A ceiling fan that spins too slowly or refuses to change speed often points straight to the wall control setup. Standard light dimmers create trouble because fan motors need a fan-rated speed control, not a lighting dimmer designed for bulbs. The wrong switch can create buzzing noises, inconsistent speeds, or heat buildup inside the control. That strange hum people hear at night usually traces back to that exact mismatch.
Older homes complicate speed control even more because many original switches were installed long before modern ceiling fans became common. Some switch boxes lack neutral wires, while others contain worn terminals that loosen over time. A fan motor depends on stable voltage, so poor switch connections lead to jerky starts and uneven airflow. Tightening loose terminals and replacing outdated controls often solves those annoying symptoms surprisingly fast.
Fan blades also influence speed performance more than people expect. Heavy blades paired with weak motors can create sluggish airflow even if the wiring is technically correct. Rooms with tall ceilings especially need the right combination of motor strength and blade pitch to circulate air effectively. Weak airflow sometimes gets blamed on wiring when the real issue sits in the fan design itself.
Mechanical sounds shouldn’t be ignored either. Persistent ticking or clicking can signal loose blade brackets, unstable mounting hardware, or switch compatibility issues. To deal with irritating noise before it gets worse, troubleshoot common causes through why does ceiling fan click and inspect the mounting bracket carefully. A quiet fan almost always points toward a cleaner installation overall.
Wall Switch Placement Issues
A poorly placed wall switch becomes irritating surprisingly fast. Walking across a dark room just to adjust the fan speed gets old within days, especially in larger bedrooms or living spaces where airflow changes constantly. Smart placement improves comfort because the switch becomes part of the room’s natural routine instead of an awkward afterthought. Little details like switch height and distance from doorways genuinely affect day-to-day convenience.
Dual-switch layouts work especially well in rooms where lighting and airflow need separate control. One switch can manage the light while the second controls the fan motor independently. That setup helps avoid the annoying habit of pulling chains every night before bed. It also reduces wear on internal pull-chain mechanisms, which can fail after years of constant tugging.
Three-way switch setups sometimes enter the picture in larger homes. Hallways, oversized bedrooms, or rooms with multiple entrances may benefit from controlling the fan from different locations. The wiring gets more involved there because traveler wires and additional switch terminals enter the equation. A rushed three-way installation often creates inconsistent switching behavior that drives people nuts later.
Moisture exposure matters too in bathrooms, enclosed patios, or poolside areas where humidity levels climb. Electrical boxes near damp environments need proper sealing and weather-safe components to avoid corrosion. For outdoor lighting systems facing similar moisture challenges, upgrade damaged fixtures using replace led pool light before water intrusion creates bigger electrical problems. Moisture protection keeps both switches and fan connections operating more reliably over time.

Common Wiring Mistakes
Loose neutral connections cause some of the strangest ceiling fan problems around. Lights may flicker randomly while the fan motor surges or stalls without warning. Neutral wires complete the circuit path, so unstable connections create inconsistent electrical flow throughout the entire fan assembly. A properly tightened neutral splice often fixes issues people mistakenly blame on defective fan motors.
Overstuffed electrical boxes create another hidden headache. Ceiling fan wiring takes up more room than standard light fixtures because extra conductors, mounting hardware, and remote receiver units compete for limited space. Cramped boxes increase pressure on wire nuts and terminals, making loose connections more likely over time. A deeper fan-rated electrical box can dramatically improve wiring stability and long-term reliability.
Wire color assumptions create trouble constantly in older houses. A white wire might actually carry switched power if previous installers repurposed it decades ago. That’s why voltage testing matters far more than relying on insulation color alone. People who skip wire testing often spend hours reconnecting wires incorrectly before realizing the circuit layout doesn’t match modern standards.
Remote control receivers also create confusion during installation. Some fans combine remote systems with wall switches, while others require constant power to function properly. Turning the wall switch off completely may disable remote communication altogether. Reading the fan wiring diagram carefully helps avoid the frustrating “everything worked yesterday” situation that pops up after an incomplete setup.
Ceiling Box And Mounting Support
A standard light fixture box isn’t always strong enough for a ceiling fan. Fans generate movement and vibration that lightweight lighting boxes were never designed to handle. A proper fan-rated ceiling box anchors securely to framing or approved support braces to prevent wobbling over time. Ignoring that requirement can lead to shaky operation and noisy performance that gets worse month after month.
Mounting brackets deserve close attention during installation. Loose screws or uneven bracket placement can throw the entire fan off balance, creating wobble even if the blades themselves are perfectly aligned. Tight hardware helps maintain stable rotation and reduces strain on the motor bearings. Stable mounting also cuts down on the clicking noises many people assume come from the motor itself.
Ceiling height changes installation needs too. Rooms with high ceilings often require downrods to position the fan at an effective airflow level. Flush-mount fans work better in low-ceiling spaces where clearance matters more than wide air circulation. Matching the mounting style to the room layout improves both comfort and long-term fan efficiency.
Heavy decorative fans sometimes require additional support compared to lightweight builder-grade models. Larger motors, thicker blades, and integrated light kits add noticeable weight overhead. Installing the right support hardware prevents movement that could loosen electrical connections later. A sturdy mount protects both the wiring system and the ceiling structure itself.
Testing The Finished Installation
Testing starts before the blades even go back on. Restore breaker power carefully, then verify that the wall switch controls the fan exactly as expected. If separate switches exist for light and fan functions, check both independently before securing the canopy. Small problems become much easier to fix while the wiring remains accessible.
Listen carefully during the first few minutes of operation. Buzzing, clicking, or delayed startup usually points toward loose wiring, incompatible controls, or unstable mounting hardware. A properly wired fan should start smoothly without harsh noise or noticeable hesitation. Quiet operation usually signals that the electrical connections are stable and secure.
Fan wobble often appears during higher speed settings. Small imbalances in blade weight or mounting alignment can create shaking that gradually loosens screws over time. Most ceiling fans include balancing kits with adhesive weights to fine-tune blade movement. Spending extra time on balancing helps preserve motor lifespan and keeps the fan feeling solid instead of flimsy.
Wall switches should stay cool during operation. Warmth around the switch plate can indicate overload issues, loose terminals, or an incompatible dimmer setup. A cool-running switch paired with smooth airflow and stable lighting usually confirms the installation was handled properly. Reliable wiring doesn’t just improve convenience; it helps the entire room feel calmer, quieter, and more comfortable every single day.


Best Small Flush Mount Ceiling Fans 2026 Ultimate Picks

Best Smart Ceiling Fan India 2026 For Effortless Comfort

Best Smart Ceiling Fans with Lights for 2026: Top Picks

Best Smart Home Non Ceiling Fans 2026 For Ultimate Comfort

Best Outdoor Misting Ceiling Fan 2026 For Ultimate Comfort

Best Ceiling Fans With Lights For Vaulted Ceilings 2026 Top Picks

Best Outdoor Ceiling Fans For Porch 2026 With Style And Breeze

Best WiFi Enabled Ceiling Fan 2026 For Effortless Comfort





