
Unleash the Power of LED: Transforming Fluorescent Tubes with Ease
Dive into the world of illumination as you learn how to convert fluorescent tubes to LED. Step into a future of energy efficiency, lower operational costs, and superior lighting quality. This guide will provide you with practical insights into the process of replacing dated fluorescent tubes with innovative LED technology. Whether you're a homeowner looking to upgrade your space or a business manager wanting to improve your office lighting, we've got the information you need. Ready to embark on this illuminating journey? Let's explore the exciting realm of LED conversion together!
1. The Dawn of LED: The Light Revolution
In a world increasingly conscious of energy consumption, LED lights have risen to prominence due to their energy efficiency, longevity, and overall cost-effectiveness. These advantages make them a compelling alternative to traditional lighting solutions like fluorescent tubes. Making the switch to LED lights is not just an eco-friendly choice, but it can also lead to significant savings over time, making it an economic decision as well.
There are numerous compelling reasons to make the switch from fluorescent lights to LED. For one, LED lights use significantly less electricity than fluorescent tubes, consuming about 30% less energy for the same amount of light. This energy efficiency translates directly into savings on your electricity bill, making the switch a financially sensible choice. In addition, LED lights have a much longer lifespan than fluorescent tubes, often lasting for up to 50,000 hours compared to the 10,000 hours that is typical of fluorescent tubes.
That said, making the switch from fluorescent tubes to LED isn't as simple as replacing the bulbs. It requires a bit of planning, some technical know-how, and the right tools. Fear not, for we will guide you through the process step-by-step in this comprehensive article.
Fluorescent tubes have served us well for decades. However, as we stride forward into a greener, more sustainable future, it is clear that LED is the way to go. Now let us delve deeper into this conversion process and shed some light on the technical aspects.
2. Shedding the Old Skin: Removing Fluorescent Fixtures
The first step in converting fluorescent tubes to LED lights is to safely remove the existing fluorescent fixtures. This involves not just removing the fluorescent tubes themselves, but also the ballasts which provide the right amount of voltage to the tubes. The ballasts are typically found within the light fixture, and their removal is crucial for the conversion to LED.
When removing the fluorescent tubes, it's important to handle them with care to prevent breakage. A broken tube can release harmful mercury vapor. After removal, ensure that the tubes are safely disposed of in compliance with local waste management regulations. Many local waste facilities and recycling centers accept fluorescent tubes.
Next, the ballast is removed. This component can be found inside the light fixture, usually behind a metal or plastic cover. Disconnect the wires that lead to the ballast and carefully remove it. Safety should be your top priority during this process, so ensure that the power is turned off and that you are using properly insulated tools.
With the fluorescent fixtures removed, you're now ready to install your new LED lights. However, there's one more step before you can do this - you'll need to decide what type of LED bulb to use.
3. A Bright Choice: Selecting Your LED Bulbs
There are essentially two types of LED bulbs that you can use to replace fluorescent tubes: plug-and-play LED bulbs and direct-wire or ballast-bypass LED bulbs. Each type has its pros and cons, and the best choice for you will depend on your specific circumstances and preferences.
Plug-and-play LED bulbs, as the name suggests, are designed to fit into the existing fluorescent fixtures without the need for any rewiring. This makes them a convenient option if you're looking for a quick and easy conversion process. However, they still rely on the existing ballast to regulate the electricity supply, which means they may not be as energy-efficient as direct-wire LEDs.
On the other hand, direct-wire or ballast-bypass LED bulbs require the removal of the existing ballast and the rewiring of the light fixture. While this may seem like more work, it has the advantage of eliminating the energy loss associated with the ballast, making these bulbs the more energy-efficient option in the long run.
So, you've removed your fluorescent fixtures and decided on the type of LED bulb to use. Now it's time to get your hands dirty and install your new LED lights.

4. Illuminate the Path: Installing LED Lights
The process of installing your new LED bulbs will vary depending on the type of bulb you've chosen. For plug-and-play LED bulbs, the process is as simple as inserting the new LED tubes into the existing fixtures. Once the bulbs are secured, you can turn the power back on and bask in the glow of your new LED lights.
For direct-wire LED bulbs, the installation process is a bit more involved. You'll need to rewire the light fixture to bypass the ballast and connect the LED bulbs directly to the mains power. Remember to follow the manufacturer's instructions to the letter, as improper installation can lead to damage to the LED bulbs or even a potential electrical hazard.
After you've successfully installed your new LED bulbs, take a moment to appreciate your work. You've not only improved the lighting in your space, but you've also made a positive impact on your energy consumption and the environment.
5. The Afterglow: Maintaining Your LED Lights
LED lights require very little maintenance once they're installed. This is one of the many benefits of making the switch from fluorescent to LED. However, there are a few things to keep in mind to ensure that your LED lights continue to perform optimally over their lifespan.
Firstly, LED lights do not burn out like traditional bulbs. Instead, their brightness gradually decreases over time. This is known as lumen depreciation. To ensure that your lighting remains adequate, it's recommended to replace LED bulbs when they've reached about 70% of their initial brightness. Most LED bulbs are rated for a lifespan until they reach this point, often around 50,000 hours.
Secondly, while LED lights are designed to withstand fluctuations in voltage, they can still be damaged by voltage spikes caused by power surges. Using surge protectors can help to protect your LED lights from such events.
Lastly, while LED lights generate less heat than traditional bulbs, they can still be damaged by excessive heat. Therefore, ensuring adequate ventilation around your LED lights can help to prolong their lifespan.
In conclusion, converting your fluorescent tubes to LED can be a rewarding project that delivers significant benefits. Not only does it reduce your energy consumption, but it also results in improved lighting quality and less maintenance. So why wait? Make the switch today and step into the light of the future.
Dive deeper:


Best Rechargeable LED Light Bulbs 2026 For Brighter Living
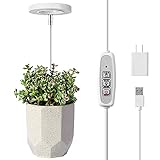
Best Grow Light For Single Plant 2026 Top Picks

Best Track Lighting for Vaulted Ceiling 2026 Top Picks

Best Track Lighting For Studio 2026 Top Picks And Insights
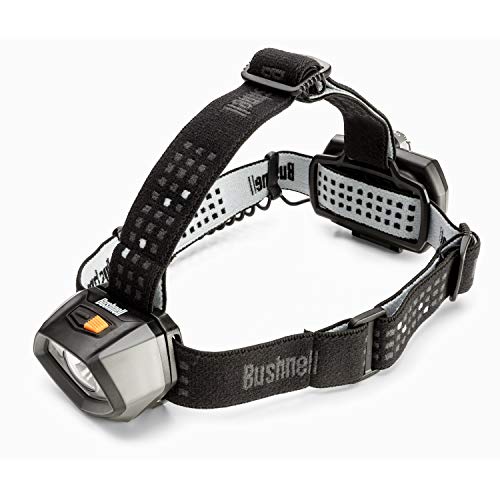
Best Color Light for Tracking Bloodtrail 2026 Top Picks

Best Track Lighting Heads Pendants 2026 Brighten Spaces Smartly
Best Track Lighting for Small Kitchen 2026 Brighten Every Corner

Best Track Lighting For Painting Studio 2026 Top Picks





