
How to Disassemble a Table Fan Without the Hassle
How to disassemble a table fan sounds simple until the front grill refuses to budge, hidden screws start playing hide-and-seek, or dusty blades leave your hands looking like you just cleaned out an attic. Plenty of people crack plastic clips or bend fan guards because they rush the process. A careful approach saves both time and frustration, especially with older fans that have brittle parts or rusted fasteners.
Dust buildup causes more trouble than most people expect. Thick grime around the motor housing can weaken airflow, create rattling noises, and even push the fan motor harder than necessary. That annoying humming sound? Yeah, sometimes it's nothing more than packed dust around moving components. Proper cleaning after disassembly helps restore smoother airflow and quieter operation without jumping straight to expensive replacements.
Small details matter more than brute force. Some table fans hide screws beneath stickers, rubber caps, or decorative covers that look permanent at first glance. Tugging too hard often snaps plastic tabs that were never designed for aggressive pulling. A slow, methodical routine keeps the housing intact and prevents the kind of damage that turns a quick cleanup into a repair headache.
Different fan styles also bring different quirks to the table. Metal table fans usually feel sturdier but may have rusted screws or tight blade locks that need patience. Plastic models tend to come apart faster, though their clips and thin frames can crack easily under pressure. Understanding where resistance is normal versus where something is stuck makes the whole process far less stressful.
Messy wiring creates another common problem. People often disconnect internal wires without taking a quick phone photo first, then end up scratching their heads during reassembly. A few seconds of preparation prevents that classic “Where does this go again?” moment later. Keeping screws separated in small containers also helps avoid the dreaded leftover parts situation after the fan goes back together.
Noise issues push many people into disassembling a fan for the first time. Clicking sounds, wobbling blades, or uneven spinning usually point toward loose components or dirt buildup around the shaft. Cleaning and inspecting internal parts can often improve performance more than expected. Routine maintenance also helps extend the lifespan of table fans that still run well but struggle with airflow.
Safety deserves attention too, especially with older fans that may have worn insulation or damaged cords. Unplugging the unit sounds obvious, yet plenty of rushed repairs start with “I forgot.” Capacitors inside certain fan models can also hold residual electricity briefly after unplugging. Taking a cautious approach keeps the job practical instead of risky.
Then there’s the satisfaction factor. Honestly, few things feel better than turning on a freshly cleaned fan and hearing smooth, steady airflow instead of rattles and grinding noise. A properly disassembled and cleaned fan often feels almost new again. How to disassemble a table fan becomes far less intimidating once the hidden clips, screws, and internal layout finally make sense.
How To Disassemble A Table Fan Safely
A fan that rattles, smells dusty, or barely pushes air can make a hot room feel even more annoying. The tricky bit is that how to disassemble a table fan looks obvious from the outside, yet one hidden screw or stubborn clip can turn a simple cleanup into a cracked housing. Slow hands, the right order, and a little patience help protect plastic guards, blade caps, and motor wiring from damage. The goal isn’t to tear the fan apart fast; it’s to open it cleanly so it can go back together without mystery parts left on the table.
Table Fan Teardown Basics
Unplug the fan first, even if the switch is already off. That sounds like common sense, but rushed cleaning jobs often start with the cord still nearby and the blades only a finger tap away. Put the fan on a steady table with a towel underneath so loose screws don’t bounce onto the floor. A bright work area also helps you spot hidden tabs, dust-packed seams, and small screw covers before you start pulling.
A basic screwdriver, a small bowl, a soft brush, and a phone camera handle most of the job. Take one quick photo before each major step, especially around the motor housing and control switch area. Those pictures save a lot of head-scratching later because fan wiring can look oddly similar once the cover is off. Keep screws grouped by location instead of tossing them all into one pile.
Most table fans come apart from the front first. The grill usually releases through clips, screws, or a locking ring around the edge. If the guard flexes but won’t open, stop and inspect the rim instead of forcing it. Brittle plastic can snap without much warning, especially on older fans that have sat near sunny windows or humid corners.
The front blade cap often turns opposite the direction people expect. Many fan blade caps use reverse threading, so turning clockwise may loosen instead of tighten. That little quirk catches people off guard and leads to scraped knuckles or cracked caps. A gentle grip and slow pressure protect the blade hub better than a hard twist.
Safety Checks Before Opening
Electrical safety deserves the first real pause. After unplugging the fan, let it sit for a few minutes before opening the motor area. Some models have internal components that may hold a tiny residual charge for a short time. The risk is usually low, but careful habits make the work cleaner and calmer.
Check the cord before touching the screws. A cracked plug, stiff cable, or exposed copper is a warning sign that the fan needs more than a dust cleanup. Don’t keep using a fan with damaged insulation, even if the motor still spins. Heat, vibration, and old wiring are a lousy mix on a tabletop appliance.
Look at the fan’s base too. Some fans hide screws under rubber feet, brand stickers, or thin plastic covers. Prying blindly can scar the base, so use a fingernail or a plastic card before reaching for metal tools. That small bit of restraint helps avoid ugly gouges and broken snap-fit covers.
Dust masks aren’t a bad idea if the fan has been sitting in a garage, kitchen, or workshop. Old dust mixed with grease can puff out once the grill comes loose, and nobody needs that cloud in their face. A dry brush breaks up loose buildup before damp cleaning starts. Keep water away from the motor vents, switch panel, and wiring channels.
Removing The Grill And Blade
The front grill sets the tone for the whole job. Find the clips around the rim and release them one at a time instead of bending the guard wide open. Metal guards usually tolerate more pressure, but plastic ones don’t forgive much. Even pressure keeps the ring from warping and helps the rear guard line up later.
Once the front guard is off, hold the blade steady with one hand and loosen the center cap with the other. Don’t grab the thin blade tips because they can bend or crack. Hold near the center hub where the plastic is thicker and less likely to flex. If the cap sticks, wrap it with a dry cloth for better grip instead of using pliers right away.
After the cap comes off, slide the fan blade forward slowly. Hair, lint, or greasy dust may cling to the shaft and make the blade feel stuck. Rocking it gently from the hub usually works better than yanking. A stuck blade often needs cleaning around the shaft, not force.
The rear guard usually comes next, and it may be held by a plastic nut or several screws. Note the order of washers, spacers, and collars as they come off. Those little pieces affect blade clearance, and missing one can cause rubbing after reassembly. For a related home airflow upgrade, compare ceiling fan with light and remote choices if a small table fan keeps falling short in a larger room.
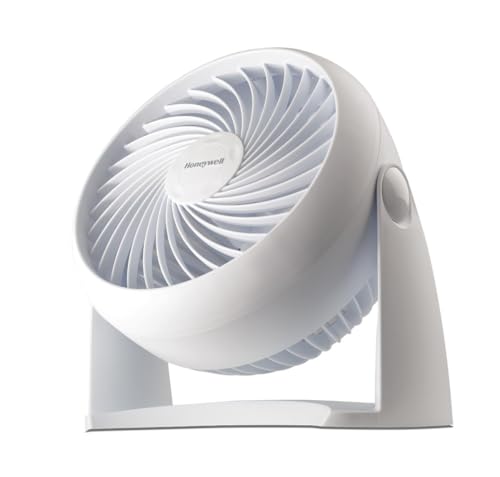
Opening The Motor Housing
The motor housing is where patience really pays off. Screws can sit deep inside narrow channels, and some are covered by dust that makes them almost invisible. Use the right screwdriver size so the head doesn’t strip. A stripped screw inside tight plastic housing turns a simple repair into a headache fast.
Separate the housing halves with gentle pressure along the seam. If one side lifts and the other side refuses, another screw or tab is probably still holding it. Don’t wedge a screwdriver hard into the seam unless you’re okay with chew marks. A plastic card or trim tool is kinder to older fan shells.
Inside the housing, wiring should stay connected unless there’s a clear reason to remove it. Take photos before touching connectors, switch wires, or capacitor leads. Color coding helps, but dust and age can make wires look less obvious than expected. Clear reference photos are cheap insurance during reassembly.
The oscillation knob and gear area may lift out with the housing cover depending on the fan design. Move slowly so springs, pins, or small plastic levers don’t pop loose. If the fan stopped sweeping side to side, this area may show cracked gears or dried grease. Light cleaning helps, but broken oscillation parts usually need replacement rather than extra pressure.
Cleaning Parts Without Damage
Cleaning should match the part, not the mess. The front grill, rear grill, and blade can usually handle mild soapy water after they’re removed from the motor. Dry them fully before they go anywhere near the fan body again. Moisture near wiring is the kind of shortcut that causes trouble later.
The motor area needs a lighter touch. Use a soft brush, dry cloth, or gentle compressed air to clear loose dust from vents and edges. Avoid blasting air too close to the motor because it can push debris deeper inside. A calm, angled sweep removes buildup without disturbing small electrical parts.
Grease around the shaft should be wiped carefully with a dry or barely damp cloth. Don’t flood the area with oil, cleaner, or water. Too much lubricant attracts dust and can create sticky residue near the blade hub. The sweet spot is smooth movement, not a shiny wet mess.
Separate household fixes often compete for attention, especially during seasonal maintenance. To keep outdoor fixtures from failing during cold snaps, compare outdoor light bulb for cold weather options while the fan parts dry nearby. Different job, same practical idea: use parts that fit the environment instead of fighting the same problem over and over.
Common Mistakes That Break Fans
The biggest mistake is forcing a part that still has a hidden fastener. A fan housing should not need wrestling moves to open. Resistance usually means a clip, screw, or locking ring is still engaged. Stop, inspect, then move beats cracking the shell and regretting it five seconds later.
Another common slip is mixing screw lengths. A long screw in a shallow hole can poke through plastic or press against internal wiring. A short screw in a deep hole may leave the housing loose and noisy. Keeping screws in labeled piles protects the fan frame and makes reassembly less irritating.
People also bend blade edges while trying to remove stuck dust. Even a slight bend can create wobble, noise, and uneven airflow. Clean the blade flat on a towel and support it near the hub. Balanced blades matter more than they look like they should.
One unrelated but useful maintenance note fits here because home routines tend to stack up. For skin-focused recovery tools outside the repair bench, explore red light therapy for cellulite options as a separate wellness purchase, not as anything connected to fan repair. Keeping those decisions separate prevents the usual junk-drawer mindset where every product gets treated like it solves every problem.
How To Reassemble A Table Fan Correctly
A table fan that suddenly rattles after cleaning can feel downright irritating, especially after spending time carefully taking everything apart. Tiny mistakes during reassembly often cause blade wobble, weak airflow, or annoying clicking noises that weren’t there before. A smooth rebuild matters just as much as learning how to disassemble a table fan because even one misplaced washer or loose screw can throw the whole thing off balance. Careful alignment, steady tightening, and a little patience usually bring the fan back to life without extra stress.
Putting The Blade Back In Place
The fan blade should slide onto the shaft smoothly without forcing it. If it sticks halfway, dust or leftover grime may still be packed near the shaft groove. Wipe the area again before pushing harder because cracked blade hubs are surprisingly common after rushed reassembly. Gentle pressure protects the blade center and keeps the rotation balanced.
Check the blade direction before tightening the cap. Some fans use curved blades designed to pull air forward in a specific orientation, and flipping them backward cuts airflow badly. Hold the blade at eye level and compare its angle with the front guard opening. A properly mounted blade creates steady airflow instead of weak, scattered air movement.
The center cap should tighten firmly without overdoing it. Too loose, and the blade may wobble during higher speeds. Too tight, and plastic threads can wear down or jam later during the next cleaning session. A snug fit usually works best for protecting both threaded caps and blade stability.
People often ignore tiny vibrations during the first test run. Don’t brush them off. Even small shakes can worsen over time and loosen screws inside the motor housing. Before finishing the fan setup, compare airflow ideas from 44 outdoor hugger ceiling fan with remote models if room circulation still feels uneven after restoring the table fan.
Aligning The Front And Rear Guards
The rear guard sits flatter than many people expect. A crooked rear grill changes blade spacing and may cause the blade tips to scrape against the housing during operation. Watch the edges carefully while tightening the mounting nut or screws. Balanced spacing around the blade matters more than cosmetic perfection.
The front grill usually snaps or screws into place one section at a time. Start at the top and work evenly around the rim instead of forcing one side completely shut first. Plastic clips flex better with gradual pressure. That approach lowers the risk of cracked tabs and warped guard rings.
Listen closely while spinning the blade by hand before plugging the fan in. A clean spin without rubbing means the guards are aligned correctly. Grinding sounds, uneven movement, or sudden resistance point toward poor alignment or a missing spacer. Quiet movement before powering the fan is a strong sign the assembly is sitting correctly.
Dust trapped between the grill rings can also create strange vibration noises later. A quick cloth wipe around the edges prevents that irritating buzzing sound people often mistake for motor damage. Tiny cleanup steps usually make the finished fan feel far more solid. Consistent airflow and smoother sound often come down to details this small.
Fixing Oscillation Problems After Assembly
The oscillation system tends to cause confusion because several moving parts work together in a tight space. If the fan head stops turning side to side after reassembly, the gear arm or oscillation pin may not be seated correctly. Open the rear housing again slowly instead of forcing the knob. Misaligned gears wear down quickly if the motor keeps pushing against them.
Dry gears create another common problem. Older fans sometimes develop stiff oscillation because the factory grease has dried out after years of heat and dust. A tiny amount of light lubricant on the moving gear surfaces helps restore smoother motion. Too much grease attracts dirt and creates sticky buildup later.
Some oscillation knobs need to sit at a certain height before locking into place. Pressing too hard while tightening the rear cover can jam the mechanism and prevent movement entirely. Test the knob gently before closing the housing completely. Smooth engagement feels easier to fix early than after every screw is tightened again.
People dealing with muscle tension from repetitive repair work sometimes set up home recovery spaces nearby. For a separate comfort-focused setup, explore red light therapy panels for home options that fit small indoor spaces without cluttering a workbench area. Keeping repair zones comfortable makes longer maintenance sessions easier to handle.

Testing The Fan Before Daily Use
The first full-speed test tells you almost everything about the assembly quality. Set the fan on a flat surface and start at the lowest speed before moving higher. Watch the base closely because wobbling feet or shaky airflow usually point to alignment issues. Stable operation matters more than raw fan speed.
Listen for changes as the motor warms up. Some fans sound fine for thirty seconds, then start clicking once vibration builds. Loose screws around the motor shell or rear guard often create that delayed noise. Tightening each screw evenly usually fixes the problem faster than tearing the whole fan apart again.
Pay attention to airflow consistency across different speeds. Weak airflow on high speed sometimes means the blade isn’t seated fully on the shaft. A slipping blade may also create uneven spinning that strains the motor over time. Proper blade positioning helps protect long-term motor performance.
Oscillation should move steadily without jerking or pausing. A slow, smooth sweep means the gears and linkage are lined up correctly. Sudden sticking usually points toward gear resistance or overly tight housing screws near the oscillation assembly. Tiny adjustments often solve these issues without another full teardown.
Reducing Dust Buildup After Cleaning
Freshly cleaned fans attract dust faster than people expect, especially near kitchens, windows, or pet areas. A light wipe every week prevents thick buildup from forming around the grill and blade edges again. Waiting too long makes the next cleaning session harder than it needs to be. Routine upkeep saves effort later.
Fan placement changes dust levels more than many realize. Putting a table fan near curtains, carpet fibers, or open windows usually increases debris around the motor vents. Elevating the fan slightly off dusty floors can help reduce intake buildup. Cleaner airflow helps maintain steady motor performance over time.
Humid rooms create sticky dust layers that cling to blade surfaces and guard wires. Bathroom fans or fans used near cooking areas often develop greasy buildup faster than bedroom fans. Mild soap and a soft cloth handle most surface grime without damaging plastic finishes. Avoid harsh cleaners that leave residue behind.
Storage habits matter too. Fans shoved into closets without covers tend to collect dust inside the motor vents during off-seasons. A simple cloth cover or clean storage bin reduces cleanup work the next time warm weather rolls around. Protected storage keeps the internal parts cleaner and lowers strain during startup.
Signs The Fan Needs More Than Cleaning
Some fans keep acting up no matter how carefully they’re cleaned and reassembled. A burning smell, visible sparks, or sudden power loss usually points toward deeper electrical trouble instead of surface dirt. Continuing to run the fan in that condition can worsen the damage. Electrical warning signs deserve attention immediately.
Motor humming without blade movement often means the capacitor or motor bearings are failing. You might free the blade temporarily by hand, but the issue usually returns. Persistent overheating after cleaning also suggests internal wear rather than airflow blockage. Old motors sometimes reach a point where repair costs outweigh replacement.
Cracked blade hubs create another long-term issue. Even if glued temporarily, damaged hubs can wobble at higher speeds and place uneven pressure on the shaft. That vibration gradually affects bearings, guards, and mounting hardware. Replacing damaged blades protects the motor assembly from unnecessary stress.
Loose switch controls or flickering speed settings may trace back to worn internal contacts. Dust cleaning won’t fix electrical wear inside aging switches. A qualified repair may help for sentimental or expensive fans, but bargain models often cost less to replace entirely. Reliable airflow sometimes means knowing when repair efforts have reached their limit.


Best Small Flush Mount Ceiling Fans 2026 Ultimate Picks

Best Smart Ceiling Fan India 2026 For Effortless Comfort

Best Smart Ceiling Fans with Lights for 2026: Top Picks

Best Smart Home Non Ceiling Fans 2026 For Ultimate Comfort

Best Outdoor Misting Ceiling Fan 2026 For Ultimate Comfort

Best Ceiling Fans With Lights For Vaulted Ceilings 2026 Top Picks

Best Outdoor Ceiling Fans For Porch 2026 With Style And Breeze

Best WiFi Enabled Ceiling Fan 2026 For Effortless Comfort





