
How To Fix A Buzzing Ceiling Fan Without The Headache
How To Fix A Buzzing Ceiling Fan starts with paying attention to the little things most people overlook. That low humming noise may seem harmless at first, but after a few nights of broken sleep or interrupted movie time, it can drive anyone up the wall. Loose screws, shaky blades, worn capacitors, or poor electrical connections often sit quietly behind the problem. The tricky part is that the sound may come and go, making the fan feel impossible to figure out.
Ceiling fans collect dust faster than many homeowners expect, and yep, that buildup can throw off balance over time. A slight wobble creates vibration, and vibration usually turns into that irritating buzz echoing across the room. Tightening blade brackets and cleaning hidden grime often helps more than replacing the entire fixture. Small maintenance habits make a surprisingly big difference, especially in older homes where fans run almost nonstop during warm months.
Electrical issues deserve extra attention because buzzing sometimes signals something deeper than loose hardware. Faulty dimmer switches, aging motor components, or overloaded circuits may create a constant humming sound even after cleaning. That’s where patience matters. Rushing into random fixes can waste money and create more frustration than the noise itself.
Some fans buzz only at certain speeds, which usually points toward capacitor trouble or motor imbalance. Others grow louder after installation because the mounting bracket wasn't secured tightly enough against the ceiling box. A fan that sounds fine during the day but becomes unbearable at night often reveals how sensitive quiet spaces can be. Honestly, once you notice the buzzing, it’s hard to ignore it.
Proper airflow, stable mounting, and smooth blade rotation all work together to reduce strain on the motor. Ignoring one weak point can slowly wear down the entire unit. Many people assume replacing the fan is the only solution, but practical troubleshooting usually solves the issue without draining the wallet. That’s good news for anyone tired of hearing that constant drone above their head.
Lighting kits can also contribute to vibration noise. Loose glass shades, poorly fitted bulbs, or rattling pull chains often mimic motor buzzing and confuse the entire diagnosis process. A quick inspection around the light fixture sometimes reveals the culprit within minutes. Funny enough, the actual fan motor isn't always the bad guy.
How To Fix A Buzzing Ceiling Fan also involves understanding the room itself. High humidity, uneven ceilings, or weak electrical boxes can affect how quietly a fan operates over time. Some fixes take five minutes, while others need a bit more elbow grease and careful inspection. Still, tackling the issue early helps prevent bigger repair costs later on.
How To Fix A Buzzing Ceiling Fan Without Guesswork
A quiet room can feel ruined by one stubborn hum above your head. The sound may be soft at first, then suddenly it’s the only thing your ears care about. That’s why how to fix a buzzing ceiling fan starts with a calm, step-by-step check instead of yanking parts apart and hoping for the best. A buzzing fan usually points to loose hardware, electrical mismatch, motor strain, or vibration that has been building for a while.
Start With The Sound Pattern
The buzz itself gives you useful clues, so don’t skip that first listen. A steady electrical hum often feels different from a rattly vibration near the blades or light kit. Turn the fan on at low, medium, and high speed, then listen for where the sound gets worse. This simple check helps you avoid chasing the wrong fix.
A buzz that appears only on one speed often points toward a speed control issue or a tired capacitor. A buzz that grows louder as the blades spin faster usually suggests loose screws, blade imbalance, or a shaky mounting point. If the noise stays even after the blades stop moving, the problem may sit in the switch, wiring, or motor housing. That’s the moment to slow down and treat the fan like an electrical device, not just a noisy appliance.
Safety comes first, even if the fix looks small. Switch off power at the wall and, for deeper inspection, cut power at the breaker before touching the canopy or wiring area. A ceiling fan combines moving parts and household electricity, which is not a place for guesswork. If you smell burning, see sparks, or feel heat near the switch, stop and call a licensed electrician.
Some buzzing sounds come from nearby parts, not the fan motor itself. A loose bulb, glass shade, pull chain, or decorative cover can mimic a motor problem and waste a whole afternoon. Before opening the canopy, tighten visible pieces by hand and listen again. Small fixes like that can make the room quiet without turning the repair into a weekend project.
Check Loose Screws And Blade Brackets
Loose hardware is the low-hanging fruit, and it causes more buzzing than people expect. Fan blades spin thousands of times during daily use, so tiny movements slowly loosen screws around the blade arms, motor housing, and light kit. Grab a screwdriver that fits snugly and tighten each screw without stripping it. Firm is enough because overtightening can crack blade material or damage brackets.
Blade brackets deserve extra attention because they carry constant motion. A slightly loose bracket can create a fast vibration that sounds like buzzing instead of rattling. Check every bracket where it connects to both the blade and the motor. If one screw keeps spinning without tightening, the hole may be worn, and the bracket may need replacement.
Dust makes this problem worse in a sneaky way. Heavy buildup along one blade edge changes weight distribution, so the fan starts shaking just enough to buzz through the ceiling box. Wipe the blade tops, edges, and brackets with a soft damp cloth, then dry everything before running the fan again. Clean blades aren’t just about looks, they help the motor run with less strain.
Light kits can be the noisy little troublemakers nobody suspects. Glass shades often loosen from vibration, and bulbs can buzz if they’re not seated properly. To reduce extra rattling during fan repair, pair lighting maintenance with the fan check and, if a bulb refuses to move, use this practical guide to remove stuck light bulb without forcing the fixture. A steady light kit helps separate true motor buzz from simple accessory noise.
Fix Buzzing From The Light Kit
A ceiling fan with lights has more places for vibration to hide. The glass shade, bulb base, pull chain, and decorative cap can all buzz when the fan reaches a certain speed. Touch each part gently while the fan is off and feel for anything loose. If it shifts, clicks, or wiggles, tighten it before blaming the motor.
Bulb type also matters more than it should. Some LED bulbs buzz with certain dimmer switches, especially older wall controls designed for incandescent bulbs. The fan may sound guilty, but the real issue can be a dimmer compatibility problem. Swap in a fan-rated bulb or test the fan with the light off to see whether the buzz disappears.
Painted or aged lamp shades can sometimes rattle because the finish has chipped near the contact points. A thin rubber washer or properly fitted shade ring may reduce vibration without changing the whole fixture. For a separate lighting refresh, improve worn shades with spray paint for lamp shade after removing them safely from the fan. Keep paint away from electrical contacts, sockets, and heat-sensitive parts.
Pull chains create their own tiny clinking buzz, especially when they tap against glass or metal. Shorten the chain slightly or add a small chain weight that keeps it from swinging into the fixture. This fix sounds almost too simple, but small contact noises can feel huge in a quiet bedroom. A fan that runs silently at night often comes down to these overlooked details.
Inspect The Mounting And Ceiling Box
A fan can only run quietly if the ceiling support is solid. The mounting bracket should sit tight against a fan-rated electrical box, not a weak light fixture box. If the canopy buzzes or vibrates against the ceiling, loosen the canopy slightly, center it, then secure it without pressing it too hard into the surface. A cramped canopy can transfer motor vibration straight into drywall.
Older homes sometimes hide the real problem above the fan. A standard ceiling box may hold a light fixture just fine, but a spinning fan needs stronger support. If the fan wobbles, hums, or shifts at the base, check whether the box is labeled for ceiling fan use. A fan mounted to the wrong box creates a safety risk along with that irritating buzz.
Downrods can also create noise if the set screws are loose. Hold the rod gently and check for movement near the ball mount and motor collar. Tighten the set screws evenly so the fan hangs straight instead of leaning to one side. A secure downrod reduces vibration transfer, which helps the motor sound smoother.
Bathrooms and laundry rooms add humidity into the mix, and moisture can make fan noise worse over time. A ceiling fan is not the same as an exhaust fan, so don’t expect it to handle steam-heavy spaces on its own. For damp rooms that need better moisture control, upgrade airflow with a ceiling exhaust bath fan built for ventilation, lighting, and warmth. Proper room ventilation helps reduce humidity stress on fixtures and nearby electrical parts.
Balance The Blades Before Replacing Parts
Blade imbalance is a classic cause of buzzing because the fan shakes just enough to create vibration. Stand back and watch the fan from the side while it runs on medium speed. If the motor housing moves in a small circle, the blades likely need balancing. That movement can loosen hardware again even after you tighten everything.
A balancing kit is cheap and useful, but patience matters. Clip the temporary weight to one blade at a time, run the fan, and note whether the buzz gets better or worse. Once you find the quietest blade position, stick the permanent weight on top of the blade where it won’t show. Balanced blades reduce motor strain and make the whole fan feel steadier.
Warped blades need a different approach. Hold a measuring tape from the ceiling to the tip of each blade and compare the distance. If one blade sits noticeably higher or lower, the bracket may be bent or the blade may be damaged. Replacing one warped blade may solve the buzz better than adding more weights.
Fan age changes the repair math. A newer fan with buzzing usually deserves careful troubleshooting, while a very old fan with motor hum, wobble, and worn parts may not be worth endless patching. Still, don’t jump straight to replacement before checking screws, blade balance, and mounting stability. Those simple steps solve plenty of buzzing problems without turning a small annoyance into a bigger bill.
How To Stop Ceiling Fan Buzzing Noise At Home
That irritating ceiling fan hum tends to feel louder late at night, especially once the house settles down and everything else goes quiet. A small vibration above the bed can suddenly sound like an old refrigerator struggling through summer. After checking blades, mounting hardware, and light kits, the next step focuses on the deeper causes behind persistent buzzing, electrical humming, and motor fatigue. Some fixes stay simple, while others reveal wear that has been building for years without anyone noticing.
Replace Worn Capacitors Carefully
Capacitors help regulate fan speed and motor startup, so they take a beating over time. A worn capacitor often causes low-speed buzzing, delayed blade movement, or inconsistent speed changes. Fans may hum loudly while barely spinning, which feels frustrating because the motor sounds active but airflow stays weak. Older ceiling fans commonly develop this issue after years of heavy seasonal use.
The capacitor usually sits inside the switch housing beneath the fan. Shut off power completely before opening anything because capacitors store electrical charge even after the fan stops. Most replacement capacitors cost far less than a brand-new fan, though matching the exact voltage and microfarad rating matters. A mismatch can create worse motor strain instead of fixing the buzz.
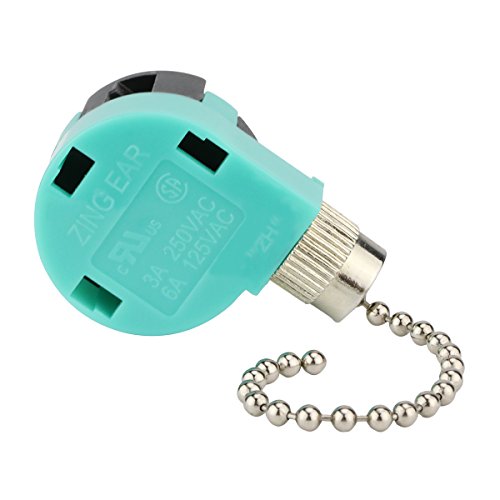
Some replacement kits bundle capacitors with speed switches since both parts tend to age together. If the pull chain feels stiff, skips speeds, or occasionally fails to respond, replacing both parts at once may save time later. This repair improves motor consistency and often restores smoother startup behavior. Fans that struggled for months sometimes sound noticeably calmer afterward.
Patience matters during reassembly because loose housing screws can create a fresh vibration problem. Route wires neatly so they don’t touch moving parts or press awkwardly against the metal housing. A rushed repair can replace one buzzing noise with another completely different one. Clean cable placement and secure fasteners help preserve quiet operation after the capacitor swap.
Test The Wall Switch And Controls
Wall controls create more ceiling fan problems than many people realize. Standard light dimmers often conflict with fan motors, producing a constant electrical hum that sounds worse at lower speeds. A fan should use a fan-rated control, not a dimmer intended for lamps or overhead lights. That mismatch creates heat buildup along with the annoying buzz.
Turn the fan on using a different control method if possible. Remote-operated fans may run quietly through the remote but buzz through the wall switch, which immediately narrows down the issue. If the fan quiets after bypassing the dimmer, replacing the switch becomes the obvious next move. Simple troubleshooting saves people from replacing perfectly good fans unnecessarily.
Wireless remotes can also create strange behavior when the receiver starts failing. Delayed responses, random speed shifts, or clicking sounds inside the canopy may point toward receiver trouble instead of motor damage. Upgrade convenience and smoother speed control with a best ceiling fan remote control kit designed specifically for ceiling fan motors. A compatible receiver helps reduce electrical interference and inconsistent operation.
Electrical buzzing should never be ignored if it grows stronger near the wall switch. Heat, faint burning smells, or buzzing behind the plate suggest wiring trouble that deserves immediate attention. Shut off power and contact an electrician if those warning signs appear. Protecting household wiring matters far more than trying to squeeze another season out of a damaged switch.
Reduce Motor Strain From Daily Use
Ceiling fans rarely get a break during hot weather, and nonstop operation slowly wears down internal bearings. A tired motor often develops a deeper humming sound that lingers regardless of blade balance or screw tightening. Heat buildup inside the motor housing increases friction, especially if dust blocks airflow around the vents. Regular cleaning helps the motor breathe instead of trapping heat inside.
Fans spinning at maximum speed all day long face more stress than most homeowners expect. Lowering the speed slightly during mild weather can reduce strain while still maintaining decent airflow. Small operating changes help preserve motor life and reduce long-term buzzing issues. Constant high-speed use may shave years off an older fan.
Lubrication matters for some older fan models with oil ports, though many newer fans use sealed bearings that don’t require maintenance. Check the manufacturer instructions before adding oil because the wrong lubricant can damage internal components. A properly lubricated bearing system often runs smoother and quieter. Grinding or scraping sounds, however, usually suggest wear beyond simple lubrication.
Dusty environments accelerate fan wear faster than people think. Homes near busy roads, construction zones, or dry outdoor conditions collect fine particles that sneak into the motor housing over time. Cleaning the vents and blade arms every few months helps reduce internal buildup and airflow restriction. Less debris inside the housing usually means less buzzing during operation.
Know When Replacement Makes More Sense
Some ceiling fans simply reach the end of their useful life. A fan with persistent motor hum, visible wobble, and repeated electrical issues may cost more to patch together than replace. Spending weekends tightening screws on a worn-out motor gets old fast. A newer fan often runs quieter while using less electricity at the same time.
Pay attention to warning signs that suggest internal motor deterioration. Strong overheating smells, random shutdowns, or buzzing that keeps worsening after repairs usually point toward deeper mechanical wear. A fan motor contains winding insulation that degrades slowly with heat and age. Once that insulation breaks down, the buzzing tends to return no matter how many small repairs happen around it.
Room size also affects how hard the fan works. A tiny fan struggling inside a large living room runs constantly at high speed just to move enough air. Matching blade span and motor size to the room improves airflow efficiency and reduces strain. Oversized fans can create different issues too, especially in smaller bedrooms with low ceilings.
Timing upgrades around seasonal maintenance often makes the transition easier. Spring and early summer usually reveal hidden noise problems after months of low winter use. Oddly enough, timing affects other home habits too, and people already juggling seasonal routines may appreciate lighter decision fatigue by reading about the best time use bumble spotlight during quieter downtime instead of late-night scrolling beside a noisy fan. Household comfort often improves through a series of small fixes instead of one giant project.
Build Habits That Keep Fans Quiet Longer
Quiet ceiling fans rarely stay quiet by accident. Small maintenance routines prevent vibration from creeping back little by little through the year. Tightening screws twice a year, wiping blade dust regularly, and checking for wobble early keeps problems manageable. A five-minute inspection beats chasing mysterious buzzing noises later.
Humidity changes affect ceiling materials more than many homeowners expect. Wood framing expands and contracts slightly across seasons, which can loosen mounting hardware over time. Fans installed near bathrooms or kitchens may experience faster hardware movement because moisture levels fluctuate constantly. Stable mounting support protects long-term fan performance and reduces vibration transfer.
Pay attention to changes in sound instead of waiting for the noise to become unbearable. A faint new buzz often signals the start of something small like a loose screw or shifting bracket. Catching those problems early usually means easier repairs and less stress on the motor. Ignoring minor vibration allows extra wear to build quietly in the background.
Comfort inside a home depends heavily on the little details people stop noticing once they work properly. A ceiling fan should fade into the room instead of demanding attention every evening with a constant hum. Stable blades, solid mounting, clean airflow, and healthy electrical parts all work together to create smoother operation, better sleep, and a calmer atmosphere throughout the house.


Best Small Flush Mount Ceiling Fans 2026 Ultimate Picks

Best Smart Ceiling Fan India 2026 For Effortless Comfort

Best Smart Ceiling Fans with Lights for 2026: Top Picks

Best Smart Home Non Ceiling Fans 2026 For Ultimate Comfort

Best Outdoor Misting Ceiling Fan 2026 For Ultimate Comfort

Best Ceiling Fans With Lights For Vaulted Ceilings 2026 Top Picks

Best Outdoor Ceiling Fans For Porch 2026 With Style And Breeze

Best WiFi Enabled Ceiling Fan 2026 For Effortless Comfort





