How to Safely Fix a Ceiling Fan Hanging by Wires

Most people assume a dangling ceiling fan just needs a few longer screws driven back into the ceiling. That shortcut is dangerous. The only safe first step is to shut off power at the circuit breaker and prop the motor on a tall ladder before the lines snap. Electrical wires cannot support that heavy weight, which creates an immediate risk of electrical sparks, fire, or a sudden crash.
The permanent fix depends on what failed and how badly the fall pulled the wiring. Sometimes the bracket screws simply stripped out, but often an unrated plastic ceiling electrical box cracked under the motor vibration. The repair also depends on whether the copper wires stretched or lost their plastic coating, and whether you can reach the ceiling joists from an attic or must work from below. Here is how to take down the fixture safely, check the wires, and install a solid support.
Emergency Steps to Secure the Dangling Fan Right Now
A ceiling fan dangling by its electrical cables is an active hazard. A typical fan weighs between 15 and 35 pounds. When that weight hangs from thin copper strands, those wires stretch, heat up, or tear completely free. Take these four actions immediately before doing anything else.
- Shut off the main electrical switch at your breaker box or service panel. Walk straight to your electrical panel and flip the breaker controlling that room to the off position. Flipping a wall switch on the wall is not enough because someone could bump it, or the switch may not disconnect every live conductor inside the ceiling electrical box. Shutting off power at the main breaker removes the risk of electrical shock and sparks if a wire pulls loose while you work.
- Clear people and pets out of the room. Keep everyone away from the area beneath the hanging fixture. If the copper strands snap under the heavy motor weight, the fan will drop straight to the floor, which can cause severe blunt impact injuries or shatter glass light shades across the room.
- Set up a sturdy stepladder directly beneath the motor. Place a tall stepladder directly under the fan so the top step or ladder shelf sits just below the hanging motor. Climb up carefully and take the weight of the motor in your hands, resting the base of the motor housing securely on the ladder platform or top step.
- Prop or support the motor to relieve wire tension. Rest the motor housing on the ladder shelf, or prop it up with sturdy cardboard boxes placed on top of the ladder. Relieving that downward pull stops the copper wires from stretching any further and prevents the ceiling electrical box from ripping away more of your drywall.
Why Ceiling Fans Pull Loose From the Ceiling
Ceiling fans do not fall without warning. They drop because an installer mounted the unit improperly or because the mounting hardware deteriorated over time. Understanding what gave way helps you choose the right fix so this never happens again.
The most common cause is mounting a fan to a standard plastic light fixture box instead of a fan-rated ceiling outlet box. Builders often put cheap plastic boxes in ceilings meant only for lightweight light fixtures weighing under six pounds. These plastic boxes have tiny screw tabs that become brittle. The constant rotational movement and vibration of a ceiling fan snaps those plastic tabs, dropping the entire bracket.
Another common mistake is using drywall screws to hold the ceiling bracket. Drywall screws are brittle and snap easily under sideways vibration. Ceiling fans require heavy steel machine screws threaded into a metal box or thick lag screws driven directly into solid wood ceiling framing.
Wobble and motor vibration also work loose mounting hardware over several years. If the bracket screws back out slowly, the decorative ceiling cover cup (the metal canopy touching the ceiling) hides the problem until the last screw thread slips free. If you are dealing with an older fixture that finally worked its way loose, our guide on how to safely remove an old ceiling fan covers how traditional canopy brackets come apart.
How to Safely Disconnect and Lower the Dangling Fan
Once the motor weight rests safely on your ladder, you must disconnect the wiring and get the fixture down to the floor before you can rebuild the ceiling support.
- Confirm the power is dead with a voltage sensor. Hold a non-contact electrical voltage sensor against the insulated wires coming out of the ceiling. The sensor should remain silent. If it chirps or lights up, your breaker is still feeding power to that circuit, so go back to the panel and switch off the correct breaker before touching any bare metal.
- Slide down the decorative ceiling cover cup. Loosen the set screws holding the decorative canopy against the ceiling. Slide the canopy cup down the hanging extension rod toward the motor. This exposes the electrical connections and the hanging bracket.
- Untwist the twist-on plastic wire caps. While keeping one hand or a helper supporting the motor body, unscrew the plastic wire caps by turning them counterclockwise. Disconnect the black wire (power), the white wire (neutral), and any blue wire (light kit supply).
- Disconnect the bare copper ground wire. Untwist the green or bare copper grounding wires that connect the fan bracket, the fan body, and the metal box. Separate all wires so the fan is completely detached from the house wiring.
- Lift the fan down to the floor. Lift the motor ball joint out of the metal ceiling bracket if it is still hanging, or lift the entire unit off the ladder. Place the motor gently on the floor on top of an old blanket to protect your flooring and the fan blades.
How to Install a Retrofit Fan Brace and Metal Ceiling Box From Below
You cannot screw a ceiling fan back into damaged plastic or loose drywall. You must install a proper fan brace, which is an expandable metal support bar between ceiling joists, paired with a fan-rated ceiling outlet box. You can install this system completely from below without going up into an attic.
-
Remove the old ceiling electrical box from the ceiling hole.
Pry or unscrew the old plastic or lightweight metal box from the joist or ceiling opening, pulling the electrical supply cable carefully out through the back of the box.
Reason: An unrated or damaged box cannot withstand the continuous rotational torque of a moving motor, and reusing it guarantees another failure.
-
Push the expandable metal support bar up into the ceiling hole.
Slide the metal brace rod horizontally through the four-inch round drywall opening until it sits flat across the top of the drywall, centered directly over the hole.
Reason: The expandable design allows a heavy steel support beam to pass through a small hole so you do not have to cut open large sections of finished ceiling.
-
Rotate the center shaft to lock the brace teeth into the wood joists.
Turn the center metal shaft with your hand or an open-end wrench until the brace extends outward and the sharp metal teeth at both ends dig firmly into the wooden framing joists on either side.
Reason: The mechanical teeth embed deep into solid structural wood joists, anchoring the entire fixture so it cannot twist, slip, or drop under motor vibration.
-
Attach the U-bolt bracket to the center of the metal bar.
Slip the metal mounting saddle over the center of the expanded support bar directly above the hole and tighten the included locknuts until the bracket sits rigid and centered.
Reason: The saddle transfers the full downward pull of the ceiling fan directly into the steel bar rather than letting any weight touch the drywall.
-
Route the house wiring into the new fan-rated metal ceiling box.
Knock out one round plug on the back of the new metal box, install a protective wire clamp, and thread your house electrical cable into the box so at least six inches of wire extends into the room.
Reason: The clamp locks the cable jacket firmly in place and keeps the sharp metal edges of the box from wearing through wire insulation.
-
Bolt the metal box directly to the brace saddle.
Push the metal ceiling box up over the saddle bolts and secure it with the provided nuts, making sure the face of the metal box sits flush with or slightly recessed into the ceiling drywall.
Reason: A flush metal box provides a flat, unyielding base that keeps the fan mounting bracket from rocking when the fan runs at high speed.
-
Mount the fan bracket with heavy machine screws.
Fasten your ceiling fan mounting bracket to the threaded screw ears of the new metal box using heavy number 10-24 or 10-32 machine screws.
Reason: Heavy machine screws into metal threads will never strip out under normal fan vibration, unlike wood or drywall screws.
Checklist for Electrical Wire Damage
When a heavy fan falls and yanks on electrical wires, the copper inside the plastic coating can stretch, pinch, or break. Before you hook the fan back up, run through this inspection checklist to ensure your house wiring is safe to reuse.
- Check for stretched copper (necking): Look closely at the bare copper ends of the black and white wires. If the copper appears pinched, thinned out, or lighter in color in any spot, the metal has been stretched past its structural limit. Stretched copper has high electrical resistance and generates dangerous heat. Cut off the stretched section back to thick, uniform wire.
- Inspect the colored wire insulation: Run your fingers along the plastic insulation of every wire coming out of the ceiling. If you feel flat spots, splits, or see bare copper peeking through scrape marks where the wire scraped against a metal edge, you must wrap it with heavy electrical tape or strip the outer cable sheath back to expose undamaged wire.
- Verify remaining wire length: You need at least six inches of undamaged wire protruding from the front of the ceiling electrical box to make clean, secure connections with twist-on plastic wire caps. If you have less than three inches of wire left, you will struggle to twist the caps securely.
- Look for signs of heat or black soot: Check the old wire caps and copper ends for black soot marks, melting plastic, or a burnt smell. These signs indicate that loose wires were arcing inside the box before the fan fell.
When to Call a Licensed Electrician
Fixing a loose ceiling mount is a great home repair project if you have basic mechanical comfort, but certain electrical situations demand a licensed electrician. Stop and call a professional if you run into any of the following problems:
First, call an electrician if the house supply wires snapped off flush with the ceiling drywall or deep inside the cable sheath. Splicing an extension onto a wire that sits outside an accessible ceiling electrical box violates electrical safety codes and creates a hidden fire risk inside your ceiling cavity.
Second, seek professional help if your home has vintage wiring, such as ungrounded cloth-covered wiring or older aluminum branch wiring. Aluminum wiring requires special connectors and handling to prevent oxidation fires, and brittle cloth insulation will crumble into dust as soon as you bend it.
Third, bring in a carpenter or electrician if your ceiling joists are cracked, rotted from an old roof leak, or spaced wider than 24 inches apart. If the structural wood cannot provide a rock-solid bite for the support bar teeth, the ceiling framing must be reinforced from above.
What Support Hardware You Need to Anchor a Ceiling Fan Correctly
To remount your fan permanently, you need structural mounting hardware designed specifically for moving dynamic loads, not standard light fixtures. Here is what to look for when selecting replacement support hardware:
Always choose a heavy-duty retrofit fan brace kit. These kits include an expandable steel bar that twists between your ceiling joists and a matching heavy-gauge metal ceiling electrical box. Look for a kit labeled for ceiling fan support, with a marked rating of at least 35 pounds for moving fans and up to 70 pounds for stationary fixtures. The metal box should feature threaded screw holes that accept heavy machine screws.
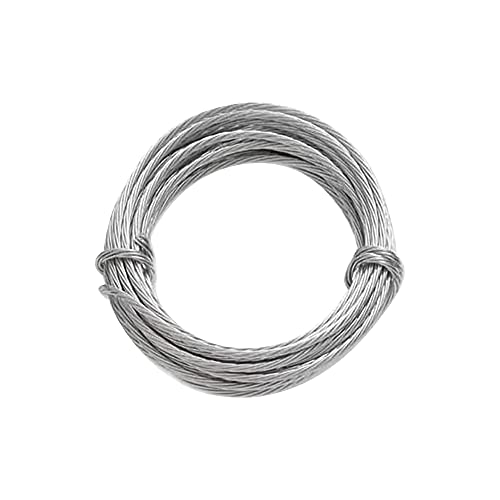
Never attempt to fix a dangling ceiling fan by stringing up hanging wires, picture hanging cords, nylon line, swag chains, or plastic drywall anchors. A ceiling fan produces strong rotational torque and dynamic wobble. Lightweight hanging wires and picture cords will quickly snap or pull out of the ceiling under that rocking motion, dropping the heavy motor right back down.

- LFR Score9.4
LFR Score is a ranking system developed by lightfansreviews.com. LFR Score has no relationship or impact from any manufacturers or sales agent websites. Learn more
- BrandSealproof

- LFR Score9.4
LFR Score is a ranking system developed by lightfansreviews.com. LFR Score has no relationship or impact from any manufacturers or sales agent websites. Learn more
- BrandCanomo
- LFR Score9.4
LFR Score is a ranking system developed by lightfansreviews.com. LFR Score has no relationship or impact from any manufacturers or sales agent websites. Learn more
- BrandOOK

- LFR Score9.2
LFR Score is a ranking system developed by lightfansreviews.com. LFR Score has no relationship or impact from any manufacturers or sales agent websites. Learn more
- BrandWestinghouse

- LFR Score8.8
LFR Score is a ranking system developed by lightfansreviews.com. LFR Score has no relationship or impact from any manufacturers or sales agent websites. Learn more
- BrandHARBOR BREEZE

- LFR Score8.8
LFR Score is a ranking system developed by lightfansreviews.com. LFR Score has no relationship or impact from any manufacturers or sales agent websites. Learn more
- BrandCerpourt
- LFR Score8.8
LFR Score is a ranking system developed by lightfansreviews.com. LFR Score has no relationship or impact from any manufacturers or sales agent websites. Learn more
- BrandOOK

- LFR Score8.8
LFR Score is a ranking system developed by lightfansreviews.com. LFR Score has no relationship or impact from any manufacturers or sales agent websites. Learn more
- BrandTeemyaa

- LFR Score8.4
LFR Score is a ranking system developed by lightfansreviews.com. LFR Score has no relationship or impact from any manufacturers or sales agent websites. Learn more
- BrandZHIXING

- LFR Score8.2
LFR Score is a ranking system developed by lightfansreviews.com. LFR Score has no relationship or impact from any manufacturers or sales agent websites. Learn more
- BrandGeneric
Last update on 2026-10-02 / Affiliate links / Images, Product Titles, and Product Highlights from Amazon Product Advertising API
FAQs
Can I screw the fan bracket back into the same holes in the ceiling box?
No, you should never screw the bracket back into the original holes that failed. The screw threads inside those holes are stripped, or the plastic tabs holding them have cracked under tension. Reusing damaged screw holes will cause the fan to pull loose and drop again within weeks.
Will my ceiling fan still work after dangling by its wires?
In most cases, the fan motor and internal windings survive a fall completely unharmed. As long as the motor housing did not crash into a wall or crush its hanging extension rod, the unit will run fine once reconnected. Inspect the hanging ball joint and the rod threads for bends before hanging it back up.
How do I know if my ceiling electrical box is fan-rated?
Look inside the back of the box for embossed lettering stamped into the metal or plastic. A fan-rated ceiling outlet box will explicitly say "Acceptable for Fan Support" along with a weight limit, usually 35 or 70 pounds. If the box has no markings, is made of thin blue or grey plastic, or uses small number 6 screws, it is not rated for a ceiling fan.
Can I use hanging wire or picture cord as a temporary safety strap?
No, you should not use picture hanging wire, string, or thin cables to secure a fan motor. Picture wire is designed for steady, dead weight on a motionless wall, not the vibrating, twisting force of a ceiling fan. Always use a rigid, fan-rated steel brace bar bolted directly into the ceiling framing joists.


Best Small Flush Mount Ceiling Fans 2026 Ultimate Picks

Best Smart Ceiling Fan India 2026 For Effortless Comfort

Best Smart Ceiling Fans with Lights for 2026: Top Picks

Best Smart Home Non Ceiling Fans 2026 For Ultimate Comfort

Best Outdoor Misting Ceiling Fan 2026 For Ultimate Comfort

Best Outdoor Ceiling Fans For Porch 2026 With Style And Breeze

Best Smart Bulb For Ceiling Fan 2026 That Brightens Life
Best Smart Ceiling Fan Control 2026 For Effortless Comfort