
How to Fix a Loose Ceiling Fan Mount Safely
How to fix a loose ceiling fan mount turns into a pressing issue the second that rattling sound starts echoing through the room. One tiny wobble can snowball into shaky blades, strange clicking noises, or worse, visible ceiling damage that makes people glance up every few minutes. Plenty of homeowners brush it off at first, hoping the movement will settle down on its own. It rarely does. A loose mounting bracket usually gets worse with vibration, especially during long summer runs or humid weather that affects ceiling materials.
Ceiling fans take more abuse than most people realize. Constant spinning, shifting weight, and years of vibration slowly loosen screws and mounting hardware little by little. That annoying sway often starts subtly, then suddenly feels impossible to ignore. Tightening random screws without understanding the mounting setup can actually make the problem trickier later. Stability, proper electrical support, and secure anchoring matter far more than rushing through a quick fix.
Most mounting issues trace back to a few common culprits. Loose junction boxes, worn mounting brackets, stripped screws, or weak ceiling support tend to sit right at the center of the headache. Older homes sometimes hide outdated electrical boxes that weren't designed to support a moving ceiling fan at all. That's where things get dicey. A regular light fixture box simply doesn't provide the same level of structural support needed for a spinning fan.
Noise also plays a huge role in why people finally tackle the repair. Clicking, humming, scraping, or low rattling sounds can make an otherwise relaxing room feel irritating fast. Nobody wants to fall asleep hearing a fan wobble overhead like it's hanging on by a thread. Proper mounting alignment often reduces both movement and unwanted sound almost immediately. Sometimes the difference feels night and day after a careful adjustment.
Safety can't be ignored either. A severely loose fan mount puts stress on wiring connections, ceiling drywall, and blade balance all at once. That combination creates a messy chain reaction if left untreated for too long. Tightening the mounting system correctly helps protect the ceiling structure while keeping the fan operating smoothly. Small maintenance steps now can prevent expensive repairs later.
Tools and materials usually stay pretty basic, thankfully. A sturdy ladder, screwdriver, voltage tester, adjustable wrench, and replacement mounting hardware handle most situations. Some setups may need a reinforced ceiling fan brace if the electrical box shifts inside the ceiling cavity. That extra support makes a huge difference in long-term durability. Secure installation always beats temporary patchwork fixes that barely last a few weeks.
How To Fix A Loose Ceiling Fan Mount Without Guesswork
A ceiling fan that wobbles above your head has a special talent for ruining a quiet room. The noise nags at you, the blades sway just enough to look unsafe, and every tiny click makes the ceiling feel suspicious. That’s where how to fix a loose ceiling fan mount becomes more than a handy repair topic, because fan stability, ceiling support, and electrical safety all meet in the same spot. A careful repair keeps the fan steady instead of turning a simple fixture into a weekend headache.
Loose Fan Mount Basics
A loose ceiling fan mount usually starts with movement at the bracket, the electrical box, or the support brace hidden above the ceiling. That small movement matters because a fan creates constant vibration every time it runs. Over time, loose screws, weak mounting points, or old hardware can let the fan shift more than it should. The fix begins by figuring out where the movement comes from instead of tightening every screw in sight and hoping for the best.
Many ceiling fans weigh between 15 and 50 pounds depending on size, motor build, and light kit, so the mount has to hold more than dead weight. Spinning blades add vibration, torque, and repeated stress. A standard ceiling light box often isn’t rated for that kind of movement, and that’s where trouble starts. Fan-rated support is the line between a steady fixture and a ceiling fan that keeps coming loose.
Start by watching the fan from a safe distance while it runs on low speed. Look for movement at the canopy near the ceiling, not just blade wobble. Blade imbalance can make a fan shake, but a true mounting issue usually shows up as movement where the downrod, canopy, or bracket meets the ceiling. That visual check helps separate mount problems from blade balance issues.
Power should be turned off at the breaker before touching anything near the canopy or wiring. A wall switch alone isn’t enough because someone could flip it back on while you’re working. Use a voltage tester before handling wires or metal parts near the electrical box. Safe inspection always comes before quick repair, even if the fix looks simple from the floor.
Safety Checks Before Tightening
The first real step is making the workspace stable. Use a sturdy ladder that lets you reach the fan without stretching your shoulders or leaning sideways. Awkward posture leads to dropped screws, stripped heads, and rushed decisions. Good ladder placement keeps both hands free, which makes the repair cleaner and safer.
Remove the canopy carefully so the mounting bracket and electrical box are visible. Some canopies use small side screws, while others twist into a locked position. Keep those screws in a cup or magnetic tray because they love rolling off into carpet. Once the canopy is down, bracket access gives you the first real clue about what’s loose.
Check the downrod connection if your fan uses one. The set screw, retaining pin, and cotter pin should all be secure, because a loose downrod can mimic a bad ceiling mount. A missing cotter pin is a red flag, not a minor detail. Downrod security matters because it carries the fan’s hanging weight and keeps the motor housing from shifting.
Look at the wiring without pulling hard on it. Loose wire nuts, pinched wires, or strained connections can happen when a fan shifts repeatedly. Any burnt smell, melted insulation, or scorched wire connector needs professional attention. Electrical damage is not a “tighten it and move on” situation.
Find The Real Source Of Movement
The mounting bracket should sit tight against the electrical box or ceiling support. Try gently moving the fan body by hand while watching the bracket, not the blades. If the bracket shifts, the problem is likely at the screws, box, or support brace. Bracket movement is one of the clearest signs that the mount itself needs work.
Loose screws are common, but stripped holes are just as common in older installations. A screw that spins without tightening means the threads no longer grip properly. Reusing that same weak point only buys a little time before the wobble returns. Stripped mounting holes need fresh hardware, a proper fan-rated box, or stronger support above the ceiling.
The electrical box should not flex, sag, or move inside the ceiling. If it does, the fan may be hanging from a box that was meant for a lightweight light fixture. That’s a big deal because the National Electrical Code requires boxes used for ceiling-suspended paddle fans to be listed for that use. Fan-rated boxes exist for a reason, and ignoring that detail can damage the ceiling or wiring.
Drywall cracks around the canopy can also tell a story. Small cracks may come from vibration, but wider gaps or sagging usually point to poor support above the ceiling. A fan should attach to framing, a rated brace, or a fan-rated box, not just drywall. Ceiling structure carries the load, while drywall only finishes the surface.
Tighten Hardware The Right Way
Use the correct screwdriver or driver bit for the mounting screws. A mismatched bit strips screw heads fast, and then a simple repair turns annoying. Tighten bracket screws evenly rather than cranking one side all the way down first. Even pressure helps the bracket sit flat and reduces crooked alignment.
If the mounting screws are loose but still grip well, tighten them until snug without overtightening. Crushing the box, bending the bracket, or forcing old screws can create new problems. Metal brackets need firm contact, not brute force. Controlled tightening beats muscle every time.
Replace damaged screws with matching hardware rated for the fan bracket. Random screws from a junk drawer may be too short, too soft, or the wrong thread type. That’s not a place to improvise, especially with a moving overhead fixture. Correct fasteners keep the fan mount dependable after the repair.
After tightening the bracket, check the canopy clearance before reinstalling it. A canopy rubbing against the ceiling can create a ticking sound that feels like a mechanical issue. Leave it properly seated, not jammed tight against uneven texture or paint buildup. Noise control often comes down to these small contact points.
A clean work area helps here too. If you’re already updating nearby ceiling fixtures, compare trim removal steps through remove recessed light cover before forcing delicate covers or clips. Small ceiling repairs tend to overlap, and careful handling prevents cosmetic damage around lights, fans, and ceiling paint.
Reinforce A Weak Ceiling Box
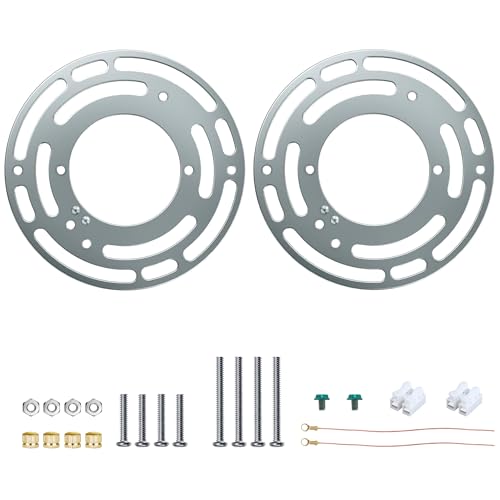
A loose electrical box is the repair that separates a quick tightening job from a real mounting fix. If the box moves inside the ceiling, tightening the fan bracket won’t solve the root problem. The fan needs a stable anchor point that can handle weight and vibration. Box reinforcement is the heart of a long-lasting repair.
Fan-rated retrofit braces are made for situations where attic access is limited. These braces expand between ceiling joists and create a stronger mounting point for the fan-rated box. They’re especially useful in finished rooms where cutting a large ceiling opening would be a pain. Retrofit support braces can turn a shaky setup into a much safer installation.
Attic access makes the job easier if the fan sits below an open space. You can inspect the joists, brace position, and box attachment from above. That view shows whether the original installer used proper framing support or took shortcuts. Visible framing removes a lot of guesswork.
Some older boxes are nailed to a joist from the side and loosen over time. Others are attached to thin bars that were never meant for fan movement. If the box isn’t marked as fan-rated, treat it with suspicion. Fan-rated labeling matters more than the box looking sturdy from below.
Replacing a weak box may require disconnecting and reconnecting wiring. Anyone uncomfortable identifying wires, grounding correctly, or making secure wire connections should call a licensed electrician. There’s no shame in that. Electrical confidence and structural confidence both matter with overhead fixtures.
Fix Wobble After The Mount Is Secure
A secure mount can still leave a fan with mild blade wobble. That doesn’t mean the repair failed. Blade imbalance, warped blades, uneven blade irons, or dust buildup can all make a fan shake even after the bracket is solid. Mount stability comes first, then blade balance gets its turn.
Clean the blades before judging the wobble. Dust collects unevenly, especially on textured or wooden blades, and that tiny weight difference can show up as movement at higher speeds. Use a damp cloth and support each blade gently while wiping. Balanced blade weight starts with a clean surface.
Check every blade screw where the blade attaches to the blade iron and where the blade iron attaches to the motor. Loose blade hardware creates a wobble that feels more dramatic than it really is. Tighten screws carefully without cracking older blade material. Blade hardware deserves the same attention as the ceiling mount.
A balancing kit can help if the fan still wobbles after cleaning and tightening. The clip-and-weight method lets you find the blade causing the shake and add small adhesive weights where needed. It takes patience, but it’s cheaper than replacing a fan that still has a good motor. Fine-tuned balance makes the whole repair feel finished.
Spot Problems That Need A Pro
Some loose mount problems are bigger than a weekend fix. A ceiling box that drops visibly, damaged wiring, cracked framing, or a fan that feels unstable after reinforcement deserves professional help. The cost of a service call is easier to swallow than repairing a damaged ceiling later. Serious structural movement should never be ignored.
Burn marks near wire connections mean the fan may have had overheating or arcing issues. That’s not normal wear, and it shouldn’t be covered back up behind the canopy. Electrical heat can come from loose connections, overloaded wiring, or improper installation. Burnt wiring is a stop sign, plain and simple.
Ceiling fans installed on sloped ceilings also need the right mounting hardware. A standard mount used at the wrong angle can put stress on the downrod and bracket. Sloped ceiling adapters exist to keep the hanging angle safe and stable. Correct mounting geometry helps prevent repeated loosening.
Large fans need extra attention because longer blades create more leverage. A small wobble at the motor can become a wider sweep at the blade tips. Rooms with heavy airflow use, vaulted ceilings, or oversized fans shouldn’t rely on questionable support. Fan size, mount strength, and ceiling height all affect the repair plan.
Room comfort doesn’t stop with the ceiling fan either. For focused seating areas where overhead airflow isn’t enough, compare placement ideas with a floor standing reading lamp so lighting and airflow don’t fight each other. A steady fan and well-placed task light make a room feel calmer without adding clutter.
Prevent The Mount From Loosening Again
Prevention starts with checking the fan once or twice a year. Listen for new rattles, watch the canopy, and feel for unusual vibration after turning off the breaker. A five-minute check can catch a loose screw before it becomes a full repair. Routine inspection saves time and keeps the fan safer.
Humidity can affect wood framing, ceiling texture, and blade material. In rooms with seasonal moisture swings, fans may need more frequent checks. Bathrooms, covered patios, and poorly ventilated bedrooms can all put extra stress on fixtures. Moisture exposure quietly changes how hardware behaves over time.
Use the fan speeds realistically. Running an old fan on high every night can expose weak mounting faster than occasional use. That doesn’t mean avoiding high speed completely, but it does mean paying attention if the fan gets louder or shakier at one setting. Speed-related wobble is often an early warning sign.
Keep blade sets matched and avoid swapping random blades between fans. Even blades that look similar may differ in weight or pitch. Mixed blades can create vibration that works the mount loose again. Matched blades protect the balance you just worked to restore.
Bedroom fans need extra care because noise feels louder at night. A loose canopy screw or slightly uneven bracket can become maddening in a quiet room. To balance style with quieter airflow, compare design ideas through a looking ceiling fan bedroom before replacing a worn unit. Quiet operation and secure mounting should work together, not compete.
How To Fix A Loose Ceiling Fan Mount That Keeps Wobbling
A fan can look repaired for a day, then start rocking again the next time the room gets warm and the speed goes up. That back-and-forth frustration usually means one small detail was missed, not that the whole fan is doomed. How to fix a loose ceiling fan mount depends on checking the hidden support, the bracket fit, and the way the fan behaves after every adjustment. A steady repair feels boring in the best way because nothing rattles, nothing shifts, and nobody keeps glancing at the ceiling.
Test The Fan After Each Repair
Run the fan on low speed first, then slowly move to medium and high. A mount that stays quiet on low may still show vibration once the motor spins faster. Watch the canopy, downrod, and motor housing instead of staring only at the blade tips. The real clue is whether movement starts at the ceiling or farther down on the fan body.
Turn the fan off and let it coast naturally. A wobble that gets worse while slowing down can point to blade imbalance rather than a loose ceiling box. A sharp clicking sound near the canopy may mean the cover is touching a screw head or rubbing against textured ceiling paint. Small contact points create big noise in quiet bedrooms.
Press gently near the canopy after switching off the breaker. The fan should not feel like it shifts inside the ceiling. If the bracket stays firm but the motor moves, check the downrod pin, set screw, and ball hanger. Mount firmness and hanger security need to work together.
Keep a simple pattern during testing: tighten, check, run, listen, then inspect again. Skipping that rhythm makes it easy to miss where the problem returns. A ceiling fan is a moving fixture, so repeat testing matters more than one quick shake by hand. That patient approach keeps the repair from turning into a guessing game.
Check Wiring Strain And Canopy Fit
Loose mounting often pulls gently on wiring over time. That strain may not look dramatic, but it can loosen wire connectors or press wires against sharp metal edges. After the breaker is off, inspect the wire nuts and make sure the connections sit tucked inside the box without tension. Secure wiring protects both the fan and the home’s electrical system.
The canopy should cover the bracket neatly without forcing wires upward. A packed canopy can push against the mount and create a slight tilt. That tilt may lead to scraping sounds, especially if the fan has a downrod. Clean wire placement helps the canopy sit flat and keeps the fan looking finished.
Paint buildup around the canopy can also cause weird noises. Older ceilings sometimes have thick layers of paint that create an uneven ring where the canopy rests. Scraping, ticking, or tiny vibration sounds may come from that edge rather than the bracket itself. Canopy clearance is a small detail, but it can calm down a noisy fan fast.
Nearby ceiling fixtures deserve the same gentle handling during repairs. To avoid cracking trim or bending spring clips, use a careful guide for remove recessed light cover before working around lights close to the fan. Ceiling projects get messy fast when one repair accidentally damages another fixture. Slow removal keeps the room from collecting extra problems.
Know When Replacement Makes More Sense
A loose mount can be repaired, but an old fan with worn parts may keep causing trouble. Rusted screws, cracked blade arms, warped blades, and a tired motor all add stress to the mounting point. At some point, tightening the bracket only hides the bigger issue. Repeated wobble is often the fan’s way of saying the whole setup needs a tougher look.
Replacement makes sense if the fan has been repaired several times and still shakes at normal speed. That doesn’t mean buying the biggest or flashiest model. A better fit usually means the right blade span, proper mounting hardware, and a motor size that suits the room. Correct sizing reduces vibration before it starts.
Old ceiling fans also need careful disposal because they include metal parts, wiring, blades, and sometimes light kits. Before tossing one into the trash pile, check practical steps for dispose ceiling fans so the old unit doesn’t become clutter in the garage. Responsible removal keeps the repair area clear and makes the replacement process smoother. Clean disposal is part of finishing the job properly.
Some fans are worth saving, especially if the motor runs quietly and the blade arms are straight. Others keep eating your time with rattles, stripped screws, and uneven rotation. A practical decision beats emotional loyalty to a fixture that never stays fixed. Repair value depends on safety, stability, and how often the fan needs attention.

Match The Repair To The Room
Bedrooms need quieter fixes than garages or utility rooms. A tiny canopy tick might not matter in a workshop, but it can feel loud at midnight. Tight mounting, balanced blades, and soft operation all matter more in sleeping spaces. Low-noise performance should guide every adjustment.
Living rooms often have taller ceilings and heavier fans. That extra height makes small wobbles more noticeable because the downrod gives the fan more room to swing. A longer downrod needs a secure hanger ball, tight set screws, and the right ceiling angle. Downrod stability becomes more important as ceiling height increases.
Kitchens and sunrooms bring heat, moisture, and dust into the picture. Grease or fine dust on blades can throw off balance faster than people expect. Clean the blades more often in those rooms, especially if the fan runs daily. Dust control helps protect the mount from vibration over time.
Lighting also changes how the room feels after the fan is fixed. A fan with a harsh light kit can make a repaired room feel less comfortable, especially near reading corners or plant shelves. For a softer setup away from the fan, compare a natural spectrum lamp that supports clearer task lighting without adding more ceiling weight. Balanced room lighting can reduce the need to overload one fixture with every job.
Avoid Mistakes That Bring Wobble Back
Overtightening is one of the sneaky mistakes. It feels productive, but it can bend brackets, crack old boxes, or strip screw holes. Snug and secure is the goal, not crushed and forced. Controlled pressure keeps hardware strong without damaging the mount.
Ignoring blade pitch can also bring wobble back. A slightly bent blade arm changes airflow and makes the fan pull unevenly. Lay a straightedge along matching blade points or measure from each blade tip to the ceiling. Even blade pitch keeps rotation smoother.
Mixing replacement parts from another fan causes headaches too. Screws, blade arms, canopies, and hanger balls may look close enough, but small differences can throw off alignment. Use parts made for the fan model whenever possible. Matched hardware lowers the chance of repeat vibration.
Skipping the final high-speed test leaves too much to chance. A fan may behave nicely on low, then rattle once stronger airflow starts. Run every speed long enough to hear changes and watch the canopy. Full-speed testing proves the repair can handle real use.
Build A Simple Maintenance Habit
A ceiling fan mount stays healthier with a quick seasonal check. Before hot weather hits, inspect the canopy, listen for new sounds, and clean the blades. That small routine catches loose hardware before it becomes a bigger ceiling repair. Preventive maintenance takes less effort than fixing a fan after months of shaking.
Keep the fan clean without soaking the motor housing. A lightly damp cloth handles most blade dust, while a dry cloth works around the canopy and vents. Heavy moisture near electrical parts is never worth the risk. Careful cleaning protects both balance and wiring.
Pay attention after furniture changes too. Moving a tall shelf, bunk bed, or large cabinet can change airflow patterns in a room. Strange as it sounds, airflow disruptions sometimes make a fan seem noisier at certain speeds. Room layout can affect how vibration sounds and feels.
Document the repair if the fan has been a repeat offender. Write down whether you tightened bracket screws, replaced the box, balanced blades, or adjusted the canopy. Next time a noise appears, you won’t start from scratch. Repair notes make future troubleshooting faster and less frustrating.


Best Small Flush Mount Ceiling Fans 2026 Ultimate Picks

Best Smart Ceiling Fan India 2026 For Effortless Comfort

Best Smart Ceiling Fans with Lights for 2026: Top Picks

Best Smart Home Non Ceiling Fans 2026 For Ultimate Comfort

Best Outdoor Misting Ceiling Fan 2026 For Ultimate Comfort

Best Ceiling Fans With Lights For Vaulted Ceilings 2026 Top Picks

Best Outdoor Ceiling Fans For Porch 2026 With Style And Breeze

Best WiFi Enabled Ceiling Fan 2026 For Effortless Comfort





