
Fast Push Button Flashlight Repairs
Having a flashlight with a faulty push button can be hugely frustrating. But before you toss it in the trash, know that most push button issues can be easily fixed at home with some basic tools and know-how. This guide will walk you through the common causes of a jammed or faulty push button, from stuck contacts to worn springs. You'll learn step-by-step how to take apart the flashlight, diagnose the issue, repair or replace any damaged parts, and reassemble it to working order. We'll also cover maintenance tips to prevent future problems. With the right information and a little practice, even beginners can breathe new life into a broken push button flashlight in under an hour. Save money on replacements and feel empowered knowing how to quickly fix this common flashlight problem yourself.
A flashlight with a faulty push button switch can be endlessly aggravating when you need illumination in a hurry. But before you relegate that push button flashlight to the trash, know that most button issues can be resolved with basic tools and some DIY troubleshooting. This guide will outline the quick fixes that have you back to bright light in under an hour.
Finding Yourself in the Dark
It's happened to all of us - you're camping in the woods and suddenly realize you forgot to pack extra batteries. Or the power goes out during a storm, blanketing your home in darkness. You fumble for your trusty flashlight, flick the switch, and nothing happens. After smacking it against your palm a few times, you depress the button once more but only get a flicker of light before it dies again.
We rely on flashlights when we need them most, so few things are more infuriating than a broken one. But before you relegate that faulty flashlight to the junk drawer, know there is likely an easy fix. With a basic toolkit and some DIY troubleshooting, most push button issues can be repaired in under an hour.
Consider this example:
Mike was halfway through a cave tour when his flashlight started giving him trouble. After intermittently flashing, the button jammed halfway down, refusing to make contact. Temporarily using his phone's flashlight, Mike struggled to see the cave's intricate formations in the dim light. Once home, he considered just buying a new flashlight but decided to search online for repair tips first. After disassembling the unit, Mike realized the spring behind the button had become compressed over time, preventing full contact. He was able to stretch the spring back into shape in just a few minutes. After reassembly, the flashlight worked good as new!
Empowerment Through Self-Reliance
With the right knowledge, faulty devices don't have to be discarded. Repairing your own flashlight can save money while giving you a sense of self-reliance and control. We've come to expect short lifespans for our consumer goods, but learning basic home repairs bucks this trend. Next time your flashlight fails, don't immediately run to the store. Instead, arm yourself with information - you may be surprised what can be fixed with a little patience and some DIY ingenuity. The ability to troubleshoot and mend your own possessions is empowering in an age of planned obsolescence. So before you trash that faulty flashlight, give repair a shot - you may wind up seeing things in a whole new light!
Buttons Get All Jammed Up
Of all the components that can fail in a flashlight, the push button switch is one of the most common culprits. A faulty button can completely disable your light or make operation frustrating and unreliable. But don't despair - most button issues stem from just a handful of problems. By understanding what can go wrong, diagnosing and repairing your switch is straightforward.
The button and circuit contacts take the brunt of wear and tear. After months or years of use, the metal contact surfaces can become corroded. Oxidation buildup increases electrical resistance, interfering with current flow. The gritty corrosion prevents clean contact between surfaces, causing intermittent function as you click the button.
Moisture is kryptonite for flashlights, attacking the contacts with oxidizing effects. Leaky or old batteries are often the source, leaching corrosive acids and ruinous electrolyte fluids into the flashlight body. Even occasional exposure to wet conditions can gradually degrade the contacts over time.
While corrosion is likely external, poor solder joints can also impede contact internally. Shoddy manufacturing with cold joints or weak bonding can rear their head down the road. Faulty solder connections are sensitive to vibration or impacts, progressively worsening through normal wear until contact is lost.
The Spring Has Left the Building
The mechanical spring behind the button is another common failure point. This spring provides the "snap" or return action that pops the button back out when released. But metals fatigue and lose their springiness with repeated use. A compressed or broken spring prevents the button from fully extending or making proper contact.
Springs can also get bent, kinked, or even fall out of position, preventing proper operation. If your button feels loose, floats around, or lacks its usual crisp action, a spring issue is likely the culprit.
Then there is simple dirt, grime, and debris. Dust particles, metal shavings, old lubricants, or bits of plastic can accumulate under the button or in the contacts over time. These contaminants interfere with electrical connections or cause scratchy, sticky, or sluggish button action.
In severe cases, the button or switch mechanism itself may suffer mechanical failure. Plastic parts can crack or detach, while mechanical linkages can bend or break entirely. Damage from accidental drops or crushing impacts often precipitate outright component failure.
Regardless of the root cause, diagnosing the issue requires getting inside your light...
Gather Your Toolkit
Before cracking open your flashlight to diagnose and repair button issues, having the proper tools and supplies on hand is key. While specialized equipment isn't essential, a basic toolkit goes a long way for disassembly, troubleshooting, and repairs. Here's a quick rundown of handy items to have:
- Screwdrivers - A selection of small Phillips and flathead drivers. Jeweler's screwdrivers provide the precision needed for tiny flashlight screws.
- Tweezers and pliers - Helpful for manipulating and gripping small parts. Needle nose tweezers excel at retrieving tiny springs or contacts.
- Soldering supplies - For resoldering faulty connections. A 15-25W iron, thin gauge solder, flux, and desoldering braid or pump suffice.
- Replacement parts - Springs, contact points, wires, and switches can be purchased online or sourced from old electronics.
- Sandpaper, steel wool - Useful for cleaning corrosion from contacts. Fine grit wet/dry paper removes oxidation effectively.
- Cleaning solutions - Isopropyl alcohol, contact cleaner, or electronics flux remover to dissolve built-up grime.
- Multimeter - Tests continuity and isolates faults in the circuitry. Even an inexpensive model suffices.
- Safety gear - Eye protection, work gloves, and proper ventilation are a must if soldering.
While not strictly required, an inspection mirror, magnifying glass, and helping hands tool can make the repair job easier on the eyes and hands. With the fundamentals covered, you're equipped for surgery on that troublesome flashlight button.

Cracking Open the Case
Now that you're locked and loaded with the right tools, it's time to carefully disassemble the flashlight and access the switch. Taking your light apart does require some finesse, but have no fear - with care and patience, it's very doable for the average DIYer. Here are some tips for smooth sailing:
- Work in a clean, well-lit area and lay out parts sequentially to aid reassembly.
- Don't force anything! Brute strength can damage fragile components. Take your time and don't skip steps.
- Follow product-specific disassembly instructions if available. Generic procedures also apply to most flashlights.
- Unscrew and remove bezel and head components gradually to expose the switch mounted in the barrel.
- Detach any wired connections, making note of polarity. Insulate any exposed contacts to prevent shorts.
- For advanced diagnosis, remove the switch entirely to test it independently of other circuits.
- Use gentle prying motions under plates or housings to free the button mechanism without bending parts.
Once open, inspect closely for obvious issues like broken solder joints, damaged springs, stuck buttons or accumulated dirt and debris. Use your multimeter to check for continuity across the switch contacts in different button positions. If issues aren't clearly apparent, you may need to fully disassemble the button housing itself. This usually requires desoldering any electrical tabs and then carefully prying apart or unscrewing the case.
Thorough disassembly without damage takes finesse, but allows inspecting and testing all switch components individually to isolate the root cause. Patience and care pays off for smooth repairs.
Honing Your Troubleshooting Skills
Some diagnosis will come down to good old-fashioned visual inspection, relying on your senses and powers of observation. But developing solid troubleshooting skills also involves using tools effectively to isolate faults. Getting comfortable using a multimeter to test continuity through the switch circuits takes practice but is extremely helpful for pinpointing problems. With experience, you'll learn how to "trace the circuit" from the battery contacts through the switch to identify breaks that prevent current flow. Verifying fixes restore full functionality is also part of the troubleshooting process. While developing these diagnostic skills takes time, persistence pays off with the ability to quickly repair all kinds of devices.
Making Things Right Again
Now for the satisfying part - reviving your flashlight with some simple repairs. Once you've diagnosed the issue, corrective measures typically involve cleaning, part replacement, soldering, or contact adjustment. We'll cover proven fixes for the most common button problems:
Corroded contacts - Lightly sanding away oxidation and using isopropyl alcohol or contact cleaner to dissolve corrosion deposits restores connectivity. Prevent future buildup by applying dielectric grease on switch contacts before reassembly.
Worn/broken spring - Replace compromised springs with new ones of the same specifications. Harvest springs from electronics junk drawers if needed. Gently bend or stretch saggy springs back into proper shape.
Poor solder connections - Resolder any flaky joints using flux, proper iron temperature, and good flow technique. Splice wires or replace components as needed.
Dirt/debris - Compressed air clears away dust and grit, while swabs dipped in cleaner dissolve gummy buildup.
Broken parts - Replace defective components like cracked insulators or malfunctioning button mechanisms. Rewire as needed.
For full switch failure, wiring a new assembly into the flashlight may be required. Fortunately, affordable and universal replacement switches are readily available online or at electronics stores. With a simple desolder/resolder job, you'll be back in business.

Reassembly Redemption
After completing any repairs or parts swaps, reassemble in reverse order. Confirm switches function properly before reinstalling into the flashlight body. Refer to disassembly notes and diagrams if needed to ensure correct orientation and positioning. Once everything is screwed together solidly, add fresh batteries and test thoroughly before relying on the revived light. Take pride in your repair prowess and the satisfaction of an hour well spent!
An Ounce of Prevention
They say an ounce of prevention is worth a pound of cure. Some basic maintenance and handling precautions help prevent troublesome button issues in the first place:
- Keep contacts corrosion-free by cleaning with alcohol and applying dielectric grease periodically.
- Inspect solder connections for cracks or cold joints before they fail. Reflow any suspect ones.
- Remove batteries before long-term storage to avoid leaks shorting circuits or damaging springs.
- Avoid button damage by not storing loose or uncased, and prevent crushing impacts.
- Consider adding a membrane cover or silicone button boot for water protection in wet environments.
- Monitor function on older lights and proactively replace worn parts like springs.
Catching issues before button failure lets you fix things easily. But even periodic repairs are simple tasks to extend your light's useful lifespan.
Parting Thoughts
Our consumer culture is quick to discard gadgets at the first sign of problems. But minor faults like flashlight switch failures are often easy and inexpensive to remedy with basic DIY skills. Learning to troubleshoot and fix your own devices is empowering, saves money wasted on replacement costs, and reduces environmental impact. So before you trash that broken flashlight, give repair a try - you might discover untapped talents while keeping useful items from the landfill. A little knowledge, patience, and an hour invested can illuminate the way forward sustainably.


Best Rechargeable LED Light Bulbs 2026 For Brighter Living
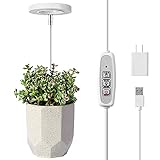
Best Grow Light For Single Plant 2026 Top Picks

Best Track Lighting for Vaulted Ceiling 2026 Top Picks

Best Track Lighting For Studio 2026 Top Picks And Insights
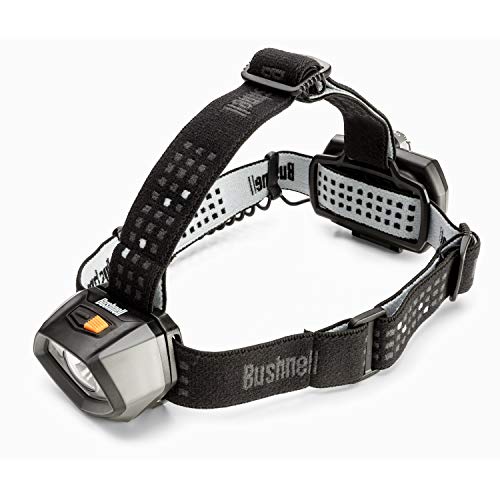
Best Color Light for Tracking Bloodtrail 2026 Top Picks

Best Track Lighting Heads Pendants 2026 Brighten Spaces Smartly
Best Track Lighting for Small Kitchen 2026 Brighten Every Corner

Best Track Lighting For Painting Studio 2026 Top Picks





