
How To Fix A Stuck Ceiling Fan Pull Chain Fast
How to fix a stuck ceiling fan pull chain becomes a real headache once the room starts feeling stuffy and the fan suddenly refuses to cooperate. One minute the fan works fine, then bam, the chain locks up, spins loosely, or won’t budge at all. Plenty of people yank harder out of frustration, but that usually turns a tiny mechanical issue into a broken switch hidden inside the housing. A calmer approach saves time, prevents extra damage, and keeps the repair surprisingly manageable.
Most pull chain problems start with everyday wear. Dust sneaks into the switch housing, internal springs weaken, or the chain twists itself into an awkward angle after years of constant pulling. Ceiling fans installed in kitchens, humid rooms, or covered patios tend to collect grime faster, which can make the mechanism sticky over time. That sluggish feeling while pulling the chain usually appears long before the fan completely stops responding.
Ceiling fan pull chain repair often sounds more intimidating than it actually is. In many situations, the issue comes down to a jammed chain extension, a worn switch, or loose internal components rattling around inside the fan body. A small screwdriver, steady hands, and a bit of patience can go a long way. Also, cutting power at the breaker first matters more than people think, especially when working around older wiring.
Some fans hide the problem behind decorative light kits or tight switch housings that barely leave room for fingers. That’s where frustration creeps in. Tiny screws disappear, chains slip back inside the fixture, and suddenly the whole thing feels like a circus act balanced on a ladder. Still, breaking the process into simple steps helps keep the repair under control instead of turning it into an all-day project.
Fixing a stuck ceiling fan chain also depends on knowing when the switch itself has failed. If the chain feels completely frozen, spins endlessly, or clicks without changing fan speed, internal damage is likely already there. Replacing the pull chain switch usually costs very little, yet it restores normal operation without replacing the entire fan. That tradeoff alone makes repair worth trying before shopping for a brand-new fixture.
Older fans sometimes develop multiple issues at once. Loose blades, wobbling mounts, or failing capacitors can make the fan seem broken even when the chain isn’t the main culprit. Paying attention to unusual humming noises, delayed startup, or inconsistent speed changes helps narrow down what’s actually happening. A careful inspection often reveals the real issue faster than randomly replacing parts.
Safe ceiling fan maintenance plays a bigger role than most people realize. Gentle pulls, occasional dust cleaning, and replacing cheap chain extenders before they snag can prevent future jams altogether. Fans handle thousands of pulls during their lifespan, so even small habits affect how long the switch mechanism survives. A little preventive care keeps the fan running smoother and avoids that annoying moment when the chain suddenly refuses to move.
How To Fix A Stuck Ceiling Fan Pull Chain
A fan that quits responding right as the room gets warm can test anybody’s patience. The tiny chain feels like such a small part, yet one jam can stop the light, the fan speed, or both from working the way they should. That’s why how to fix a stuck ceiling fan pull chain starts with calm troubleshooting, not a hard yank and a prayer. A careful first look can protect the switch housing, the chain mechanism, and the wiring tucked inside the fan.
Ceiling Fan Pull Chain Basics
A ceiling fan pull chain works through a small internal switch that changes speed, controls the light, or turns the unit off. Each tug rotates or triggers that switch in a set pattern, so a jam usually means the chain, spring, or switch cam has fallen out of rhythm. The weak spot is rarely the visible chain alone. The real trouble often hides behind the fan switch housing, where dust, wear, and tension slowly gang up.
Most stuck chains fall into a few common patterns. The chain may feel frozen, pull halfway and stop, spin without clicking, or disappear into the housing after snapping. Each symptom points to a different repair path, so guessing can waste time. A frozen chain usually suggests a jammed switch, while a loose chain with no click often points to a broken pull chain switch.
Ceiling fans with lights add another wrinkle because the switch housing may hold extra wiring, wire nuts, and a light kit connection. That cramped space can make a simple repair feel fiddly, especially if the fan is mounted close to the ceiling. Still, the job stays manageable once the power is off and the parts are handled gently. The goal is to protect the wiring layout while reaching the stuck mechanism without bending or twisting anything.
A stuck pull chain should never be forced. Hard pulling can snap the chain inside the switch, crack the plastic switch body, or loosen wires that were perfectly fine a minute earlier. Slow pressure, a steady ladder, and a small screwdriver beat brute force every time. Treat the repair like a tiny mechanical puzzle, because that’s exactly what it is.
Safety Checks Before Touching The Fan
Power safety comes first, even if the repair looks harmless from the floor. Turn the fan off at the wall switch, then shut off the matching breaker before opening the housing. A wall switch alone doesn’t always remove power from every wire in the fan box. That small extra step protects you from electric shock, surprise sparks, and damage to the fan’s internal controls.
A sturdy ladder matters more than people want to admit. Standing on a chair, bed frame, or wobbly stool turns a basic repair into a bad idea fast. Keep your shoulders level with the switch housing so you’re not reaching overhead for long stretches. Better balance gives you cleaner hand control, which helps prevent stripped screws and dropped parts.
Remove glass shades or bulbs before opening a light kit. Those parts love to rattle loose at the worst moment, and nobody needs broken glass on the floor during a fan repair. Put screws in a cup or small tray instead of setting them on top of the ladder. Simple habits keep the repair area organized and save you from crawling around later.
A non-contact voltage tester adds peace of mind, especially on older homes where wiring changes may not be obvious. Test near the switch housing before touching wires, even after the breaker is off. If anything still shows power, stop and recheck the breaker panel. A safe repair starts with confirmed power shutoff, not assumptions.
Spot The Chain Problem First
The chain’s behavior tells a story before any screw comes out. A chain that won’t move at all may be wedged against the housing hole or stuck inside the switch. A chain that pulls but doesn’t click often means the switch has failed internally. A chain that snapped off close to the fan usually needs either a new connector or a full pull chain switch replacement.
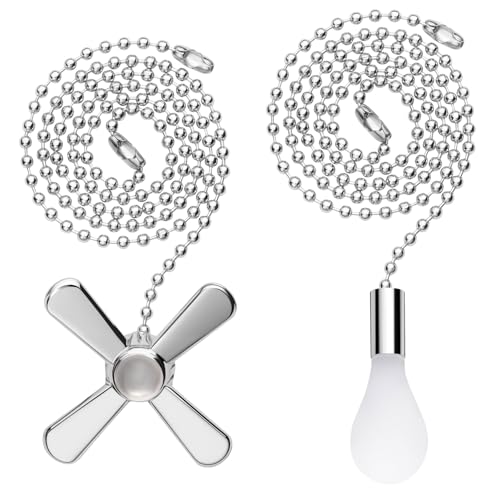
Start with the visible chain and check for twists, knots, or a chain extender caught at an odd angle. Cheap extenders sometimes snag where the chain enters the housing, especially if the hole has a sharp edge or built-up grime. Gently rotate the chain between your fingers while pulling downward with light pressure. If it suddenly frees up, the issue may be chain alignment rather than a broken switch.
Listen for the click. A healthy switch usually makes a distinct mechanical click with each pull, even if the fan motor takes a second to react. No click at all is a big clue that the internal switch is jammed or broken. A weak, mushy click suggests worn parts inside the fan speed switch, which often means replacement is smarter than repeated tinkering.
Fan speed behavior helps too. If the chain clicks but the fan stays on one speed, the switch may no longer be sending power through the right circuit. If the light chain works but the fan chain doesn’t, the issue is probably isolated to the fan control switch. Separating those symptoms keeps the repair focused and prevents unnecessary part swapping.
Open The Switch Housing Carefully
The switch housing usually sits below the fan motor, often behind a cap, light kit, or small decorative plate. Remove the screws slowly while supporting the housing with your other hand. Some housings drop down only a few inches because wires are still connected inside. That limited slack is normal, so don’t tug hard or let the housing hang by the wires.
Take a quick photo before disconnecting anything. A phone picture gives you a simple map of wire colors, wire nuts, and switch placement. This little move saves a lot of head-scratching later, especially if the wires are crowded. A clear reference protects the original wiring order and makes reassembly much less stressful.
Look for the chain path inside the housing. Sometimes the chain slips off-center and binds against the metal opening instead of moving straight through it. Dust, old grease, or a bent retaining nut can also restrict movement. Clean around the opening with a dry cloth and check whether the pull chain hole has any rough edges catching the beads.
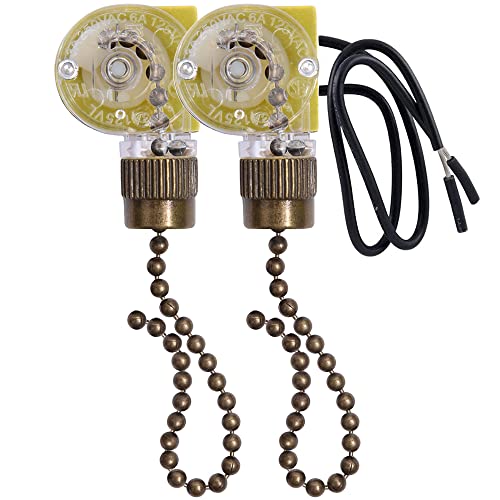
The switch is usually held in place with a small threaded collar on the outside of the housing. Loosen that collar only after confirming the switch and chain are the actual problem. If the switch body looks cracked, burnt, or loose, replacement is the better path. If it looks intact and the chain is merely snagged, a gentle realignment may bring it back without changing parts.
Free A Jammed Chain Without Breaking It
A jammed chain needs steady movement, not force. Hold the switch body with one hand while nudging the chain from inside the housing with the other. Pull downward lightly, then release, then pull again. That small back-and-forth motion can reset a stuck internal spring or free a bead caught inside the switch throat.
Needle-nose pliers can help, but use them with a soft touch. Grip one bead at a time rather than crushing the chain. Metal beads can flatten or separate if squeezed too hard, which turns a simple jam into a broken chain. The repair works best when the chain keeps its smooth bead shape and moves straight through the switch.
A dry lubricant can sometimes help a sticky chain, but avoid spraying oily products into the fan housing. Oil attracts dust and can create a gummy mess around electrical parts. If the chain opening is dirty, clean the area instead of soaking it. A dry, clean path gives the ceiling fan chain a better chance of moving freely.
If the switch clicks again after freeing the chain, test it only after reassembling enough parts to keep everything safe. Restore power briefly and check each pull position. Then shut power off again if more adjustment is needed. This careful rhythm helps you avoid touching live components while still confirming the repair result.
Replace A Broken Pull Chain Switch
A broken switch often costs less to replace than to fight with. The tricky part is matching the old switch, especially for multi-speed fans. Look at the number of wires, the switch label, and the terminal markings before buying a replacement. A fan light switch and a fan speed switch can look similar, but their internal wiring patterns may be different.
Label the wires before removing the old switch. Small tape tabs marked with terminal letters can prevent mix-ups during installation. Some switches use labels like L, 1, 2, and 3, while others use color-based patterns. Keeping the wiring consistent protects the fan speed sequence and prevents odd behavior after the repair.
Disconnect one wire at a time if possible. Move each wire from the old switch to the matching spot on the new switch, then tighten or secure it according to the switch design. Loose connections can cause flickering lights, speed failure, or heat buildup. A snug connection is one of those boring details that makes the whole repair safer.
After the switch is mounted, make sure the chain hangs straight through the hole before tightening the outside collar. A crooked chain can jam again even with a brand-new switch. Reattach the housing carefully, tuck wires without pinching them, and test every function. A good replacement should restore a clean click, reliable fan speeds, and normal pull chain control.
Handle Stuck Chains On Fan Light Kits
Fans with built-in lights often have two chains, and it’s easy to blame the wrong one in a hurry. One chain controls the fan motor, while the other controls the light kit. Trace the stuck chain to its switch before taking anything apart. That small check prevents accidental work on the wrong fan control circuit.
Light kit chains may jam from heat, dust, or a chain extender rubbing against the glass shade. Bulbs that run hot can make nearby plastic parts age faster, especially in older fixtures. If the light chain feels brittle or scratchy, inspect the switch body closely. A worn light switch can fail even while the fan motor keeps running normally.
Bedroom fans create their own set of annoyances because light output, fan speed, and nighttime noise all matter at once. To improve comfort after the chain repair, compare ceiling fans with bright lights for rooms where a weak light kit keeps causing daily frustration. A brighter integrated fan may make sense if the current fixture has repeated switch issues, dim lighting, or awkward chain placement. Still, replacing the fan should come after checking whether a simple pull chain switch can solve the immediate problem.
Outdoor or damp-area fans need extra caution. Moisture can corrode small switch parts and make a chain feel gritty or stuck. If the housing shows rust, water marks, or brittle insulation, the repair may need a licensed electrician. Electrical parts exposed to moisture deserve more respect than a dry indoor fan in a hallway.
Fix Chain Snaps And Missing Extensions
A chain that snaps outside the housing may be the easiest version of this problem. If enough chain remains visible, attach a new connector and extension. Choose an extender that hangs low enough to reach comfortably but not so low that it swings into blades, lamps, or furniture. A properly sized extension reduces side pulling, which helps the switch last longer.
A chain snapped inside the housing takes more work. Open the switch housing and look for a short piece of bead chain still attached to the switch. If a small length remains, a chain connector may rescue it. If nothing remains or the switch no longer clicks, replacement is usually the cleaner fix.
Chain extenders should move straight down, not sideways across the housing. Angled pulling wears the switch throat and can make the chain bind over time. Decorative pulls can look nice, but heavy ones add stress every time the chain swings. A lighter pull protects the switch mechanism and keeps daily use smoother.
Fan placement affects chain life too. A fan above a bed, table, or plant shelf often gets pulled from awkward angles because people reach from the side. If the chain keeps sticking after repair, adjust the extension length or move the pull so it hangs in a more natural spot. Small ergonomic fixes can prevent the same ceiling fan pull chain problem from coming back.
Separate Pull Chain Trouble From Other Fan Issues
A stuck chain is obvious, but it doesn’t always explain every fan problem. A fan that hums without spinning may have a capacitor issue, not just a switch problem. A fan that wobbles badly may need blade balancing or mounting checks. The chain might be one symptom sitting beside another mechanical problem.
Speed changes offer useful clues. If the chain clicks through settings but the fan only runs on high, the switch wiring or capacitor may be involved. If the fan runs sometimes and stalls other times, loose connections inside the housing deserve a closer look. A repair that ignores these signs can leave the main fan performance issue untouched.
Lighting upgrades sometimes happen during fan repairs because the housing is already open. To plan safer outdoor lighting work separately, explore install outdoor led strip lights before mixing unrelated wiring projects into a ceiling fan repair. Keeping projects separate avoids confusion and keeps each electrical task cleaner. One fix at a time is usually the smarter path.
Noise also matters. Grinding, buzzing, or repeated clicking after a switch repair can point toward loose screws, blade brackets, or motor wear. Don’t keep pulling the chain hoping the sound will vanish. Track the sound source, tighten accessible hardware, and stop using the fan if it smells hot or electrical.
Know When To Stop And Replace Parts
Some pull chain repairs hit a clear stopping point. A cracked switch, burnt smell, melted plastic, or brittle wiring means the fan needs more than a quick adjustment. Replacing the switch is reasonable, but repairing damaged wiring without experience is risky. Safety beats saving a few dollars, especially with overhead electrical fixtures.
Older fans can be worth repairing if the motor runs smoothly and the mount feels solid. A simple switch replacement may give the fan more years of use. But a fan with constant wobble, weak airflow, loud humming, and repeated chain failures may be nearing the end of its useful life. At that point, repair costs and hassle start adding up.
Health-related searches sometimes overlap with home noise problems, especially for people sensitive to humming or ringing sounds at night. For a separate wellness topic, review red light therapy for tinnitus without treating it as a fix for fan noise or electrical buzzing. A noisy ceiling fan still needs mechanical inspection, tightening, or replacement. Mixing unrelated solutions muddies the real repair path.
A working repair should leave the chain moving freely, clicking cleanly, and controlling the correct function. The fan should not spark, flicker, buzz sharply, or smell hot during testing. If any of those signs appear, shut off the breaker and stop using the fan. A stuck chain is annoying, but a damaged fan switch assembly deserves careful attention before the fan goes back into daily use.
Fixing Ceiling Fan Pull Chain Problems At Home
Nothing drags down a relaxing evening faster than a ceiling fan that suddenly refuses to respond. The room gets warmer, the air feels heavy, and that tiny pull chain starts acting stubborn for no obvious reason. A lot of people assume the fan is completely dead, but most of the time the real issue hides inside a worn switch, tangled chain, or loose connection. Getting familiar with ceiling fan pull chain repair can save money, reduce frustration, and help avoid replacing an otherwise solid fan.
Keep The Pull Chain From Sticking Again
One successful repair doesn’t guarantee the problem stays gone forever. Ceiling fan pull chains wear down slowly because they handle constant movement every single day. Rough pulling, swinging extensions, and built-up dust all put pressure on the switch assembly over time. A few small maintenance habits can stretch the lifespan of the entire fan.
Dust buildup around the chain opening creates more trouble than people expect. Fine debris settles inside the switch housing and gradually interferes with the chain movement. Wiping the chain area during regular cleaning helps reduce grinding and stiffness before the switch starts jamming again. A clean chain path keeps the internal spring mechanism moving smoothly instead of dragging.
Chain extenders should stay lightweight and balanced. Decorative pulls made from glass, stone, or thick metal may look attractive, but they add extra stress to the switch every time they swing. A simple lightweight extension keeps the chain easier to grab without overloading the fan switch housing. Small details like that make a bigger difference than most homeowners realize.
Fans installed in humid rooms need more attention because moisture speeds up corrosion. Bathrooms, covered patios, and kitchens often create sticky buildup around moving parts. If the fan starts feeling rough during operation, inspect it early instead of waiting for a complete jam. Catching minor resistance quickly helps protect the pull chain mechanism before replacement becomes necessary.
Common Mistakes That Damage Fan Switches
Frustration causes a surprising amount of ceiling fan damage. Someone pulls the chain too hard once, then suddenly the switch spins freely or the chain snaps into the housing. That aggressive tug can crack delicate plastic parts inside the switch body. A stuck chain usually responds better to patience than force.
Another common mistake happens during reassembly. Wires get pinched between the housing pieces, screws tighten unevenly, or the chain exits the housing at a crooked angle. Those little errors can create new problems immediately after the repair. Careful alignment protects the switch wiring and prevents repeated sticking.
Cheap replacement switches also create headaches. Some off-brand switches may technically fit the fan, yet fail to match the original speed sequence or amperage requirements. The fan may suddenly skip speeds or stop responding properly after installation. Matching the correct fan speed switch matters far more than grabbing the cheapest replacement off the shelf.
Ignoring wobbling blades creates long-term stress on the switch housing too. Constant vibration loosens internal parts and increases wear on the chain assembly. Tightening blade brackets and balancing uneven blades helps the entire fan operate more smoothly. Less vibration means less strain on the internal switch components.
Signs Your Ceiling Fan Needs More Than A Chain Repair
Some ceiling fans show warning signs that go beyond a simple stuck chain. Loud humming noises, overheating smells, or flickering lights often point toward deeper electrical issues hiding inside the fan body. A replacement switch won’t solve motor damage or failing capacitors. Watching for these symptoms helps prevent wasted time and repeated repairs.
A fan that spins slowly despite changing speeds may have capacitor trouble instead of switch failure. Capacitors help regulate motor startup and speed control, so weak performance often traces back there. The chain might still click normally while the fan struggles to move air. That disconnect usually signals a motor-related issue instead of a jammed pull chain.
Fans that wobble excessively can loosen internal wiring over time. Constant shaking creates wear inside the housing and sometimes disconnects wire nuts or switch terminals. Tightening loose mounting hardware early prevents small problems from turning into electrical failures. Stable operation protects the fan’s internal connections and improves long-term reliability.
Smart technology upgrades sometimes make more sense than repeatedly repairing an aging fan. To simplify airflow control and reduce wear on traditional pull chains, explore smart ceiling fans with lights for rooms where daily chain pulling becomes annoying. Remote controls, app settings, and voice commands can reduce physical strain on switches entirely. That upgrade works especially well in bedrooms with high ceilings or difficult fan placement.
Repair Tips For Older Ceiling Fans
Older ceiling fans often use sturdier motors than many newer budget models, which makes repair worth considering. The challenge is tracking down compatible switches and parts that match the original wiring layout. Some vintage fans use uncommon terminal arrangements that require extra care during replacement. Taking detailed photos before disconnecting anything becomes extremely valuable on older fixtures.
Plastic components inside older switches can become brittle after years of heat exposure. Even gentle handling may crack weakened pieces during disassembly. Slow movements and careful screw removal reduce the risk of accidental damage. Patience protects the aging switch housing and helps avoid turning a simple repair into a larger rebuild.
Dust buildup inside old fan motors can also affect overall performance. Thick dust layers trap heat and restrict airflow around internal components. Cleaning the housing carefully with compressed air or a soft brush may improve operation after the switch repair. Cooler operation helps preserve the motor lifespan and reduces electrical strain.
Some older fans were installed before modern ceiling box standards improved. Loose mounting brackets or undersized electrical boxes may become visible during repairs. If the fan shifts while being touched, stop and inspect the mounting system before continuing. Stable support matters just as much as repairing the pull chain assembly.
Why Ceiling Fan Placement Affects Chain Wear
Fan placement changes how people interact with the pull chain every day. A fan mounted directly over a bed or sectional couch often forces awkward side pulling instead of a straight downward motion. That repeated angle gradually wears the switch opening and stresses the chain connection. Better pulling angles help extend the life of the fan switch mechanism.
High ceilings create another issue because people tend to yank extensions harder to compensate for the extra reach. Long decorative pulls swing around and sometimes strike light shades or blades. That constant movement slowly loosens internal switch parts over time. Keeping the chain controlled and lightweight reduces unnecessary strain on the chain attachment point.
Outdoor fans face harsher conditions than indoor models. Heat, moisture, wind, and airborne debris all increase wear on the switch housing and moving components. In covered patios or garden spaces, weather-resistant fixtures perform far better over time than standard indoor fans. For nearby outdoor comfort solutions during colder seasons, compare solar powered heat lamp setups that handle changing weather conditions more effectively.
Children pulling chains repeatedly can also speed up wear, especially if the chain becomes a fidget toy or swinging object. Teaching gentle operation sounds simple, yet it helps preserve the switch much longer. Pulling straight down with moderate pressure protects the internal spring system from sudden stress. Consistency matters more than force.
Best Tools For Pull Chain Repairs
Most ceiling fan chain repairs require only a handful of basic tools. A screwdriver set, needle-nose pliers, voltage tester, and flashlight handle the majority of small repairs safely. Fancy equipment usually isn’t necessary unless wiring damage or motor issues appear. Keeping the setup simple helps maintain focus during the repair.
Magnetic screwdrivers save a surprising amount of frustration while working overhead. Tiny housing screws love to disappear onto carpet or behind furniture once dropped. Magnetic tips keep screws secure during removal and reassembly. Less fumbling means fewer chances to damage the fan housing finish or lose hardware.
A headlamp works better than balancing a flashlight under your arm. Good visibility helps identify wire colors, chain alignment problems, and cracked switch bodies without awkward positioning. Repairs become smoother once both hands stay free for the actual work. Better lighting protects the wiring layout from accidental mistakes.
Needle-nose pliers should grip gently, not crush the chain beads. Excessive pressure can flatten chain links and create future sticking problems. Small controlled movements work far better than aggressive squeezing. Precision protects the chain integrity and helps the repaired switch move freely afterward.
How To Test The Fan After Repairs
Testing the fan carefully after reassembly matters just as much as the repair itself. Restore power at the breaker, then operate the fan slowly through every setting. Listen for clean clicks, steady motor startup, and smooth speed transitions. Strange noises or hesitation may signal a loose connection still hiding inside the housing.
Light kits should respond consistently without flickering or delayed activation. Flickering often points toward loose wiring or poor switch contact rather than bad bulbs. Shut the power off immediately if sparks, burning smells, or sharp buzzing appear during testing. Those signs deserve immediate attention before regular use resumes.
Check whether the chain hangs straight after the housing is fully tightened. A crooked chain angle may seem minor at first, yet it often causes repeated sticking later. Smooth vertical movement protects the switch opening and reduces friction during everyday use. Tiny adjustments now can prevent another repair a few weeks later.
Run the fan for several minutes at different speeds instead of testing only one setting. Heat buildup, vibration, or inconsistent performance may appear only after extended operation. Stable airflow, steady light performance, and smooth chain movement usually confirm the repair was successful. A properly repaired fan should feel dependable again rather than unpredictable.
Situations That Need A Licensed Electrician
Some ceiling fan repairs cross into territory where professional help makes more sense. Burnt wiring, melted insulation, damaged ceiling boxes, or repeated breaker trips all deserve closer inspection from a licensed electrician. Those problems involve broader electrical safety issues beyond a simple pull chain repair. Taking shortcuts around damaged wiring can create serious hazards.
Fans mounted on unstable ceiling boxes also need attention before continued use. A loose fan may wobble enough to damage wiring connections or mounting brackets over time. Electrical boxes rated only for light fixtures sometimes struggle to support heavy ceiling fans safely. A secure mounting system protects both the fan assembly and the ceiling structure itself.
Homes with older aluminum wiring deserve extra caution during any fan repair. Aluminum wiring connections require specific handling techniques and approved connectors to prevent overheating. If aluminum wiring appears inside the fan housing, pausing the repair and calling a professional is the safer route. Electrical compatibility matters just as much as replacing the pull chain switch.
Repeated switch failures can also signal voltage issues or overheating hidden deeper inside the fan motor. Replacing chain switches over and over without fixing the root cause wastes money and time. A professional diagnosis may reveal problems that aren’t visible from the outside. Sometimes the smartest repair decision is recognizing when the issue extends beyond the chain itself.


Best Small Flush Mount Ceiling Fans 2026 Ultimate Picks

Best Smart Ceiling Fan India 2026 For Effortless Comfort

Best Smart Ceiling Fans with Lights for 2026: Top Picks

Best Smart Home Non Ceiling Fans 2026 For Ultimate Comfort

Best Outdoor Misting Ceiling Fan 2026 For Ultimate Comfort

Best Ceiling Fans With Lights For Vaulted Ceilings 2026 Top Picks

Best Outdoor Ceiling Fans For Porch 2026 With Style And Breeze

Best WiFi Enabled Ceiling Fan 2026 For Effortless Comfort





