
How To Fix Ceiling Fan Bearing Noise Fast
How To Fix Ceiling Fan Bearing Noise often becomes a late-night headache right when the room finally settles down. That low grinding hum, rattling vibration, or sharp squeak can slowly drive anyone up the wall. Some fans start making noise after years of steady use, while others suddenly sound rough after seasonal temperature changes or dust buildup. Either way, the sound rarely disappears on its own, and ignoring it usually makes the problem worse over time.
Dust accumulation inside the motor housing creates more friction than many people expect. Dry bearings, loose screws, and worn lubrication can all trigger irritating mechanical sounds that seem harmless at first. Then the fan starts wobbling slightly, airflow weakens, and the motor strains harder than it should. A noisy ceiling fan doesn't just interrupt sleep or concentration. It also hints that internal parts may be wearing down faster than normal.
Ceiling fan bearing noise tends to show up during higher speed settings because the motor rotates faster and exposes hidden wear. That's why many people notice the issue only during warmer months when the fan runs daily. Small fixes like tightening mounting hardware, cleaning debris, or applying the correct lubricant can sometimes calm the noise almost immediately. Still, badly worn bearings may need replacement before the motor suffers permanent damage.
Some fans produce a metallic scraping sound, while others create a dull humming vibration that echoes through the ceiling. Pinpointing the exact sound matters because different noises usually point to different causes. Loose blade brackets often create clicking noises, but dry motor bearings typically sound rough and continuous. Paying attention to these little clues saves time and prevents unnecessary part replacements.
Motor maintenance also plays a bigger role than most homeowners realize. Ceiling fans collect grease, airborne particles, and humidity year after year, especially in kitchens or poorly ventilated rooms. That buildup slowly affects balance, airflow, and internal rotation. Cleaning and lubricating the fan regularly helps reduce strain on the motor while extending the lifespan of critical moving parts.
Repair costs can climb quickly if the problem gets ignored for too long. Replacing an entire ceiling fan often feels frustrating when the actual issue started with a dry bearing or loose component worth only a few dollars. That's why practical troubleshooting matters. A smoother-running fan not only sounds better but also improves energy efficiency and creates more stable airflow throughout the room.
How To Fix Ceiling Fan Bearing Noise At Home
A quiet room can turn annoying fast once the fan above your head starts growling, scraping, or buzzing like it’s working too hard. The good news is that how to fix ceiling fan bearing noise usually starts with simple checks before anyone needs to panic about replacing the whole fan. A rough bearing sound often points to dry lubrication, dust buildup, or motor strain, not always a dead motor. Fixing it early keeps the fan smoother, safer, and far less irritating during sleep, work, or dinner.
Spot The Bearing Noise First
Bearing noise has a different personality from a loose blade click or canopy rattle. It often sounds like a steady grinding, low rumble, dry squeal, or rough hum that follows the fan speed. A loose screw may click once per rotation, but a tired bearing usually sounds continuous. That clue matters because chasing the wrong problem wastes time and can turn a small repair into a weekend headache.
Start by listening at each fan speed and standing in different spots around the room. Low speed may hide the sound, while medium or high speed often makes worn bearings complain. A wobble paired with grinding can also mean the bearing is carrying uneven load from poor blade balance. As the old saying goes, the squeaky wheel gets the grease, but only after you know which wheel is squeaking.
Switch the fan off and let the blades coast to a stop. A rough bearing may keep making a faint scraping or growling sound as the motor slows down. That coast-down noise is a useful clue because electrical hum usually stops as soon as power cuts off. Mechanical friction sticks around until the movement fully stops.
Do a quick visual check before touching tools. Look for blade wobble, a tilted motor housing, loose brackets, or dust gathered around the motor vents. A dirty fan can mimic deeper motor trouble because grime throws off balance and adds drag. Clean clues make better fixes, and that saves both money and patience.
Cut Power Before Touching Anything
Safety comes first, even for a repair that looks simple. Turn the fan off at the wall switch, then shut off the correct breaker if you plan to open the motor housing or touch wiring areas. A ceiling fan may look harmless, but live wires and moving blades are a bad mix. Don’t wing it, because one careless shortcut can cause a shock or a damaged switch.
Use a sturdy ladder that lets you work at eye level with the fan, not stretched on tiptoe. Stable footing makes every step easier, from removing screws to checking the canopy. Keep a small container nearby for screws so nothing disappears into carpet or under furniture. Tiny parts have a funny way of vanishing right when you need them.
Let the motor cool if the fan has been running for hours. A hot motor can hide friction issues because heat changes how parts expand and sound. Cooling it down also protects your hands while you inspect the housing. Patience here isn’t fancy, but it’s smart.
Never spray lubricant blindly into vents or around wiring. Wrong lubricant placement can attract more dust, stain the ceiling, or create electrical risks. Some sealed fan motors aren’t designed for oiling at all, so forcing oil inside can do more harm than good. Check the fan label or manual if it’s available, then work with the design instead of against it.
Clean Dust Around The Motor
Dust buildup is boring, sure, but it causes real fan trouble. Dust adds weight to blades, blocks motor vents, and works its way near moving parts. Over time, that buildup can make a fan sound rough even before the bearing itself is badly worn. Cleaning is the low-cost first move that often quiets minor noise right away.
Wipe the top and bottom of each blade with a damp microfiber cloth. Keep one hand supporting the blade so you don’t bend the bracket or stress the motor. Blade balance depends on even weight, and thick dust on one blade can create wobble. That wobble pushes extra load into the bearing, which makes the noise louder.
Use a soft brush or vacuum brush attachment around the motor housing vents. Airflow around the motor helps control heat, and heat speeds up wear inside moving parts. Avoid soaking the housing or pushing debris deeper into gaps. Gentle cleaning beats aggressive scrubbing here.
For rooms with poor lighting, repair work gets clumsy fast, so upgrade the workspace with stronger ambient light through best floor lamp maximum light before inspecting tiny screws and dust-packed vents. Clear visibility helps you catch loose hardware, hairline cracks, and uneven blade buildup without guessing. It also keeps the job from turning into a neck-straining mess. A simple lighting fix can make fan troubleshooting feel far less frustrating.
Tighten Hardware That Adds Strain
Loose screws can make bearing noise seem worse because the fan vibrates harder than it should. Check blade screws, blade arm screws, canopy screws, and mounting bracket hardware. A fan that shifts slightly during rotation transfers uneven force into the motor shaft. That extra strain can make a dry bearing sound rougher than it really is.
Use the correct screwdriver and tighten hardware snugly, not brutally. Over-tightening can strip screws or crack blade holders, especially on older fans. Firm and even pressure is the goal. Think of it like tuning a guitar, too loose sounds bad, too tight causes trouble.
Pay close attention to the canopy near the ceiling. A loose canopy can rattle and trick the ear into blaming the bearing. Ceiling vibration travels in weird ways, and sounds often bounce around the room. Tightening the canopy may not fix a true bearing issue, but it removes one noisy suspect from the lineup.
Check the downrod and ball mount if the fan has one. A small amount of movement can create a rhythmic knock, especially at higher speed. Mounting stability matters because the motor bearing works best when the fan hangs straight. A tilted or shifting fan forces parts to work against gravity in the wrong direction.

Check Blade Balance And Alignment
Blade imbalance often teams up with bearing noise like a bad double act. Even a slightly warped blade can make the motor shaft move unevenly. That side-to-side motion puts pressure on the bearing and makes grinding or humming louder. Fixing balance won’t repair a worn bearing, but it can reduce the stress that makes the sound worse.
Measure each blade tip from the ceiling while the fan is off. The distances should be close, not wildly different. A blade sitting lower than the others may have a bent bracket or loose arm. Even blade height keeps rotation smoother and protects the motor from unnecessary vibration.
Use a balancing kit if the fan still wobbles after cleaning and tightening. The small clip helps locate the heavy or light spot, then adhesive weights fine-tune the blade. Balanced rotation reduces bearing load and often quiets a fan that sounded worse than it actually was. It’s a small fix, but it punches above its weight.
Bathroom fans and ceiling fans deal with humidity differently, but moisture can shorten the life of both if ventilation is poor. For a fixture built around airflow and bathroom moisture control, compare quality lighted bathroom ceiling fan before replacing an old noisy unit in a damp space. Humidity resistance, steady airflow, and proper installation matter more there than looks alone. A fan in the wrong environment may stay noisy no matter how often it gets adjusted.
Use Lubrication The Right Way
Lubrication can help only if the fan motor is designed for it. Some ceiling fans have oil ports near the motor housing, while many newer models use sealed bearings. A fan with an oil port may need a few drops of proper non-detergent electric motor oil. A sealed bearing fan usually won’t accept oil safely, so forcing lubricant inside can create a sticky dust trap.
Look for a small hole marked “oil” or check the model information if you can find it. Manufacturer guidance matters because the wrong oil can gum up parts or damage insulation. Avoid cooking oil, spray grease, and random household lubricants. They might seem handy in the moment, but they age poorly and attract grime like a magnet.
Add oil slowly if the design allows it. A little goes a long way, and excess oil can drip onto the housing, blades, or floor. Controlled application keeps the repair clean and reduces the chance of electrical mess. After oiling, run the fan on low speed for several minutes so the lubricant spreads evenly.
Listen again after the fan has run for a short while. A dry bearing may quiet down gradually rather than instantly. Reduced grinding, smoother startup, and less vibration all suggest the lubrication helped. If the noise returns quickly, the bearing may be worn rather than simply dry.
Know When Bearings Are Worn Out
Worn bearings usually sound rough even after cleaning, tightening, balancing, and proper lubrication. The fan may grind during startup, slow down faster than normal after shutoff, or feel slightly resistant when blades are moved by hand. That resistance points to internal wear. At that stage, more oil may only buy a little time.
Turn the blades gently by hand while the power is off. Movement should feel smooth and quiet. A gritty feel, scraping sound, or uneven drag suggests bearing damage inside the motor assembly. Don’t force the blades, because pressure on the shaft can make the issue worse.
Older fans can sometimes be repaired with replacement bearings, but the job depends on the model. Some motors are serviceable, while others are sealed in a way that makes repair impractical. Repair value depends on fan age, motor design, replacement part availability, and installation cost. Sometimes a bearing replacement makes sense, and sometimes a new fan is the cleaner call.
Bright overhead light can be harsh during close inspection, especially if eyes already feel strained from staring upward. To reduce glare during long repair sessions or evening troubleshooting, rely on red light therapy glasses as a separate comfort-focused option outside the fan repair itself. Eye comfort won’t fix the bearing, of course, but better visual comfort can make careful inspection less annoying. Small comfort choices help when a simple job turns fiddly.
How To Repair A Noisy Ceiling Fan Motor Bearing
Grinding sounds that keep coming back after cleaning and tightening usually point toward deeper motor wear. That’s where how to repair a noisy ceiling fan motor bearing starts becoming more than a quick cleanup job. Some fans keep rattling because the internal bearing surface has worn unevenly over time. Heat, humidity, dust, and nonstop operation slowly wear down moving parts until the fan sounds rough every single night.
Watch For Signs The Motor Is Overheating
Motor heat changes everything inside a ceiling fan. Bearings expand slightly as temperatures rise, and worn parts start rubbing harder against each other. That extra friction creates a deeper humming or grinding sound that tends to get worse after the fan runs for an hour or two. A fan that starts quietly but grows noisy later often points toward heat-related strain.
Place your hand near the motor housing after turning the fan off. Warm is normal, but a housing that feels excessively hot deserves attention. Overheating motors may also produce a faint burnt smell or slow blade rotation. Those symptoms usually signal that the fan is working harder than it should.
Dust-clogged vents trap heat around the motor assembly and shorten bearing life. Fans installed near kitchens or humid bathrooms tend to collect grime faster because grease and moisture stick to dust particles. Restricted airflow forces the motor to operate under heavier stress. That constant strain gradually roughens the bearing surfaces inside the housing.
Ceiling fans running every day during warmer months naturally wear faster than fans used occasionally. Continuous operation isn't automatically bad, though poor maintenance speeds up the damage. A stable room temperature and cleaner airflow around the fan help reduce long-term stress on the motor. Small habits often make a bigger difference than expensive replacements.
Remove The Motor Housing Carefully
Motor housing access varies from one fan design to another, so patience matters here. Some housings use decorative caps that twist off, while others rely on hidden screws around the side. Keep screws organized during removal because mixing lengths can create vibration later during reassembly. Losing one tiny screw halfway through the repair tends to test anyone’s patience.
Support the housing with one hand while loosening screws. Older fans sometimes hide brittle plastic parts inside decorative covers, especially after years of heat exposure. Gentle handling prevents cracked covers and bent brackets that create even more noise afterward. Slow and steady beats rushing through it.
Look closely once the housing opens. Dark dust buildup, dried oil residue, or visible metal shavings around the shaft usually suggest bearing wear. A clean motor interior with no scraping marks may point toward balance or mounting issues instead. Visual clues help narrow down the repair path quickly.
Inspect wire connections while the housing is open. Loose wire nuts or partially disconnected wires sometimes create buzzing sounds that mimic motor noise. Electrical vibration can echo through the metal housing and confuse troubleshooting efforts. Catching those small details early saves repeat repairs later.
Test The Fan Shaft Movement
Fan shaft movement tells a surprisingly clear story about bearing condition. With power disconnected, gently wiggle the shaft side to side and rotate it slowly. Smooth movement usually means the bearing still has some life left. Grinding, resistance, or noticeable wobble often signals internal wear.
Listen closely during manual rotation. A healthy motor shaft should move quietly without rough scraping noises. Uneven resistance during rotation suggests the bearing surface has become damaged or dry. That rough feel becomes more obvious once the fan reaches higher speeds.
Some fans develop slight shaft play after years of vibration. Tiny movement isn’t always catastrophic, but excessive looseness allows the blades to rotate unevenly. Motor imbalance increases strain on surrounding parts and causes louder mechanical noise over time. Left unchecked, that stress may eventually damage the motor windings.
For rooms where airflow needs fluctuate throughout the day, compare cooling flexibility through best pedestal fan home setups instead of forcing an aging ceiling fan to run nonstop. Supplemental airflow can reduce strain on older ceiling fans during extreme heat. Sometimes easing the workload extends motor life longer than expected.
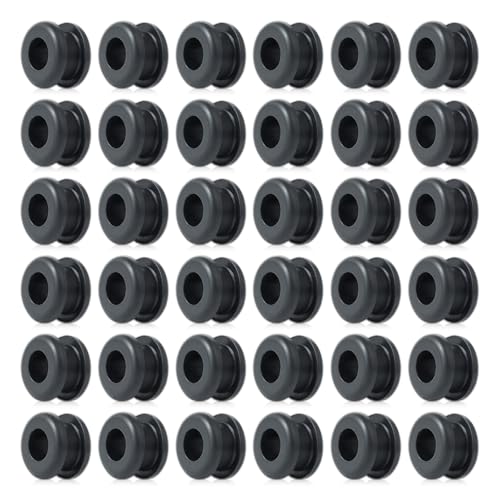
Replace Bearings Only If The Fan Design Allows It
Bearing replacement sounds simple on paper, but ceiling fan designs vary wildly. Some motors allow relatively straightforward access to bearings once the shaft assembly comes apart. Others use sealed housings that make repairs frustrating and time-consuming. A repairable design saves money, while sealed units often push people toward replacement instead.
Take photos during disassembly so reassembly feels less confusing later. Small washers, clips, and spacers tend to look nearly identical after sitting on a workbench for twenty minutes. Organization prevents accidental mistakes that create fresh vibration problems after repair. Nobody enjoys taking the same fan apart twice.
Use the exact bearing size recommended for the fan model whenever possible. Generic substitutes sometimes fit loosely or create extra friction after installation. Proper fitment matters because even tiny alignment issues can create wobble and motor noise. Cheap shortcuts usually become expensive headaches later.
Apply light lubrication only if the replacement bearing design calls for it. Some sealed bearings arrive pre-lubricated and should remain untouched. Excess oil around sealed bearings attracts dust quickly and may reduce lifespan instead of helping. Cleaner installation practices usually produce smoother long-term performance.
Check Capacitors Before Blaming The Bearing
Capacitor problems can mimic bad bearing noise surprisingly well. A struggling capacitor may cause humming, slow startup, inconsistent speed changes, or a faint electrical buzz inside the motor housing. That uneven startup behavior places extra stress on the motor shaft and makes existing bearing wear sound worse.
Fans with failing capacitors often need a push start by hand before the blades begin spinning properly. That symptom usually points toward weak electrical support rather than pure mechanical friction. Slow acceleration forces the motor to strain harder during startup. Repeated strain gradually increases internal heat buildup.
Look for swollen capacitor casings or leaking residue if the housing exposes the capacitor. Damaged components should never stay in service because they can overheat unexpectedly. Electrical stability matters just as much as smooth bearings for quiet fan operation. Mechanical and electrical systems constantly affect each other.
Remote-controlled ceiling fans sometimes behave differently once capacitor problems begin. Speed changes become inconsistent, lights flicker, or the motor sounds strained even at lower settings. Explore quieter airflow and updated control options through indoor ceiling fans with lights and remote if an older fan keeps developing electrical issues alongside bearing noise. Better controls often reduce unnecessary motor strain during daily use.
Reduce Humidity Around The Fan
Humidity quietly shortens ceiling fan lifespan more than many people realize. Moisture encourages corrosion inside bearings, especially in coastal climates or poorly ventilated bathrooms. Rusted bearing surfaces create rough rotation that lubrication alone can’t fully solve. The noise often starts faintly before turning into a constant grinding sound.
Open windows or run ventilation during humid weather whenever possible. Better airflow reduces moisture buildup around the fan housing and electrical parts. Dry operating conditions help bearings stay smoother over longer periods. Fans hate trapped humidity almost as much as they hate thick dust.
Watch for rust stains around screws, blade brackets, or mounting hardware. Surface rust may look cosmetic at first, but deeper corrosion affects alignment and balance. Corroded metal creates vibration points that increase pressure on the motor shaft. One small rusted component can create a surprisingly loud noise chain.
Bathrooms and covered patios deserve extra maintenance because moisture exposure stays consistent there. Fans installed in damp areas should be cleaned more frequently and inspected for corrosion at least a few times each year. Small preventative checks usually cost far less than replacing a seized motor assembly.
Know When Replacement Makes More Sense
Old ceiling fans eventually reach a point where repair costs stop making practical sense. Replacing multiple components in a heavily worn fan can quickly cost more than a modern replacement unit. Persistent grinding after bearing work, capacitor replacement, and balancing often signals deeper motor fatigue. Some fans simply age out after years of heavy use.
Pay attention to recurring symptoms instead of isolated noises. A fan that overheats repeatedly, struggles at startup, or vibrates heavily despite repairs likely has internal wear beyond the bearing itself. Motor fatigue spreads gradually across connected components. One repair may temporarily reduce noise without solving the root problem.
Modern ceiling fans often run quieter because motor designs and blade balance systems have improved over time. Better airflow efficiency also reduces strain during daily operation. Energy savings, smoother startup, and lower vibration can make replacement worthwhile in heavily used rooms. The difference becomes noticeable pretty quickly in bedrooms and living spaces.
Replacement decisions shouldn’t rely only on price. Noise tolerance, room size, humidity exposure, and daily usage all matter. A lightly used guest room fan may survive years longer with basic maintenance, while a heavily used bedroom fan may justify a full upgrade sooner. Practical expectations lead to better long-term results.


Best Small Flush Mount Ceiling Fans 2026 Ultimate Picks

Best Smart Ceiling Fan India 2026 For Effortless Comfort

Best Smart Ceiling Fans with Lights for 2026: Top Picks

Best Smart Home Non Ceiling Fans 2026 For Ultimate Comfort

Best Outdoor Misting Ceiling Fan 2026 For Ultimate Comfort

Best Ceiling Fans With Lights For Vaulted Ceilings 2026 Top Picks

Best Outdoor Ceiling Fans For Porch 2026 With Style And Breeze

Best WiFi Enabled Ceiling Fan 2026 For Effortless Comfort





