
How to Fix Ceiling Fan Light Not Working Fast
How to fix ceiling fan light not working becomes a frustrating search the second a room suddenly feels dim, uneven, or flat-out unusable. One minute the fan runs normally, then bam, the light refuses to turn on no matter how many times the switch gets flipped. That kind of issue tends to show up at the worst possible moment too, especially during late evenings or while tackling everyday chores. A dead ceiling fan light can feel minor at first, yet it quietly throws off comfort, visibility, and the entire mood of a room.
Burned-out bulbs aren't always the real culprit. Loose wiring, faulty pull chains, damaged sockets, tripped breakers, or worn light kits often hide behind the problem. Plenty of homeowners swap bulb after bulb without realizing the actual issue sits deeper inside the fixture. That's where understanding electrical connections, switch behavior, and common wear points starts making a huge difference.
Oddly enough, ceiling fan lights usually give subtle warning signs before quitting completely. Flickering bulbs, random dimming, buzzing sounds, or delayed startup often point toward failing components. Ignoring those clues can eventually lead to bigger electrical headaches that cost more time and money to handle later. Nobody wants to stand on a ladder repeatedly guessing what went wrong.
How to fix ceiling fan light not working also depends heavily on the fan's age and design. Older fixtures may struggle with aging wire insulation or outdated sockets, while newer models sometimes deal with remote receiver glitches or faulty LED modules. Some setups use integrated lighting systems that behave differently from traditional bulb sockets. Knowing the difference saves a lot of unnecessary trial and error.
Small maintenance habits can quietly extend the lifespan of ceiling fan lighting too. Dust buildup inside sockets, loose glass covers, and heat trapped around bulbs often shorten component life faster than people expect. Cleaning fixtures regularly and checking connections once in a while can help avoid those sudden “why won't this thing turn on?” moments. A little prevention usually beats climbing a ladder in frustration later.
Then there's the safety side of things. Electrical repairs might seem simple until exposed wires or overloaded circuits enter the picture. Shutting off power properly, testing switches carefully, and avoiding rushed fixes matter more than most people realize. A careful approach keeps both the fixture and the room safer while troubleshooting lighting failures step by step.
How To Fix Ceiling Fan Light Not Working
A dark room can make a perfectly normal evening feel sideways fast. The fan still spins, the switch still clicks, and yet the light sits there doing absolutely nothing. That gap between “the fan works” and how to fix ceiling fan light not working is where most frustration starts. Before replacing the whole fixture, a careful check of the bulb, switch, wiring, socket, and light kit can usually narrow the problem without turning the ceiling into a guessing game.
Start With The Simple Stuff
The easiest fix is also the one people tend to skip because it feels too obvious. A burned-out bulb, loose bulb base, or wrong bulb type can make a ceiling fan light seem broken even when the fixture is fine. Remove the bulb, inspect the base, and check for dark glass, rattling parts, or a loose center contact. Replace it with a bulb that matches the fan’s allowed wattage and socket style.
Ceiling fan light kits can be picky about bulbs, especially newer fixtures with LED modules, dimmer controls, or remote receivers. Some LED bulbs flicker, stay dim, or refuse to turn on if the wall control is made for older incandescent bulbs. A standard non-dimmable LED in a dimmer circuit can act like a tiny troublemaker. Matching the bulb to the control setup saves a lot of head-scratching.
Power should be checked before digging deeper. Flip the wall switch a few times, test nearby outlets, and look at the breaker panel for a tripped circuit. A breaker may not always sit fully in the off position, so push it firmly off and then back on. That quick reset can restore lost power if the circuit tripped during a surge or overload.
Loose glass shades and dust buildup can also create sneaky issues. Dust can trap heat around bulbs, while a shade screwed too tightly may press against the bulb or socket area. Clean the fixture gently and make sure the bulb sits snug without being forced. Small details matter because heat, vibration, and poor contact are common enemies inside ceiling fan lights.
Check The Pull Chain And Wall Switch
A ceiling fan light often has more than one control point, and that’s where the mix-up begins. The wall switch may be on, but the pull chain could be off. The remote may show power, but the receiver may not be sending a signal. Testing each control one by one helps separate a switch problem from a fixture problem.
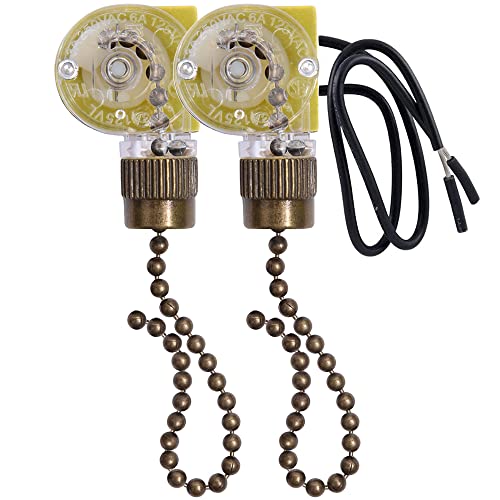
Pull chains wear out because they deal with constant tugging and vibration. A chain that feels loose, jammed, or too easy to pull may not be moving the internal switch anymore. Sometimes the chain breaks inside the switch housing even though the outside piece still looks fine. That failure can leave the light stuck off while the fan motor keeps running normally.
A wall switch can fail quietly too. If the switch feels warm, crackly, loose, or inconsistent, shut off the breaker before touching anything further. A worn switch may send power sometimes and fail at other times, which explains random flickering or delayed lighting. Replacing a faulty switch is often cheaper than replacing the fan, but safe power shutoff comes first.
Remote-controlled fans add another layer. Weak batteries, a lost pairing, or a failing receiver can stop the light from responding while the fan still works. Resetting the remote, checking dip switch settings, and replacing batteries can clear simple remote issues. If the fixture model is unclear, identify the exact unit first through the fan label or manual, and use a practical guide like how to find ceiling fan model before ordering replacement parts.
Inspect The Light Socket Safely
The socket is where a lot of ceiling fan light problems hide in plain sight. A bulb may look tight, but the small metal tab at the bottom of the socket may not be touching the bulb base properly. With the breaker off, that tab can sometimes be lifted slightly with a non-metal tool if it has been pressed flat. That tiny adjustment can restore proper electrical contact.
Burn marks around the socket are a bigger warning sign. Brown spots, melted plastic, brittle wiring, or a scorched smell suggest heat damage that shouldn’t be ignored. A damaged socket can keep bulbs from working and may create a safety concern. In that case, replacing the light socket or full light kit is smarter than forcing another bulb into the same failing part.
Wrong bulb wattage can cook a socket over time. Older ceiling fan light kits often have strict wattage limits because heat builds up inside enclosed glass shades. A bulb that runs too hot can weaken the socket, damage insulation, and shorten the life of nearby parts. Staying within the fixture rating protects the wiring, shade, and socket assembly.
Integrated LED fixtures are different from standard bulb sockets. Instead of replacing a screw-in bulb, the light may rely on an LED board, driver, or module. If the fan light glows faintly, flashes once, or dies completely, the LED driver may be failing. That repair usually means replacing the LED light module or compatible kit rather than treating it like a basic bulb issue.

Trace Wiring Without Guesswork
Ceiling fan wiring can loosen over time because fans vibrate every time they run. Even a small connection gap can stop the light while leaving the fan motor unaffected. Turn off the breaker, remove the canopy or light kit cover, and look for loose wire nuts, disconnected wires, or signs of heat. A solid connection should feel secure, not wobbly or barely twisted together.
Most fan light kits use separate wires for the motor and the light. That’s why the blades may spin while the light stays dead. A common setup uses a black wire for fan power, a blue wire for light power, a white neutral, and a green or bare ground. The exact colors can vary, so the manual or wiring label matters more than guesswork.
Loose neutrals can cause strange behavior too. A weak neutral connection may make the light flicker, hum, or refuse to turn on even though power is present. Wire nuts should cover clean copper ends and hold wires firmly together. Any cracked insulation, exposed copper outside the connector, or brittle wire deserves careful repair before the fixture goes back together.
Some homes have separate wall switches for fan and light, while others route both through one switch and a pull chain. That difference changes where the fault might be hiding. If the light worked before a switch replacement, paint job, or fixture adjustment, the issue may sit at the wall box instead of the fan. A simple voltage tester can help confirm power flow, but live electrical testing should be left to someone qualified if there’s any doubt.
Know When The Light Kit Is The Problem
A ceiling fan light kit can fail even when every bulb, switch, and wire looks normal. The internal switch, socket cluster, LED board, or limiter can wear out from heat and age. If several bulbs fail at once, the issue usually isn’t the bulbs. That pattern points more toward a shared light kit component.
Older fans may include a wattage limiter that shuts down the light if it senses too much load. These parts were added to reduce excessive energy use and overheating, but they can fail over time. A bad limiter may block power even with correct bulbs installed. Replacing the light kit is often cleaner than trying to bypass safety-related parts.
Replacement kits must match the fan brand, mounting style, and wiring layout. Universal kits exist, but not every “universal” part fits neatly once the cover comes off. Measure the fitter size, check screw spacing, and compare connector types before buying anything. A mismatched kit can turn a simple repair into an annoying return trip.
Room conditions matter as well. Bedrooms with low ceilings often use compact fans where the light kit sits close to the ceiling and traps more heat. If clearance is already tight, choosing a fixture built for that space can reduce future lighting problems, so compare options like best ceiling fan for low ceiling bedroom before replacing an entire fan. Better fit can mean less heat buildup, better clearance, and easier maintenance.
Watch For Heat, Humidity, And Hidden Wear
Ceiling fans live in rougher conditions than they get credit for. Heat rises, dust collects, vibration never really stops, and moisture can sneak in through bathrooms, kitchens, and enclosed patios. Those conditions slowly wear down wire insulation, sockets, switches, and connectors. The light may be the first part to complain because it handles extra heat from bulbs or LED drivers.
Humidity can corrode contacts inside sockets and switches. A slightly green, dull, or rusty contact may not pass electricity cleanly. That can cause flickering, weak light output, or sudden failure. Cleaning minor residue may help, but heavy corrosion usually means the damaged part should be replaced.
Heat management matters more than most people expect. Enclosed glass shades trap warmth around bulbs, especially if the fixture uses bulbs that run hotter than recommended. LED bulbs usually run cooler than incandescent bulbs, but poor-quality LED drivers can still fail in tight spaces. A cooler-running bulb with the right rating helps protect the socket and light housing.
Seasonal temperature swings can stress fixtures in garages, sunrooms, and covered outdoor areas. Plastic parts expand and contract, wire nuts loosen slightly, and tiny gaps can form at contacts. Garden rooms and greenhouse-adjacent spaces can add humidity and warmth into the mix, so separate heating gear such as a best greenhouse heat lamp should stay away from ceiling fan wiring and light housings. Keeping heat sources separated helps reduce electrical stress and fixture wear.
Ceiling Fan Light Troubleshooting And Repair Tips
Nothing drags down a room faster than a ceiling fan light that suddenly quits after working perfectly fine the night before. People usually expect a quick bulb swap to fix everything, then frustration kicks in once the new bulb still refuses to turn on. That’s where ceiling fan light troubleshooting starts becoming less about luck and more about checking the right components in the right order. A calm step-by-step approach helps narrow down the issue without wasting money on unnecessary replacement parts.
Test Power Flow Before Replacing Parts
Power issues can fool even experienced homeowners because the fan motor and light kit often run on separate connections. A ceiling fan may spin normally while the light stays completely dead due to a disconnected blue wire or failed light switch. Before replacing anything expensive, verify that the fixture is actually receiving stable electrical power. A non-contact voltage tester makes this process safer and less stressful.
Wall switches deserve more attention than they usually get. Dust, age, heat, and loose internal contacts can cause random light failures that appear unrelated to the switch itself. If the switch feels mushy, crackles slightly, or only works after repeated flipping, there’s a decent chance the switch is worn out. Replacing an old switch often restores consistent lighting performance surprisingly fast.
Remote-controlled ceiling fans create another layer of confusion. Some remotes lose pairing after power outages, while others develop receiver problems that only affect the light kit. Resetting the remote and checking battery strength can solve issues that initially look electrical. Fans connected to advanced systems may also benefit from updated controls like best smart ceiling fan control if inconsistent signal behavior keeps interrupting normal lighting operation.
Breaker panels shouldn’t be ignored either. A partially tripped breaker can still look “on” from a distance while quietly cutting power to sections of the circuit. Turn the breaker fully off before switching it back on. That reset can restore full circuit function after minor overloads or sudden voltage spikes.
Fix Flickering And Intermittent Lighting
Flickering ceiling fan lights usually start small. Maybe the bulb dims for half a second, flashes briefly, or turns on only after tapping the switch twice. Those early symptoms matter because they often point toward loose wiring, unstable sockets, or failing controls before the light stops completely. Ignoring flickering rarely makes the problem disappear on its own.
Loose bulbs are still one of the most common causes. Ceiling fans vibrate constantly, and over time that movement can loosen bulb connections just enough to interrupt power flow. Tightening the bulb carefully without over-torquing it may restore a solid connection. A bulb that rattles slightly inside the socket usually signals poor electrical contact.
Dimmers can also create flickering problems with incompatible LED bulbs. Older dimmer switches designed for incandescent lighting sometimes struggle with modern LEDs, especially budget bulbs with weak drivers. That mismatch can lead to buzzing, random dimming, or visible flickers during startup. Replacing either the bulb or the dimmer often restores stable brightness.
Loose wire connections inside the fan canopy can trigger intermittent lighting too. Even a slightly loose neutral wire may create inconsistent current flow that causes flickers under load. Turn off the breaker before inspecting any wiring. Tightening wire nuts and checking for overheated insulation can prevent bigger electrical headaches later.
Deal With Burned Or Overheated Components
Heat damages ceiling fan light kits more often than most people realize. Enclosed shades trap warmth around bulbs, especially in fixtures using outdated incandescent lighting. Over time, excessive heat weakens sockets, dries insulation, and stresses plastic components. A burned smell or discolored socket usually points toward heat-related wear.
Socket damage tends to appear gradually. The center contact tab may flatten, metal contacts may darken, or the surrounding plastic may become brittle from repeated heating cycles. Those problems interfere with proper bulb contact and can eventually stop the light entirely. Replacing the socket is usually safer than trying to force another bulb into a damaged fixture.
High-wattage bulbs often create hidden trouble. Some homeowners install brighter bulbs hoping to improve room lighting without checking the fixture’s rating. That extra heat builds quietly until the socket or wiring starts failing. Staying within the recommended wattage protects the light kit, wiring, and insulation from unnecessary stress.
Seasonal decorative lighting can contribute to overload issues too. Rooms packed with extension cords, decorative lamps, and holiday lighting sometimes place extra demand on shared circuits. Heavy lighting setups paired with ceiling fans can push aging circuits harder than expected, especially during colder months when decorative systems like best permanent outdoor christmas lights stay active for long stretches. Balanced circuit loads help reduce breaker trips and overheating.
Replace A Faulty Light Kit Without Stress
Sometimes the light kit itself simply wears out. Internal switches fail, LED boards die, and socket assemblies weaken after years of heat and vibration. If multiple bulbs stop working at once and wiring looks solid, the light kit becomes the next likely suspect. Replacing the entire kit can actually save time compared to chasing one failing part after another.
Compatibility matters more than people expect. Screw spacing, connector plugs, fitter size, and wattage ratings all need to match the existing fan. Universal kits can work well, but some require minor rewiring or adapter brackets depending on the fan design. Measuring carefully before ordering helps avoid the headache of incompatible parts arriving later.
Integrated LED systems deserve special attention because they don’t use standard screw-in bulbs. Many newer fans rely on dedicated LED boards paired with small driver modules. If the LED board fails, replacing the board or complete module usually solves the issue. Trying to treat an integrated LED fixture like a normal bulb socket often wastes time and creates more confusion.
Patience matters during installation. Wires should sit neatly inside the housing without pinching against metal edges or screws. Loose screws and crowded wires can create rattling noises or future electrical problems. Taking an extra few minutes during assembly protects the new light kit from avoidable wear.
Prevent Future Ceiling Fan Light Problems
Ceiling fan lights last longer with small maintenance habits that people often overlook. Dust buildup traps heat around bulbs and sockets, while loose shades increase vibration inside the fixture. Cleaning the light kit regularly helps airflow move around the bulb instead of cooking the surrounding parts. That simple habit supports better cooling and longer component life.
Bulb quality makes a noticeable difference too. Cheap LED bulbs sometimes fail early because weaker internal drivers struggle with enclosed fan fixtures. Spending slightly more on reliable bulbs designed for enclosed fixtures usually means fewer flickering issues and better long-term stability. Not every bulb handles heat equally well.
Watch for subtle warning signs before total failure happens. Buzzing sounds, delayed startup, faint flickers, or warmth around switches often appear weeks before the light stops entirely. Catching those clues early gives homeowners time to fix loose connections or replace aging parts before the room suddenly goes dark. Small symptoms usually point toward bigger electrical wear building underneath.
Fan balance matters more than most people think. Wobbling blades create extra vibration that slowly loosens screws, stresses wire connections, and shakes bulb sockets over time. Tightening blade screws and using balancing kits where needed reduces stress throughout the fixture. A smoother-running fan helps protect both the motor and lighting system from long-term strain.
Know When Professional Help Makes Sense
Some ceiling fan light problems cross the line from annoying into potentially dangerous. Burned wiring, repeated breaker trips, melted insulation, or sparks near the fixture deserve immediate attention. Turning off power at the breaker should happen first before any further inspection. Electrical problems tied to overheating or damaged wiring shouldn’t be ignored.
Older homes can complicate repairs because wiring standards may differ from modern setups. Shared neutrals, aging junction boxes, or brittle insulation can create issues that aren’t visible from the outside. A licensed electrician can safely trace those problems without risking damage to the ceiling or surrounding circuits. That matters especially if multiple fixtures show similar symptoms.
Some repairs simply require tools or experience most homeowners don’t keep around. Testing live voltage, replacing internal receiver modules, or troubleshooting hidden wall switch wiring can become risky without proper equipment. Calling for help early may actually reduce repair costs by preventing accidental damage. A careful repair beats rushed trial-and-error every single time.
Electrical safety always outweighs convenience. A ceiling fan light may seem like a small household issue, but damaged wiring can affect the larger circuit feeding the room. Taking the time to repair problems correctly protects lighting reliability, household safety, and fixture lifespan all at once.


Best Small Flush Mount Ceiling Fans 2026 Ultimate Picks

Best Smart Ceiling Fan India 2026 For Effortless Comfort

Best Smart Ceiling Fans with Lights for 2026: Top Picks

Best Smart Home Non Ceiling Fans 2026 For Ultimate Comfort

Best Outdoor Misting Ceiling Fan 2026 For Ultimate Comfort

Best Ceiling Fans With Lights For Vaulted Ceilings 2026 Top Picks

Best Outdoor Ceiling Fans For Porch 2026 With Style And Breeze

Best WiFi Enabled Ceiling Fan 2026 For Effortless Comfort





