
How to Fix Chain Pulled Out of Ceiling Fan Fast
How to fix chain pulled out of ceiling fan becomes a frustrating search the second that tiny chain slips loose and leaves the fan stuck on one speed or completely dead. One quick tug too hard, and suddenly the whole room feels uncomfortable. Plenty of people assume the fan is ruined, but honestly, that's usually not the case. Most pull chain problems come from worn switches, broken connectors, or chains that snapped loose inside the housing.
Ceiling fans deal with constant movement, dust buildup, humidity, and repeated pulling day after day. Eventually, those small internal parts start wearing down, especially in older fixtures that have seen years of use. A loose or missing chain can feel like a major headache, yet the repair often comes down to opening the switch housing and replacing a relatively inexpensive component. That's the good news. The better news is that basic tools usually handle the job just fine.
Pull chain switches fail in sneaky ways. Sometimes the chain hangs loosely with no clicking sound at all. Other times the fan gets stuck on high speed, refuses to turn on, or only works if the chain gets pulled at a weird angle. Those little warning signs often point toward a damaged internal mechanism rather than a wiring disaster. Spotting the difference matters because it saves time, money, and a whole lot of unnecessary stress.
Old ceiling fans also collect grime inside the switch housing, which can interfere with smooth operation. Dust mixed with heat and moisture creates wear over time, especially in busy rooms where the fan rarely gets a break. Kitchen fans and bedroom fans tend to show these issues faster than expected. While replacing the entire ceiling fan might sound tempting, repairing the switch usually keeps everything running smoothly again without turning the project into a full weekend ordeal.
Electrical safety still matters, though. Turning off the breaker before touching the housing isn't optional. Plenty of homeowners rush through simple repairs and end up creating bigger problems by skipping that step. A careful approach makes the process easier and prevents accidental shocks or damaged wiring. Slow and steady wins here, no question about it.
Some pull chains can simply reconnect, while others require a complete switch replacement. That's where knowing the symptoms helps narrow things down fast. A chain that pulls freely without resistance often means the switch mechanism snapped internally. Meanwhile, a short broken chain hanging from the fan may only need an extension connector. Tiny details make a huge difference during troubleshooting.
How to fix chain pulled out of ceiling fan also depends on the fan model and switch style. Four-wire fan switches, light kit pull chains, and speed control switches all work differently behind the scenes. Opening the housing before buying replacement parts helps avoid the classic mistake of grabbing the wrong switch from the hardware store. Trust me, that's a pain nobody wants twice.
How To Fix Chain Pulled Out Of Ceiling Fan
A tiny broken chain can turn a comfortable room into a fussy little problem fast. The fan might stay stuck on one speed, the light may refuse to switch, or the chain may vanish right into the housing like it had somewhere better to be. That is where how to fix chain pulled out of ceiling fan becomes less about guesswork and more about spotting the real failure point. A calm repair plan, a safe power shutoff, and the right pull chain switch can save the fan without replacing the whole fixture.
Start With The Real Failure Point
A pulled-out chain does not always mean the same thing. Sometimes the chain extension simply snapped off below the fan body, which is the easiest fix on the board. Other times, the chain broke inside the switch housing, leaving the internal click mechanism useless. That difference matters because one repair takes a small connector, while the other calls for a replacement switch.
Start by looking at what is left hanging from the fan. A short bead chain sticking out usually means the lower chain section broke, not the switch itself. A completely missing chain, no clicking sound, or a loose opening in the housing points toward a broken pull chain switch. That small clue keeps the project from turning into a wild goose chase.
The fan’s behavior also tells a story. A fan stuck on high, a light that stays on, or a chain that pulls with no resistance all suggest the internal switch has failed. A healthy pull switch has a firm click, so a limp pull or empty movement is a red flag. In plain English, no click usually means no switch action.
Safety comes before curiosity. Shut off the correct breaker, not just the wall switch, because ceiling fan wiring can still surprise you. A non-contact voltage tester adds peace of mind before the housing screws come out. That extra step protects both the person doing the repair and the fan wiring tucked inside.
Open The Housing Without Making A Mess
The switch housing usually sits below the fan motor, often where the light kit connects. Remove the small screws carefully and support the cover as it loosens. Wires may be short, and yanking the cover down can stress the wire connectors. Slow hands beat rushed hands here, every single time.
Take a clear phone photo before touching anything. That photo becomes your safety net if the wiring layout looks like a bowl of spaghetti later. Most pull chain switches connect with two, three, or four wires, depending on whether they control a light or fan speed. A quick picture preserves the wire order before anything gets removed.
Look for the switch attached to the chain opening. A light pull switch is often simpler, while a fan speed switch may have multiple terminals marked with letters or numbers. Those markings are not decorative. Matching the old switch layout to the new one keeps the speed settings from acting weird after the repair.
Dust can make the inside of a fan look worse than it is. Wipe loose grime gently, but do not spray cleaner into the housing. Moisture and electrical parts are a lousy pair. A dry cloth and careful handling are enough for this stage, especially around wire nuts and plastic switch bodies.
Match The Replacement Switch Correctly
The old switch is your shopping guide. Remove it only after the breaker is off and the wiring photo is saved. Check the number of wires, terminal labels, and switch shape before buying a replacement. A close match matters because a fan speed pull switch is not the same as a simple light pull switch.
Many ceiling fan speed switches use three or four wires, while many light switches use two. That small count changes the repair completely. A mismatch can make the fan skip speeds, hum, or refuse to run. The safest move is to match the terminal pattern, not just the chain length.
Bring the old switch to the hardware store if the labels are hard to read. The tiny letters on the side can fade, crack, or hide under dust. Matching by appearance alone can fool you because two switches may look similar but operate differently inside. The internal contact pattern is the part that really counts.
Home repair projects can snowball if the fan itself is already worn out, wobbly, or too small for the room. Compare airflow options before replacing the entire fixture with bedroom ceiling fan without light models if a cleaner setup fits the space better. A repair makes sense when the motor is solid, but a tired fixture with repeated switch issues may not be worth babysitting. That is the tradeoff nobody loves, but it is practical.
Reconnect Wires With A Steady Hand
Replace one wire at a time if the old switch still has its wires attached. That method lowers the chance of mixing up terminals. Some switches use push-in terminals, while others use small screws or pre-attached leads. Keep the wire placement consistent with the original layout.
Loose wire connections create annoying problems after reassembly. The fan may flicker, click without responding, or stop after a short run. Tug gently on each connection after securing it to confirm it holds. A firm connection supports safe operation and keeps the repair from needing a second round.
Wire nuts should cover exposed copper fully. Bare wire outside the connector is a problem, not a harmless detail. Trim or reposition the wire if copper sticks out too far. Clean connections reduce the risk of short circuits, especially inside a tight fan housing.
Do not force extra wire into the housing like stuffing clothes into an overpacked drawer. Fold wires neatly so the switch sits straight and the cover closes without pressure. Pinched wires can create faults later, especially once the fan vibrates during use. A tidy housing protects the new pull chain switch and keeps the repair cleaner.
Test The Chain Before Fully Closing Up
Testing before final assembly saves aggravation. Hold the switch housing securely, restore power, and try the chain carefully. The fan should click through its settings, or the light should turn on and off cleanly. A crisp click means the switch mechanism is doing its job.
Turn the breaker back off before tightening everything permanently. That back-and-forth feels tedious, but it prevents working around live wiring. Once the test confirms the repair, tuck the wires neatly and reinstall the housing screws. The fan should feel secure without rattles around the switch cover.
If the fan hums, skips speeds, or acts backward, the wiring may not match the old switch pattern. Go back to the photo and compare every terminal. A wrong connection on a speed switch can create odd behavior without looking obviously wrong. The fix is usually a corrected wire order, not a brand-new fan.
Lighting upgrades sometimes expose older fan issues, especially in garages, shops, or rooms with tall ceilings. Improve work-area visibility with led high bay lights if the room needs stronger overhead lighting beyond the ceiling fan. Better light makes small repairs easier, and it also helps spot worn parts before they turn into bigger headaches. Still, keep fan wiring and room lighting plans as separate decisions.
Handle Broken Chain Extensions The Easy Way
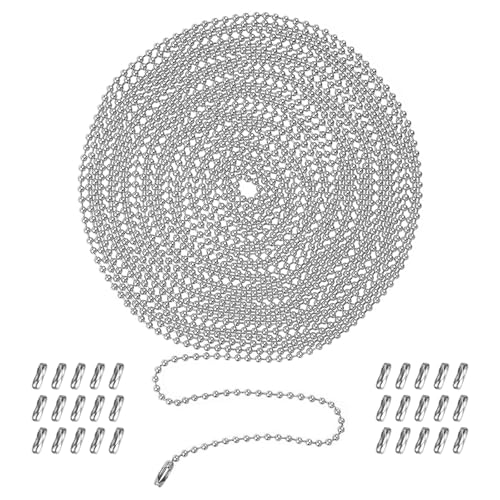
A chain that snapped below the housing is the friendliest version of this repair. The switch may still work perfectly if there is enough chain left to grab. Add a small bead-chain connector and a new extension, then test the pull. That simple fix restores easy fan control without opening the housing.
Choose a chain length that is reachable but not dangling in the way. A chain that is too short becomes annoying, while one that is too long catches hands, furniture, or curious kids. Balance matters more than style here. The best length supports comfortable daily use without swinging around every time the fan runs.
Metal bead chains are common because they move smoothly through the switch opening. Decorative pulls are fine, but heavy ornaments can strain an older switch over time. A light pull handle is easier on the mechanism and less likely to worsen a weak internal spring. That small choice helps extend the life of the pull chain assembly.
Outdoor fans add another wrinkle because moisture and corrosion can weaken pull chains faster. Upgrade weather-exposed spaces with outdoor ceiling fans lowes options if rust, wobble, or repeated chain failures keep coming back. A covered patio fan needs parts made for damp or wet conditions, not leftover indoor hardware. Repair is smart, but weather resistance matters when the fan lives outside.
How To Repair Ceiling Fan Pull Chain Switch Problems
Most people expect a ceiling fan repair to turn into an expensive hassle, especially after hearing grinding noises or feeling the chain suddenly yank loose. The surprise comes later after opening the housing and realizing the problem usually centers around one tiny component. A worn pull chain switch, loose connector, or damaged internal spring often causes the whole issue. That is why how to repair ceiling fan pull chain switch problems becomes more about patience and careful inspection than advanced electrical work.
Spot Signs Of A Failing Fan Switch
A ceiling fan rarely stops without warning. Strange clicking sounds, inconsistent speeds, or a chain that feels rough during pulling usually appear first. Those subtle changes matter because they point toward a weak switch mechanism before the chain fully pulls out. Ignoring those little signs often leads to a complete switch failure later.
Fans with older pull chains tend to feel stiffer over time. Heat buildup inside the housing slowly wears down tiny moving contacts, especially in rooms where the fan runs all day. Bedrooms, kitchens, and humid laundry rooms usually show these symptoms faster than cooler areas. That repeated strain weakens the internal pull assembly one click at a time.
Chain resistance also tells a useful story. A healthy switch feels firm with distinct clicks between settings. A failing switch may feel mushy, loose, or uneven while cycling speeds. That soft pull sensation often signals a broken spring mechanism hiding inside the switch body.
Room airflow problems sometimes get blamed on the fan motor even though the switch is actually failing. Fans stuck between speed settings can lose power without fully stopping. Smaller rooms especially feel stuffy fast once airflow drops. For tighter spaces needing extra circulation, compare small fan for desk options alongside ceiling airflow improvements to keep the room more comfortable during repairs.
Remove The Old Switch Without Confusion
The easiest mistake during ceiling fan repair happens right after the housing opens. People disconnect every wire at once, then stare at the switch later wondering where everything belonged. Keeping the process organized prevents that headache. A quick phone photo protects the original wiring layout before anything moves.
Most pull switches attach with a small threaded collar near the chain opening. Unscrew that collar gently from the outside while supporting the switch from below. Older plastic switch bodies can crack if twisted aggressively. Slow handling protects both the fan wiring and the switch housing itself.
Push-in terminals deserve extra attention. Some wires release easily with a small screwdriver inserted into the terminal slot, while others require careful pulling. Tugging too hard risks damaging older wires that may already feel brittle from years of heat exposure. Preserving the wire insulation helps avoid bigger electrical repairs later.
Labeling wires with masking tape sounds boring until confusion hits halfway through reassembly. Small details matter once several black wires start looking identical under dim ceiling light. Organized repairs move faster and create fewer surprises later. That simple prep step supports a smoother switch replacement process.
Deal With Ceiling Fan Speed Problems
A repaired pull chain should cycle cleanly through every fan speed. Problems begin when the fan skips settings, hums loudly, or spins slower than expected after installation. Those symptoms often trace back to mismatched terminals or incorrect switch types. A proper speed control switch keeps airflow smooth and stable.
Ceiling fans commonly use four-wire speed switches, though some older models vary slightly. Matching the wire order exactly matters more than matching switch appearance. Two switches can look nearly identical while operating differently inside. That tiny mismatch creates frustrating speed control issues after reassembly.
Fans with capacitor problems can also mimic switch failures. If the chain clicks properly but speeds remain weak, inconsistent, or noisy, the capacitor may deserve inspection next. Burn marks, swelling, or leaking around the capacitor housing suggest trouble. A failing capacitor affects motor performance even with a brand-new switch installed.
Low ceilings sometimes make airflow problems feel worse because the fan sits closer to the room’s living space. Compact fixtures can help maintain airflow without creating a cramped appearance overhead. Explore small flush mount ceiling fans if the room struggles with both space limitations and weak air circulation from older bulky fixtures.

Fix Light Pull Chains Separately
Light kit pull chains operate differently from fan speed switches, even though they look similar from outside. A light switch usually handles simple on-and-off operation with fewer wires involved. That simpler design makes repairs easier, but it still needs careful wiring attention. Replacing the wrong part creates unnecessary electrical confusion.
Some ceiling fans contain two separate pull chains packed into one small housing. One controls the light while the other changes fan speed. Mixing those switches accidentally causes bizarre behavior afterward. Lights may flicker while fan speeds skip entirely, which usually points toward a crossed switch installation.
Glass light kits add another challenge because they become awkward during repair work. Removing glass shades before opening the housing prevents accidental drops and cracked covers. A towel underneath the work area helps protect delicate pieces from slipping. Careful handling protects both the light assembly and your patience.
Dim lighting inside older rooms also makes repairs more frustrating than they should be. Portable work lights help, especially while tracing small wires inside crowded housings. Bright visibility reduces mistakes around terminals and wire colors. Better lighting supports safer handling of the electrical connections tucked into tight fan spaces.
Prevent Pull Chain Damage From Returning
Most pull chain failures happen gradually instead of instantly. Rough pulling habits slowly weaken the internal switch over time. Jerking the chain sideways, pulling too aggressively, or yanking repeatedly while the fan changes speed creates extra stress inside the mechanism. Gentle use extends the life of the chain switch assembly.
Dust buildup also contributes more than many people realize. Ceiling fans collect grime inside the housing, especially near kitchens and humid bathrooms. Dirt interferes with moving contacts and creates extra friction around the chain opening. Occasional cleaning helps preserve the switch movement and reduces wear.
Heavy decorative pull chains may look stylish, but they add strain to older switches. Long crystal handles or oversized ornaments swing while the fan runs and slowly loosen internal components. Lightweight extensions reduce that constant stress. A balanced setup protects the internal spring contacts from early failure.
Frequent repairs may point toward a larger fan issue rather than simple bad luck. Wobbling motors, constant vibration, or warped blades place repeated stress on switch components. Tightening blade brackets and balancing the fan helps reduce internal movement during operation. Stable airflow supports longer-lasting electrical parts throughout the fixture.
Know When Repair Stops Making Sense
Some ceiling fans deserve repair, while others quietly signal retirement. Cracked housings, burnt wiring smells, or repeated electrical issues usually mean deeper problems beyond the pull chain itself. Spending money on repeated switch replacements becomes frustrating fast once the fan motor starts deteriorating too. That balance between repair and replacement matters.
Older fans sometimes lack replacement parts entirely. Pull switches may still fit, but aging motors and brittle wiring create reliability problems later. A fan that overheats, vibrates heavily, or trips breakers deserves careful evaluation before another repair attempt. Safety should outweigh attachment to an old fixture every single time.
Noise can also become the deciding factor. Fans with worn bearings often produce grinding or humming sounds even after the switch repair succeeds. Those noises usually worsen over time rather than improving. Replacing the fixture may provide quieter airflow, lower maintenance, and better energy efficiency overall.
Repairing a pulled chain feels satisfying because the problem often looks worse than it really is. A methodical approach, careful wiring checks, and realistic expectations make the process much easier. Small mechanical failures inside ceiling fans rarely require complicated tools. Most of the time, steady hands and attention to simple repair details solve the problem without turning the room upside down.


Best Small Flush Mount Ceiling Fans 2026 Ultimate Picks

Best Smart Ceiling Fan India 2026 For Effortless Comfort

Best Smart Ceiling Fans with Lights for 2026: Top Picks

Best Smart Home Non Ceiling Fans 2026 For Ultimate Comfort

Best Outdoor Misting Ceiling Fan 2026 For Ultimate Comfort

Best Ceiling Fans With Lights For Vaulted Ceilings 2026 Top Picks

Best Outdoor Ceiling Fans For Porch 2026 With Style And Breeze

Best WiFi Enabled Ceiling Fan 2026 For Effortless Comfort





