
How to Fix Christmas Lights When a Strand Goes Dark

Plug a working lamp into the outlet first to confirm power is actually flowing. A tripped wall socket shuts down the entire display before electricity ever reaches the cord. Once the outlet checks out, slide open the little sliding door on the plug to inspect the tiny glass fuses inside. If those cylinders look clean, the trouble almost always comes down to a loose or missing bulb that broke the continuous electrical loop.
The right repair depends on how much of the cord went dark and what type of bulbs sit on the wire. A fully black strand usually points to blown fuses or a dead outlet. When only half the strand goes dark, one unseated bulb or a bent contact wire has cut power to that specific section. Older mini-lights also behave differently than modern LED strings, while chewed wires mean replacing the set for safety. Here is how to trace the break in minutes without pulling every light.
Whole-Strand Dark vs. Half-Strand Dark: How Christmas Light Circuits Work
When you plug in a strand of holiday lights and nothing happens, your first instinct might be to toss the entire cord into the trash. Before you do that, look closely at how much of the strand has failed. The visual pattern tells you exactly where the electrical break is hiding and saves you from checking bulbs that are perfectly fine.
If every single bulb on the cord stays dark, the break is located at the very front of the line. The power is not reaching the bulbs at all. This usually points to a dead wall outlet, an outdoor outlet with a reset button that tripped because of morning dew, or a blown plug fuse inside the male plug itself. In rare cases, a main wire pulled loose from the brass prongs inside the plug housing. In all whole-strand failures, you do not need to inspect fifty or one hundred individual bulb sockets right away.
If exactly half of the strand glows while the other half stays dark, your wall outlet and your plug fuses are working normally. Standard 100-light strands of mini lights (5mm conicals or T5s) are wired as two separate 50-light loops connected side by side. Each 50-bulb section forms a series circuit, which is a continuous loop where power runs through bulbs one after another. If bulb number twelve in the first section falls out, only that first 50-bulb loop goes dark. The second 50-bulb section continues to glow because power travels down a bypass wire straight to its own circuit.
Traditional incandescent mini lights have a built-in safety part called a shunt. A shunt is a tiny wire inside a bulb that keeps electricity moving when the filament burns out. When the delicate glowing filament snaps, the electrical current heats up this lower wire, melting a thin protective coating so the wire fuses together. This bypass keeps the continuous loop closed so the other forty-nine bulbs remain lit. But if a bulb falls out of its socket completely, if the glass gets crushed, or if the internal shunt fails to fuse, the physical loop breaks open. When that happens, the entire 50-bulb section drops offline instantly.
Modern LED strands behave a bit differently. LEDs run on direct electrical current and have dedicated polarity, meaning electricity flows in one direction through the diode pins. If an LED bulb pulls loose, or if water causes the tiny metal contact legs to corrode inside the socket, the whole series group goes dark. Identifying whether you have a whole-strand failure or a half-strand failure cuts your diagnostic time in half before your fingers even touch a bulb.
Checking and Replacing the Plug Fuses Step by Step
Every standard decorative light set sold in the United States includes tiny safety cylinders inside the male plug. These plug fuses protect your home by cutting electrical flow if the strand draws too much current, overheating the thin copper wires. When a full strand fails to illuminate, checking these tiny glass cylinders is your quickest repair step.
- Disconnect the strand from power. Unplug the lights from the wall outlet or extension cord. Never open plug doors or touch electrical components while current is running through the cord.
- Locate the slide-door compartment. Look at the male plug, which is the end with the two metal prongs. On the side or face of the plug body, you will see a small rectangular plastic sliding door. Many plugs have a small raised arrow showing which direction the door opens.
- Slide open the fuse door. Use your thumbnail, a small flathead screwdriver, or a dull butter knife to push the sliding door back toward the metal prongs. Slide it until the small interior compartment is completely exposed.
- Inspect the tiny glass fuses. Inside the compartment, you will find either one or two miniature glass fuses with metal caps on each end. Look closely at the thin wire running through the center of each glass tube. If the glass is clear and the wire is intact, the fuse is good. If the glass looks smoky, blackened, or charred, or if the wire inside has melted into separate pieces, the fuse has blown.
- Gently pry out the damaged fuse. Use the tip of a small precision screwdriver, a toothpick, or an unbent paperclip to lever the blown fuse out from its metal retaining clips. Pry gently so you do not crack the small glass cylinder or bend the copper contact brackets out of shape.
- Snap in a matching replacement fuse. Replacement fuses come in the small plastic bag taped to new light strands when you buy them. Holiday lights typically require 3-amp or 5-amp miniature fuses rated for 125 volts. Check the white safety tag near the plug to confirm the correct rating, as using an oversized fuse creates a fire risk. Press the new fuse firmly into the clips until it sits level.
- Close the hatch and confirm power. Slide the plastic door firmly back into its original closed position until it sits flush with the plug housing. Plug the lights into an active wall outlet to confirm that the strand illuminates.
If the replacement fuse blows immediately a second time, do not insert another one. An immediate blowout indicates a dead short circuit, where two internal copper wires are touching each other inside the harness or a socket has melted. At that point, the strand is compromised and must be replaced.
Finding Loose, Misaligned, or Missing Bulbs Along a Dark Section
When your fuses are intact but half of the strand remains dark, an open connection in that specific 50-light series loop is breaking the circuit. You do not need to pull every bulb out of its plastic base. A systematic visual check combined with a handheld sensing tool will pinpoint the problem socket in just a few minutes.
- Scan the unlit section for empty sockets. Packaged holiday lights undergo heavy friction when pulled from storage bins or dragged through evergreen needles. Bulbs frequently catch on branches and pop free. A single missing bulb leaves an empty socket that breaks the continuous loop. Insert a matching replacement bulb into any empty opening and push until the plastic retaining latch clicks over the socket ridge.
- Press each bulb firmly down into its socket. Walk down the dark section, holding the wire harness in one hand while using your thumb to press each bulb down into its socket. Bulbs frequently back out by a fraction of an inch during handling. This small gap prevents the two thin copper contact wires on the bulb base from touching the brass clips inside the socket housing.
- Inspect for bent or broken wire leads. If pressing the bulbs does not restore the light, remove the first suspect bulb. Look at the bottom of the green or white plastic wedge base. You will see two thin copper wire whiskers. One wire should fold neatly flat against one outer face of the plastic wedge, and the other wire should fold flat against the opposite face. If a wire lead has bent sideways, broken off, or folded underneath the plastic base, it cannot make contact. Straighten the wire with your fingernail so it lays flat against the plastic, then push the bulb back into the socket.
- Trace the electrical break with a voltage detector pen. If visual checks fail, plug the strand into a working outlet so the good half glows. Take a non-contact voltage detector pen, which senses the electrical field through insulated wire and beeps or lights up when power is present. Start at the first unlit bulb closest to the illuminated section. Hold the detector tip against the insulated wire leading into the socket. Move bulb by bulb down the dark section. As long as the wire carries voltage, your detector will buzz. The exact moment the detector stops buzzing marks your break point. The problem is located right at that socket or the bulb immediately before it.
Remember that bulb styles dictate how failures happen. Standard mini lights on green wire or white wire run in series, meaning one missing bulb kills fifty lights. In contrast, larger screw-in bulbs like C9 roofline lights or medium C7 bulbs run in parallel circuits. On those heavy-duty lines, each bulb receives independent line voltage. If one C9 bulb burns out, the rest stay lit, making single-bulb replacement as straightforward as changing a table lamp.
Safety Limits: When to Throw a Broken Strand Away
A string of holiday lights costs very little compared to the devastating risk of an electrical house fire. While replacing a blown plug fuse or reseating a loose mini bulb is safe and practical, repairing damaged electrical cords at home is dangerous. Knowing when to stop troubleshooting protects your home, your family, and your pets.
Review this safety checklist before spending time fixing an aging set of lights. If your strand shows any of the following warning signs, do not attempt to patch it:
- Cracked or flaking insulation: Stiff, weathered cords that show brittle cracks, splits, or exposed bare copper wiring must be thrown away immediately.
- Melted or scorched plastic: Any discoloration, charred plastic, or melted socket walls means an electrical arc occurred.
- Puncture damage from fasteners: Wires pierced by metal staples, nails, or metal tacks create hidden shock hazards. Always hang lights using dedicated plastic gutter hooks and shingle clips that cradle the insulated cord without pinching or puncturing the outer jacket.
- Chewed cords: Strands with gnawed insulation from squirrels outdoors or household pets and mice indoors should never be plugged in.
- Repeated fuse blowouts: A strand that immediately blows a new fuse a second time has a structural short circuit inside the wiring harness.
- Loose plug terminals: Male or female plugs where the cord wobbles loosely, exposing internal wire strands, cannot be safely rewired.
Pay close attention to the safety tag near the male plug. A red holographic UL tag indicates the strand is certified for both indoor and outdoor use, with weather-resistant socket seals. A green holographic UL tag means the strand is certified for indoor use only. Using a green-tagged indoor set on an outdoor shrub exposes thin insulation to rain and freezing moisture, which trips outdoor outlets with reset buttons or sparks a fire. If you are decorating indoor greenery, such as winding green wire strands on a Christmas tree for a standard living room ceiling, ensure the wires remain flexible and cool to the touch. If you are outlining eaves, follow proven steps for hanging lights along your roofline so cords do not rub against sharp metal gutters or stretch taut across corners.
What to Look for in Christmas Light Repair Tools
If you hang multiple strands of holiday lights each winter, finding burned-out sections by hand can quickly become tedious. A dedicated light repair tool speeds up the process, allowing you to identify dead connections without pulling out dozens of functional bulbs. Choosing the right diagnostic tool comes down to matching the device to the specific light styles you hang around your home.
The most useful feature on traditional light diagnostic devices is a shunt activator. When an incandescent mini light burns out, its internal shunt wire sometimes fails to fuse, leaving the circuit broken. Tools equipped with a small trigger mechanism send a quick, harmless electrical pulse down the copper wire. This pulse activates the stuck shunt wire inside the burned-out bulb, forcing it to close the loop. With one or two clicks of the hand trigger, the dark section frequently pops right back on, immediately showing you which single bulb has burned out so you can swap it.
Non-contact voltage detection is another essential capability. A repair tool with an integrated sensing tip allows you to trace the flow of electrical current directly through the plastic wire insulation. By sliding the tip along the wire harness from socket to socket, you can hear an audible tone or watch an indicator light cut out at the exact spot where electrical continuity fails.
Look for tools that include physical conveniences like a built-in bulb puller, storage for spare fuses, and dedicated quick-check slots. A sturdy plastic prying notch prevents broken fingernails and crushed glass when extracting stubborn bulbs from weathered sockets. Finally, confirm whether the repair device supports both traditional incandescent strands and modern LED cords, as pulse-activation triggers only work on incandescent shunts, while non-contact voltage sensors assist with both designs.

- LFR Score7.1
LFR Score is a ranking system developed by lightfansreviews.com. LFR Score has no relationship or impact from any manufacturers or sales agent websites. Learn more
- BrandLIGHT KEEPER PRO
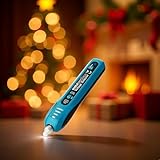
- LFR Score9.1
LFR Score is a ranking system developed by lightfansreviews.com. LFR Score has no relationship or impact from any manufacturers or sales agent websites. Learn more
- Brandallsun
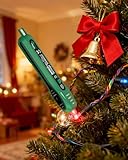
- LFR Score7.8
LFR Score is a ranking system developed by lightfansreviews.com. LFR Score has no relationship or impact from any manufacturers or sales agent websites. Learn more
- Brandallsun
Last update on 2026-10-07 / Affiliate links / Images, Product Titles, and Product Highlights from Amazon Product Advertising API
FAQs
Why does only half of my Christmas light strand work?
Most 100-light and 150-light mini strands are split into two or three separate 50-light series circuits. If one section goes dark while the other remains illuminated, your main plug and fuses are fine. The failure is caused by an unseated bulb, a missing bulb, or a burned-out bulb whose internal shunt failed to close along that specific unlit section.
Can one burned-out bulb cause the rest of the strand to burn out faster?
Yes, on traditional incandescent mini light strands. When a bulb burns out and its internal shunt bypasses the filament, the remaining bulbs in that 50-light series loop must absorb the extra voltage. Operating a strand with several dead bulbs forces the remaining bulbs to burn hotter, dramatically shortening their lifespan until you replace the burned-out units.
Can I fix a broken holiday light wire with electrical tape?
No, you should never splice thin holiday light cords together or wrap exposed copper with electrical tape. Seasonal decorative wiring is subject to physical movement, bending, and outdoor moisture that electrical tape cannot safely protect against. Spliced holiday cords present a significant risk of electrical arcing, shock, and fire, so damaged strands must be retired.

Best Value Outdoor Christmas Lights 2026 Brighten Nights

Best Christmas Lights For Bushes 2026 Brighten Your Yard
Best Outdoor Waterproof Christmas Lights 2026 For Festive Glow

Best Village Christmas Lights 2026 Magical Display Picks

12 Best String Lights For Christmas Tree of 2026 To Prevent Dark Patches

Best C9 Christmas Lights 2026 Top Picks

Best Outdoor Home Christmas Lights 2026: Brighten Your Nights

Best Outdoor Christmas Light Projector 2026 For Sparkling Displays






