
How To Fix Humming Noise In Ceiling Fan Fast
How To Fix Humming Noise In Ceiling Fan starts with figuring out what the sound is actually trying to tell you. A soft hum might seem harmless at first, but night after night, that constant buzzing can turn into pure aggravation. Sometimes the issue comes from loose screws. Other times, worn capacitors, shaky mounting brackets, or incompatible dimmer switches quietly create vibration inside the motor housing. Tiny problems tend to snowball if they’re ignored for too long.
Ceiling fans usually don’t wake up one morning and suddenly become noisy for no reason. Dust buildup on blades changes balance over time, and even slight wobbling can produce a low electrical hum that echoes through the room. Older homes also run into wiring inconsistencies that make certain fan motors buzz louder than they should. Oddly enough, many people replace the entire fan before checking the simple stuff first. That’s money flying right out the window.
Loose blade arms, worn rubber isolators, and poor installation habits create some of the most frustrating noises imaginable. A fan may look perfectly stable while hidden vibration travels through the ceiling junction box. Then the sound spreads across drywall like an annoying little drumbeat. Tightening mounting hardware often helps, but overtightening can make vibration worse. Yeah, it’s a bit of a balancing act.
Electrical humming deserves extra attention because not every sound points to mechanical problems. Some motors naturally produce a faint hum, especially cheaper AC motor designs. But loud buzzing paired with overheating, flickering lights, or speed inconsistencies deserves immediate inspection. Capacitor issues tend to show up gradually, especially after years of seasonal use. Ignoring that warning sign can shorten the fan’s lifespan faster than most people expect.
Speed settings also matter more than folks realize. Certain ceiling fans hum loudly only at medium speed because the motor struggles with unstable current flow. Dimmer switches designed for lighting fixtures commonly trigger this issue too. Swapping to a proper fan speed controller often reduces noise almost instantly. Small electrical mismatches create surprisingly big headaches.
Blade alignment plays a sneaky role in overall noise levels. Even one slightly warped blade can throw off the entire rotation pattern and create rhythmic humming throughout the room. Balancing kits help stabilize airflow while reducing stress on internal motor components. The fix doesn’t always require expensive tools either. Sometimes a careful adjustment and a few adhesive balancing weights do the trick.
Humidity and seasonal temperature shifts can also affect ceiling fan performance. Expanding metal brackets, dry bearings, and warped wooden blades may produce humming noises that seem to appear out of nowhere. Fans installed near kitchens or covered patios face even tougher conditions because grease and moisture collect around moving parts. Routine maintenance prevents many of these headaches before they spiral into larger repairs.
Silence changes the entire feel of a room. A properly balanced fan should blend into the background instead of sounding like a tired fluorescent light buzzing overhead. Fixing the noise often improves airflow efficiency too, which means the fan doesn’t have to work as hard. That smoother operation creates less strain on both the motor and mounting system. Honestly, once the humming disappears, the whole room feels calmer.
How To Fix Humming Noise In Ceiling Fan
A quiet room can feel ruined by one stubborn buzz overhead, especially at night when every tiny vibration sounds louder than it should. That low drone often points to motor strain, loose hardware, or an electrical mismatch hiding behind the canopy. Fixing how to fix humming noise in ceiling fan starts with slowing down, listening closely, and checking the simple stuff before blaming the whole fan. A small adjustment can save the fan, your patience, and sometimes a needless replacement.
Start With The Sound Itself
A ceiling fan hum doesn’t always mean the motor is dying. A soft electrical buzz, a pulsing drone, and a vibration-heavy rumble each point toward a different root cause. The trick is to listen from the floor, then near the wall switch, then directly below the fan. That quick sound check helps separate electrical humming from mechanical vibration.
A steady hum usually comes from the motor, capacitor, or wall control. A rattling hum often means the fan is shaking against loose screws, blade brackets, or the mounting box. A buzz that changes with speed settings may involve a speed controller or a worn capacitor. That difference matters because tightening screws won’t fix a bad control switch.
Turn the fan off and let the blades stop fully before touching anything. Then run the fan on low, medium, and high while standing back at a safe distance. A hum that appears only on one speed often suggests current flow trouble rather than loose blades. A hum that gets worse as speed increases usually points toward imbalance or shaky mounting.
Fans also sound louder in quiet rooms with hard floors, bare walls, or low ceilings. Sound bounces, and suddenly a mild buzz feels like a tiny engine above your head. That doesn’t make the noise imaginary, though. It simply means small fan issues can feel much bigger in bedrooms, offices, and apartments.
Check Loose Screws And Mounting Points
Loose hardware creates some of the most common ceiling fan humming problems. Blade screws, bracket screws, canopy screws, and downrod connections can all loosen after months of spinning. Even a tiny gap can turn into repetitive vibration once the fan reaches speed. Grab a screwdriver and treat every connection like a suspect.
Start with the blade arms because they take constant stress. Tighten each screw gently, not like you’re trying to win a wrestling match. Overtightening can strip threads or warp blade brackets, which may make the wobble worse. Firm and snug is the sweet spot.
The canopy near the ceiling deserves attention too. A loose canopy can buzz against the ceiling plate, especially on medium or high speed. Slide it slightly if it touches the ceiling unevenly, then tighten the retaining screws. That one little fix can stop a metal-on-metal hum that sounds far more serious than it is.
The mounting box matters more than most people think. A ceiling fan must be attached to a fan-rated electrical box, not a light-only box. If the fan moves at the ceiling or the whole fixture feels shaky, stop using it until the support is checked. For nearby lighting upgrades that need a cleaner ceiling setup, compare proper fixture work through install flush mount led ceiling light before mixing fan and light repairs.
Inspect Blade Balance Before Blaming The Motor
Blade imbalance can create a deep hum that feels like it’s coming from the motor. One blade sitting slightly higher, lower, or farther out than the rest changes the airflow pattern. That uneven pull travels through the brackets and into the ceiling. The result is vibration noise that mimics electrical trouble.
Clean the blades before balancing anything. Dust buildup sounds harmless, but thick dust along one blade edge changes weight distribution. Wipe the top and bottom of each blade with a damp cloth, then dry them fully. Clean blades reduce drag, improve airflow, and make the next checks more accurate.
Measure from the ceiling to the tip of each blade. The numbers should be close, even if they’re not perfectly identical. A blade that sits noticeably lower may have a bent bracket or loose screw. Small corrections can calm the fan down without replacing parts.
A balancing kit can help if the fan still hums or wobbles after cleaning and tightening. Clip the test weight to one blade at a time, run the fan, and notice which placement reduces vibration. Then use the adhesive weight where the kit recommends. It’s not glamorous, but blade balancing often turns a noisy fan into a background breeze again.
Look At The Wall Control And Dimmer
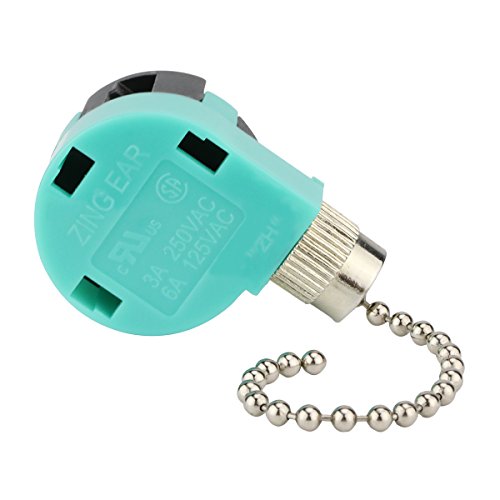
A dimmer switch can make a ceiling fan hum like crazy. Light dimmers are built for lighting loads, not fan motors, and that mismatch can create unstable current. The fan may still spin, but the motor complains through a buzzing sound. Swap the wrong control before assuming the fan is defective.
A proper fan speed controller handles motor load differently. It adjusts speed without chopping power in the same rough way a basic light dimmer might. That steadier control helps reduce electrical noise and keeps the motor from running hot. For many noisy fans, this is the “well, that was easier than expected” fix.
Remote-control fans can have receiver problems too. A failing receiver inside the canopy may create humming, delayed speed changes, or flickering light behavior. If the hum started after installing a remote kit, that kit deserves a hard look. Cheap receivers can add motor buzz even when the fan itself is decent.
Turn off power at the breaker before opening the switch box or canopy. Electrical work can bite, and ceiling fan wiring often gets messy in older homes. If wires look burned, brittle, loose, or confusing, call a licensed electrician. A quiet fan isn’t worth gambling with unsafe wiring.
Watch For Capacitor And Motor Clues
The capacitor helps the fan motor start and run at the right speeds. A weak capacitor can make the fan hum, start slowly, or refuse certain speeds. Sometimes the blades need a push before they move, which is a big red flag. That behavior points toward capacitor failure, not dirty blades.
A failing capacitor may also cause uneven speed changes. Low speed may work, medium may buzz, and high may feel weaker than it used to. That pattern often shows up gradually, so it’s easy to ignore at first. Left alone, motor strain can build and shorten the fan’s service life.
Motor hum can be normal at a very low level, especially with older AC motor fans. Still, loud humming paired with heat, burning smells, or visible speed trouble is not normal. Shut the fan off if the motor housing feels unusually hot. That kind of warning sign deserves proper inspection before the fan runs again.
Replacement capacitors are inexpensive in many cases, but matching the rating matters. The microfarad rating and voltage must match the fan’s requirements. Guessing can damage the motor or create more noise. A careful repair keeps speed control, motor health, and safe operation on the same page.
Reduce Noise From Airflow And Room Conditions
Not every hum comes from the fan’s internal parts. Airflow can create a low drone if blades sit too close to the ceiling, walls, or tall furniture. A fan in a tight room may push air unevenly and produce pressure noise. Small bathrooms, narrow bedrooms, and low-ceiling spaces are especially prone to this issue.
Blade size affects how the fan behaves in compact rooms. A large fan in a small space can move too much air too aggressively, making the motor and blades sound louder. A smaller fan may run more smoothly because it matches the room’s airflow needs. For cramped spaces, compare room-fit ideas through ceiling fan small bathroom before choosing a replacement.
Ceiling height also changes noise perception. Flush-mount fans sit closer to the ceiling, so vibration can transfer more easily into drywall. Downrod fans often allow smoother airflow, but they need enough clearance. The best setup depends on ceiling height, blade span, and how much airflow the room actually needs.
The U.S. Department of Energy notes that a ceiling fan can let you raise the thermostat about 4 degrees Fahrenheit without reducing comfort. That only helps if the fan runs smoothly and quietly. Fans cool people, not rooms, so leaving a noisy fan running in an empty space just wastes energy and patience. A quieter fan makes daily comfort feel easier instead of turning airflow into another annoyance.
Separate Helpful White Noise From Bad Humming
Some people like steady fan sound because it masks street noise, hallway chatter, or a ticking clock. That’s different from electrical humming that nags at your ear. A healthy fan should produce a smooth airflow sound, not a sharp buzz or vibrating drone. The difference sits between comfort noise and problem noise.
White noise feels even and predictable. Bad humming feels uneven, directional, or tied to a specific speed setting. If the sound makes you keep changing speeds or turning the fan off, it’s probably not harmless background noise. Your ears are often the first tool in diagnosing fan noise problems.
Bedrooms make this distinction even more obvious. A soft airflow sound can help sleep, while a pulsing hum keeps the brain half-alert. That’s why fan repairs feel urgent at bedtime even if the sound seemed minor during the day. For a separate sleep-friendly sound source, explore small fan for white noise instead of forcing a ceiling fan to do two jobs badly.
A ceiling fan should move air without stealing attention. Once screws, blades, controls, and capacitors are checked, the remaining sound should be smooth and low. If the hum still feels harsh, the motor may simply be aging out. At that point, replacement may beat pouring more time into a fan that’s already had its fair warning.
Quiet Ceiling Fan Repair For Stubborn Humming
After the obvious screws, blades, and wall controls have been checked, the next step is slowing down and treating the fan like a small system instead of one noisy object. A humming fan can hide several tiny problems at once, and each one adds a little more vibration, buzzing, or motor stress. That’s why a careful repair path works better than swapping random parts. A calm, step-by-step check keeps the fix simple and helps avoid spending money in the wrong place.
Check The Fan Box And Ceiling Support
A ceiling fan needs a solid support point because the motor is always pulling, spinning, and vibrating. If the electrical box above the fan wasn’t made for fan weight and movement, humming can travel straight into the ceiling. That sound may feel like it comes from the motor, but the real issue can be weak mounting. A loose box turns the ceiling into a speaker, and yeah, it gets annoying fast.
Turn off the fan and watch the canopy while gently moving the fan body by hand. Any shifting near the ceiling suggests the mounting bracket, box, or brace needs attention. A properly supported fan should feel firm, not springy or sloppy. Ceiling movement is a safety issue too, not just a noise problem.
Older homes sometimes have fans installed where a basic light fixture used to sit. That setup may hold for a while, but vibration slowly exposes the mistake. If the box wiggles, creaks, or sinks slightly, stop running the fan until it’s corrected. The safest fix is a fan-rated ceiling box installed with secure framing support.
Porches and semi-outdoor areas add another layer of trouble because moisture can loosen parts and swell materials over time. A fan exposed to damp air needs the right rating and a stable mount, or humming may keep coming back. For covered outdoor spaces, compare options built for humidity through outdoor ceiling fans porch before replacing an indoor fan with the wrong model. The right environment match protects motor life and reduces repeat noise complaints.
Clean The Motor Housing Without Overdoing It
Dust doesn’t just sit on blades. It sneaks into vents, gathers around the motor housing, and blocks normal heat release. A fan that runs warmer than it should may develop a louder motor hum over time. Cleaning the housing helps the motor breathe, but rough cleaning can cause more trouble than it solves.
Use a dry microfiber cloth around the motor housing and vents. Avoid spraying cleaner into openings because moisture can reach electrical parts. A soft brush attachment on a vacuum can pull dust from vents without forcing debris deeper inside. The goal is gentle dust removal, not a full teardown on the kitchen table.
Greasy dust is common in kitchens and open living spaces near cooking areas. That sticky buildup clings harder and can trap heat around the motor. Wipe exterior surfaces with a lightly damp cloth, then dry everything before running the fan again. Keeping the housing clean supports cooler operation and smoother airflow.
Fans in plant rooms, sunrooms, and humid corners may collect fine debris faster than expected. Soil dust, moisture, and pollen can settle around vents and blade arms. If indoor growing setups are nearby, light placement and airflow matter, especially around shelves and damp corners. To reduce messy wiring and heat near plants, compare solar powered grow lights as a separate lighting path instead of overloading the fan area with extra plug-in gear.
Lubricate Only If The Fan Allows It
Some ceiling fans have sealed bearings that should not be oiled. Other older models have oil ports designed for regular lubrication. Guessing wrong can create sticky buildup, attract dust, or damage internal parts. Check the fan label or manual before adding any lubricant.
A dry bearing can produce a hum mixed with a faint grinding or rubbing sound. The noise often gets worse after the fan warms up. If the fan has an oil port, use the type of oil recommended by the manufacturer. Random household oils can gum up and create bearing drag.
Sealed-bearing fans need a different approach. If they hum because the bearings are worn, oil usually won’t save them. The sound may soften briefly, then come right back. At that point, motor wear becomes a more realistic explanation.
Don’t ignore burning smells, metal scraping, or heat around the motor housing. Those signs move the problem beyond normal maintenance. Running the fan anyway can stress wiring and internal parts. A worn fan may need professional repair or replacement before the noise turns into a bigger issue.

Test Speed Settings With A Simple Pattern
Speed testing helps narrow down the cause without opening everything at once. Run the fan on low for a few minutes, then medium, then high. Listen for changes in pitch, volume, and vibration. A noise pattern tells you more than one quick on-and-off check.
A hum that stays steady on every speed may come from the motor or ceiling support. A hum that appears only on medium often points toward a capacitor or controller issue. A hum that gets louder with speed usually suggests blade imbalance or mounting vibration. This simple test keeps the repair path from turning into guesswork.
Let the fan stop fully between major checks. Spinning blades can hide wobble patterns and make small sounds blend together. Once the blades slow down, watch whether one blade dips or tracks unevenly. That visual clue can reveal blade alignment problems that your ears already noticed.
Write down what happens at each speed if the noise is inconsistent. It sounds fussy, but it helps if you need replacement parts or an electrician later. Clear notes like “buzz only on medium” or “vibration above low speed” make troubleshooting faster. A little recordkeeping can prevent unnecessary part swaps.
Know What Repairs Are Worth Doing
Not every ceiling fan deserves the same repair effort. A newer fan with loose screws, a bad capacitor, or a poor wall control is usually worth fixing. An old fan with worn bearings, weak airflow, and constant humming may be throwing good money after bad. The practical call depends on age, part availability, and how often the fan runs.
Replacement makes more sense if the fan hums, wobbles, and struggles to change speeds even after basic maintenance. Multiple symptoms usually mean the fan has more than one tired component. Repairing one part may quiet it briefly, then another issue pops up. That cycle gets old quickly.
Keep room size in the decision too. A fan that’s too large for a room may always feel louder than expected because it moves air too aggressively. A fan that’s too small may run at higher speeds all the time, adding more motor noise. Matching blade span and motor strength to the room cuts down on future humming.
Budget also matters, and nobody wants to replace a fan for one loose screw. Start with cleaning, tightening, balancing, and control checks first. Move to capacitor replacement or electrical inspection only if the symptoms point that way. That order protects your wallet and keeps repair decisions grounded in real evidence.
Prevent The Hum From Coming Back
Quiet fans usually stay quiet with small habits, not dramatic repairs. Dust the blades every few weeks, especially in rooms with pets, open windows, or heavy cooking. Check blade screws and canopy screws a couple of times a year. Those tiny tasks reduce blade imbalance and prevent vibration from creeping back.
Use the correct wall control and avoid running a fan through a basic light dimmer. That one mismatch causes plenty of annoying electrical hum. A proper fan-rated control protects the motor and gives smoother speed changes. Good controls support quiet operation without making the motor fight unstable current.
Watch seasonal changes too. Humidity can affect wood blades, metal brackets, and ceiling materials. A fan that stays quiet in winter may start humming during sticky summer weather. Quick cleaning and screw checks before heavy seasonal use can prevent humidity-related vibration.
Pay attention to new sounds instead of waiting until they become part of the room. A small buzz, a faint wobble, or a speed that feels weaker than usual is easier to fix early. Ceiling fans aren’t complicated, but they do reward regular care. Consistent maintenance keeps airflow smooth, noise low, and the room feeling calm instead of restless.


Best Small Flush Mount Ceiling Fans 2026 Ultimate Picks

Best Smart Ceiling Fan India 2026 For Effortless Comfort

Best Smart Ceiling Fans with Lights for 2026: Top Picks

Best Smart Home Non Ceiling Fans 2026 For Ultimate Comfort

Best Outdoor Misting Ceiling Fan 2026 For Ultimate Comfort

Best Ceiling Fans With Lights For Vaulted Ceilings 2026 Top Picks

Best Outdoor Ceiling Fans For Porch 2026 With Style And Breeze

Best WiFi Enabled Ceiling Fan 2026 For Effortless Comfort





