
How to Fix LED Ceiling Light: Easy Tips for Quick Repairs
If you've ever faced the frustration of a flickering or completely dead LED ceiling light, you're not alone. How to fix LED ceiling light problems is a common concern for many homeowners, renters, and DIY enthusiasts who want to avoid costly electrician visits. Whether it's a loose connection, faulty driver, or a simple bulb replacement, understanding the key fixes can save you time and money. This guide dives deep into practical, easy-to-follow steps that anyone can try, helping you regain bright, reliable lighting fast. With a few basic tools and a bit of know-how, you can tackle the most common issues and keep your ceilings shining without hassle. Plus, you'll learn about safety tips and signs to watch out for, making your repair journey smoother and worry-free. Fixing LED ceiling lights doesn’t have to be daunting when you know the right moves. Let's get your space glowing again with confidence and ease!
Flickering or dim LED ceiling lights can really put a damper on your day—and your home’s vibe. But don’t sweat it! How to fix LED ceiling light issues isn’t rocket science; often, it’s just about pinpointing the sneaky cause hiding behind that annoying flicker or blackout. From loose wiring to driver glitches, the problem usually hides in plain sight. This guide breaks down those tricky mysteries into simple steps anyone can handle, even if you’re no tech wizard. We’ll walk you through clear solutions and handy safety tips so you can tackle the repair with confidence and without calling in pricey pros. So, ready to bring your ceiling light back to life and banish those annoying flickers for good? Let’s jump right in and light up your space the smart way!
There’s nothing more irritating than flipping the switch and seeing your LED ceiling light refuse to shine. The first step to fixing it is knowing why it’s acting up. Loose wiring connections are often the sneaky culprit behind flickering or total blackout. Sometimes, the wires in the ceiling box or inside the fixture get jostled over time or weren’t connected properly in the first place. Another common cause is a faulty LED driver — that little electronic component that regulates power to the light. When it starts failing, the LED might flicker, dim, or just stop working altogether.
Besides wiring and drivers, don’t overlook the LED bulb or panel itself. While LEDs last way longer than traditional bulbs, they aren’t immortal. Overheating or manufacturing defects can cause premature failure. Sometimes, the issue might be as simple as a tripped circuit breaker or a blown fuse somewhere in your home’s electrical system. Noticing if other lights or outlets are out can save you a wild goose chase. Knowing these common reasons gives you a solid foundation to troubleshoot smartly, without wasting time or money on unnecessary replacements.
Before you get your hands dirty, the number one key factor is safety. Working with electricity is no joke, and even experienced DIYers respect the risks. Always switch off the circuit breaker that controls your ceiling light before touching any wires or opening up the fixture. Using a non-contact voltage tester is a smart move to double-check that the power is truly off. Wearing insulated gloves and working with insulated tools adds an extra layer of protection, especially if your wiring situation is old or questionable.
Make sure you have a sturdy ladder and clear workspace. Trying to fix a ceiling light while balancing on a wobbly chair is a recipe for disaster. If you’re unsure about any step, it’s totally okay to call a pro — but having basic electrical safety knowledge will help you avoid accidents and handle many fixes yourself. Respecting these precautions will keep you safe and confident, turning what might seem like a daunting job into a manageable project.
One of the easiest fixes for a malfunctioning LED ceiling light is tightening loose wiring. Start by removing the light fixture cover or panel carefully. You might find a set of wire nuts connecting the fixture wires to the house wiring. Gently wiggle these connections — if anything feels loose or disconnected, that’s your troublemaker. Sometimes, wires can pull out of the nuts or the screws holding them in place.
Using a screwdriver, tighten any loose screws on wire terminals and reconnect any loose wires securely. Make sure no bare wire is exposed outside the connectors, as this could cause shorts or shocks. After securing everything, replace the fixture cover and turn the power back on to test. In many cases, this simple step fixes flickering or non-working LEDs and saves you a trip to the hardware store.

If your wiring is solid but the light still misbehaves, the LED driver might be the sneaky villain. The driver converts the home’s AC power to the low voltage DC that LEDs need to function properly. When it goes bad, your LED light can flicker, dim, or refuse to turn on. Testing the driver usually requires a multimeter, so having one handy is a bonus.
First, unplug or disconnect the driver from the power source and LEDs. Measure the output voltage to see if it’s within the driver’s specified range. If the voltage is too low, inconsistent, or zero, it’s time to replace the driver. Drivers are generally inexpensive and available online or at lighting stores. Make sure to buy one that matches your LED light’s voltage and wattage specifications. Swapping out the driver often restores your ceiling light’s full brightness and reliability without replacing the entire fixture.
Sometimes, the problem isn’t with wiring or drivers but the LED panel or bulb itself. While LEDs typically have long lifespans, they can still burn out or suffer damage. If your ceiling fixture has replaceable bulbs, try swapping in a new LED bulb first to rule this out. If the light uses an integrated LED panel, replacement can be trickier but still doable.
Check if the LED panel shows any signs of damage like discoloration, cracks, or burn marks. In many cases, you can buy compatible replacement panels or retrofit kits for your existing fixture. If replacing the panel feels overwhelming, some fix-it pros offer repair services for integrated LED fixtures. Keep in mind that an easy bulb replacement is the quickest fix, but when it comes to integrated panels, a little patience and research pay off in getting your ceiling light shining bright again.
While many LED ceiling light issues can be tackled at home, there are times when it’s best to call in a professional. If your home’s wiring is old, damaged, or non-standard, DIY fixes might cause more harm than good. Likewise, if you notice sparks, burning smells, or frequent circuit breaker trips, it’s a clear red flag that a licensed electrician should inspect your system.
Complex electrical problems can pose serious safety hazards, and electricians have the tools and know-how to diagnose hidden issues quickly. If your fixes aren’t working or you feel uneasy about any step, investing in expert help is well worth it. Remember, prioritizing your safety and your home’s electrical health ensures that your LED ceiling light stays reliable and bright for years to come.
Having the right tools on hand can make fixing your LED ceiling light a breeze instead of a headache. At a minimum, keep a multimeter nearby to test voltage and continuity — it’s essential for diagnosing power issues and checking your LED driver. A good set of insulated screwdrivers will help you safely tighten screws and open fixture covers without slipping. Don’t forget a non-contact voltage tester to double-check that power is off before touching wires — safety is always the top priority.
Besides these basics, having wire strippers and cutters lets you handle damaged wiring or make new connections cleanly. A reliable ladder or step stool is crucial for reaching ceiling fixtures comfortably and securely. Investing in these simple but important tools not only saves time but also boosts your confidence as you troubleshoot and fix your LED lights efficiently.
Flickering LED ceiling lights are one of the most annoying issues you can face. Usually, flickering points to inconsistent power supply or faulty components. Loose wiring is a common offender, but don’t overlook dimmer switches that aren’t compatible with LED bulbs — these can cause flicker too. If your fixture is on a dimmer, check if it’s designed for LED use and consider upgrading to an LED-compatible dimmer switch.
Sometimes, flicker results from a failing LED driver struggling to regulate power properly. Replacing the driver often stops the flicker dead in its tracks. Another sneaky cause is voltage fluctuations from your home’s electrical system, especially if you live in an older house or an area with unstable power. Using a surge protector or power stabilizer can help protect your LEDs and reduce flicker. Tackling flickering isn’t just about comfort — it prolongs your LED’s lifespan and ensures steady, pleasant lighting.
A clean LED ceiling light not only looks better but performs better too. Dust and grime buildup can block light output and cause overheating, which shortens the lifespan of your LEDs. Regular maintenance is a key factor in keeping your fixtures shining bright for years. Use a soft, dry microfiber cloth to gently wipe the surface of the light panel or bulbs every few months.
Avoid harsh chemicals or abrasive materials that could damage the LEDs or the fixture finish. If your ceiling light has a removable cover, carefully take it off and clean inside the housing as well. Ensuring proper ventilation around your LED fixture also helps prevent overheating — don’t block vents or trap heat with insulation. A little care and cleaning go a long way in protecting your investment and keeping your space brilliantly lit.
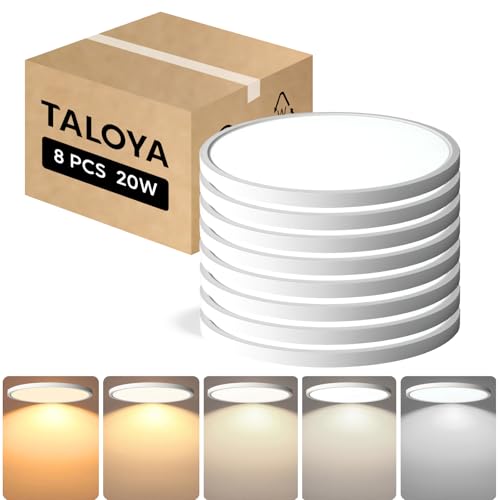
Sometimes, repairing your LED ceiling light might not be the best option — especially if it’s old or underperforming. Upgrading to newer LED technology can bring impressive benefits like better energy efficiency, higher brightness, and smarter controls. Modern LED panels often have improved heat dissipation, longer lifespans, and a wider range of color temperatures to match your style and mood.
Consider upgrading if your fixture flickers frequently, dims prematurely, or if replacement parts are hard to find. Switching to a fixture with dimmable LEDs or smart home compatibility can enhance your lighting experience significantly. Plus, newer models often come with warranties that give you peace of mind. Investing in an upgrade is not just about fixing a problem — it’s about elevating your home’s lighting to a new level of comfort and style.
Beyond fixing issues, embracing LED ceiling lights offers huge energy savings and environmental benefits. LEDs use up to 80% less energy than traditional incandescent bulbs, which can slash your electricity bills noticeably. Their longer lifespan means fewer replacements, reducing waste and the environmental impact of discarded bulbs.
LEDs also emit less heat, cutting down on cooling costs in warmer months. Many LEDs are free from toxic elements like mercury, making them safer to dispose of compared to some older lighting types. When you fix or upgrade your LED ceiling light, you’re not just improving your home — you’re contributing to a more sustainable future with cleaner energy use and less waste. That’s a win-win worth shining a spotlight on.


Best LED Track Strip Lighting 2026: Bright Ideas for Every Space

Top Rated Best LED Dimmable Track Lights of 2026: Enlighten Your Space!

Best Plug In Track Lighting LED 2026 For Bright Spaces
Best Integrated LED Track Lighting: Top Picks for 2026

Best Round LED Ceiling Light Reviews - Top Picks 2026

Best Modern Track Lighting LED 2026: Sleek Illumination Upgrade

Best Mini LED Track Lighting: Top Picks for 2026

Best Oiled Bronze Track Lighting 2026 Stylish Illumination Picks






