
How to Fix Micro LED Lights: Simple Solutions That Work
How to fix micro LED lights is a handy guide tailored for anyone who's ever faced the frustration of tiny LEDs flickering, dimming, or just outright refusing to shine. Whether you're a homeowner, a tech-savvy DIYer, or just someone curious about lighting repair, this topic dives deep into practical solutions that won’t require a full electrician’s toolbox. From spotting common issues like loose connections or power supply glitches to understanding when a simple reset or replacement can do the trick, you’ll gain the confidence to tackle those micro LED headaches head-on. Plus, we’ll unravel a few clever tricks and maintenance tips to keep your micro LEDs glowing bright for the long haul. Say goodbye to guessing games and hello to easy fixes that save you time and money. If you want your tiny lights working flawlessly again, this guide's got your back!
Struggling with those pesky micro LED lights that just won’t behave? You’re not alone. These little powerhouses are amazing for their brightness and efficiency, but when they start flickering, dimming, or cutting out, it’s enough to drive anyone up the wall. Luckily, fixing micro LED lights doesn’t have to mean calling in the pros every single time. With a bit of know-how and some simple troubleshooting, you can bring those stubborn bulbs back to life without breaking a sweat or your wallet. From checking power sources to tightening connections, the solutions might be right at your fingertips. Let’s jump into the nuts and bolts of what makes micro LEDs tick and how you can easily fix the most common hiccups. You’ll be surprised how often a small tweak makes a huge difference. Ready to shine some light on your problem? Let’s get started!
Another frequent snag is overheating, which can cause micro LEDs to dim gradually over time or fail prematurely. This usually happens when the LEDs are packed too tightly or the heat dissipation system isn’t working well. Recognizing overheating signs like discoloration or warmth can save your setup from permanent damage. Finally, a simple but overlooked factor is dust and dirt buildup on the LED surface, which dims the light output and affects brightness consistency. Regular cleaning can prevent this from sneaking up on you.
Before diving into repairs, double-check power sources too. Faulty adapters, voltage mismatches, or loose plugs can all wreak havoc on your micro LED performance. Keeping these key factors in mind will save you from chasing shadows and allow you to zero in on the actual problem fast.
Loose connections between the power adapter and LED strips are another classic headache. Over time, plugs can loosen or wires fray, leading to intermittent power flow. A quick inspection and tightening of all connectors can make a world of difference. If you notice any burnt smells or melted parts near your power supply, it’s time to replace the unit immediately — don’t gamble with faulty hardware.
For those using long LED strips, voltage drop is a hidden enemy. The further the electricity travels, the weaker it becomes, causing LEDs at the far end to dim or flicker. Adding a secondary power injection point midway can restore consistent brightness throughout your setup. Taking the time to test and optimize your power supply setup is one of the easiest and most effective ways to fix micro LED issues without major headaches.
Connections at the solder points or plug joints deserve special attention. Over time, vibrations or movement can loosen these critical links. Gently wiggle connections while the lights are on — flickering or dimming as you move them points to a bad connection. Re-soldering joints or securing plugs firmly can often fix these problems without replacing entire strips.
Another handy trick is testing wiring continuity with a multimeter. This lets you pinpoint breaks or shorts that aren’t visible to the naked eye. When your micro LED setup includes multiple strips or segments, ensure polarity matches on every connection. Reversing polarity is a silent killer for LEDs and will prevent them from lighting up correctly. Tackling wiring issues methodically can save you costly replacements and extend your lights’ lifespan.
Using a soldering iron, carefully remove the malfunctioning LED and replace it with an identical one. Take care to match polarity and ensure the new LED sits flush with the strip’s pads. If you’re not confident with soldering, there are beginner-friendly kits and tutorials available online that can guide you through the process step-by-step.
Replacing single LEDs is particularly common with micro LEDs, given their dense arrangement and delicate size. This targeted approach prevents wasting the entire strip and keeps your lighting consistent and bright. Remember to power off and unplug your setup before attempting any replacements to avoid shocks or further damage.
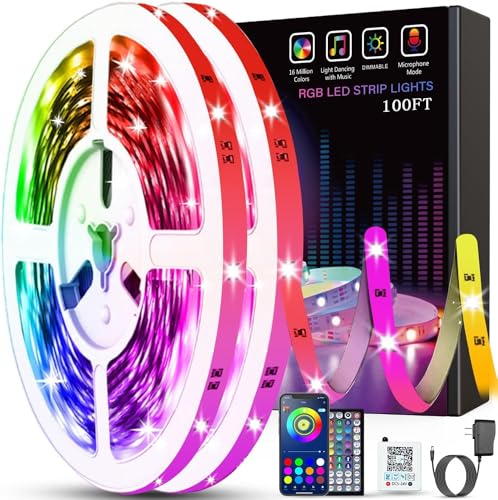
Keep an eye on heat management. Ensure your LEDs have proper ventilation and aren’t crammed into tight spaces where heat can build up. Consider adding heat sinks or cooling fans for longer runs or higher brightness setups. Managing temperature not only keeps your LEDs bright but also extends their operational life significantly.
Finally, inspect all connectors and wires periodically. Even if everything looks fine, slight loosening over time can lead to flickers or outages. A quick tighten and visual check every few months can prevent small issues from snowballing into big fixes. Building these maintenance habits can mean the difference between a lighting system that lasts years and one that burns out prematurely.
Attempting high-voltage fixes without experience can be dangerous and may void warranties. Professionals also have specialized tools and knowledge to troubleshoot and repair intricate LED systems safely. Don’t hesitate to invest in expert help if your micro LED setup is costly or part of an important installation.
Knowing when to pause and call the pros saves time, money, and stress in the long run. After all, bright, reliable lighting is the goal — and sometimes that means trusting the experts to get it done right.
Pay special attention to the manufacturer’s specifications and try to source parts from reputable suppliers. Quality LEDs feature better heat resistance and longevity, ensuring your repair lasts longer. If you’re working with LED strips, consider buying replacement segments or LEDs that are specifically designed for your model to avoid compatibility issues.
Investing in quality also means you won’t be chasing the same problem repeatedly. A solid replacement guarantees that your micro LED setup retains its vibrancy and efficiency, saving you money and frustration in the long run.
A soldering kit with a fine tip is also vital for repairing connections or replacing individual LEDs. Precision matters here, as micro LEDs are tiny and fragile. Having a magnifying glass or a head-mounted magnifier can boost accuracy and prevent accidental damage during delicate work.
Other handy gadgets include a power supply tester and LED testers designed specifically for strips. These tools allow you to isolate problems quickly and verify repairs before fully reassembling your setup. With the right tools at your disposal, troubleshooting becomes less intimidating and more productive.
If your micro LEDs are acting up, checking the controller’s settings and firmware is a smart first step. Sometimes, simple resets or updates can resolve glitches that cause flickering or uneven lighting. These features put powerful diagnostic capabilities right in your hands, making maintenance smoother.
Moreover, smart controls allow for customized brightness profiles, which can prevent overheating by adjusting intensity during extended use. Leveraging these technologies not only fixes problems but helps prevent them, keeping your micro LED system running flawlessly longer.
Be cautious with soldering irons — these tools get extremely hot and can cause burns or damage if mishandled. Work in a well-ventilated space to avoid inhaling fumes from solder or flux. Also, avoid rushing; careful, deliberate movements reduce mistakes and hazards.
Proper disposal of damaged LEDs and wiring is another safety aspect. Many LEDs contain small amounts of heavy metals, so recycle or dispose of them following local guidelines. By keeping safety front and center, you protect yourself and ensure your repairs go smoothly without surprises.
Limiting frequent on/off cycles is another key factor. Constant switching stresses LEDs and their drivers, leading to premature failure. If possible, use timers or smart controls to manage operating times efficiently.
Maintaining a cool environment with adequate ventilation ensures heat doesn’t build up. Heat is one of the main enemies of micro LEDs, so preventing it is crucial. Following these simple habits means your lights will stay bright and reliable for years, saving you from frequent fixes or replacements.
Flexible and modular LED strips allow for easier segment replacements without dismantling entire setups, cutting repair times dramatically. Some manufacturers now offer self-diagnosing LED systems that alert users to specific faults via apps, streamlining troubleshooting.
Furthermore, the use of advanced coatings protects micro LEDs from moisture and dust, common culprits behind malfunctioning lights. Keeping an eye on these trends lets you choose more durable products or upgrade your existing system with confidence, ensuring fewer headaches and brighter results.

Regular follow-ups, such as monthly inspections and cleanings, keep minor issues from snowballing. Make a habit of verifying connections, power supplies, and surface cleanliness as part of your maintenance routine. This proactive approach saves you time and money over the life of your micro LED system.
By wrapping up your repair process with these thorough checks and setting up a maintenance schedule, you guarantee consistent brightness and longer-lasting performance. Bright, dependable lighting is just a few smart steps away.


Best LED Track Strip Lighting 2026: Bright Ideas for Every Space

Top Rated Best LED Dimmable Track Lights of 2026: Enlighten Your Space!

Best Plug In Track Lighting LED 2026 For Bright Spaces
Best Integrated LED Track Lighting: Top Picks for 2026

Best Round LED Ceiling Light Reviews - Top Picks 2026

Best Modern Track Lighting LED 2026: Sleek Illumination Upgrade

Best Mini LED Track Lighting: Top Picks for 2026

Best Oiled Bronze Track Lighting 2026 Stylish Illumination Picks






