
How to Fix Sagging Ceiling Fan Blades Fast
How to fix sagging ceiling fan blades usually becomes a pressing issue right after the fan starts wobbling like crazy, making clicking sounds, or pushing uneven airflow around the room. One crooked blade might not seem like a big deal at first. Then the shaking starts rattling light fixtures, loosening screws, and driving everyone nuts during the quietest part of the night. Ceiling fans often wear down slowly, so people ignore the small warning signs until the wobble becomes impossible to overlook.
Heat, humidity, dust buildup, and years of spinning can gradually pull fan blades out of alignment. Wooden blades tend to warp over time, especially in rooms with changing moisture levels like kitchens, patios, or bathrooms. Loose screws also sneak up on people because the fan still spins, just not smoothly anymore. That uneven movement puts extra stress on the motor, and sooner or later, the whole thing starts acting up in ways that feel way more expensive than they actually are.
Balance plays a bigger role than most people realize. Even a tiny difference in blade angle can throw off the entire fan. Some fans begin making a low humming noise, while others shake hard enough to look unsafe. A lot of frustration comes from replacing bulbs, tightening random screws, or blaming the motor before checking the blades themselves. Funny enough, the real fix is often simpler than expected once the source of the sagging becomes obvious.
Several ceiling fans also develop sagging because of poor installation habits from years back. Over-tightened screws can damage blade brackets, while loose mounting hardware allows the fan body to shift during operation. Dust accumulation adds extra weight unevenly across the blades, which quietly worsens balance problems over time. Small maintenance steps, skipped again and again, tend to snowball into bigger headaches later.
How to fix sagging ceiling fan blades involves more than tightening whatever looks loose. Blade alignment, bracket condition, mounting stability, and material warping all work together. Some blades can be adjusted back into shape without replacing anything. Others need balancing clips or fresh hardware to stop the wobble for good. A steady fan not only looks better but also runs quieter, circulates air evenly, and helps the motor avoid unnecessary strain.
Rooms with constant fan use usually reveal these problems faster. Bedrooms, living rooms, and covered outdoor areas push ceiling fans through daily wear that gradually shifts blade positioning. Once the wobbling starts, airflow suffers too. One side of the room feels breezy while the other barely gets circulation. That uneven performance frustrates people far more than they expect from something spinning overhead all day long.
How To Fix Sagging Ceiling Fan Blades
A fan that wobbles over your head can make a quiet room feel weirdly tense. One blade dips, the light kit trembles, and the whole thing starts looking less like a comfort feature and more like a small ceiling problem waiting to grow legs. That is where how to fix sagging ceiling fan blades becomes more than a quick chore because blade alignment, tight hardware, and safe balance all affect how smoothly the fan runs.
Check The Sag Before Touching Anything
Sagging fan blades usually show themselves through wobbling, uneven airflow, or a soft clicking sound that gets worse at higher speeds. Start by turning the fan off and letting the blades stop fully because safety beats speed every single time. Look at each blade from the side and compare the distance between the blade tip and the ceiling. A small visual gap can reveal a bent bracket, a warped blade, or a loose screw hiding in plain sight.
A ruler or tape measure helps take the guesswork out of the job. Measure from the ceiling to the tip of each blade, then write down the numbers so you’re not eyeballing it like a guessing game. If one blade sits lower than the rest, that blade deserves closer attention. For better room comfort after the repair, compare airflow needs with best flush mount ceiling fans bedrooms if low ceilings or cramped bedrooms keep making fan placement tricky.
Dust buildup can also make blades sag visually because one side may carry more weight than the others. Clean each blade with a damp cloth, especially near the outer edge where grime loves to settle. Don’t soak wood or MDF blades because too much moisture can cause swelling. A clean fan gives you a clearer read on the real problem, and honestly, it often runs quieter right away.
Tighten Screws Without Overdoing It
Loose screws are the sneaky little troublemakers behind many sagging ceiling fan blades. Check the screws where each blade attaches to the blade bracket, then check where the bracket connects to the motor housing. Use a screwdriver that fits snugly so you don’t strip the screw heads. Tighten each screw firmly, but don’t crank it like you’re fixing a truck axle.
Over-tightening can crack blade material or distort the bracket, especially on older fans with brittle parts. That damage can create a fresh sag even after the fan looks fixed for a moment. A steady hand matters here because even pressure keeps the blade seated flat against the bracket. If a screw spins without gripping, replace it with the same size rather than forcing a larger one into the hole.
Bracket screws need the same careful treatment. A slightly loose bracket can tilt the blade downward, making the whole fan wobble like it’s had too much coffee. Check each bracket in the same order so you don’t miss one. Small adjustments, done evenly, often bring the fan back into balance without needing new parts.
Spot Warped Blades And Bent Brackets
Warped fan blades can happen after years of humidity, heat, and daily spinning. Wood, composite, and thin pressed materials may twist or bow, especially in kitchens, bathrooms, covered patios, or rooms without stable airflow. Remove the blade and lay it on a flat surface to see whether the edges sit evenly. If one corner lifts, the blade itself may be the real culprit.
A bent bracket creates a similar problem but usually feels more mechanical. Hold the bracket beside the others and compare the angle, mounting holes, and curve. If one bracket looks off, don’t bend it back aggressively because metal fatigue can make it weaker. Replacement brackets are usually the safer route when the bend is obvious or the fan keeps wobbling after tightening.
Lighting issues nearby can make blade inspection harder, especially in dim rooms or garages. To get cleaner visibility while checking small parts, use brighter task lighting, and for separate lighting setup ideas, explore what is a gobo light if patterned or focused light effects are part of another room project. Clear visibility helps you catch tiny cracks, warped edges, and misaligned brackets before they turn into repeat repairs.
Balance The Blades After Basic Repairs
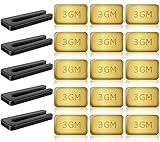
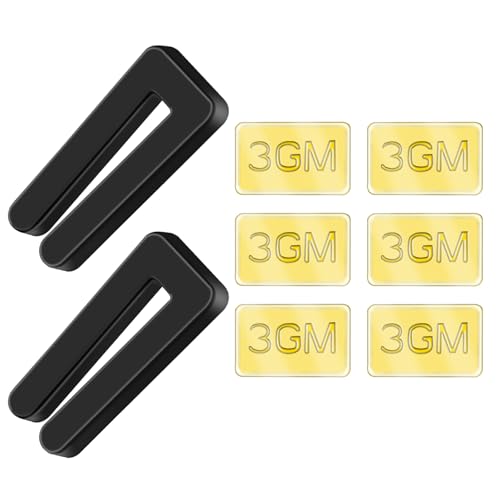
Blade balancing matters after tightening screws or replacing a warped piece. A fan can look straight while still shaking at medium or high speed. Use a balancing clip from a ceiling fan balance kit and attach it to the middle of one blade. Run the fan on low first, then move the clip from blade to blade until the wobble improves.
Once you find the blade causing the shake, slide the clip along that blade in small steps. Moving it closer to the tip or closer to the bracket changes how the weight affects rotation. Mark the best spot lightly, then place the adhesive weight on top of the blade where it won’t be obvious from below. Small weight changes can make a surprisingly big difference in noise control and smooth airflow.
Don’t rush the balancing process. Run the fan at different speeds because some wobble only shows up after the blades gain momentum. A fan that behaves on low but shakes on high still needs adjustment. Clean electronics and light boards around the fixture can also help with maintenance visibility, so use safer cleaning habits from how to clean led light board before touching nearby lighting components.
Fix Airflow Problems Linked To Sagging
Uneven airflow often lingers even after the sag looks better. A blade that sits lower than the others changes the way air moves across the room, which can leave one corner breezy and another oddly stale. Check the fan direction switch too because seasonal airflow settings affect comfort. In warm months, most ceiling fans should push air downward for a stronger cooling feel.
Blade pitch also matters. If one blade angle differs from the others, the fan may wobble or push weak air even with tight screws. Compare blade angles gently by sight and feel, without forcing the blade by hand. A damaged bracket or warped blade pitch usually needs replacement because forced bending can weaken parts and create a safety issue.
Motor strain is the bigger reason not to ignore sagging blades. Constant wobbling puts stress on the motor, mounting hardware, downrod, and electrical connections inside the housing. The fan may keep spinning for a while, sure, but that shake can turn a cheap fix into a bigger repair. Smooth blades protect airflow, quiet operation, and long-term fan life without making the room feel like a repair zone.
How To Stop Ceiling Fan Blades From Drooping
A ceiling fan that keeps wobbling after basic tightening usually points to a deeper issue hiding inside the blade setup. Some fans shake only at high speed, while others make a low rattling sound that slowly gets worse every week. Those little warning signs matter because blade balance, mounting stability, and motor strain all connect together. Ignoring the wobble too long can eventually loosen electrical parts or damage the fan housing itself.
Inspect The Ceiling Mount And Downrod
Ceiling mounts take more stress than most people expect. Every spinning blade transfers movement into the mounting bracket, especially if the fan has been wobbling for months. Grab the fan body gently and test for side-to-side movement while the power stays off. A loose mount can make perfectly straight blades look crooked because the whole fan shifts while spinning.
Downrod fans deserve extra attention because the rod amplifies movement once balance starts slipping. Tighten the mounting screws near the canopy and check the ball joint connection carefully. Small gaps around the mount can create a clicking noise that sounds like blade trouble even though the blades are fine. A secure ceiling connection keeps fan stability and air circulation more consistent across every speed setting.
Older ceiling boxes sometimes loosen over time, especially in homes with frequent fan use. Electrical boxes rated only for light fixtures may flex under the constant spinning weight of a fan. That movement can slowly throw blade alignment off again, even after repairs. Strong mounting hardware protects both quiet operation and long-term durability.
Replace Blade Hardware That Keeps Slipping
Blade screws occasionally loosen again after a repair because the threaded holes have worn down. Repeated tightening can strip softer metals or weaken older brackets, especially on budget ceiling fans that have been running for years. If screws keep backing out, swap them with matching replacements instead of forcing them tighter. Fresh hardware often holds blade alignment much more reliably.
Pay attention to the rubber or fiber washers too. Missing washers can create tiny spacing problems that throw the fan off balance over time. Some fans use vibration-dampening pieces between the blade and bracket to reduce stress during operation. Losing even one small piece can affect blade angle, rotation smoothness, and noise control.
Lighting upgrades nearby sometimes happen during fan repairs, especially in bedrooms or living rooms where visibility matters most. For stronger illumination after fixing airflow issues, explore ceiling fan light brighter ideas that improve room lighting without replacing the entire fan fixture. Better lighting also makes future maintenance easier because small alignment problems become easier to spot.
Cheap replacement screws create another headache. Soft metals wear down quickly and may loosen faster under constant vibration. Stainless or coated hardware handles humidity better, particularly in coastal or damp environments. Stable hardware protects blade balance and helps the fan feel smoother instead of shaky or noisy.
Reduce Humidity Damage On Fan Blades
Humidity quietly ruins more ceiling fan blades than people realize. Moisture seeps into wood and composite materials over time, especially in bathrooms, kitchens, covered patios, and laundry rooms. Blades begin absorbing uneven moisture levels, which gradually changes their shape. That subtle warping eventually causes sagging, wobbling, and weak airflow.
Fans installed near windows or exterior doors often deal with larger temperature swings too. One side of the blade may heat up more during the day, then cool unevenly at night. Those repeated changes stress the blade material little by little. Keeping indoor humidity under control helps preserve blade shape, motor efficiency, and overall fan lifespan.
Cleaning matters more than people expect here. Dust traps moisture against blade surfaces, especially in humid climates. Use a lightly damp microfiber cloth instead of soaking the blades during cleaning sessions. Excess water can seep into seams or edges and worsen swelling problems later.
Know When Replacement Makes More Sense
Some ceiling fan blades simply reach the end of their useful life. Cracked blade arms, heavily warped materials, or repeated wobbling after multiple repairs usually signal that replacement is smarter than another temporary fix. Spending hours adjusting damaged blades often leads right back to the same problem a few weeks later. A stable fan should spin smoothly without constant tweaking.
Replacement blades need to match the original size, weight, and pitch as closely as possible. Mixing unmatched blades creates airflow imbalance and can overload the motor. Manufacturers design blade sets around specific weight distributions, so random replacements rarely perform well together. Consistent blade specs protect safe operation and even circulation.
Motor age matters too. An older fan with worn bearings may continue wobbling despite perfectly aligned blades because internal parts have already loosened. Grinding noises, delayed startup, or overheating usually point toward deeper wear inside the housing. At that point, replacing the entire fan may save more frustration than chasing endless small repairs.
Garage workshops and utility spaces sometimes use brighter automotive-style bulbs during repair projects for better visibility. For stronger task lighting in those areas, compare options through best led tail light bulbs if brighter focused lighting helps during maintenance work or detailed hardware inspection. Better visibility reduces mistakes while handling small screws and blade brackets.
Keep The Fan Balanced Long After Repairs
Routine maintenance keeps sagging ceiling fan blades from sneaking back into the picture a few months later. Dust the blades regularly because uneven buildup slowly affects balance again over time. Check screw tightness every season, especially before heavy summer use starts. Tiny adjustments early prevent larger repairs later.
Watch how the fan behaves at different speeds instead of running it only on high all year. Constant maximum speed creates more wear on blade brackets and motor components. Lower settings during cooler evenings reduce stress and help parts last longer. Balanced operation protects quiet airflow, energy efficiency, and motor stability.
Room layout also affects fan performance more than many people think. Furniture placement, ceiling height, and nearby vents can make airflow feel uneven even after the blades are fixed properly. Small room adjustments sometimes improve comfort without touching the fan again. A smoother airflow pattern helps the room feel cooler and more comfortable without increasing fan speed.
Fans that stay level, quiet, and stable usually receive attention before small problems grow into larger repairs. Sagging blades rarely improve on their own, and the wobble tends to spread stress across the entire fixture over time. Careful balancing, proper cleaning, and solid mounting support keep the fan running smoothly without turning every quiet evening into a rattling distraction.


Best Small Flush Mount Ceiling Fans 2026 Ultimate Picks

Best Smart Ceiling Fan India 2026 For Effortless Comfort

Best Smart Ceiling Fans with Lights for 2026: Top Picks

Best Smart Home Non Ceiling Fans 2026 For Ultimate Comfort

Best Outdoor Misting Ceiling Fan 2026 For Ultimate Comfort

Best Ceiling Fans With Lights For Vaulted Ceilings 2026 Top Picks

Best Outdoor Ceiling Fans For Porch 2026 With Style And Breeze

Best WiFi Enabled Ceiling Fan 2026 For Effortless Comfort





