How to Hang Fairy Lights in a Bedroom Without Peeling Paint

Setting up cozy accent lighting is not something to stress over, because you can easily get a warm glow without driving nails or stripping off paint. The simplest method is pressing clear adhesive clips onto clean drywall every twelve inches, starting right beside your power source and working outward. On furniture like headboards or curtain rods, you can simply drape or wrap the thin wire without using any sticky pads at all.
A few room details will change how you tackle the project. Smooth drywall holds adhesive strips firmly, while rough plaster or textured walls make sticky pads struggle to grip. Your power setup matters just as much, since reaching a low wall outlet takes more slack than tucking a battery box behind a pillow. Spanning an open ceiling also requires tighter spacing than tracing a window frame. The steps below show how to map your path, keep the wire taut, and protect your walls from start to finish.
How do you map your path and power source?
Hanging fairy lights starts with a clear plan for your power source. Before touching the wall, locate your nearest electrical outlet or decide where your battery pack will rest. Running out of wire two feet before the plug leaves you with dangling cords that look messy and pull on your wall fasteners.
Unroll your light strand on the floor or bed first. Plug it in to confirm every tiny bulb lights up before you mount anything. Checking the strand now saves you from hanging a dead line of lights and having to pull your clips off the wall immediately.
Walk through this layout checklist before you place your first hook:
- Measure the distance to your outlet: Check the length of the lead cord, which is the bare wire between the plug and the first bulb. If the lead cord is short, plan your route so the first lit bulb starts right near the outlet, or use an extension cord tucked behind furniture.
- Select your wire type: Fairy lights usually come on thin bendable wire (bare copper or silver wire) or flexible plastic-coated cord. Thin bendable wire holds its shape around corners and stays lightweight, while thicker cords require sturdier clips.
- Choose your brightness and tone: For a cozy bedroom, look for a color tone or warmth of around 2700K (warm soft white). Brightness in lumens is low on fairy lights, typically around one to five lumens per bulb, which creates a restful glow rather than harsh glare.
- Mark your anchor points: Lightly mark your intended corners or turns with a pencil dot. Keeping your path along architectural borders like door frames, baseboards, or ceiling lines keeps the installation clean and hides the wire.
How do you prepare walls so paint stays safe?
Torn paint happens when adhesive sticks to surface dust instead of the drywall, or when the adhesive bond is peeled away aggressively. Standard painted drywall holds light clips reliably if the surface is completely clean and dry before application.
Avoid using metal nails, pushpins, or a plastic screw sleeve (a wall anchor inserted into a drilled hole) for lightweight fairy lights. Thin accent lights weigh only a few ounces, so clear clips with gentle sticky pads provide plenty of support without piercing your drywall.
Follow these steps to mount your light clips without damaging your paint:
- Clean the mounting area: Wipe the wall surface with a lint-free cloth dampened with standard rubbing alcohol. Rubbing alcohol removes oils and fine bedroom dust without softening latex wall paint. Never use household cleaning sprays or soapy water, because they leave slick residues that cause adhesives to slide off.
- Let the drywall dry: Wait ten minutes for the alcohol to evaporate completely. If the wall feels cold or damp, the adhesive will not grip properly.
- Attach the sticky pad to the clip: Peel the protective backing from one side of the sticky pad (adhesive strip). Press the pad firmly against the back of the clear plastic clip for five seconds.
- Press the clip to the wall: Peel the remaining paper backing and press the clip against your marked wall spot. Press firmly with your thumb for thirty seconds. This pressure activates the adhesive bond across the entire flat base.
- Wait one full hour: Let the clips sit empty on the wall for at least sixty minutes before hanging your light strand. Giving the adhesive time to cure prevents the weight of the wire from pulling clips off the drywall later.
If your bedroom was painted recently, check that the paint has cured for at least thirty days before using any adhesive clips. Fresh paint feels dry to the touch within hours, but it takes weeks to cure fully. Applying sticky pads to uncured paint will pull the topcoat away when removed.
How do you hang the wire without ugly sagging?
A loose, drooping wire looks accidental and sloppy, while a wire pulled too tight puts stress on the clips and pops them off the wall. The secret to clean lines is consistent clip spacing and controlled tension as you work away from the power source.
Take your time and guide the strand through each hook using these steps:
- Anchor the power end first: Begin hanging at the end closest to your wall outlet or battery box. Place your first clip about six inches from the power plug so the weight of the plug does not pull down on the rest of the light run.
- Space your clips twelve inches apart: For a straight, crisp line along a ceiling or wall, place a clip every twelve inches. If you prefer a relaxed swag look where the lights dip gently, space the clips eighteen to twenty-four inches apart.
- Thread the wire loosely: Lay the thin bendable wire into each clip hook without pulling hard. Keep just enough tension to eliminate big droops while leaving a tiny fraction of slack so changes in bedroom temperature will not snap the wire tight.
- Lock thin bendable wire in place: If you are working with bare copper or silver wire, make a single gentle turn around the hook peg. This tiny bend stops the wire from sliding sideways and pooling into the center of the span.
- Secure the tail end: When you reach the end of your run, support the final bulb with a clip placed three inches from the tip. If you have extra wire length, loop it back along the existing run rather than cutting it, because cutting a series light string breaks the electrical circuit.
Which room pattern works best for your bedroom layout?
The layout you choose determines how many clips you need and where the light falls in the room. Matching the pattern to your room features creates a balanced look without crowding your space.
Here is how the four most popular bedroom light layouts compare:
- The Headboard Frame: Wrapping fairy lights directly around an iron, wood, or spindle headboard requires zero wall clips. You simply weave the thin bendable wire around the posts and frame rails. This layout keeps the glow focused near your pillows for evening reading without putting any adhesive on the wall.
- The Ceiling Perimeter: Stringing lights along the boundary where your walls meet the ceiling illuminates the whole room with soft, indirect bounce light. This pattern requires the most clips (one every twelve inches around the perimeter), but it keeps all wiring completely out of reach of children and pets.
- The Cascading Curtain: Hanging strands vertically down behind a sheer window curtain or tapestry creates a soft, diffused waterfall of light. You only need a horizontal row of clips along the top curtain rod or upper wall. The fabric softens the light points and hides the vertical drop wires naturally.
- The Accent Wall Zigzag: Running strands back and forth horizontally across an open accent wall creates a mini gallery where you can attach light photo prints using mini wooden clothespins. This design requires careful measuring to keep your horizontal rows level, but it turns an empty bedroom wall into a focal point.
Is it safe to leave fairy lights on overnight?
Modern LED fairy lights are very safe for bedroom use because LEDs produce almost no heat compared to traditional filament bulbs. The thin bendable wire carries low voltage, usually between three and twelve volts, which means the bulbs remain cool to the touch even after running all night against drywall or fabric.
Always verify that your light strand is dry-rated for living rooms and bedrooms. Outdoor-rated lights are built with heavy rubber cords and bulky transformers that are unnecessary indoors, while cheap uncertified lights may lack internal fuses. Look for a safety mark from an accredited testing laboratory on the plug or packaging to confirm the power adapter meets basic electrical standards.
Leaving lights running indefinitely uses unnecessary power. Plugging your strand into a simple timer outlet or integrating it with home automation lights allows you to schedule automatic shut-offs an hour after your normal bedtime. This prevents ambient glow from disrupting your deep sleep cycles while keeping your bedroom cozy while you wind down.
When the time comes to redecorate or move out, remove your adhesive clips properly to protect your drywall. Never pull the plastic clip straight out toward yourself, as this leverages the adhesive against the paint paper. Instead, firmly hold the base of the clip with one hand, grasp the tab on the sticky pad with the other, and pull the tab slowly downward, flat against the wall. The pad stretches out like a rubber band and releases its grip without peeling paint or leaving sticky residue.
What should you look for in hanging clips?
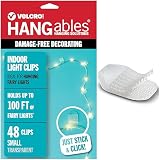
Finding the right clips for your bedroom project comes down to wall compatibility, hook size, and package quantity. Look for clips made of clear plastic so they disappear against your paint color and let the glow of the lights take center stage.
Check the adhesive type supplied with the hooks. You want removable sticky pads formulated specifically for painted indoor drywall. Heavy-duty outdoor foam tapes or permanent mounting squares hold too tightly and will tear your drywall paper when pulled down.
Match the hook channel to your wire. Thin bendable wire needs only a shallow notch to stay in place, while thick coated cords require a wider clip opening so the plastic jacket does not pinch. Finally, measure the length of your planned wall run and divide by twelve inches to calculate your hook count, then buy a pack with enough extras to replace any clips you misplace during installation.

- LFR Score8.8
LFR Score is a ranking system developed by lightfansreviews.com. LFR Score has no relationship or impact from any manufacturers or sales agent websites. Learn more
- BrandVELCRO Brand
- LFR Score8.1
LFR Score is a ranking system developed by lightfansreviews.com. LFR Score has no relationship or impact from any manufacturers or sales agent websites. Learn more
- BrandVELCRO Brand
Last update on 2026-10-17 / Affiliate links / Images, Product Titles, and Product Highlights from Amazon Product Advertising API
FAQs
Can you stick adhesive light clips to textured plaster walls?
Adhesive light clips struggle to stick to rough plaster, popcorn textures, or heavy orange-peel drywall. The bumps prevent the flat sticky pad from making full contact with the surface, which causes the clips to peel away under light weight. On textured walls, clip your fairy lights along smooth wooden window trim, door molding, or curtain rods instead of the plaster.
How do you hide a fairy light battery box?
A battery box looks heavy if left dangling down the wall. Mount the box to the wall using a medium removable foam strip placed directly behind a headboard, nightstand, or curtain panel. If your lights are strung on furniture, tuck the battery pack into an open decorative basket or use a hook-and-loop strap to anchor it to the back of a bed leg.
Will fairy lights damage wallpaper if you use adhesive clips?
Yes, adhesive clips will almost always damage wallpaper upon removal. Wallpaper glue and surface paper are delicate, and the pull force of the sticky pad lifts the paper pattern right off the wall. If your bedroom features wallpaper, hang your fairy lights by draping them across curtain rods, mirrors, or existing picture frames without applying adhesive to the paper.
What should you do if an adhesive clip falls off the wall?
Clean the spot again with rubbing alcohol to remove any residual dust that caused the original failure. Throw away the used sticky pad, as adhesives cannot be reused once they lose contact with the wall. Apply a fresh sticky pad to the plastic clip, press it to the wall for thirty seconds, and let it cure empty for an hour before resting the wire back in the hook.


Best Lighting For Makeup 2026 Bright Ideas For Flawless Looks

Best Wall Sconces For Staircase 2026 Brighten Your Home

Best Lighting For Computer Desk 2026 For Focused Work

Best Boat Black Lights 2026 For Nighttime Adventure

Best Black 30 Inch Light Bar Reviews – Top Picks of 2026

Best Black Light For Aquarium 2026 For Vibrant Glow

Best Black Light for Authenticating Glass 2026 Top Picks

Best Waterproof Spotlight 2026 That Outshines Expectations