How to Safely Install a Bathroom Light Fixture

Tackling a bathroom light replacement is far less intimidating than it looks, and there is no reason to worry about doing it yourself. The whole job comes down to shutting off the circuit breaker, checking that the wires carry no power, and matching the wire colors with simple plastic twist caps. Once the old base comes off the wall, connecting black to black, white to white, and bare copper to the safety screw takes only a few minutes with basic hand tools.
A few household details determine how smooth the swap will be. An existing wall electrical box must be firmly anchored so the weight of the fixture does not pull the drywall loose. Older homes might also hide brittle, cloth-covered wiring that cracks easily, unlike modern plastic insulation. Fixture placement also counts, especially if the light hangs close to a shower where moisture builds up quickly. Here is the safest way to walk through each step from start to finish.
Shut Off the Main Breaker Before Touching Any Tools
Shutting off the power at the wall switch is never enough when you replace a light. A single wall switch only interrupts one side of the electrical circuit. If a previous worker accidentally switched the neutral line instead of the hot line, live electrical current still sits inside the wall box even when the switch is flipped off. Someone else in the house could also walk past and flip the switch by mistake while your hands are on bare copper. Always walk to your main electrical panel and shut off the circuit breaker controlling the bathroom.
Flipping the breaker often plunges the bathroom, nearby closets, and connecting corridors into darkness. Setting up battery lamps or plug-in indoor motion sensor lights for hallways keeps your walkway safe while you carry tools back and forth. Before taking anything apart, assemble everything you need so you do not have to leave the work area mid-job:
- A non-contact voltage sensor (a handheld plastic pen that chirps or lights up when it senses live electrical current).
- Phillips and flathead screwdrivers with insulated rubber handles.
- Wire strippers with cutting notches sized for common household wiring gauges.
- Needle-nose pliers for gripping and twisting thick copper ends.
- A small torpedo level (a pocket-sized bubble level) to keep your light straight.
- Plastic twist caps (often called wire nuts) sized to fit your fixture wires.
- A roll of black electrical tape.
Once you switch the breaker off at the panel, verify that the circuit is dead before loosening a single screw. Flip the bathroom wall light switch on and off to confirm the light stays dark. Then hold the tip of your non-contact voltage sensor right against the wall switch and the base of the light fixture. If the sensor stays silent and dark, the circuit breaker cut the current successfully. If the sensor beeps or lights up red, power is still flowing. Return to your panel and shut off the correct breaker before moving forward.
Remove the Old Fixture Carefully to Protect Drywall
Taking down an old vanity light requires patience so you do not rip drywall paper or drop heavy glass onto porcelain sinks. Lay a thick folded towel across the bathroom counter and sink basin. The towel prevents dropped screws from bouncing down the drain and cushions the sink if a tool slips from your grip.
- Remove all bulbs and glass shades first. Unscrew the lightbulbs and set them aside. Most decorative glass shades are secured by small thumb screws or threaded socket rings. Loosen these rings and lift off each shade individually. Stripping the fixture down to its bare metal frame makes the unit light and easy to control with one hand.
- Score the perimeter paint line. Over the years, bathroom steam and fresh coats of wall paint cause fixture backplates to glue themselves tightly to the wall. If you yank the metal plate forward, you will tear off the top layer of drywall paper. Glide a sharp utility knife lightly around the outer metal rim to break the paint bond cleanly.
- Loosen the decorative cap nuts. Look at the front of the fixture base for two rounded metal nuts or small screws holding the canopy against the wall. Support the center of the fixture with one hand while unscrewing these nuts with your other hand. Slowly ease the fixture away from the wall until the wiring behind it becomes visible.
- Confirm the wires are dead with your sensor. Before your fingers touch any bare metal or wire connectors, place the tip of your non-contact voltage sensor directly against each plastic twist cap inside the wall cavity. Confirm once more that no electrical charge is present in any wire.
- Disconnect the wires. Unscrew the plastic twist caps counter-clockwise. Untwist the joined wire pairs gently with your fingers or needle-nose pliers. Once free, lower the old fixture to the counter.
- Remove the old mounting plate. Unscrew the two machine screws holding the old metal wall plate to the wall electrical box (junction box). Pull the plate off the wall, leaving the house wires sticking straight out into the room.
Align the Metal Wall Plate Level and Flush
The metal wall plate (mounting bracket) creates the structural foundation for your new light. It bridges the gap between the wall electrical box anchored inside the wall and the decorative fixture canopy you see in the room. A hardwired fixture (wired directly into a ceiling or wall electrical box) depends entirely on this plate for balance and stability.
First, inspect the wall electrical box. This is the plastic or metal round or octagonal box recessed into the wall that protects your wire connections. Press firmly on the box edges with your fingers. The box must feel rock-solid against the wall framing. If the box wiggles, slides, or pulls loose from the drywall, locate the mounting screws inside the back of the box and tighten them directly into the wall stud. If you mount a multi-bulb vanity light to a loose wall box, the extra leverage will pull the box out of the wall and cause the light to sag forward over your mirror.
Screw the new metal wall plate onto the electrical box using the two long machine screws supplied in the hardware bag. Thread the screws through the curved adjustment slots on the plate and into the threaded holes on the electrical box ears. Keep the screws slightly loose so you can still pivot the plate.
Place a small torpedo level across the top edge of the metal plate. Rotate the plate until the bubble rests precisely between the center marker lines. Hold the plate steady with your thumb and tighten both mounting screws securely with a screwdriver. Checking for level right now saves you from discovering a crooked light later, because most fixture canopies lock firmly into fixed positions once attached to this plate.
Decide whether you want your light shades pointing up toward the ceiling or down toward the sink. Pointing shades down delivers strong, shadow-free light directly onto your face, which is helpful for shaving or applying makeup. Pointing shades up casts soft, indirect illumination that bounces off the ceiling to fill the entire bathroom evenly without harsh glare. Make this choice before wiring so you orient the mounting plate screws in the proper direction for your fixture design.
Connect Matching Wires Firmly With Plastic Twist Caps
Wiring a standard light fixture requires connecting three distinct paths: the hot line, the neutral line, and the safety ground line. The hot wire (black wire) brings 120-volt current from the breaker panel to the fixture. The neutral wire (white wire) carries that current back to complete the electrical circuit. The ground wire (bare copper safety wire or green insulated wire) routes stray current safely into the earth if a loose wire touches the metal frame, preventing accidental shock.
- Connect the safety ground wires. Locate the bare copper safety wire emerging from your wall electrical box. Wrap this copper wire around the green ground screw located on the metal wall plate, leaving a few inches of wire tail free. Tighten the green screw down tight against the copper. Next, hold the bare copper tail alongside the ground wire coming from your new fixture. Twist an approved plastic twist cap clockwise over both ends until tight. If your home has an older metal box with no bare wire coming from the cable, wrap the fixture ground wire directly around the green screw threaded into the metal box. The metal box itself acts as the ground path in that configuration.
- Connect the white neutral wires. Gather the neutral wire coming from the wall (covered in white plastic insulation) and the neutral wire from the light fixture. Line up the stripped bare copper tips side by side so they sit even with each other. Place a plastic twist cap over the tips and twist clockwise firmly. Turn the cap until the plastic threads bite hard into the copper and twist the insulated wires slightly around each other. Give both wires a firm tug while holding the cap; neither wire should slip or budge.
- Connect the black hot wires. Bring the hot wire from the wall (covered in black plastic insulation) together with the black hot wire from the fixture. Thread another plastic twist cap over the exposed ends and twist clockwise until rock-solid. Tug both black wires firmly to confirm the joint cannot pull apart.
Some fixtures use a two-conductor cord that does not have clear black and white insulation jackets. Look closely at the plastic coating on these wires using a bright flashlight. One wire has subtle ribs, ridges, or square grooves molded along the outside edge. That ribbed wire is your neutral wire, and it connects directly to the white wall wire. The other wire has a completely smooth jacket, sometimes printed with faint lettering. That smooth wire is your hot wire, and it connects directly to the black wall wire. Reversing these wires will still light the bulbs, but it energizes the outer threaded screw shell of the light socket, creating a serious shock hazard whenever you replace a bulb down the road.
Mount the Light Body and Confirm the Switch Works
With all wire splices secured, tuck the wires safely out of the way before bolting the fixture to the wall plate. Push the grouped wires gently into the wall electrical box using an accordion fold. Push the neutral white pair toward one side of the box and the hot black pair toward the other side. Separating them reduces heat buildup and prevents crowding. Check that no bare copper peeks out beneath the plastic twist caps. If any bare wire shows past the plastic cap rim, unscrew the cap, trim the exposed copper slightly shorter with wire strippers, and re-twist the cap until the insulation sits flush inside the plastic collar.
- Fasten the fixture canopy. Guide the fixture body over the threaded studs protruding from the metal wall plate. Push the canopy flat against the wall surface, checking that no internal wires get pinched between the metal edges and the drywall. Thread the decorative cap nuts onto the studs and tighten them down snugly by hand. If needed, give them a quarter-turn with pliers wrapped in a soft rag to protect the metal finish from scratches.
- Attach the shades and bulbs. Reinstall the glass shades and hand-tighten their retaining rings. Screw in lightbulbs that match the socket ratings. Most fixtures use a standard screw-in bulb base (E26 medium base), while some low-profile models feature a built-in LED (integrated diode array) that requires no bulb changes. When buying standard bulbs, evaluate brightness in lumens rather than old wattage numbers; lumens measure actual brightness while watts only measure power draw. Look for bulbs with a 90+ CRI (color accuracy) rating so skin tones and paint look true in the mirror. Choose your color tone or warmth (Kelvin) to set the mood: 2700K delivers warm soft white light, while 5000K provides crisp daylight. Always confirm the fixture packaging states it is damp-rated for steamy bathrooms rather than dry-rated for living rooms and bedrooms. Fixtures mounted inside enclosed showers must be wet-rated for direct moisture contact.
- Restore power at the electrical panel. Walk back to your main electrical panel, locate the bathroom breaker you switched earlier, and push it firmly back to the ON position.
- Flip the bathroom wall switch. Turn the wall switch on to confirm the light turns on instantly without flickering. If your light connects to an LED-compatible dimmer switch, slide the dimmer lever slowly from minimum to maximum. Make sure the light dims smoothly without faint buzzing, humming, or flashing, which are common signs of an incompatible older wall switch.
Stop and Call an Electrician When Wiring Looks Unsafe
Installing a light fixture into an existing, well-maintained wall box is a manageable household task. However, older homes and unpermitted remodel work can hide dangerous electrical conditions behind the wall plate. Knowing when to stop working protects your home from electrical fires and keeps you safe from severe shocks.
Stop immediately and contact a licensed electrician if you run into any of these four warning signs:
- Crumbling cloth insulation: If your home was built before the mid-1960s, the wires inside the wall box may be wrapped in woven fabric rather than modern vinyl plastic. When you bend old cloth-insulated wires, the dried fabric often crumbles away, leaving bare, exposed hot wires touching inside the box. Modern light fixtures run hot and can easily spark a fire if cloth insulation fails.
- Silver-colored aluminum wiring: If the metal inside the insulated house wires looks dull silver rather than shiny copper, your house likely has aluminum wiring installed during the late 1960s or 1970s. Aluminum expands and contracts dramatically as electricity flows through it. Standard plastic twist caps loosen over time on aluminum conductors, causing dangerous heat arcs. Working on aluminum circuits requires specialized connectors, antioxidant paste, and specific training.
- A missing electrical box: If you pull down the old light and find the wires poking through a jagged hole in the plaster with no plastic or metal box surrounding them, stop. Code requires all electrical splices to sit enclosed inside a firmly anchored wall electrical box to contain sparks and heat. An electrician must cut the drywall and mount an approved remodel box to the framing before a new light can be installed.
- Scorched wires or melted plastic: If you notice black soot marks on the old metal plate, melted wire insulation, or an acrid burning odor inside the wall opening, your circuit suffered previous electrical arcing or overheating. Replacing the light fixture will not fix an overloaded or damaged circuit run. A professional must inspect the wire runs all the way back to the panel to guarantee your home is safe.


Best Lighting For Makeup 2026 Bright Ideas For Flawless Looks

Best Wall Sconces For Staircase 2026 Brighten Your Home
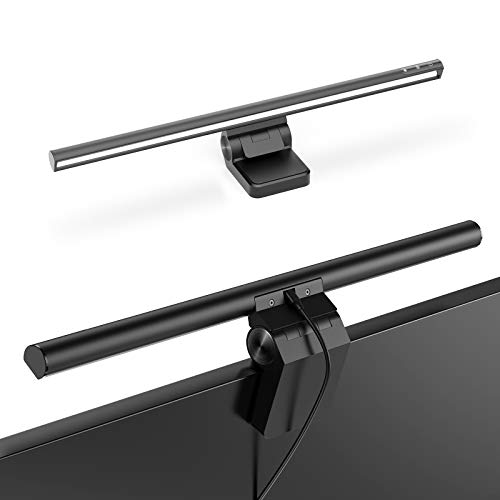
Best Lighting For Computer Desk 2026 For Focused Work

Best Boat Black Lights 2026 For Nighttime Adventure

Best Black 30 Inch Light Bar Reviews – Top Picks of 2026

Best Black Light For Aquarium 2026 For Vibrant Glow

Best Black Light for Authenticating Glass 2026 Top Picks
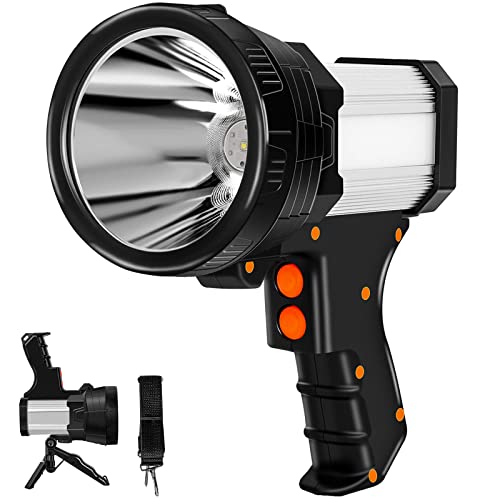
Best Waterproof Spotlight 2026 That Outshines Expectations