
How to Safely Install a Fluorescent Tube Light

A dull buzz, an annoying flicker, and a sudden click leave the garage workbench in the dark. Fixing it just takes a minute: shut off the wall switch, slide the metal pins into the open socket slots, and rotate the tube a quarter-turn until it locks. There is no need to wrestle with the fixture or touch the wiring.
A few details can change how the bulb fits. Thick, older glass tubes need more room than modern skinny bulbs, and some shop lights use spring-loaded ends instead of standard two-pin brackets. Aging plastic holders on the ceiling can also turn brittle over time, which means forcing a twist can crack the mount. Taking a steady approach keeps the glass safe and gets the room bright again.
Set Up Your Ladder and Cut the Power Before You Begin
Working overhead on a ceiling light fixture creates two main risks: losing your balance and touching live electrical contacts. Taking two minutes to prepare your workspace keeps you safe and prevents fragile glass from dropping to the floor.
Follow this safety checklist before reaching overhead:
- Cut wall power: Turn the wall switch off and place tape over the switch toggle so no one flips it on while you work. If the switch controls multiple lights or the wiring feels uncertain, turn off the circuit breaker for that room at your main electrical panel.
- Set a sturdy ladder: Place a stepladder directly beneath the fixture. Position it so your chest stays level with the bulb without leaning backward or reaching over ladder rails. Never stand on the top step.
- Wear safety gear: Put on work gloves with a rubber grip and clear safety glasses. Fluorescent tubes can crack if twisted sideways, and gloves keep skin oils off the new glass.
- Clear the floor: Move workbenches or clutter away from the drop zone. Keep the cardboard sleeve from your new tube next to your ladder for immediate storage of the old bulb.
Twist and Slide Out the Old Glass Tube Carefully
Most overhead fixtures in garages, basements, and kitchens use standard two-pin twist sockets. On each end of the tube, two metal pins (called a bi-pin base) sit inside a plastic end socket (often called a tombstone because of its upright shape). Removing the dead bulb requires a smooth quarter-turn to guide the pins out through the entry channel.
Follow these steps to take the dead tube down without cracking the glass:
- Grasp near the ends: Climb your ladder until the fixture rests comfortably in front of you. Hold the glass tube with both hands about five inches inward from each metal end cap. Never hold the tube only by the middle, because long glass tubes flex easily and can snap under uneven pressure.
- Rotate the tube ninety degrees: Gently rotate the tube a quarter-turn toward you or away from you. You will feel a slight release as the two metal pins on each end rotate out of their spring clips and line up with the open vertical slot of the plastic end socket.
- Verify pin alignment: Look at the plastic socket on both ends. The open entry slot runs straight down, so both contact pins must sit perfectly vertical to slide free. If one end resists, gently rock that side until the pins center in the channel.
- Lower the tube straight down: Guide the tube straight down out of the slots with both hands moving together. Keep the bulb completely level so the pins clear both brackets at the exact same moment.
Some commercial workshop fixtures use single-pin tubes with a spring-loaded socket on one end. For those, push the tube firmly toward the spring-loaded end until the opposite pin clears its bracket, then lower that end and slide the tube free. If you want to know why your old tube burned out, check how long fluorescent bulbs last in real life use to see how daily runtime impacts lifespan. Slide the old tube into the cardboard sleeve and set it safely on the floor.
Align the Contact Pins and Lock the New Tube into Place
Installing your replacement tube is the reverse of removing it, but proper pin alignment is essential. Forcing a misaligned tube into brittle plastic brackets can bend the metal contact prongs or crack the socket frame.
Follow these steps to seat and lock the new tube securely:
- Verify tube thickness: Check the printed markings on the glass near the metal end cap. A standard T8 bulb measures one inch thick, while an older T12 bulb measures one and a half inches thick. Ensure the length matches your fixture, with forty-eight inches being the standard residential size.
- Point the pins straight up: Hold the new tube with both hands near the outer ends. Rotate the tube until the two metal pins on both ends point straight upward toward the ceiling, matching the vertical entry slots of the plastic sockets.
- Slide the pins into the socket slots: Raise the tube straight into the fixture, sliding the pins into the vertical grooves on both plastic sockets simultaneously. Push upward until you feel the pins seat at the very top of the track.
- Rotate the tube ninety degrees: Twist the tube a smooth quarter-turn in either direction. As the glass turns, the pins rotate into horizontal brass contact springs inside the socket. You will feel a firm mechanical resistance as the pins settle into place, and any printed text on the glass should face flat toward the floor.
- Confirm the grip with a gentle pull: Keep your hands near both ends and gently tug downward on the glass tube. A properly locked tube will not drop out of the sockets or shift downward. If either side drops, rotate the tube back, reseat the pins at the top of the track, and twist again.
Step down from your ladder, clear your workspace, and switch the wall power back on. The tube should strike smoothly and provide steady, even light across the entire length.
Fix Fixtures That Flicker, Buzz, or Stay Dark
If you turn the light switch on and your new tube remains dark, flickers rapidly, or emits a loud hum, do not assume the new bulb is broken. In most cases, the issue comes down to pin contact or an aging component inside the fixture body.
Start by checking the pin position. If the tube was turned seventy or eighty degrees instead of a full ninety degrees, the pins only touch the edge of the brass clips inside the socket. Turn off the wall switch, reach up, and gently wiggle the tube clockwise and counterclockwise by a fraction of an inch. That slight adjustment often scrapes off light surface oxidation and seats the pins flush against the internal contacts, eliminating rapid fluttering.
Examine the ends of the tube while power is applied. If the glass ends glow bright orange or pink while the center stays dark, the tube is drawing starting current but cannot ignite the gas inside. This symptom points to a failing ballast (the internal power box housed inside the metal fixture body that regulates electrical current). The ballast cannot deliver the voltage spike needed to run the lamp. If your fixture uses a separate small metal cylinder called a starter, swapping that twist-in starter for a new one may resolve the glow without changing the whole ballast.
Listen closely to the sound of the fixture. A low hum is normal for older magnetic ballasts. But a loud, rattling buzz that fills the room indicates the internal magnetic coils of the ballast are degrading. If you smell burnt resin, see black scorch marks around the sockets, or notice brown tar dripping from the metal fixture channel, shut off the circuit breaker immediately. Those are clear signs of an overheating ballast that requires replacement by a qualified electrician.
Check and Replace Cracked Plastic End Sockets
Over years of use, the heat generated by fluorescent lighting dries out the plastic end sockets (tombstones). These brackets turn yellow, brittle, and weak. When you twist a tube inside an aged socket, the thin plastic walls can crack or crumble, leaving the bulb loose overhead.
Inspect both plastic sockets thoroughly with a flashlight before locking in your new bulb:
- Look for vertical hairline splits along the entry groove where the pins slide into the socket.
- Check the internal rotating rotor to ensure the circular center piece has not cracked in half.
- Press gently on the socket body with your finger to verify it remains anchored firmly to the sheet metal frame without rocking back and forth.
If a socket is cracked or loose, do not install a glass tube into it. The tube can vibrate loose over time and fall. Replacing a broken tombstone is a straightforward repair that restores your fixture to safe operating condition. Always turn off the circuit breaker at your main electrical panel before opening the metal fixture housing.
Remove the metal channel cover running between the two sockets by squeezing the sides together to release the locking tabs. Unclip the damaged plastic socket from the metal end bracket. Standard replacement sockets use push-in wire terminals. Insert a small flat screwdriver or a stiff pin into the release slot next to the wire port to release the existing copper wire, then push the bare wire firmly into the matching port on the replacement socket. Snap the new socket into the metal frame, reinstall the channel cover, and lock your new bulb into place.
Pick the Right Replacement Parts Before You Shop
Finding the right replacement tube or repair hardware requires checking the physical dimensions and electrical requirements of your existing ceiling fixture. Fluorescent fixtures rely on exact pin spacing and overall length, so picking parts with matching measurements ensures everything fits securely on your first attempt.
Match the tube diameter to your fixture by reading the printed code on your dead bulb. A T8 tube has a one-inch diameter, while an older T12 bulb has a one-and-a-half-inch diameter. If you maintain heavy-duty overhead lights in a workshop or utility space, comparing options like the best industrial light bulb choices will help you understand different output levels and durability ratings. You can also choose replacement tubes based on the ambiance you want in the room. Packages mark color temperature in Kelvins: choose daylight white (5000K) for crisp visibility in a garage or workshop, cool white (4000K) for a balanced kitchen workspace, or warm white (3000K) for a softer glow in basements and hobby rooms.
If your end brackets are cracked or discolored, look for replacement turn-type plastic sockets made from fireproof materials that fit standard medium two-pin bases. Many universal replacement sockets work seamlessly with both T8 and T12 fixtures. Having a spare set of sockets on hand lets you replace aged brackets immediately if an old piece snaps while you are changing out bulbs overhead.

- LFR Score9.4
LFR Score is a ranking system developed by lightfansreviews.com. LFR Score has no relationship or impact from any manufacturers or sales agent websites. Learn more
- BrandTiqian
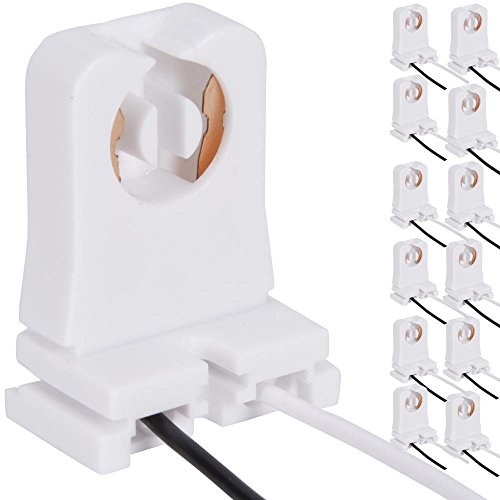
- LFR Score9.2
LFR Score is a ranking system developed by lightfansreviews.com. LFR Score has no relationship or impact from any manufacturers or sales agent websites. Learn more
- BrandJACKYLED

- LFR Score9.2
LFR Score is a ranking system developed by lightfansreviews.com. LFR Score has no relationship or impact from any manufacturers or sales agent websites. Learn more
- BrandJESLED

- LFR Score9.2
LFR Score is a ranking system developed by lightfansreviews.com. LFR Score has no relationship or impact from any manufacturers or sales agent websites. Learn more
- BrandJACKYLED

- LFR Score9.0
LFR Score is a ranking system developed by lightfansreviews.com. LFR Score has no relationship or impact from any manufacturers or sales agent websites. Learn more
- BrandJESLED

- LFR Score8.4
LFR Score is a ranking system developed by lightfansreviews.com. LFR Score has no relationship or impact from any manufacturers or sales agent websites. Learn more
- BrandDDRAUY

- LFR Score8.4
LFR Score is a ranking system developed by lightfansreviews.com. LFR Score has no relationship or impact from any manufacturers or sales agent websites. Learn more
- BrandLeviton

- LFR Score8.4
LFR Score is a ranking system developed by lightfansreviews.com. LFR Score has no relationship or impact from any manufacturers or sales agent websites. Learn more
- BrandMECCANIXITY

- LFR Score8.2
LFR Score is a ranking system developed by lightfansreviews.com. LFR Score has no relationship or impact from any manufacturers or sales agent websites. Learn more
- BrandYAFIYGI

- LFR Score8.0
LFR Score is a ranking system developed by lightfansreviews.com. LFR Score has no relationship or impact from any manufacturers or sales agent websites. Learn more
- BrandLuatoxry
Last update on 2026-10-01 / Affiliate links / Images, Product Titles, and Product Highlights from Amazon Product Advertising API
FAQs
Do I need to turn off the main circuit breaker to change a fluorescent bulb?
Turning off the wall switch is usually enough for a simple bulb swap, provided no one flips the switch while you work. If you plan to replace cracked plastic sockets, touch wiring, or replace the internal ballast, always shut off the breaker at your main electrical panel. Cutting power at the breaker guarantees the entire fixture is dead before your fingers reach any metal terminals.
Can I replace an old T12 tube with a thinner T8 tube?
A thinner T8 tube shares the same medium two-pin spacing as a T12 tube and will physically fit into the sockets, but it may not run properly on an older T12 ballast. Modern electronic ballasts handle T8 tubes, while older magnetic ballasts are tuned specifically for T12 wattage. Check the label on your fixture ballast inside the metal housing to confirm whether it supports T8 lamps before making the switch.
Which direction should I twist the fluorescent tube to lock it in?
You can twist the tube either clockwise or counterclockwise. Sockets are designed symmetrically, so turning the bulb ninety degrees in either direction locks the two pins into the internal contact springs. The important part is completing the full quarter-turn so the pins sit flat against the brass terminals rather than stopping halfway.
What should I do if a fluorescent tube breaks while I am installing it?
Clear people and pets from the room immediately, open an exterior window, and let the room air out for fifteen minutes. Fluorescent tubes contain a small amount of mercury vapor that dissipates quickly with fresh ventilation. Put on gloves, scoop up the glass shards using stiff cardboard or heavy paper, and pick up tiny fragments with duct tape. Never use a vacuum cleaner on broken fluorescent glass, because the vacuum exhaust can blow mercury vapor into the room air.


Best Bulb For Exposed Light 2026 That Shines Bright

Best Industrial Light Bulb Reviews: Top Picks for 2026

Best Outdoor Light Bulb Reviews: Top-Rated Picks for 2026

Best LED Reading Light Bulb Reviews - Top Picks for 2026

Best Vintage Light Bulb 2026 With Style And Glow

Best Yellow Fog Light Bulb 2026 For Clearer Night Drives

Best Z Wave Light Bulb 2026 Top Picks For Smart Control

Best Light Bulb For Vanity Mirror 2026 Brightness Boost






