
How to Install Exterior Light Fixture Safely and Easily
How to install exterior light fixture is a handy skill every homeowner or DIY enthusiast should have. Whether you're looking to brighten up your porch, increase home security, or add a splash of style to your outdoor space, a well-installed exterior light can make a huge difference. This guide dives deep into the essential steps, safety precautions, and tools you’ll need, making the process approachable, even if you’re not a seasoned electrician. Plus, it addresses common challenges like wiring quirks and weatherproofing, ensuring your light lasts through the seasons. By understanding the ins and outs of installation, you’ll save money on professional help, avoid costly mistakes, and get a stunning result that lights up your home’s exterior beautifully. Stick around for practical advice, insider tips, and a step-by-step breakdown that turns a daunting task into a rewarding project.
Installing an exterior light fixture might seem tricky at first glance, but with the right know-how, it’s more than doable for anyone who’s ready to roll up their sleeves. Imagine turning your dark entryway into a warm, welcoming space that not only looks great but also keeps unwanted visitors at bay. That’s the kind of power good lighting brings to your home. This guide strips away the mystery, giving you clear, no-nonsense instructions and vital safety pointers to keep you confident and secure throughout the process. Whether you’re sprucing up your garden path or upgrading your porch light, learning how to install exterior light fixture means taking control of your home’s ambiance and safety. Ready to light up your outdoors? Let’s get started!
Picking the perfect exterior light fixture isn’t just about looks , it’s about balancing style with functionality. Your choice will influence how well your outdoor space is lit, how secure it feels, and how it complements your home's architecture. Think about the brightness level and the type of bulb it supports; LED fixtures are often favored for their energy efficiency and long lifespan, helping cut down on electricity bills and bulb replacements. Also, consider the fixture’s material, weather-resistant metals or plastics ensure your light holds up against rain, sun, and wind without losing its charm.
Beyond durability, the design and placement matter. You want a fixture that doesn’t just look good but illuminates areas where you need it most, like pathways, porches, or driveways, without creating harsh shadows or glare. For added convenience, fixtures with built-in motion sensors can boost your home's security while saving energy by lighting up only when movement is detected. Keep in mind, though, that a fixture’s size and style should be in harmony with your home's exterior, too big, and it can overpower; too small, and it won't provide enough light.
Another key factor is the type of lighting you want: ambient, task, or accent lighting. Ambient lighting softly lights up the whole area, task lighting helps you see where you’re doing specific activities, and accent lighting highlights architectural features or landscaping. Understanding these can help you select a fixture that matches your needs and enhances your outdoor living space effectively.
Lastly, check the fixture’s wattage rating and electrical requirements to ensure compatibility with your home’s wiring. Ignoring this could lead to safety hazards or poor performance. All these considerations come together to create a perfect balance between aesthetic appeal, safety, and practicality in your exterior lighting project.
Having the right tools and materials at your fingertips is crucial for a smooth and safe installation. Before diving in, gather essentials like a voltage tester, wire strippers, screwdrivers, drill, and electrical tape. These tools help you work efficiently and protect you from electrical mishaps. Don’t forget a sturdy ladder that safely reaches your fixture location and weatherproof wire connectors to keep your wiring secure against the elements.
Besides tools, you’ll need the proper materials, including the exterior light fixture itself, appropriate outdoor-rated wiring, a junction box, and waterproof sealant to protect electrical connections. Using components rated for outdoor use is a non-negotiable safety step because standard indoor wiring and fixtures aren’t designed to handle moisture or temperature extremes.
Make sure your light fixture kit comes with clear instructions and mounting hardware compatible with your home’s surface, be it brick, wood, or siding. Some installations might require additional anchors or brackets to ensure a secure, stable fit. Having all these ready before you start saves time and prevents frustrating trips back to the hardware store.
Safety gear, such as gloves and safety glasses, should never be overlooked. Working with electricity and heights demands a cautious approach, and the right gear minimizes risks. A quick prep session with the right tools and materials turns a potentially stressful project into an enjoyable DIY achievement.
Preparation is the backbone of any successful exterior light fixture installation. First, turn off the power at the breaker for the circuit you’ll be working on. This critical safety step prevents accidental shocks and injuries. Next, verify with a voltage tester that the power is truly off before touching any wires. It sounds basic, but skipping this check is a common mistake with serious consequences.
Before mounting, clear the installation area of debris and make sure you have stable footing. If you’re working on uneven ground or slippery surfaces, use a ladder stabilizer or ask someone to hold the ladder steady. Assess the wall or ceiling where the fixture will go, remove any old fixtures and patch up holes or damage to create a solid surface.
Check the wiring condition inside your junction box or wall cavity. If wires look frayed or outdated, it might be time to upgrade them for safety and performance. Weatherproofing your wiring connections is also a must: use silicone caulk or sealant around the box to keep water from creeping in and causing corrosion or shorts.
Taking time to prep properly means fewer headaches down the road and a longer-lasting, safer exterior light setup. A solid prep phase gives you confidence to proceed and ensures your fixture will shine brightly for years to come.
Wiring is often the scariest part of the job, but knowing a few key facts helps take the fear out of it. Most exterior light fixtures use a simple setup involving three wires: hot (usually black), neutral (white), and ground (green or bare copper). The hot wire carries electricity from your home’s power supply, the neutral completes the circuit back to the breaker, and the ground wire protects you from shocks by redirecting stray electricity safely into the earth.
When connecting wires, always match colors correctly and use wire nuts or connectors designed for outdoor use to secure the connections. Twisting wires tightly together before securing helps ensure a strong, reliable connection that won’t come loose over time. It’s a good habit to wrap the wire nuts with electrical tape for added protection, especially in damp outdoor environments.
If you’re installing a light fixture controlled by a switch, make sure the switch wiring is properly integrated into the circuit. Testing with a voltage tester before and after connections helps catch wiring errors early on. Remember, if you feel unsure at any point, consulting or hiring a licensed electrician is the smartest move, your safety and the fixture’s performance depend on it.
Proper wiring is the heartbeat of your exterior light fixture, so don’t rush it. Taking time to do it right means better functionality, fewer repairs, and peace of mind every time you flip the switch.
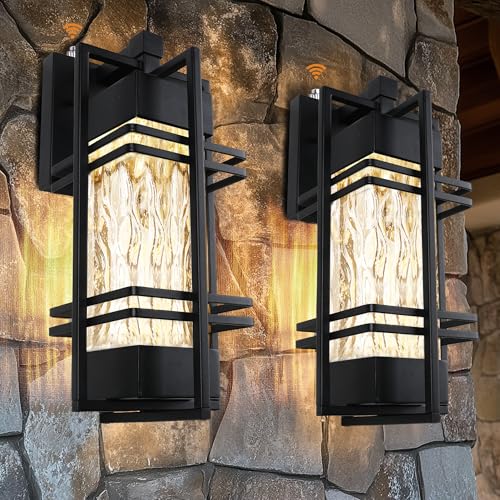
Once wiring is sorted, it’s time to get your fixture up on the wall or ceiling. Start by securing the mounting bracket or plate that came with your fixture. This piece usually attaches to the junction box and provides the sturdy base your light will rest on. Make sure the bracket is level and tightly fastened to avoid any wobbling or uneven hang.
Next, carefully feed the fixture’s wires through the bracket or mounting hole, giving yourself enough slack to make neat connections. Connect the wires according to the color codes, black to black, white to white, and green or bare to ground. After securing the wire nuts and wrapping with tape, tuck the wiring neatly into the box so it won’t be pinched or exposed.
Attach the fixture body to the mounting bracket using the screws provided. Double-check that it’s snug but don’t overtighten to avoid damaging the fixture. Many modern fixtures have a gasket or rubber seal, make sure it’s properly seated to keep moisture out and prolong the life of your light.
Finally, install the bulb recommended for your fixture and test the light by turning the power back on. If everything glows as it should, congratulations, you’ve successfully mounted your exterior light fixture!
Avoiding pitfalls during installation can save you hours of frustration and potential hazards. One classic mistake is neglecting to turn off the power at the breaker, never skip this step, no matter how small the job seems. Another frequent error is mismatching wire connections, which can lead to flickering lights, blown fuses, or worse, electrical shocks.
Don’t overlook the importance of using outdoor-rated fixtures and wiring; indoor-rated products simply aren’t built to withstand weather conditions, leading to rust, shorts, and early failure. Also, beware of over-tightening screws or brackets, this can crack fixture housings or damage mounting surfaces.
Failing to seal around your fixture or junction box leaves your wiring exposed to moisture, a surefire way to invite corrosion or shorts. Using silicone sealant or weatherproof covers is a simple fix that many DIYers miss.
Lastly, rushing through the job often causes sloppy connections or missed steps. Taking your time, following instructions carefully, and double-checking each phase ensures your exterior lighting project is both safe and stunning.
A well-installed exterior light fixture doesn’t just add beauty to your home, it brings multiple practical perks that pay off in the long run. First, it significantly boosts your home’s security by deterring intruders and illuminating dark corners where unwanted visitors might lurk. Bright outdoor lighting helps neighbors and passersby spot anything suspicious, creating a safer environment.
From a lifestyle perspective, exterior lighting extends your living space into the evening hours. Whether you’re hosting a barbecue, enjoying a quiet night on the porch, or simply coming home after dark, good lighting makes these moments more comfortable and inviting. It also adds curb appeal, increasing your property’s value and making it stand out in the neighborhood.
Energy-efficient fixtures with motion sensors or timers save money by lighting only when necessary, blending convenience with sustainability. Plus, modern exterior lights come in styles to fit any taste, from classic lanterns to sleek, contemporary designs, so you get to express your personality while lighting up your world.
Keeping your exterior light fixture in tip-top shape is vital for maximizing its lifespan and maintaining its performance. Regularly check for dirt, cobwebs, and debris that can dim the light or damage the fixture’s surface. A quick wipe-down with a soft cloth and mild detergent can restore its shine and prevent corrosion caused by buildup.
Inspect seals and weatherproofing materials frequently to catch any cracks or gaps where moisture could sneak in. Moisture is one of the biggest enemies of outdoor lighting, leading to rust and electrical issues if left unchecked. Reapply silicone caulk or replace rubber gaskets as needed to keep your wiring safe and dry.
Replacing bulbs with the correct wattage and type is another key step. Using bulbs not recommended by the manufacturer can lead to overheating or reduced efficiency. For those fixtures with motion sensors or timers, periodic testing and adjustment ensure they work optimally, saving energy and enhancing security.
A little regular maintenance goes a long way in keeping your exterior lighting looking sharp and working flawlessly through all seasons, protecting your investment and your home.
Even with careful installation, you might face some hiccups along the way. Flickering lights often signal loose wiring or poor connections, double-check your wire nuts and ensure all connections are tight and secure. Sometimes, the bulb itself could be the culprit, so swapping it out with a fresh, compatible bulb is a quick fix.
If your exterior light doesn’t turn on at all, the problem could be as simple as a tripped circuit breaker or a faulty switch. Always start by testing the power supply with a voltage tester before diving into more complicated fixes. Moisture intrusion is another common issue; foggy or damp fixture covers often mean the seal isn’t airtight, requiring resealing or replacement parts.
Motion sensors that fail to trigger or turn off too quickly might need sensitivity adjustments or relocation to a better vantage point. Remember, troubleshooting is often a process of elimination, checking power, bulbs, wiring, and sensors systematically helps pinpoint the exact issue.
Taking time to diagnose problems carefully not only restores your lighting but prevents costly repairs or replacements down the road.
To truly elevate your outdoor environment, think beyond a single light fixture. Layered lighting combines ambient, task, and accent lighting to create a dynamic, inviting atmosphere. Ambient lighting provides overall illumination for safety and comfort, while task lighting focuses on areas like patios, steps, or outdoor kitchens where activities happen.
Accent lighting highlights architectural details, trees, or garden features, adding depth and character after dark. By mixing these layers, you get a well-balanced setup that’s functional and visually stunning. For example, pathway lights guide guests safely, porch fixtures welcome visitors warmly, and spotlights can dramatize landscaping.
Utilizing dimmers or smart lighting controls lets you adjust brightness levels and moods effortlessly, making your outdoor space flexible for different occasions. This thoughtful approach not only increases usability but boosts the aesthetic appeal and value of your home.
Saving energy without sacrificing brightness is a win-win, and the right fixtures make all the difference. LED bulbs dominate the market for exterior lighting thanks to their low power consumption, long lifespan, and superior brightness compared to traditional incandescent bulbs. Switching to LEDs can reduce your lighting energy bill significantly.
Solar-powered lights have gained popularity for their easy installation and zero electricity costs. These are perfect for garden paths or decorative lighting but may not provide as consistent illumination as wired fixtures. For more control, fixtures with motion sensors ensure lights only activate when needed, avoiding wasted electricity.
Timers and smart home integrations can automate your outdoor lighting, tailoring schedules to your lifestyle while boosting efficiency. When selecting fixtures, look for the ENERGY STAR label or similar certifications to guarantee energy-saving performance without compromising on style or durability.
While many homeowners feel confident tackling how to install exterior light fixture on their own, some situations call for professional help. Complex wiring, old electrical systems, or installations at tricky heights might require an electrician’s expertise to ensure safety and compliance with local codes.
Professionals bring peace of mind by handling permits, inspecting existing wiring, and delivering neat, reliable installations. Their experience can also help you avoid hidden pitfalls and costly mistakes that a DIY approach might invite. On the flip side, DIY installation can save money and offer a satisfying sense of accomplishment.
Before deciding, weigh factors like your comfort level with electrical work, the complexity of your project, and your budget. If you opt to go solo, research thoroughly and follow safety guidelines rigorously. Either way, investing in proper installation is an investment in your home’s security, style, and value.
The world of exterior lighting is evolving fast with tech-savvy, eco-friendly, and design-forward options hitting the market. Smart lighting systems now let you control your outdoor fixtures remotely via apps or voice commands, offering convenience and customizable settings that adjust brightness and color.
Color-changing LEDs bring a fun twist to outdoor decor, allowing you to set moods for parties, holidays, or quiet evenings. Motion-activated floodlights have become more sophisticated, incorporating cameras and sensors to boost home security while lighting the way.
Materials and finishes are also evolving, with fixtures made from recycled or sustainable materials becoming more popular among eco-conscious homeowners. These innovations blend functionality with sustainability and style, helping you create an exterior lighting setup that’s not only smart and efficient but also reflects your personality and values.
Maintaining safety shouldn’t stop at installation. Keep your exterior lighting system safe by scheduling periodic inspections to catch any wear or damage early. Look for exposed wires, loose mounts, or corrosion that can pose hazards. Replace bulbs before they burn out completely to avoid flickering that can signal bigger issues.
Avoid overloading circuits by knowing the wattage limits of your fixtures and your home’s electrical system. If you notice any sparks, smells, or frequent breaker trips, turn off the power immediately and consult a professional. Outdoor lighting should also be kept away from flammable materials like dry leaves or fabrics to reduce fire risks.
Regularly clear the area around fixtures to prevent debris buildup, which can block light and trap moisture. These simple but important steps keep your exterior light fixture shining safely and reliably, season after season.



Best Boat Black Lights 2026 For Nighttime Adventure

Best Black 30 Inch Light Bar Reviews – Top Picks of 2026

Best Black Light For Aquarium 2026 For Vibrant Glow

Best Black Light for Authenticating Glass 2026 Top Picks

Best Waterproof Spotlight 2026 That Outshines Expectations

Best Solar Spotlight For Yard 2026 Brighten Outdoor Spaces With Ease
Best Led Spotlight Rechargeable 2026 Bright Picks

Best Rechargeable Spotlight For Boat 2026 That Cuts Through Darkness





