
How to Install LED Strips Under Cabinet for Perfect Lighting
How to install LED strips under cabinet is the go-to guide for anyone wanting to transform their kitchen or workspace with sleek, efficient lighting. Whether you're a DIY newbie or a savvy home improver, these lights add that wow factor by creating a warm, inviting glow while making your counters pop. The real charm lies in how simple it can be to install — no complicated wiring or fancy tools needed. This guide covers everything from choosing the right LED strips, prepping the surface, to mounting and wiring them safely. Not only do LED strips save energy, but they also boost visibility and ambience, making every cooking session or late-night project easier and more enjoyable. Plus, with tips on neat cable management and best practices, you’ll avoid common pitfalls and keep your setup looking tidy and professional. Get ready to brighten up your life and space with LED strips under cabinet lighting that’s as smart as it is stylish.
Brightening your kitchen or workspace doesn’t have to be a headache. How to install LED strips under cabinet is a simple yet game-changing way to add charm and functionality to your home. Imagine the warm glow highlighting your countertops, making every meal prep feel like a pro’s. You don’t need to be a tech wizard or electrician — with some easy-to-follow steps, even the most cautious DIYer can pull off a clean, dazzling installation. Beyond aesthetics, these LED strips are a powerhouse for energy savings and safety, lighting up dark corners without cranking your electric bill. Whether you want subtle accents or full-on brightness, this approach ticks all the boxes. Stick around, because you’re about to unlock a neat trick that’s affordable, efficient, and seriously stylish — all by learning how to install LED strips under cabinet perfectly.
Picking out the perfect LED strips for your under-cabinet setup is the first big step toward a flawless lighting upgrade. The market is flooded with options, from color-changing RGB strips to warm white daylight hues. What really matters here is matching the lighting style to your space and needs. If you want a cozy kitchen vibe, warmer tones work wonders. For task lighting that sharpens your workspace, cooler whites with higher lumens will do the trick.
Another key factor is the strip’s brightness, usually measured in lumens per foot. Don’t just grab the cheapest strips; invest in ones with good brightness and durability, so they last and actually illuminate your counters well. Plus, check for waterproof or moisture-resistant options if your kitchen tends to get steamy. Power consumption is a big plus too — LED strips are famously energy-efficient, but some models outperform others.
Length and flexibility also play a huge role. Some strips come in standard lengths, but many can be cut to fit your exact cabinet dimensions. Make sure the adhesive backing is strong enough to hold on smooth or slightly textured surfaces. It pays to look for strips with a plug-and-play design or easy connectors, especially if you want a straightforward installation without wiring headaches.
Lastly, don’t forget the control features. Remote controls, dimmers, or smart home integration can turn your lighting into an experience rather than just illumination. Whether it’s for a romantic dinner setup or prepping a late-night snack, having control over brightness and color can be a game-changer.
Before you start slapping those strips under your cabinets, a bit of prep work is crucial to nail a clean, lasting installation. First things first, clear the counters and remove any dust, grease, or grime from the surface where the strips will go. A clean surface means the adhesive sticks better and your strips won’t peel off after a few weeks.
Measure twice, cut once — you know the drill. Carefully measure your cabinet undersides to know exactly where your LED strips will sit. This is also the moment to map out the wiring route and where your power source will come from. Planning ahead saves you from scrambling mid-install and keeps the final look tidy and professional.
Next up, decide how you want to hide cables. Concealing wires not only keeps things neat but also prevents accidental tugging or damage. Use cable clips or adhesive channels that match your cabinet color. This might sound like small detail work, but it seriously impacts your final aesthetic.
Don’t rush the installation temperature either. If you’re working in a chilly or damp environment, adhesives might not hold as well. Installing at room temperature or slightly warmer ensures better adhesion. Taking time here pays off with strips that stick firmly and lighting that stays put for years.
Alright, now the fun part — putting those LED strips in place. Start by unrolling the strip and testing the connection to your power source. It’s smart to check that all LEDs light up before sticking anything down. This saves you from peeling off strips and fixing errors later on.
Once everything checks out, gently peel the adhesive backing and press the strip firmly against the cabinet underside. Work slowly, making sure the strip stays straight and secure. If your strips can be cut, cut only at the marked points — otherwise, you risk damaging the circuit. For corners or uneven surfaces, flexible strips bend but avoid sharp folds that can snap the wiring inside.
Next, connect the strip to its power supply or driver. If you’re not comfortable with electrical work, consider a plug-in option that just needs an outlet. For hardwired setups, make sure the power is off and follow safety instructions carefully. Double-check connections for snugness and avoid loose wiring.
Finally, tuck away cables neatly using clips or channels you prepared. Test your lighting again, this time adjusting any dimmers or color settings. Watch how the light spreads evenly under your cabinets and see how it completely changes the room’s feel — practical, inviting, and modern.
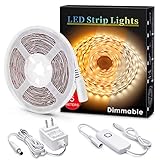
Even with the best plans, mistakes happen — but many are avoidable if you keep your eyes peeled. One of the biggest slip-ups is ignoring the power supply specs. Using a power adapter that can’t handle your strip’s wattage often causes flickering or premature burnout. Always match the power supply’s capacity to the total length and wattage of your LED strips.
Another rookie mistake is rushing the surface prep. Skipping the cleaning step can lead to strips falling off or leaving sticky residue behind. This not only ruins the installation but might damage your cabinets’ finish, costing more time and money down the line.
Cutting the strips incorrectly is a sneaky trap too. Strips only cut at designated points to keep the circuit intact. Cutting elsewhere means no light or flickering spots. Mark these cut points clearly and follow instructions precisely.
Lastly, poor cable management can turn a slick lighting upgrade into a messy eyesore. Don’t just let cables dangle or pile up. Use cable clips, sleeves, or channels designed for this job — your future self will thank you every time you open the cabinet or clean the kitchen.
Besides the obvious boost in kitchen or workspace lighting, LED strips under cabinets bring a boatload of benefits. The first and biggest is energy efficiency. Compared to traditional bulbs, LEDs sip power while pumping out vibrant light, helping slash your electricity bills and environmental footprint.
Next up is versatility. You can tweak the brightness or color temperature to suit your mood, task, or time of day. Whether it’s bright white light for chopping veggies or soft warm light for evening vibes, LED strips adapt effortlessly. This flexibility beats bulky fixtures that require rewiring or replacing.
Installation speed and minimal invasiveness are other standout perks. No drilling, no heavy lifting — just peel, stick, and plug in. This makes LED strips a perfect solution for renters or those wanting quick upgrades without remodeling headaches.
Finally, the aesthetic value is huge. These slim strips add a sleek, modern flair that traditional lighting can’t touch. Highlighting countertops, backsplash, or decorative elements, they create ambiance that’s both functional and eye-catching, giving your space a high-end feel without breaking the bank.
Keeping your LED strips under cabinet looking and working their best doesn’t have to be a chore. One of the most important maintenance tips is to regularly dust and wipe them down with a soft, dry cloth. Avoid harsh chemicals or abrasive materials that could damage the delicate LEDs or peel off the adhesive backing.
If you notice any flickering or dim spots, check the power connections first. Loose plugs or connectors are usually the culprit and can be easily fixed without replacing the entire strip. Also, avoid exposing the strips to excessive moisture or steam over time — even if your strips are water-resistant, prolonged exposure can shorten their lifespan.
Another smart move is to inspect the adhesive every once in a while. If any sections start to lift, use double-sided tape or adhesive pads designed for LEDs to re-secure them. This small upkeep can prevent falling strips and keep your lighting neat and consistent.
Don’t forget that LED technology is evolving fast, so when it’s time to upgrade, look for newer strips with better energy efficiency, higher brightness, or smart home compatibility. Staying updated means you’ll keep benefiting from the latest features and improvements.
While installing LED strips under cabinet lighting is a fantastic upgrade, these flexible lights have so much more potential around your home. Ever thought about lining your shelves, bookcases, or even inside closets? It’s an easy way to add depth and style while making it easier to find things in the dark.
You can also use LED strips to backlight your TV or computer monitor, reducing eye strain and giving your entertainment setup a cool glow. Outdoors, waterproof LED strips are perfect for patio railings, decks, or garden pathways, creating a cozy atmosphere for evening hangouts.
For creative spirits, LED strips can highlight artwork, picture frames, or architectural details, turning your home into a personalized gallery. The ability to change colors and dim the lights means you can tailor the vibe for parties, movie nights, or quiet dinners.
Experimenting with different placements and colors is a fun way to discover how LED strips can transform your living spaces beyond just practical lighting — they’re as much about mood and style as functionality.
Getting familiar with LED strip specs might sound technical, but it’s a key factor to avoid costly mistakes. First up is the voltage — most common strips run on 12V or 24V DC. Choosing the right voltage ensures your power supply matches perfectly, avoiding flickers or damage.
The brightness level, usually in lumens per meter or foot, tells you how much light the strip emits. If you want bright task lighting, look for strips with higher lumens. For subtle accent lighting, a lower lumen rating works just fine.
Color temperature is another important spec. It’s measured in Kelvins (K) and indicates the warmth or coolness of the light. Warm white (2700K-3000K) creates a cozy feel, while cool white (4000K-6000K) is crisp and energizing — perfect for kitchens and workspaces.
Lastly, check the IP rating if your LED strips will face moisture or dust. IP65 or higher means water resistance, which is crucial in kitchens. Ignoring this could lead to premature failure, so keep an eye on this important point.
Even with careful installation, problems can pop up — and knowing how to troubleshoot saves time and money. Flickering lights often point to a power supply issue, such as an underpowered adapter or loose connection. Swapping to a higher wattage power source usually fixes this.
If parts of your strip won’t light up, inspect the solder joints or connectors. Sometimes a poor connection can interrupt the circuit. You might need to re-solder or replace small sections, but luckily these fixes are usually straightforward.
Another hiccup is strips peeling off prematurely. This often happens if the surface wasn’t cleaned properly or if the adhesive quality is low. Reinforce with strong double-sided tape or mounting clips to prevent future peel-offs.
Finally, if you’re experiencing unexpected color shifts or dimming, check the controller settings or remote batteries if applicable. A quick reset or battery swap often brings things back to normal, letting you enjoy consistent, bright lighting again.
Safety is never something to cut corners on, especially when dealing with electrical components like LED strips under cabinet lighting. Always unplug the power supply before making any connections or adjustments to avoid shocks or shorts.
Use proper tools for cutting and connecting your strips — sharp scissors for cutting at designated points, and quality connectors or soldering tools for joining sections. Avoid forcing bends or sharp corners on your strips, as this can break internal wiring and cause shorts.
Make sure your power supply is certified and rated for indoor use, matching the total wattage of your LED strips to prevent overheating. If you’re not comfortable handling wiring, don’t hesitate to call a professional electrician.
Also, keep cables away from heat sources or sharp edges that could damage insulation. Taking these important precautions protects your home and gives you peace of mind while enjoying your new lighting setup


Best LED Track Strip Lighting 2026: Bright Ideas for Every Space

Top Rated Best LED Dimmable Track Lights of 2026: Enlighten Your Space!

Best Plug In Track Lighting LED 2026 For Bright Spaces
Best Integrated LED Track Lighting: Top Picks for 2026

Best Round LED Ceiling Light Reviews - Top Picks 2026

Best Modern Track Lighting LED 2026: Sleek Illumination Upgrade

Best Mini LED Track Lighting: Top Picks for 2026

Best Oiled Bronze Track Lighting 2026 Stylish Illumination Picks






