
How to Install Track Lighting Without the Headache
How to install track lighting is a practical skill for homeowners who want flexible illumination without committing to permanent fixtures. Track lighting adapts to changing layouts, whether furniture moves, artwork rotates, or tasks evolve over time. Dangling above kitchens, hallways, or studios, it balances form and function in a way few lighting options can match. Done right, the result feels intentional rather than improvised.
Before diving in, preparation quietly does most of the heavy lifting. Understanding ceiling structure, power access, and layout spacing prevents the classic stop and start frustration. A thoughtful plan helps avoid crooked tracks, shadowy corners, or overloaded circuits. In other words, measure twice, drill once, and breathe easy.
Installation itself follows a logical rhythm once the groundwork is set. Mounting the track, connecting wires, and locking in fixtures becomes almost mechanical, step by step. Each connection reinforces safety and stability, keeping flickers and loose fittings at bay. With patience, the process feels less like guesswork and more like assembly.
Finishing touches make the difference between decent and dialed in. Adjusting light heads, aiming beams, and testing brightness brings the setup to life. Track lighting flexibility shines here, letting you highlight surfaces or soften a room’s mood in seconds. Suddenly, the space works with you, not against you.
Planning the layout before touching a drill
How to install track lighting starts long before wires or screws enter the picture. Most frustrations come from rushing layout decisions, then realizing light falls in the wrong spots. Track lighting works best when the plan reflects how the room is actually used, not how it looks in an empty photo. Thinking through daily habits saves time, money, and a whole lot of patching later.
Begin by identifying focal zones that truly matter, like countertops, artwork, walkways, or work surfaces. These areas benefit most from directional lighting rather than general overhead glow. A common mistake is centering tracks purely for symmetry, which often leaves shadows where tasks happen. Practical placement always beats perfect alignment.
Spacing matters more than most expect, especially in long or narrow rooms. Tracks placed too close to walls can create harsh glare, while tracks too far inward waste valuable light. Many installers follow a simple rule of thumb, placing tracks roughly 18 to 24 inches from walls for balanced coverage. That small detail makes the setup feel intentional instead of improvised.
Consider future flexibility while planning, not after installation. One of the biggest advantages of track lighting is adaptability, but only if the track path supports it. Straight runs are clean, while L or U shapes add versatility in larger spaces. Planning with change in mind turns a basic install into a long-term lighting solution.
Checking power sources and ceiling conditions
Before learning how to install track lighting, it’s critical to know what’s hiding above the ceiling. Existing junction boxes determine where power can safely connect, and ignoring them creates unnecessary electrical work. Many homeowners discover too late that their chosen layout doesn’t align with available wiring. A quick inspection avoids that headache.
Ceiling type influences both mounting hardware and installation time. Drywall ceilings are common and forgiving, while concrete or plaster ceilings require special anchors and more patience. Knowing this upfront helps select the right tools and prevents stripped screws or cracked surfaces. Preparation here directly affects safety and durability.
Electrical capacity also deserves attention, especially in older homes. Track lighting systems draw more power than a single fixture, particularly when multiple heads are installed. Overloading a circuit leads to flickering lights or tripped breakers, neither of which feels reassuring. Checking breaker limits keeps the system reliable.
Some homeowners use this step to rethink overall lighting quality. For example, pairing track lighting with insights from make fluorescent lights look better can help balance mixed lighting environments. Combining sources thoughtfully creates smoother transitions between rooms. Power planning isn’t just technical, it’s aesthetic too.
Choosing the right track lighting system
Not all track lighting systems behave the same, which surprises many first-time installers. Selecting the right system simplifies how to install track lighting and improves results. Differences in voltage, connector types, and mounting styles affect compatibility with existing wiring. Choosing blindly often leads to returns or awkward workarounds.
Line-voltage systems connect directly to household power and suit most residential installs. They’re widely available, affordable, and easy to maintain. Low-voltage systems offer sleeker profiles but require transformers, adding complexity. Matching system type to skill level prevents frustration.
Track head design influences both function and mood. Adjustable heads provide targeted illumination, while fixed heads deliver even spreads. Some homeowners prefer mixing both for layered lighting effects. Flexibility here helps tailor light without reworking the entire track.
For rooms that demand bold visual impact, inspiration sometimes comes from unexpected sources. Concepts borrowed from black light bar setups influence modern track lighting aesthetics. Clean lines and high-contrast finishes elevate the entire room. Design choices shape perception just as much as brightness.
Installing the track securely and safely
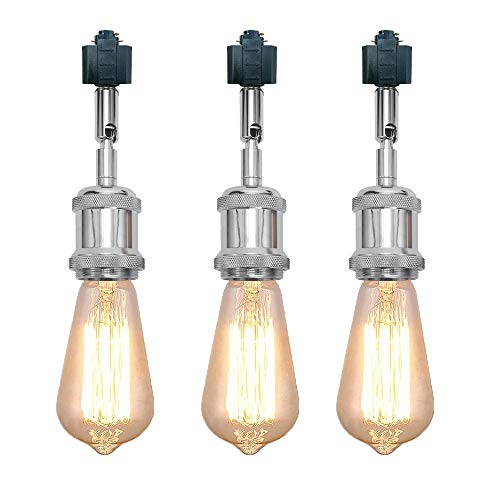
The physical installation phase is where confidence either grows or crumbles. Following proven steps keeps how to install track lighting straightforward rather than stressful. Mounting the track securely ensures long-term stability, especially when multiple heads add weight. Skipping anchors or overtightening screws often causes sagging later.
Begin by turning off power at the breaker, not just the switch. This step sounds obvious but gets overlooked more than it should. Verifying power is off with a tester adds peace of mind. Safety habits here prevent serious mistakes.
Mounting brackets should align cleanly with ceiling joists or anchors. Uneven spacing leads to twisting tracks that never quite sit right. Taking time to measure and mark accurately pays off visually. A level track feels professional even in DIY installs.
Wire connections demand patience and clarity. Matching wires correctly and securing them tightly avoids flickers or dead sections later. Loose connections are a common cause of system failures. Clean wiring supports long-term reliability.
Adjusting light heads for real world use
Once the track is mounted, the real magic begins with aiming the lights. How to install track lighting doesn’t end when power turns on, it ends when light works for daily life. Directional adjustments transform raw brightness into purposeful illumination. This step often gets rushed, yet it defines satisfaction.
Start by identifying primary tasks, then angle heads accordingly. Countertops, vanities, and reading areas benefit from focused beams rather than ambient wash. Proper aiming reduces shadows and eye strain. Light should support activity, not distract from it.
Layering brightness levels adds depth and comfort. Some heads can handle stronger bulbs, while others stay softer for balance. Using insights from lightbulbs vanity selection helps refine color temperature and output. Small tweaks create noticeable improvements.
Revisit adjustments after living with the lights for a few days. Habits reveal issues that initial testing misses. Track lighting shines because it evolves with the space. Fine-tuning keeps it functional rather than fixed.
Common installation mistakes that sabotage results
Even with solid preparation, how to install track lighting can go sideways when small details get ignored. One frequent mistake is assuming all ceilings behave the same, which leads to loose mounts or uneven tracks. Tracks that aren’t fully supported tend to sag over time, creating visual tension and safety concerns. Fixing this later usually takes more effort than doing it right the first time.
Another common misstep involves poor wire management. Wires left cramped or twisted inside the junction box can cause intermittent power issues. These problems often show up weeks later, right when confidence is highest. Clean, deliberate wiring supports both performance and peace of mind.
Overloading the track with too many heads is also a quiet troublemaker. While tracks look sturdy, each system has weight and wattage limits. Ignoring those limits reduces lifespan and increases the chance of failure. Respecting manufacturer specs protects the investment.
Some homeowners forget to test lighting behavior at night, relying only on daytime impressions. This leads to glare, uneven brightness, or uncomfortable shadows after dark. Light reacts differently once natural light disappears. Testing under real conditions reveals what adjustments are still needed.
Blending track lighting with room atmosphere
How to install track lighting successfully isn’t just technical, it’s emotional. Lighting sets mood, defines comfort, and shapes how a space feels at different hours. Track lighting offers flexibility, but only if it’s tuned to the room’s personality. Cold light in a warm space can feel jarring.
Color temperature plays a major role in this balance. Warm tones work well in bedrooms and living areas, while cooler tones support focus in kitchens or offices. Mixing temperatures intentionally creates depth rather than chaos. Thoughtful choices keep the environment cohesive.
Room size and reflectivity also influence perceived brightness. Lighter walls bounce light generously, while darker finishes absorb it. Adjusting beam angles compensates for these differences without adding more fixtures. Smart positioning often beats higher wattage.
Some installers use software or apps to preview lighting behavior. Tools similar to use light room workflows help visualize how beams interact with surfaces. Digital previews reduce guesswork and improve confidence. Seeing outcomes before committing makes decisions easier.
Optimizing track lighting for different rooms
Each room demands a unique approach to how to install track lighting. Kitchens benefit from task focused beams that eliminate countertop shadows. Aligning heads with work zones improves safety and efficiency. Lighting here supports action, not ambiance.
Living rooms often require more nuance. A mix of wall washing and accent lighting keeps the space flexible. Track lighting can highlight artwork one moment and soften seating areas the next. Versatility defines success in shared spaces.
Bedrooms require restraint and intention. Overly bright setups disrupt relaxation and sleep cycles. Softer beams and warmer temperatures encourage comfort without sacrificing visibility. Track lighting works best when subtle here.
Ceiling height also changes strategy. Lower ceilings demand careful angling to avoid glare. In these cases, learning from solutions like nickle bedroom fans setups helps balance light and airflow visually. Proportion matters more than raw brightness.
Maintenance habits that extend system life
Once installed, how to install track lighting shifts into how to maintain it. Dust accumulation on heads and tracks dulls output over time. Regular cleaning preserves brightness and keeps heat from building up. A simple wipe every few months goes a long way.
Bulb replacement should follow manufacturer guidance closely. Mixing incompatible bulbs affects performance and may damage sockets. Consistency ensures stable color and brightness across the system. Small mismatches become noticeable quickly.
Periodic inspections catch problems before they escalate. Loose heads, slight flickers, or unusual warmth signal issues worth addressing early. Ignoring these signs shortens system lifespan. Maintenance keeps lighting dependable.
Track lighting shines because it adapts. Repositioning heads as furniture or décor changes keeps the system relevant. That flexibility is wasted if adjustments never happen. Treat the system as dynamic, not fixed.
When professional help makes sense
DIY confidence is valuable, but how to install track lighting sometimes crosses into professional territory. Complex wiring, high ceilings, or unfamiliar electrical layouts increase risk. Knowing when to pause protects both safety and budget. Pride shouldn’t override caution.
Professionals bring efficiency and experience to tricky installs. What takes a homeowner an entire weekend may take a pro a few hours. That time savings matters when schedules are tight. Expertise reduces costly mistakes.
Some homeowners choose hybrid approaches. They plan layouts and select fixtures themselves, then hire help for wiring. This balances control with safety. Collaboration often yields the best outcome.
Ultimately, success comes from clarity and intention. Whether handled solo or with help, track lighting should feel purposeful and reliable. The right decisions early shape long term satisfaction. Installation quality echoes every time the lights turn on.


Best Boat Black Lights 2026 For Nighttime Adventure

Best Black 30 Inch Light Bar Reviews – Top Picks of 2026

Best Black Light For Aquarium 2026 For Vibrant Glow

Best Black Light for Authenticating Glass 2026 Top Picks

Best Waterproof Spotlight 2026 That Outshines Expectations

Best Solar Spotlight For Yard 2026 Brighten Outdoor Spaces With Ease
Best Led Spotlight Rechargeable 2026 Bright Picks

Best Rechargeable Spotlight For Boat 2026 That Cuts Through Darkness





