
How to Light a Light Bulb With a Battery

Connect both battery ends to the bulb. Press the metal bottom tip of the bulb directly against one battery terminal (a metal end). Next, take a short wire with bare metal exposed at both ends. Touch one wire tip to the metal side of the bulb base, and press the other tip against the opposite battery end. That completes a closed electrical loop, and the bulb lights up right away.
A few details decide whether this works. A single 1.5-volt battery only provides enough power for a tiny flashlight bulb, never a standard 120-volt lamp bulb. Both ends of your wire must have bare, exposed metal, since plastic insulation stops the current. Connecting the wrong spots can also create a short circuit that heats the wire up fast enough to pinch your fingers. Here is how to assemble the pieces safely and make that bulb glow.
The Short Version
- Match the voltage: Pair a miniature flashlight bulb rated for 1.5 to 3 volts with a standard 1.5-volt AA, C, or D battery. Regular household bulbs need far too much electrical push to glow from a single cell.
- Position the bulb: Place the base contact (the metal foot at the bulb bottom) directly onto the positive battery terminal, which is the raised bump on top.
- Close the loop: Touch one stripped end of an insulated wire to the negative battery terminal (the flat bottom), and press the other stripped end against the threaded metal side of the bulb.
- Avoid short circuits: Never connect a bare wire straight from the top terminal to the bottom terminal without the bulb in the path, or the wire will overheat and burn your fingers.
Gathering the Right Parts and Matching Bulb Voltage
Lighting a bulb with a battery requires three basic items: a fresh battery, a compatible miniature bulb, and a short piece of conductive wire. Understanding how these pieces connect ensures your project lights up immediately without damaging parts or overheating the wire.
Standard household dry cells like AAA, AA, C, and D batteries all produce 1.5 volts of direct current. The size difference between an AA and a D cell changes how long it lasts, not its voltage. Larger batteries simply hold more chemical fuel. For a quick experiment, any fresh 1.5-volt battery works well.
You cannot use a standard household bulb here. You need a miniature incandescent bulb from an old flashlight or science kit. These bulbs contain a tiny filament (a delicate glowing wire inside glass) designed to glow on 1.5 to 3 volts. A 120-volt household bulb stays dark on an AA cell, while a 9-volt battery will instantly pop a delicate 1.5-volt filament.
Use a six-inch piece of insulated copper wire. The plastic jacket protects your fingers from heat. Strip about half an inch of plastic off each end to expose the bare copper underneath.
Look closely at the bulb base. A light bulb requires two separate contact points to complete an electrical path. The first contact point is the base contact (the metal foot at the bulb bottom). The second is the threaded metal casing wrapping around the side. An insulating ring separates these metal areas. To light the bulb, electricity must enter one contact point, travel through the filament, and exit through the other.
Step-by-Step Instructions to Build the Working Loop
To produce light, you must build a circuit (a continuous loop) that lets electricity flow out of one battery end, pass through the bulb filament, and return into the opposite battery end. If any connection breaks, the bulb stays dark. Here is how to assemble the circuit using direct contact.
- Check your wire ends: Make sure both ends of your insulated wire have half an inch of clean, bare copper showing. Scrape off any leftover plastic coating to ensure clean metal-to-metal contact.
- Stand the battery upright: Place your AA, C, or D battery on a flat table with the positive terminal (the raised bump) facing up. The flat bottom is the negative terminal.
- Place the bulb on the positive bump: Set the base contact (the metal foot at the bulb bottom) directly on top of the raised positive battery terminal. Hold the bulb steady with your fingers.
- Press the wire against the negative end: Take one bare end of your copper wire and press it firmly against the flat negative bottom of the battery. You can hold it with your finger or tape it down.
- Touch the side of the bulb: Bring the other bare end of the wire up to the bulb. Press the bare copper tip against the threaded metal side of the bulb base. The moment the wire touches the threads, the continuous loop closes and the filament glows bright yellow.
If balancing the bulb feels awkward, use two wires instead. Tape one wire to the positive terminal and the second to the negative bottom. Touch the free positive wire to the metal foot at the bulb bottom, and touch the free negative wire to the threaded side. Both methods create the exact same working loop.
Avoiding Short Circuits, Hot Wires, and Dead Batteries
The main hazard when handling loose batteries and wires is creating a short circuit (a direct wire connection that overheats). Electricity always takes the easiest path. A light bulb filament provides resistance, safely limiting electrical current and converting power into visible light. If you touch a wire directly from the positive terminal to the negative terminal without going through the bulb, there is almost no resistance.
Without resistance, the battery empties its stored energy into the wire almost instantly. Within seconds, the wire can become hot enough to melt plastic and blister bare skin. In extreme cases, the battery can swell or leak fluid. Keep your experiment safe with these habits:
- Keep the bulb in the circuit: Never connect a bare wire straight from one battery terminal to the other without the bulb in the loop.
- Check for heat: If the wire or battery feels warm, pull the wires away immediately. A properly connected miniature circuit stays cool.
- Disconnect when done: Never leave wires taped to a battery in a drawer or backpack. If loose wires shift, they can create an unnoticed short circuit that drains the battery and creates a fire hazard.
- Watch young children: While 1.5-volt batteries are safe to touch, wires can still heat up quickly. Keep small button cells away from children, as swallowed coin batteries cause severe internal burns.
Why Standard Household Bulbs Stay Dark on Everyday Batteries
During a power outage, people often remove an A19 bulb (the standard household teardrop bulb) from a table lamp and try to light it by touching it to an AA or 9-volt battery. The bulb stays dark. This happens because household bulbs need far more electrical push than loose dry cells can provide.
Residential fixtures in the United States operate on 120 volts of alternating current from wall wiring. A standard AA battery produces just 1.5 volts of direct current. That means a wall outlet pushes electricity with eighty times more force than an AA cell. Just as learning how to change a halogen light bulb safely at home shows you how much power household fixtures demand, these bulbs are fundamentally engineered for high-voltage wall power.
Older incandescent bulbs have thick tungsten filaments built to withstand 120 volts. A 1.5-volt cell cannot push enough current through that heavy wire to make it glow, and even a 9-volt battery falls far short of what is required to produce visible light.
Modern homes mostly use LED bulbs with an E26 base (the standard medium screw base found in common household lamps and ceiling fixtures). Inside the base of an LED bulb sits an internal driver circuit that expects 120-volt alternating current and converts it into low-voltage direct current for internal LED chips. When you touch a low-voltage battery to an LED bulb base, that driver board never gets enough voltage to switch on. Whether in a desk lamp or a multi-level fixture using a three way light bulb, household screw-in bulbs cannot run directly on loose dry cell batteries.
Emergency Backup Bulbs for Practical Home Lighting
If your goal is to light a room during an electrical blackout rather than demonstrate a science experiment, taping loose wires to batteries is not practical. For dependable storm preparedness, self-charging emergency light bulbs provide a clean, reliable solution.
These emergency bulbs screw into standard medium screw base fixtures like regular household teardrop bulbs. During daily use, they draw wall power and quietly recharge an internal battery backup. When a storm knocks out power, internal sensors detect the blackout and switch to battery power immediately. Many models also include a hook cap with a switch, letting you carry the bulb like a portable flashlight.
When shopping for backup emergency bulbs, keep these practical points in mind:
- Battery runtime: Check the listed emergency runtime on the packaging. Most backup bulbs offer three to five hours of emergency lighting, while dimmable options set to lower output can last up to fifteen hours during prolonged outages.
- Lumens versus wattage: Shop by lumens (actual brightness) rather than wattage (power used). On wall power, an LED bulb may produce 800 lumens (equal to a traditional 60W bulb). On battery power, it may drop to roughly 300 to 450 lumens (equal to a 40W bulb) to preserve battery life.
- Color temperature: Match the Kelvin rating to your living space. Select 2700K (soft warm white) for cozy bedrooms, 3000K (warm white) for balanced lighting in living rooms, or 5000K (daylight white) for bright task visibility during storm cleanup.
- Charging method: Confirm whether the bulb recharges automatically in its regular lamp socket during normal use or requires an external charging dock or cable.

- LFR Score9.2
LFR Score is a ranking system developed by lightfansreviews.com. LFR Score has no relationship or impact from any manufacturers or sales agent websites. Learn more
- BrandMinetom

- LFR Score9.2
LFR Score is a ranking system developed by lightfansreviews.com. LFR Score has no relationship or impact from any manufacturers or sales agent websites. Learn more
- BrandGE

- LFR Score9.0
LFR Score is a ranking system developed by lightfansreviews.com. LFR Score has no relationship or impact from any manufacturers or sales agent websites. Learn more
- BrandOstwiki

- LFR Score8.6
LFR Score is a ranking system developed by lightfansreviews.com. LFR Score has no relationship or impact from any manufacturers or sales agent websites. Learn more
- BrandYochoice

- LFR Score8.6
LFR Score is a ranking system developed by lightfansreviews.com. LFR Score has no relationship or impact from any manufacturers or sales agent websites. Learn more
- BrandBrightown

- LFR Score8.6
LFR Score is a ranking system developed by lightfansreviews.com. LFR Score has no relationship or impact from any manufacturers or sales agent websites. Learn more
- BrandKimjo
- LFR Score8.4
LFR Score is a ranking system developed by lightfansreviews.com. LFR Score has no relationship or impact from any manufacturers or sales agent websites. Learn more
- BrandBrightown

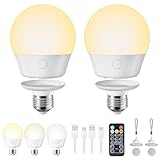
BLUEYE Rechargeable Battery Operated Light Bulb,2Packs,300LM,40W Equivalent,E26 Detachable Charging(E12 available),4
View on Amazon- LFR Score8.4
LFR Score is a ranking system developed by lightfansreviews.com. LFR Score has no relationship or impact from any manufacturers or sales agent websites. Learn more
- BrandBLUEYE

- LFR Score8.4
LFR Score is a ranking system developed by lightfansreviews.com. LFR Score has no relationship or impact from any manufacturers or sales agent websites. Learn more
- BrandKandicyar

- LFR Score7.8
LFR Score is a ranking system developed by lightfansreviews.com. LFR Score has no relationship or impact from any manufacturers or sales agent websites. Learn more
- BrandBoRccdit
Last update on 2026-10-02 / Affiliate links / Images, Product Titles, and Product Highlights from Amazon Product Advertising API
FAQs
Which end of the battery connects to the light bulb?
Either end works when using a standard miniature incandescent bulb. Because an incandescent bulb creates light by heating a simple wire filament, electricity flows in either direction without an issue. Polarity only matters if you use a loose light-emitting diode (LED), which requires the positive wire to touch the positive terminal and the negative wire to touch the negative terminal.
Why is my wire getting hot while the light bulb stays dark?
Your wire is overheating because of a short circuit. Electricity is bypassing the bulb filament and traveling directly between the battery terminals. Disconnect the wire immediately to prevent burns. Make sure one wire end touches only the metal foot at the bulb bottom while the other touches only the threaded metal side casing.
Can a 9-volt battery light up a small flashlight bulb?
A 9-volt battery can power a miniature bulb only if the bulb is rated for 9 volts. If you connect a standard 1.5-volt or 3-volt flashlight bulb to a 9-volt battery, the excessive voltage will overwhelm the tiny filament. The bulb will flash brightly for a split second before the filament melts and breaks permanently.
Can I use aluminum foil if I do not have copper wire?
A clean strip of folded aluminum foil can carry electrical current if you lack insulated copper wire. Fold a strip of foil several times lengthwise into a narrow, sturdy ribbon about six inches long. Press one end against the battery terminal and the other against the bulb contact point. Be careful, because bare foil transfers heat directly to your fingers much faster than insulated wire.


Best Bulb For Exposed Light 2026 That Shines Bright

Best Industrial Light Bulb Reviews: Top Picks for 2026

Best Outdoor Light Bulb Reviews: Top-Rated Picks for 2026

Best LED Reading Light Bulb Reviews - Top Picks for 2026

Best Vintage Light Bulb 2026 With Style And Glow

Best Yellow Fog Light Bulb 2026 For Clearer Night Drives

Best Z Wave Light Bulb 2026 Top Picks For Smart Control

Best Light Bulb For Vanity Mirror 2026 Brightness Boost






