
How to Make a Mini Table Fan Without the Fuss
How to make a mini table fan sounds simple at first, yet plenty of people end up frustrated halfway through the project. Weak airflow, noisy blades, shaky stands, or tangled wires can turn a fun little build into a headache pretty fast. Small rooms trap heat like a sauna during warmer days, and bulky cooling devices often feel overkill for a desk, bedside table, or cramped workspace. A compact DIY fan solves that problem without eating up space or draining extra electricity.
Portable cooling matters more than people expect. Sitting through long work sessions with stale air blowing nowhere useful can feel downright irritating, especially during humid afternoons. A properly built mini table fan creates a focused stream of airflow that actually reaches your face instead of disappearing into the room. The trick isn't fancy materials either. Stable blades, balanced motor placement, and the right fan housing make a huge difference in how comfortable the final setup feels.
Cheap plastic fans often rattle after a few weeks, and honestly, that constant buzzing gets old fast. Building your own setup gives better control over noise levels, fan speed, and airflow direction. Some people prefer a lightweight design that can move between a desk and kitchen counter, while others want stronger airflow for gaming setups or workshop corners. Different layouts work for different habits, so flexibility matters more than stuffing random parts together.
Heat buildup in tiny spaces usually sneaks up quietly. A small bedroom, dorm corner, crafting table, or home office can feel stuffy even with open windows. That's where a carefully designed DIY cooling solution becomes surprisingly practical. Recycled containers, USB-powered motors, rechargeable batteries, and compact blades can all work together without making the fan bulky or awkward to carry around.
Materials also play a bigger role than many expect. Lightweight cardboard might look convenient at first, but it can warp near moisture or lose stability after long use. Sturdier plastic frames or compact wooden bases hold vibration better and reduce annoying movement on smooth tables. A balanced frame keeps the airflow steady instead of wobbling all over the place every time the motor speeds up.
Safety deserves attention too, especially with homemade electronics sitting close to hands, cables, and drinks. Proper blade spacing, secure wiring, and stable motor attachment prevent unnecessary accidents. Nobody wants a cooling fan that suddenly tips over during work or starts making grinding noises after two days. Small improvements in assembly often decide whether the project feels reliable or ends up shoved into a drawer.
Style counts more than people admit. A chunky homemade fan can stick out awkwardly in modern spaces, while a cleaner compact design blends naturally beside laptops, bookshelves, or indoor plants. Some setups lean toward industrial-looking builds with exposed metal parts, while others keep things minimal and smooth. Either way, a thoughtfully built mini table fan adds practical comfort without turning the room into a cluttered mess.
How To Make A Mini Table Fan For Small Spaces
A hot desk can make even a simple task feel twice as annoying, especially with a laptop humming nearby and stale air hanging around your face. That tiny pocket of discomfort is exactly where how to make a mini table fan becomes more than a cute weekend project. A small DIY fan can give you personal airflow, less clutter, and better control without dragging a bulky cooling appliance into the room.
Mini Fan Basics
A reliable mini fan starts with a simple idea: move air toward one spot without shaking, whining, or tipping over. The core parts usually include a small DC motor, lightweight blades, a power source, basic wiring, and a stable base. Keep the build compact, but don’t make it so tiny that the blades can’t push enough air. A fan that looks adorable but barely moves a napkin will get old fast.
The motor matters because it decides how much air the fan can move and how loud the build feels on a quiet desk. A common USB motor or low-voltage DC motor can work well for a desk-friendly fan, as long as the blade size matches the motor strength. Oversized blades on a weak motor create drag, heat, and that tired buzzing sound nobody wants. Smaller blades spin easier, but they may need better shaping to feel useful.
Blade balance is the sneaky detail that makes or breaks this project. Uneven blades cause vibration, and vibration turns into noise, wobble, and loose parts over time. Trim both sides evenly, check the center hole, and spin the blade by hand before powering anything. A tiny adjustment can make the fan feel smoother right away.
The base should feel boring in the best possible way. A flat plastic lid, small wooden block, sturdy cardboard stack, or reused container can hold the motor if it has enough weight and grip. Lightweight bases look neat at first, but they slide around when the fan starts spinning. Add stability before chasing style, because a fan that crawls across the table is a nuisance.
Materials That Actually Make Sense
Start with parts that are easy to cut, safe to handle, and strong enough for daily use. A USB cable, switch, mini DC motor, plastic bottle, foam board, popsicle sticks, or light craft plastic can form the main structure. Reused materials are fine, but they shouldn’t feel flimsy near the spinning blade. A cracked bottle piece or bent cardboard mount can turn a fun build into a rattly mess.
Plastic from a bottle can make decent blades because it’s light, flexible, and easy to shape with scissors. Cut the blades evenly and curve them slightly so they can scoop air instead of just slicing through it. That small bend creates better airflow without requiring a stronger motor. Go easy though, because steep blade angles can slow the motor and increase noise.
For the frame, sturdier materials beat pretty materials. Foam board is easy to cut but can loosen near glue joints, while thin wood holds screws better and handles vibration more calmly. A compact plastic container can also work if the motor fits snugly. The goal is a firm motor mount that doesn’t flex every time the fan speeds up.
Power choices depend on where the fan will sit most often. USB power makes sense beside a laptop or power bank, while battery power adds portability for shelves, bedside tables, or plant corners with weak airflow. So, if lighting efficiency is already on your mind for a small room setup, compare practical power-saving ideas through most energy efficient lighting before planning the whole desk area. Small energy choices add up, especially in rooms where fans, lamps, chargers, and grow lights all run in the same corner.
Build The Fan Body Without The Wobble
A fan body should hold the motor straight, protect the wires, and keep the blade away from fingers. That sounds plain, but it’s the difference between a neat DIY table fan and a shaky craft project. Mark the motor position before gluing anything, then test the blade clearance from every side. Give the blades breathing room so they don’t scrape the frame after the glue settles.
Mount the motor on a vertical support that doesn’t bend under light pressure. Popsicle sticks can work if doubled up and glued firmly, but a small wood strip or thick plastic support usually feels sturdier. The motor shaft should point forward in a straight line, not slightly upward or off to one side. Even a tiny tilt can cause uneven airflow and annoying vibration.
Glue alone can work for light builds, but hot glue softens in warm rooms and may loosen after repeated vibration. Tape can help during testing, yet it shouldn’t be the main support for the final fan. A small clamp, zip tie, or snug cutout around the motor gives extra grip. That extra hold keeps the motor alignment steady after several uses.
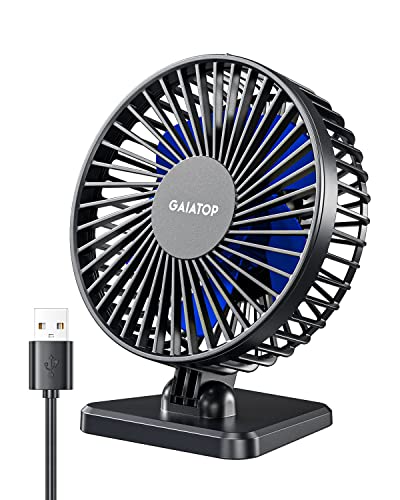
The fan housing doesn’t need to be fancy, but it should prevent accidental contact with the spinning blade. A simple guard made from mesh, plastic strips, or a small circular frame gives peace of mind. Leave enough open space so air can move freely through the front. Too much covering blocks airflow and makes the fan feel weaker than it really is.
Wire It Safely And Keep It Simple
Wiring should stay short, clean, and easy to inspect. A basic setup connects the positive wire from the power source to a switch, then from the switch to the motor, while the negative wire returns to the motor directly. Twist connections carefully, insulate them with electrical tape or heat-shrink tubing, and keep exposed copper away from the frame. Messy wiring isn’t just ugly, it can cause shorts.
A switch makes the fan feel much more practical. Without one, plugging and unplugging becomes annoying, especially if the fan sits behind a monitor or beside a crowded charging area. Place the switch where your hand naturally reaches, not underneath the base. That little convenience turns a rough build into a daily-use fan.
USB-powered builds should use low-voltage parts that match the motor’s needs. Don’t force a motor to run from a power source it wasn’t meant to handle. Too much voltage can overheat the motor, while too little voltage makes the blades crawl. Safe matching protects the motor life and keeps the fan from smelling warm after a few minutes.
Keep wires away from the blade path and moving shaft. Tape them along the back support or tuck them into a small channel on the base. A loose wire can drift forward, touch the blade, and make a sharp clicking noise that gets irritating immediately. Clean routing also makes the fan look more intentional, not like a handful of parts thrown together.
Shape The Blades For Better Airflow
Blades need shape, not just size. Flat blades can spin quickly but often push weak air, while slightly curved blades create a stronger breeze at lower effort. Use light plastic and cut each blade to the same length and width. Balanced, angled blades give the fan smoother airflow without making the motor strain.
Three blades are usually easier to balance than five or six on a small homemade fan. Fewer blades reduce weight, and that helps a modest DC motor spin without dragging. More blades may look cooler, but they can create more resistance if the motor is small. Practical beats flashy here, especially for a mini fan build meant to sit close by.
The blade hub deserves careful attention. A loose center hole causes wobbling, even if the blades are cut evenly. Use a tight fit around the motor shaft, and add a tiny amount of glue only after confirming the blade spins straight. Rushing this step often creates the classic DIY problem: loud fan, weak breeze.
Household materials behave differently under spin. Thin bottle plastic flexes nicely, but it can deform if cut too narrow. Thicker plastic holds shape better, though it may add too much load for a tiny motor. Basic material knowledge helps here, and a quick look at what light bulbs are made of can also give a useful sense of how everyday items use glass, metal, and plastic differently under heat and stress.
Control Noise Before It Drives You Nuts
Noise usually comes from three places: vibration, blade imbalance, and loose mounting. A quiet mini table fan needs a firm base, centered blades, and a motor that isn’t overloaded. Listen during the first test instead of staring only at the airflow. A soft hum is normal, but rattling, scraping, or clicking means something needs adjusting.
Rubber pads under the base can reduce vibration on wooden desks, glass tables, and metal shelves. Even small felt pads help because they stop the base from buzzing against the surface. If the fan feels jumpy, add weight to the bottom instead of trying to hold it down with tape. A heavier base gives better stability and makes the fan feel less homemade in the bad way.
Blade clearance can also affect sound. If the blade sits too close to a guard or frame, air turbulence may create a rough whooshing noise. Move the guard slightly forward and test again. Small gaps can change the sound more than expected, especially in a close-range fan used near your ears.
Motor quality sets the noise floor. Some salvaged motors buzz no matter how carefully they’re mounted, especially if they came from old toys or worn gadgets. That doesn’t mean the build failed, but it does set realistic limits. A cleaner, newer motor usually gives lower noise and steadier speed for desk use.
Make It Useful On A Desk Or Bedside Table
A fan sitting on a desk has to share space with mugs, cables, notebooks, and maybe a small plant or two. Keep the footprint narrow but not top-heavy. A wide, low base handles bumps better than a tall skinny stand. The best mini table fan design feels easy to move but hard to knock over.
Angle control makes the fan more useful than raw power. A fixed fan can miss your face by a few inches and still feel disappointing. Use a tilted support, adjustable neck, or simple wedge under the base to aim the airflow. Better direction means cooler comfort without needing a bigger motor.
Desk setups often mix heat sources in one place. A monitor, laptop charger, lamp, and small electronics can warm the air around your hands and face. A mini fan helps move that trapped heat away, but it won’t cool the whole room like an air conditioner. That honest expectation keeps the project grounded and prevents disappointment.
Outdoor spaces need a different kind of airflow, so don’t expect a tiny DIY fan to handle a patio or porch the same way. For larger covered areas, compare airflow and convenience with outdoor ceiling fans with remote instead of forcing a mini desk build into the wrong job. A small fan shines close up, while a ceiling fan moves air across a wider zone.
Test The Fan Before Making It Pretty
Test the fan while it still looks unfinished. That’s the smart move. Run it for a few minutes, check for motor heat, listen for rattles, and watch whether the base moves. Fixing issues before painting or decorating saves a lot of frustration.
Airflow testing can be as simple as holding a strip of tissue in front of the fan. The tissue should move steadily, not flutter wildly from uneven blade motion. Try different angles and distances to see where the airflow feels strongest. This gives you a real sense of the fan’s useful range instead of guessing.
Heat checks matter with battery or USB builds. Touch the motor housing carefully after a short run, and stop if it feels unusually hot. Warm is common, but uncomfortable heat means the motor is working too hard or receiving the wrong voltage. Protecting the parts keeps the DIY fan safer and longer lasting.
Once the fan spins smoothly, decoration can happen without hiding problems. Paint the base, wrap the support, clean up the wire path, or add a simple guard that matches the room. Just don’t cover vents or trap heat around the motor. A good-looking fan still needs open airflow, steady balance, and easy access to the switch.
How To Make A Mini Table Fan Safer And More Useful
After the fan spins cleanly, the real work starts: making it safe, steady, and comfortable enough to use every day. A homemade build can look clever on the table, but loose wiring, sharp blade edges, or a weak base will ruin the whole thing fast. The best version of how to make a mini table fan feels simple, but every small detail has a job. Better safety, smoother airflow, and easier upkeep turn a quick craft into a practical cooling tool.
Add A Guard Without Killing Airflow
A blade guard should protect fingers without choking the breeze. Thin plastic strips, mesh from an old organizer, or a lightweight wire ring can work if the openings stay wide enough for air to pass through. A tight, heavy cover may look safer, but it can block air movement and make the fan feel weak. Keep the guard light, centered, and slightly away from the blade tips.
Finger safety matters more if the fan sits near kids, pets, or a crowded desk. Even small plastic blades can sting if they spin fast enough. A front guard lowers that risk while still letting the mini table fan do its job. Sand any sharp edges before attaching the guard because rough plastic can scratch hands during cleaning.
The guard should not touch the blade during startup, shutdown, or small bumps. Test this by gently tapping the base while the fan runs at low speed. Any scraping means the guard needs more space or the blade hub needs better alignment. Quiet clearance is a key sign that the fan is assembled with enough breathing room.
Use removable attachment points if possible. Small clips, twist ties, or screws make cleaning easier than permanent glue. Dust builds up on blades faster than people expect, especially near windows, craft tables, or indoor plants. A guard that comes off easily keeps maintenance from becoming a chore.
Control Power Without Overcomplicating It
A small fan doesn’t need a confusing control panel. A basic switch is usually enough for daily use, while a simple speed controller can help if the motor supports it. The goal is easy operation, not a mess of parts that makes troubleshooting harder later. Keep the wiring visible enough to inspect but tucked away enough to avoid snags.
USB power is convenient for desks because it connects to a laptop, wall adapter, or power bank. Battery power works better when the fan needs to move between a bedside table, shelf, or plant-growing corner. Each choice has a tradeoff: USB limits placement, while batteries need charging or replacement. A smart build matches the power source to the place where the fan will actually live.
Don’t chase extreme speed from a tiny motor. Faster spinning may sound tempting, but it often brings heat, noise, and faster wear. A slightly slower fan with a clean blade angle can feel better than a screaming motor that shakes the table. Steady airflow beats raw speed for a personal cooling fan.
Small room setups often combine fans, lamps, and nighttime lighting in tight spaces. To reduce wasted power around patios, plant shelves, or entry areas, compare sensor-friendly lighting through dusk to dawn light bulb options before adding more plug-in devices. A tidy power plan keeps the desk, shelf, or corner from turning into a cable jungle.
Make The Fan Fit Real Daily Habits
A useful fan should sit where warm air actually bothers you. That might be beside a laptop, near a sewing machine, next to a bedside lamp, or close to a seed-starting tray where air gets stale. Aim the airflow direction toward the comfort problem, not just the middle of the room. Tiny fans work best at close range.
Desk users usually need a fan that stays quiet during calls, reading, or typing. A rattly fan can become more distracting than the heat itself. Add rubber feet, tighten the motor mount, and avoid oversized blades if the fan sits near your ears. That kind of practical tuning makes noise control feel baked into the design.
Plant corners have different needs. Gentle air movement helps reduce stagnant pockets around small pots, but a strong direct blast can dry soil too quickly or stress delicate seedlings. Angle the fan across the space rather than straight into the leaves. A soft breeze supports air circulation without turning plant care into a watering headache.
Bedside use calls for even more restraint. Bright indicator lights, rough motor hum, and exposed wires feel more annoying at night. Keep the switch easy to reach, the base heavy enough to avoid tipping, and the blade guard secure. A bedside DIY mini fan should feel calm, not like a science fair project buzzing next to your pillow.

Fix Weak Airflow Without Rebuilding Everything
Weak airflow usually comes from blade shape, motor strain, or blocked intake space. Before tearing the whole fan apart, check whether the blade curve is too flat. A slight twist can help the blades grab more air. Small changes often improve cooling comfort without replacing the motor.
Move the fan away from walls, books, and monitor stands during testing. A fan needs space behind the blades to pull air in cleanly. Pressing it against clutter makes the airflow feel dull and uneven. Even a few inches of clearance can give a noticeable breeze at desk distance.
Blade size should match motor strength. Large blades on a weak motor may spin slowly and heat the motor, while tiny blades may spin fast but barely move air. Trim oversized blades little by little instead of cutting too much at once. Careful trimming protects the fan balance and avoids starting over.
Battery condition can also fool you. A tired battery may make the fan seem poorly built even though the design is fine. Test with a stable USB source or fresh battery before changing the blade or frame. Power consistency gives a clearer read on the fan performance.
Keep It Clean Without Damaging Parts
Dust buildup reduces airflow and makes the fan louder over time. Turn the fan off, unplug it, and remove the guard before cleaning. Use a dry cloth, soft brush, or cotton swab around the motor area. Avoid dripping water near wiring, switches, or battery contacts.
Blades need gentle handling because small DIY parts can bend out of shape. Wipe from the center outward and support the blade with a finger if the plastic feels thin. Bent blades create wobble, and wobble turns into noise. Clean blades keep the airflow smoother and easier to control.
Glue joints deserve a quick check during cleaning. Warm rooms, vibration, and repeated handling can loosen mounts over time. If the motor shifts even a little, reinforce the support before the next long use. A solid mount protects both safety and comfort.
Outdoor or semi-outdoor spaces are a different story. A tiny homemade fan shouldn’t be treated like a porch fixture because moisture, dust, and wide areas demand stronger equipment. For covered patios or larger airflow needs, compare outdoor ceiling fans lowes ideas instead of stretching a small desktop build beyond its limits. Right tool, right space, fewer headaches.
Personalize The Design Without Hurting Performance
Decoration should come after the fan runs smoothly. Paint, stickers, wood stain, or wrapped cords can make the build fit a desk or shelf better. Just keep paint away from the motor shaft, switch openings, and blade hub. A pretty finish should never interfere with moving parts.
Color can help the fan blend into a home office, dorm room, or plant shelf. Matte finishes hide scratches better than glossy coatings, especially on reused plastic. A darker base can look cleaner around soil, dust, or craft debris. Practical style makes the mini table fan feel less temporary.
Handles and cable clips add real usefulness. A small loop on the back makes the fan easier to move, while a cable clip keeps the USB cord from falling behind the desk. These details don’t look dramatic, but they solve everyday annoyances. Simple upgrades make daily handling smoother.
Keep add-ons lightweight. Heavy decorations can shift the center of gravity and make the fan easier to tip. If the front guard gets decorative pieces, check that they don’t block airflow or loosen during vibration. Good customization respects the balance that made the fan work in the first place.
Know The Limits Before You Rely On It
A homemade mini fan improves personal comfort, but it won’t cool an entire room. It moves air across a short distance, which helps skin feel cooler and reduces stuffiness near your seat. That’s useful, especially in a small workspace. Still, realistic expectations keep DIY cooling from feeling disappointing.
Hot, humid rooms may need more than a small fan. Air movement helps, but humidity can still make the space feel sticky. Pair the fan with shade, open airflow paths, or better room ventilation if possible. The fan becomes one piece of a comfort setup, not the whole answer.
Long run times require extra caution. Check motor warmth during the first few longer sessions and avoid leaving the fan running unattended if the build uses exposed DIY wiring. A simple project can still involve electricity and spinning parts. Respecting those limits keeps the mini table fan safer.
Repairability is one of the best perks of building it yourself. A loose blade, weak switch, or tired cable can usually be fixed without tossing the whole thing. Keep the design simple enough that parts can be reached and replaced. That practical mindset gives how to make a mini table fan more value than a one-time craft.


Best Small Flush Mount Ceiling Fans 2026 Ultimate Picks

Best Smart Ceiling Fan India 2026 For Effortless Comfort

Best Smart Ceiling Fans with Lights for 2026: Top Picks

Best Smart Home Non Ceiling Fans 2026 For Ultimate Comfort

Best Outdoor Misting Ceiling Fan 2026 For Ultimate Comfort

Best Ceiling Fans With Lights For Vaulted Ceilings 2026 Top Picks

Best Outdoor Ceiling Fans For Porch 2026 With Style And Breeze

Best WiFi Enabled Ceiling Fan 2026 For Effortless Comfort





