
How to Make a Noisy Ceiling Fan Quiet Again
How to Make a Noisy Ceiling Fan Quiet becomes a real concern once that steady hum turns into clicking, rattling, or wobbling every single night. A fan that should create comfort can suddenly feel like a constant distraction, especially during sleep, movie nights, or quiet afternoons at home. Tiny noises often signal loose screws, blade imbalance, worn mounting hardware, or dust buildup hiding in plain sight. Ignore those warning signs for too long, and the problem usually gets louder instead of fading away.
Ceiling fan noise has a sneaky way of driving people up the wall. One evening it's a faint ticking sound. A week later, the entire room feels like it’s buzzing overhead. That frustration gets even worse in bedrooms, nurseries, and small apartments where every sound echoes. Loose blades, poor installation, and uneven airflow commonly trigger these issues, but thankfully, many fixes don’t require replacing the whole fan.
Dust also causes more trouble than most people expect. Heavy buildup changes blade balance, creates vibration, and forces the motor to work harder than necessary. Cleaning the fan thoroughly can sometimes reduce noise almost immediately, which honestly surprises plenty of homeowners. Also, worn rubber gaskets or loose light kits tend to create metallic rattles that mimic serious motor problems.
Balance plays a huge role in fan performance. Even a slight tilt in one blade can create wobbling strong enough to shake mounting parts loose over time. That shaky movement often produces clicking sounds, humming, or a repetitive tapping noise against the ceiling canopy. Blade balancing kits and careful screw tightening usually solve the issue before it turns into expensive damage.
Motor noise creates a different headache altogether. Older fans may develop a grinding hum due to aging bearings or internal wear, while cheaper models sometimes produce constant buzzing from day one. Some people assume every noisy fan needs replacement, but that’s not always true. Lubrication, secure mounting, and proper speed settings can dramatically reduce sound levels in many situations.
Room conditions matter too, oddly enough. Low ceilings, loose junction boxes, and uneven electrical current can all amplify vibration. Certain fan speeds may sound quieter simply because the airflow changes pressure against the blades differently. Small adjustments often make a surprisingly big difference once the source of the sound becomes clear.
How to Make a Noisy Ceiling Fan Quiet isn’t only about eliminating irritation. A quieter fan usually means smoother operation, less strain on internal parts, and a longer lifespan overall. Nobody wants to lie awake listening to rhythmic clicking overhead like some kind of tiny drummer practicing at midnight. Fixing the problem early helps restore comfort while preventing bigger mechanical issues later on.
How To Make A Noisy Ceiling Fan Quiet
A soft breeze feels great until the fan above you starts clicking like a loose jar lid in a junk drawer. The room may still feel cool, but that steady rattle can ruin sleep, break focus, and make a relaxing evening feel oddly tense. How to make a noisy ceiling fan quiet starts with figuring out whether the sound comes from loose hardware, dirty blades, poor balance, or a tired motor that has been ignored for too long. Fix the small stuff first, and you’ll often avoid the bigger repair bill that sneaks up later.
Quiet Fan Basics
Ceiling fan noise usually gives clues before anything serious happens. A ticking sound often points to a loose blade screw, while a low hum can come from the motor, wall control, or electrical vibration. A scraping sound feels more urgent because it may mean a blade bracket, canopy, or light kit is rubbing against another part. The trick is to listen closely instead of guessing, because the wrong fix wastes time and may leave the noise untouched.
Start with the fan turned off before touching anything, even if the job looks small. Blades can shift, brackets can pinch fingers, and light kits can hide loose glass or hot bulbs. A sturdy step ladder matters too, because leaning from a chair is asking for trouble. Calm, slow inspection beats the “tighten everything and hope” method every time.
Most noisy fans don’t fail overnight. They get dusty, screws loosen from vibration, and small imbalances grow into bigger shakes. That’s why a fan that sounded fine last summer can suddenly feel like it’s tapping out a beat above the bed. Routine maintenance keeps the fan steady and makes each repair easier to spot.
Different rooms also change how noise feels. A fan in a vaulted living room may sound mild, while the same ticking in a bedroom can feel maddening at midnight. Hard floors, low ceilings, and quiet walls can make small vibrations seem louder than they really are. So, before blaming the motor, check the basic moving parts and nearby surfaces first.
Find The Noise Source
Run the fan on each speed and listen for changes. A noise that appears only on high speed usually points to blade balance or airflow vibration. A hum that stays the same on every speed may involve the motor, capacitor, or wall control. A click that speeds up with the blades usually means something is loose near the rotating parts.
Stand in different spots around the room while the fan runs. Sounds bounce, and the loudest spot isn’t always under the problem part. The canopy might rattle near the ceiling, while the light kit may click near the center housing. This little walkaround helps separate blade noise from mounting noise.
Then turn the fan off and let it stop naturally. Watch the blades as they slow down. A fan that wobbles in a wide circle likely has a balance issue, a bent blade arm, or a loose mounting bracket. A fan that stops smoothly but still hums during use may have an electrical or motor-related issue instead.
Some noise only shows up after the fan has been running for a while. Heat can expand small parts, loosen a glass shade, or make a weak bearing more noticeable. Try listening after ten or fifteen minutes of operation, especially if the noise appears mostly at night. Timing matters because it can point toward vibration, heat, or wear.
Tighten Loose Fan Hardware
Loose screws are the easiest and most common cause of ceiling fan noise. Blade screws, blade arm screws, canopy screws, and light kit screws all loosen slowly from repeated spinning. A quarter turn may be enough to stop a click that has been bothering the room for weeks. Use a screwdriver that fits properly so you don’t strip the screw heads.
Check each blade where it connects to the bracket. Then check where each bracket connects to the motor housing. A single loose blade arm can throw the fan off balance and create both wobble and noise. Tightening in a consistent pattern helps keep pressure even across all blades.
The canopy near the ceiling deserves attention too. If it sits too close to the ceiling, it may rub or vibrate against the surface. If it hangs too loose, it can rattle every time the fan changes speed. Canopy adjustment often takes only a minute, but it can quiet a sound that feels much more serious.
Light kits create their own little orchestra of rattles. Glass shades, pull chains, bulb bases, and decorative caps can all buzz from airflow and vibration. Tighten those parts gently because glass can crack if you muscle it. For extra stubborn rattles, a small rubber washer can help soften contact between metal and glass.
Clean Dust From Blades
Dust buildup may look harmless, but it can change the weight of each blade. One dusty blade edge and one cleaner blade edge can create enough imbalance to make the fan wobble. That wobble loosens hardware, and then the noise gets worse. A good cleaning is often the cheapest quiet-fan fix in the room.
Use a microfiber cloth or pillowcase to trap dust instead of pushing it into the air. Clean the top and bottom of each blade, then wipe the blade edges where buildup gets thick. Greasy kitchen dust may need a damp cloth with mild soap. Dry the blades afterward so moisture doesn’t warp wood or leave streaks on painted finishes.
Outdoor and porch fans collect pollen, grit, and moisture faster than indoor fans. That extra grime makes the blades heavier and rougher through the air. If your fan sits near plants, open windows, or a humid room, cleaning needs to happen more often. For compact airflow in smaller rooms or plant corners, explore rechargeable clip on fan options that can move air without shaking a ceiling fixture.
Dust also hides around the motor housing vents. Blocked vents can trap heat, and heat makes some motors hum louder. Don’t spray cleaner into the motor area because liquid can damage electrical parts. A dry brush or vacuum attachment works better for removing surface dust around vents and seams.
Balance Wobbly Fan Blades
Blade imbalance is the usual suspect when a fan swings from side to side. Even a small difference in blade pitch, weight, or height can make the whole unit shake. That movement travels into the ceiling box, canopy, and light kit. Once the fan starts wobbling, noise usually follows close behind.
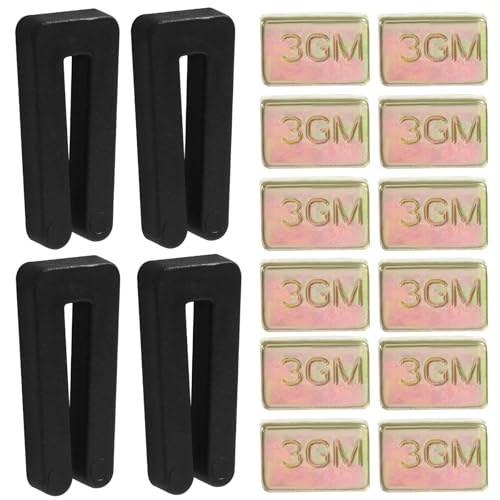
A balancing kit can help, and many fans include one in the box. The small clip lets you test each blade until the wobble improves. After finding the best spot, a stick-on weight goes on top of the blade where it stays hidden. It’s a simple process, but patience matters because tiny changes can shift the result.
Blade height also deserves a quick check. Measure from the ceiling to the tip of each blade while the fan is off. If one blade sits lower than the others, the bracket may be slightly bent or loose. Matching blade height helps the fan spin evenly and cuts down on repetitive tapping.
Don’t ignore blade warping. Wood and composite blades can bend from humidity, heat, or age. A warped blade may never balance correctly, even with weights. In that case, replacing the blade set usually makes more sense than chasing the wobble all weekend.
Check The Mounting Box
A secure ceiling box is non-negotiable for a quiet fan. Standard light fixture boxes may not support a fan properly, especially during long-term vibration. If the box flexes or moves when you gently test the fan body, the mounting needs attention. A noisy fan can sometimes be a warning that the support above the ceiling isn’t right.
Fan-rated boxes are built to handle movement and weight. They attach firmly to ceiling joists or approved braces rather than depending on drywall. A weak box can cause wobbling, rattling, and unsafe operation. This is one of those places where a cautious approach beats a quick patch.
Older homes may have ceiling boxes that were installed before a fan was added. The fan might work for years, but vibration can slowly loosen the setup. If the entire fan moves at the ceiling instead of just the blades wobbling, stop using it until the mount is checked. Mounting stability affects both noise and safety.
Call a qualified electrician if the box looks loose, cracked, or unsupported. That’s not overkill. Ceiling fans are heavier and more dynamic than basic lights, so the support has to match the job. A quiet fan starts with a mount that doesn’t shift, flex, or chatter above the ceiling.
Reduce Motor Humming
Motor hum feels different from clicking or rattling because it sits in the background like a low electrical buzz. Sometimes it comes from the fan motor itself, especially in older models. Other times the wall control creates the problem by sending power in a way the motor doesn’t like. Cheap dimmer switches are a common troublemaker because many ceiling fans need fan-rated controls, not light dimmers.
Try running the fan from its pull chain or remote instead of the wall control, if possible. If the hum changes, the control may be the issue. A compatible fan speed controller can reduce buzzing and make speed changes smoother. Electrical compatibility matters more than most people expect.
Some fans hum more at one speed than another. Medium speed may vibrate differently than low or high, which can make the motor sound louder. That doesn’t always mean the fan is failing. It may simply mean the fan has a natural vibration point at that setting.
Persistent grinding, burning smells, or a hot motor housing should not be ignored. Those signs move beyond normal noise troubleshooting. Turn the fan off and get it checked before using it again. Grinding sounds can point to worn bearings or internal damage that basic tightening won’t fix.
Quiet Light Kit Rattles
Light kit noise often tricks people into blaming the fan motor. Glass shades can buzz against metal holders, bulbs can sit loose in sockets, and pull chains can tap against the housing. The sound may seem to come from the center of the fan because, well, it does. But the fix is usually simpler than motor repair.
Start by checking every bulb after the power is off and the bulbs are cool. A bulb that isn’t seated well can vibrate just enough to create a faint rattle. Tighten it gently and avoid forcing it. If the socket feels damaged or loose, stop and have it inspected.
Glass shades should be snug, not crushed. Over-tightened thumb screws can stress glass and still fail to stop vibration. A small rubber washer or cushion can reduce contact noise where glass meets metal. Soft contact points help quiet the fixture without making it harder to remove later.
Pull chains can also become tiny noise machines. Shorten a chain that taps the glass or housing while the fan runs. If the chain swings heavily, add a lighter pull or reposition it away from the blades and shade. Small fixes like that can make the room feel calmer fast.
Ways To Stop Ceiling Fan Noise At Night
Late-night ceiling fan noise hits differently once the house gets quiet and every tiny sound starts bouncing around the room. A faint ticking during the afternoon may suddenly feel impossible to ignore at 2 a.m. Sleep gets interrupted, concentration drops the next day, and frustration slowly builds every time the fan spins overhead. Ways to stop ceiling fan noise at night usually involve fixing vibration points, airflow problems, and small worn parts before they grow into larger mechanical headaches.
Fix Airflow Problems Around The Fan
Airflow resistance creates more noise than many people realize. Curtains that sit too close to the blades can flutter loudly, especially on higher speeds. Loose ceiling decorations, lightweight vent covers, and nearby cords may also vibrate once the air starts moving. Sometimes the fan itself isn’t the noisy part at all.
Low ceilings can amplify sound in a surprisingly annoying way. The blades push air downward, and the pressure bounces back faster in tighter spaces. That extra turbulence can create a humming or pulsing effect that feels louder during quiet evenings. Running the fan at medium speed instead of high often smooths out airflow and reduces that choppy sound.
Blade shape also affects airflow tone. Some wider blades move air more aggressively, which helps cooling but may create a soft whooshing noise. That sound is normal to a point, though heavily warped blades tend to create uneven air movement and extra vibration. Smooth airflow usually means the fan runs quieter and feels steadier overall.
Humidity changes can shift blade shape slightly over time, especially with older wooden blades. Rooms with moisture buildup may notice more wobble during humid seasons. For rooms dealing with damp air and stale circulation, explore uv light kill mold methods that help reduce moisture-related issues around ceilings and vents.
Inspect Remote Controls And Receivers
Remote control systems can create weird fan behavior if the receiver starts failing or loses connection stability. Fans may beep unexpectedly, change speeds randomly, or hum during operation because the signal isn’t communicating properly. A fan that suddenly acts erratic after years of smooth operation may have a receiver issue instead of a motor problem.
Battery problems inside the remote also create confusion. Weak batteries can cause delayed commands or incomplete speed changes, making the fan stutter between settings. That inconsistent operation sometimes sounds like a clicking relay or electrical tapping inside the housing. Fresh batteries are cheap, quick, and honestly worth trying before digging deeper.
Loose receiver boxes inside the canopy can vibrate during operation. The sound often feels like a faint plastic rattle near the ceiling. Turning off power and checking receiver placement may reveal that the unit shifted slightly during previous maintenance. Secure receiver placement helps reduce subtle but irritating vibration noises.
Fans with pairing issues sometimes fail to hold a stable connection after power outages or electrical interruptions. If speed controls stop responding correctly, review hunter ceiling fan remote instructions to restore proper communication between the remote and fan system.
Lubricate Moving Components Carefully
Older ceiling fans sometimes develop dry internal parts that create grinding or squealing sounds. Not every fan requires lubrication because many modern motors are sealed permanently at the factory. Still, older units with oil ports may become noisy simply because the bearings dried out over time. A small amount of proper lubricant can calm the sound noticeably.
Always check the fan manual before adding oil anywhere near the motor housing. Using the wrong lubricant can damage seals or attract dust buildup inside moving parts. Thin electrical motor oil works better than thick household grease in most approved applications. Slow and careful beats dumping oil into every opening you can find.
Ceiling fans with neglected bearings often produce a rough scraping sound during startup. The noise may soften after the fan warms up, but that doesn’t mean the issue disappeared. Dry bearings create friction, and friction slowly wears down internal components. Proper lubrication reduces strain and helps the fan spin more smoothly.
Some fans continue making noise even after lubrication because the bearings already suffered damage. Grinding that grows louder over weeks usually signals deeper wear inside the motor assembly. At that point, replacement parts or a new fan may make more financial sense than repeated temporary fixes.

Check Fan Speed Settings
Fan speed changes how vibration travels through the blades, mounting hardware, and ceiling box. A fan that sounds smooth on low speed may suddenly wobble and hum on high. That doesn’t always mean the fan is defective. Some rooms simply create more air resistance at certain speeds because of ceiling height, furniture layout, or nearby walls.
Try each speed separately for several minutes instead of switching quickly between settings. Listen for changes in humming, clicking, or wobbling patterns. A speed-specific noise often points toward balance issues or airflow turbulence rather than motor failure. Small details matter during troubleshooting.
Wall-mounted fan controls deserve attention too. Some older dimmer-style controls aren’t compatible with modern ceiling fans and create electrical buzzing. Replacing them with a proper fan-rated controller often improves operation immediately. Compatible speed controls help prevent uneven power delivery that stresses the motor.
Fans installed in large open rooms may need stronger airflow than compact bedrooms. Running a small fan on maximum speed all day can create extra vibration and wear over time. If stronger circulation is necessary, compare high speed ceiling fan setups built specifically for larger spaces and heavier airflow demands.
Replace Damaged Blade Arms
Blade arms, also called blade irons, connect the blades to the motor housing. These metal brackets handle constant movement, vibration, and shifting airflow pressure. Over time they may bend slightly, especially after accidental impacts during cleaning or bulb replacement. Even a tiny bend can throw the fan off balance.
Fans with bent blade arms often wobble in a repeating pattern that balancing kits can’t fully fix. One side dips lower during rotation, creating rhythmic movement across the entire fixture. Measuring blade height helps reveal which bracket sits unevenly. A ruler and careful eye usually expose the problem quickly.
Replacement blade arms should match the original size and shape exactly. Mixing different bracket styles can create uneven blade pitch and strange airflow sounds. Manufacturers design those angles carefully so the blades move air evenly across all speeds. Matching hardware keeps the fan balanced and stable.
Corrosion also weakens blade arms in humid rooms and covered outdoor areas. Rust near screw holes may loosen connections and increase vibration during operation. If the metal looks cracked, warped, or heavily rusted, replacement becomes safer than trying to force the old bracket back into shape.
Reduce Electrical Buzzing Sounds
Electrical buzzing feels sharper and more constant than ordinary airflow noise. It may come from loose wiring connections, failing capacitors, or overloaded wall switches. Fans connected to unstable circuits sometimes hum louder during peak appliance usage inside the home. That sound can feel subtle during the day but incredibly irritating at night.
Turn off power before checking any wiring connections near the ceiling box or switch plate. Loose wire nuts can create vibration and inconsistent electrical flow. Tightening those connections may stop the buzzing immediately if the problem stayed small. Electrical repairs deserve patience and caution instead of rushed guesses.
Capacitors inside the fan housing help regulate speed and motor startup. A failing capacitor may cause buzzing, inconsistent speeds, or weak airflow even though the fan still spins. Replacing a capacitor costs far less than replacing the entire fixture in many cases. Electrical consistency plays a major role in quiet fan operation.
Some buzzing sounds actually travel from nearby fixtures or switches instead of the fan itself. Electrical vibrations can echo through ceiling materials and make troubleshooting confusing. Testing nearby lights or outlets while the fan runs may reveal another hidden source contributing to the noise problem.
Know When Replacement Makes Sense
Older ceiling fans eventually reach a point where repeated repairs stop being practical. Constant grinding, recurring wobble, or severe motor hum after multiple fixes often signals deeper wear inside the assembly. Spending money on replacement parts every few months gets frustrating fast. A quieter, more stable fan may save both stress and future repair costs.
Energy efficiency also changes over time. Older motors tend to run hotter and noisier while moving less air compared to newer designs. That extra strain can increase electrical buzzing and vibration during long summer use. Replacing an outdated fan sometimes improves comfort far beyond simple noise reduction.
Large rooms with heavy airflow demands may overwhelm smaller fans that were never designed for the space. A fan working too hard often develops vibration problems earlier because the motor constantly pushes near its limit. Matching blade size and airflow strength to the room creates steadier long-term performance. Proper fan sizing reduces unnecessary wear and annoying sound issues.
Decorative style matters too, honestly. Some older fans include bulky glass kits, thin blade brackets, or outdated mounting systems that naturally create more movement and rattling. Newer designs often simplify those weak points with steadier blade support and quieter motor housings. A calmer room starts with a fan that feels balanced instead of strained every time it spins.
Vehicle owners dealing with dim rear lighting during nighttime repairs or garage work can also upgrade visibility with led tail light bulbs that produce brighter and more consistent illumination in low-light spaces.


Best Small Flush Mount Ceiling Fans 2026 Ultimate Picks

Best Smart Ceiling Fan India 2026 For Effortless Comfort

Best Smart Ceiling Fans with Lights for 2026: Top Picks

Best Smart Home Non Ceiling Fans 2026 For Ultimate Comfort

Best Outdoor Misting Ceiling Fan 2026 For Ultimate Comfort

Best Ceiling Fans With Lights For Vaulted Ceilings 2026 Top Picks

Best Outdoor Ceiling Fans For Porch 2026 With Style And Breeze

Best WiFi Enabled Ceiling Fan 2026 For Effortless Comfort





