
The Ultimate Guide on How to Make Black Light Posters
There's a certain thrill that comes with the process of making black light posters. It's a form of art that gives you the chance to shine, literally and figuratively! At the crossroads of innovation and tradition, making black light posters is a journey, an exciting exploration of color, contrast, and luminous creativity. As you learn how to make black light posters, you'll delve into a unique artistic universe, finding new ways to express your ideas and vision. Whether you're a seasoned artist looking for a new medium or a beginner exploring various art forms, this guide will help you unearth the secrets and techniques to create stunning black light posters.
1. Plunging Into The Dark: The Science of Black Light
The core principle behind the enchanting display of black light posters lies in the science of ultraviolet light. When normal light strikes an object, we see the reflected light that falls within the visible spectrum. However, when ultraviolet light, invisible to the human eye, hits certain materials, they glow, or fluoresce, in a process known as phosphorescence.
This phenomenon is the secret behind black light posters. Ultraviolet light, often termed as black light, shines on the special ink used in these posters, making them emit a glow that creates an ethereal visual spectacle. The energy absorbed by the special inks is emitted in the form of visible light, creating the iconic neon or fluorescent display.
However, for the uninitiated, the first step toward creating an eye-catching black light poster starts with the essential materials. One needs the right tools to weave magic under black light. So, what exactly does one need to make this happen?
2. Gathering the Glow: Essential Materials For Black Light Posters
The art of creating black light posters starts with selecting the right kind of materials. First and foremost, the backbone of the poster - the paper - should be a white or light-colored matte surface, to enhance the phosphorescent glow. The smoother the surface, the better the poster quality, as the special ink won't bleed.
Then comes the main attraction, the black light reactive ink. These are special paints or markers that react under ultraviolet light. They come in a variety of colors, typically neon or fluorescent, which are highly reflective under black light. These paints are easily available in the market, either as liquid paints or as markers.
However, creating the perfect black light poster does not stop at just the paper and the ink. One also needs a source of black light, like a UV lamp or a black light bulb. These sources emit light in the UV range, which is then absorbed and re-emitted by the reactive ink.
3. Crafting the Vision: Designing Your Black Light Poster
While materials provide the foundation, it's the creative design that breathes life into a black light poster. The very first step is to choose a theme or concept. The theme could range from abstract patterns to specific images, depending on your preference. The key is to create a design that would be enhanced by the glow of black light.
Drawing out the design should be done with care, keeping in mind that certain colors will pop out more under the UV light. It's also crucial to test your design under a black light before finalizing it. This way, you can make necessary adjustments to ensure that the overall effect is as intended.
It's also crucial to be mindful of color placement and color interaction. Colors that glow vibrantly under black light can create stunning contrasts and effects. However, too much of the same color can cause a washing out effect, diluting the impact.
4. Brush and Black Light: Painting the Poster
Once the design is finalized, it's time to bring it to life with UV reactive inks. To start, it's always advisable to paint the lighter colors first and gradually work towards the darker ones. This approach helps in maintaining the intensity of the colors and reduces the chances of colors getting mixed up.
Remember that these inks might look different under normal light compared to under black light. Therefore, periodically turning off the lights and checking your progress under a black light is crucial. It allows for immediate adjustments and can help maintain the balance and intensity of the colors.
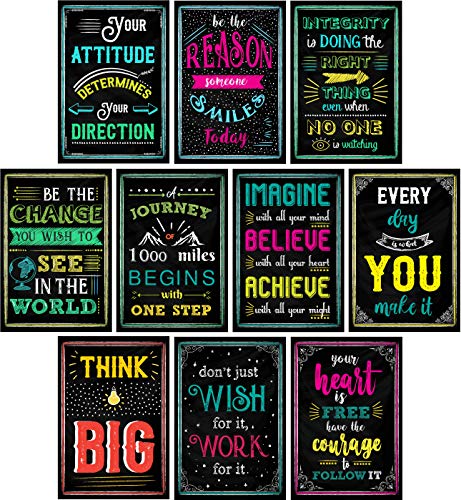
Once your painting is complete, let it dry thoroughly. Then, hang it up and light it with the UV light source. The black light will cause your poster to glow brilliantly, making your artwork come to life.
5. Spotlight Under The Shadows: Displaying Your Black Light Poster
Once the painting process is complete, the final step is displaying your masterpiece. The black light poster should ideally be placed in a darker area, where the effects of the UV light can be fully appreciated without interference from other light sources.
To enhance the vibrancy of the poster, a specific arrangement of the black lights could be employed. Lights can be placed at various angles to create an overall balanced illumination. It's also beneficial to adjust the distance of the light source from the poster to control the intensity of the glow.
With the right tools, materials, and a dash of creativity, anyone can create a visually mesmerizing black light poster. Whether you're an art enthusiast looking to try something new, or you're simply intrigued by the glow of these luminescent artworks, making a black light poster is a fun and rewarding experience.
Continue reading:

Best Black Light For Pet Urine Detection 2026 Spot Hidden Stains Fast

Best Black Light Bulbs For Party 2026 Ultimate Glow Picks

Best Black Track Lighting 2026 For Sleek Illumination

Best Plug In Track Lighting With Power Cord 2026 Top Selection

Best Incandescent Black Light Bulbs 2026 For Ultimate Glow

Best Fluorescent Black Light Bulbs: Top Picks of 2026

Best Black Booty Head Light 2026 for Powerful Night Vision
Best Black Light Fixtures - Top Picks for 2026





