
How To Measure A Ceiling Fan For Replacement Right
How To Measure A Ceiling Fan For Replacement sounds simple until the tape measure comes out and suddenly nothing lines up the way it should. One wrong measurement can leave blades scraping too close to walls, airflow feeling weak, or the entire room looking awkward. Plenty of people assume every ceiling fan fits the same way, then realize halfway through installation that ceiling height, room width, and blade span actually matter a lot more than expected. A replacement fan should improve comfort, not create another home project headache.
Ceiling fans affect more than airflow. They shape how a room feels, how balanced the ceiling looks, and even how lighting spreads across the space. A fan that's too small often disappears visually while struggling to circulate air. A fan that's oversized can dominate the room and make the ceiling feel lower than it is. That's why accurate measurements matter before clicking the buy button or hauling a new box home.
Most sizing frustrations happen because measurements get rushed. People often measure blade tips incorrectly or ignore ceiling clearance altogether. Then comes the classic moment: the new fan arrives, but the downrod hangs too low over the dining table or blocks cabinet doors nearby. Yikes, that's an expensive lesson. Paying attention to blade span, mounting height, and room dimensions prevents those problems before they start piling up.
Room layout also changes what works best. Open-concept living areas need different airflow coverage than compact bedrooms or narrow offices. Vaulted ceilings add another wrinkle because angled mounting systems sometimes require additional hardware. Small details like sloped ceilings, beam placement, or low ceiling clearance can completely change replacement options. That's where practical measuring steps save both money and patience.
Lighting placement deserves attention too. Some ceiling fans sit directly above beds, tables, or seating areas where glare becomes annoying fast. A poorly measured replacement may cast shadows in weird spots or feel visually off-center once installed. Getting dimensions right creates a cleaner, more balanced look that feels intentional instead of patched together. Honestly, those visual details stick out every single day once the fan is installed.
How To Measure A Ceiling Fan For Replacement also helps avoid airflow disappointment. Bigger isn't always better. Certain rooms benefit from moderate blade spans that move air evenly without overwhelming smaller spaces. Blade pitch, motor housing size, and ceiling height all influence performance. Smart measurements create better circulation while keeping the room comfortable year-round instead of turning it into a wind tunnel.
Then there's the installation side of things. Existing electrical boxes, mounting brackets, and canopy dimensions don't always match newer fan designs. Measuring carefully before replacement reduces surprises during setup and cuts down on unnecessary return trips. Nobody wants to stand on a ladder halfway through installation realizing the fan canopy doesn't fully cover the old ceiling mark. A little preparation goes a long way.
How To Measure A Ceiling Fan For Replacement
A shaky old fan can make a room feel tired, noisy, and a little neglected. Replacing it sounds easy until the tape measure hits the ceiling and the old blade span doesn’t match the size printed in a product listing. That’s where how to measure a ceiling fan for replacement becomes the difference between a smooth swap and a frustrating return. A good measurement plan keeps airflow, ceiling clearance, and room balance from turning into guesswork.
Start With The Existing Fan Size
The old fan gives the first clue, even if it isn’t the right size for the room. Measure from the center of the motor housing to the tip of one blade, then double that number to get the blade span. For fans with an odd number of blades, measure from one blade tip across the center to the farthest opposite point. That number matters because most ceiling fans are sold by diameter, not by single blade length.
Plenty of replacement mistakes happen because someone measures only one blade and shops with that number. A 26-inch blade does not mean the fan is 26 inches wide. It usually means the fan could be close to a 52-inch blade span, depending on the design. That little mix-up can throw off room proportion fast.
Write the measurement down before removing anything. Also note whether the fan has a light kit, a long downrod, or a flush-mount canopy. Those pieces affect the total hanging depth and can change which replacement model fits best. A fan that looks similar online may sit lower, wider, or bulkier once installed.
A practical rule from many installers is simple: “Measure the fan, then measure the room before buying.” It sounds obvious, but skipping the second step causes most headaches. The existing fan might have been too small from day one, especially in larger bedrooms, vaulted living rooms, or open layouts. Treat the old fan as a clue, not the final answer.
Measure The Room Before Choosing Blade Span
Room size controls how much air the fan needs to move. A small bedroom usually doesn’t need the same blade span as a wide living room. Measure the room’s length and width, then multiply them to estimate the square footage. This gives a better starting point than eyeballing the space and hoping the fan “looks about right.”
A fan that’s too small can spin all day and still leave warm corners untouched. A fan that’s too large may crowd the ceiling and make the room feel visually heavy. The goal is balanced airflow, not just a bigger fan. For a calmer, cleaner look, match the fan to the space rather than chasing the largest size available.
Bedrooms, offices, and breakfast nooks often feel better with moderate spans that circulate air without creating a drafty blast. Living rooms, covered patios, and open family spaces may need wider blades or multiple fans. A narrow room can be tricky because the fan needs wall clearance on both sides. That’s why wall-to-wall measurement matters as much as square footage.
Use the room layout as a reality check. Beds, tables, cabinets, and tall shelves can make a fan feel bigger than the number on the box suggests. For rooms with a more polished ceiling style, compare your options with contemporary bedroom ceiling fans to see how blade span and design can work together without crowding the space. A replacement should feel built into the room, not dropped in as an afterthought.
Check Ceiling Height And Safe Clearance
Ceiling height can make or break the replacement. Measure from the floor to the ceiling directly below the fan location. Most setups aim to keep the blades at least 7 feet above the floor, which helps reduce head-clearance issues in everyday use. That number becomes especially important in bedrooms, hallways, and rooms with low ceilings.
Low ceilings usually call for a flush-mount fan or a low-profile design. Standard downrods can hang too low and make the room feel cramped. A fan that looks sleek in a showroom can feel awkward if it drops too close to eye level. So, before picking a style, measure the full vertical space from ceiling to floor.
Higher ceilings often need a longer downrod so the fan can move air where people actually sit and stand. A fan mounted too close to a tall ceiling may look fine but circulate air poorly near the floor. That’s a common frustration in vaulted rooms and two-story living areas. The right downrod length helps bring airflow into the usable part of the room.
Measure the current downrod from the ceiling canopy to the motor housing. Then measure from the floor to the lowest blade edge. These two numbers tell you whether the current setup feels comfortable or needs adjustment. If the old fan always felt weak, mounting height could be part of the problem.
Measure Blade Clearance From Walls And Furniture
Blade clearance keeps the fan safe, quiet, and visually comfortable. Measure from the blade tip to the nearest wall, cabinet, beam, or tall furniture piece. A cramped fan may wobble more noticeably, and even if it doesn’t hit anything, it can still look wrong. Clear space around the fan supports steady airflow and cleaner movement.
Rooms with built-ins need extra attention. Tall wardrobes, bunk beds, open cabinet doors, and shelving can interfere with the fan’s sweep. A replacement fan with the same listed span may still have a different motor shape or blade angle. That’s why measuring the full fan footprint beats relying on blade span alone.
Ceiling beams create another sneaky problem. A fan centered between beams may need a smaller span than the room size chart suggests. Otherwise, the blades can feel squeezed, and airflow may bounce unevenly. In that case, a slightly smaller fan with a better motor can feel more comfortable than a wider fan stuffed into a tight bay.
Keep light fixtures in mind too. Chandeliers, recessed lights, and track lighting can make a fan feel cluttered if everything sits too close together. A clean replacement plan checks the fan’s width, hanging depth, and nearby fixtures before installation day. The payoff is less visual clutter and fewer “why does this look off?” moments.
Measure The Downrod And Mounting Style
The mounting style affects both appearance and comfort. Look at the current fan and identify whether it uses a flush mount, standard downrod, angled mount, or extended downrod. Measure the downrod length, canopy width, and distance from ceiling to blade. These details help you choose a replacement that keeps the same ceiling clearance or improves it.
Flush-mount fans sit close to the ceiling and work well where headroom is tight. The tradeoff is that airflow can sometimes feel less forceful because the blades sit nearer to the ceiling surface. Standard downrods usually provide better air movement in rooms with average or taller ceilings. That small gap above the blades helps the fan pull air more effectively.
Sloped ceilings need a careful angle check. Some ceiling fans require a special angled adapter or a longer downrod to hang straight. Measure the slope if the fan sits on a vaulted or angled ceiling. A replacement that doesn’t support the ceiling angle can tilt badly, wobble, or simply refuse to install correctly.
The canopy size matters more than most people expect. An old fan can leave a paint ring or ceiling mark that a smaller new canopy won’t cover. Measure the current canopy’s diameter before shopping. A slightly larger canopy can hide old marks and make the replacement look cleaner without repainting the ceiling.
Match The Electrical Box And Fan Weight
The ceiling box is easy to ignore because it hides behind the canopy. Still, it plays a major role in a safe replacement. A ceiling fan needs a box rated for fan support, not just a light fixture box. The difference matters because a spinning fan creates movement, vibration, and steady weight stress.
Remove the canopy only after power is off at the breaker. Look for markings on the box that identify it as fan-rated. If the box looks loose, old, plastic, or unsupported, stop and plan for a proper replacement box. A solid fan-rated box helps prevent wobble and keeps the installation from turning risky.
Measure the box opening and note how the bracket attaches. Some older fans use mounting hardware that doesn’t match newer brackets. A new fan may include its own bracket, but the ceiling box still needs to accept it securely. This is where mounting compatibility saves time and frustration.
Light kits can add weight too. A fan with a heavy glass shade or large integrated light may put more load on the mount than a simple fan-only model. Compare the replacement’s listed weight with the ceiling box rating whenever possible. For a separate home detail that often gets overlooked, upgrade small lighting projects with scentsy light bulb size guidance so the bulb fit doesn’t become another annoying mismatch.
Record Light Kit And Control Details
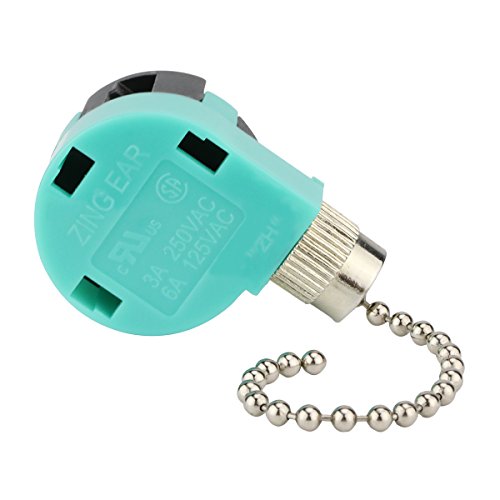
A ceiling fan replacement isn’t only about blade size. Controls, lighting, and wiring can change the whole project. Check whether the current fan uses pull chains, wall controls, remote control, or smart controls. These details affect whether the new fan connects smoothly or needs extra electrical work.
Measure the light kit height if the fan includes one. Some replacement fans have larger glass shades or deeper LED housings that hang lower than expected. In a low-ceiling room, even a few extra inches can feel annoying. That’s why total hanging height should include both blades and lights.
Look at the number of wall switches connected to the old fan. One switch may control both fan and light together, while two switches may separate them. Newer remote fans can sometimes work differently, which may change daily convenience. Matching the control setup helps avoid that “Wait, why doesn’t this switch work anymore?” moment.
Bulb type also matters if the replacement fan uses replaceable bulbs. Some compact light kits need specific bulb shapes or wattage limits. Using the wrong bulb can cause poor fit, weak light, or trapped heat. A clean replacement plan covers fan size, lighting depth, and control compatibility before the old fan comes down.
Avoid The Most Common Measuring Mistakes
The biggest mistake is measuring only the old fan and ignoring the room. That creates a copy-and-paste replacement, which may repeat the same airflow problems. A room that always felt stuffy might need a wider fan, better blade pitch, or a better mounting height. Replacement is a chance to fix what never worked well.
Another common slip is forgetting the lowest point of the fan. The blade height might pass the clearance test, but the light kit may hang lower. In a bedroom or dining area, that can feel awkward fast. Measure from the ceiling to the lowest visible point, not just the motor housing.
People also forget nearby doors and cabinets. A closet door, tall cabinet door, or bunk bed can sit inside the fan’s visual zone even if it doesn’t touch the blades. That cramped look can make the whole room feel poorly planned. Measuring nearby obstacles gives the new fan room to breathe.
Small side projects can distract from the main replacement, especially in homes with multiple lighting fixes happening at once. Keep fan measurements separate from unrelated repairs, and for a different household issue, use blue light for toenail fungus guidance only as its own focused task. Mixing projects sounds efficient, but careful measuring works best when the ceiling fan gets full attention.
Best Way To Measure Ceiling Fan Size And Fit
Replacing a ceiling fan usually starts with confidence and ends with someone staring at the ceiling wondering why the new fan suddenly feels oversized, too low, or strangely noisy. Measurements solve most of those problems before the box even gets opened. A well-planned replacement keeps air circulation, visual balance, and daily comfort working together instead of fighting each other. Small details matter more than most people expect.
Check Airflow Needs Before Buying
Airflow problems often have less to do with the fan brand and more to do with fan placement and size. A replacement fan should move air evenly across the room instead of blasting one area while leaving the rest stale. That balance depends heavily on blade span, ceiling height, and the shape of the room itself. Measuring first prevents disappointment later.
Large open rooms usually need wider airflow coverage, especially in spaces connected to kitchens or hallways. Smaller rooms can feel uncomfortable with oversized fans because the air movement becomes too direct. That constant draft gets annoying quickly, particularly near beds or desks. A properly measured fan keeps airflow comfortable instead of distracting.
Blade pitch also affects performance. Two fans with the same diameter can move air very differently depending on blade angle and motor strength. A flatter blade design may look sleek but struggle in taller rooms. That’s why air movement efficiency matters just as much as fan width.
Ceiling height changes airflow behavior too. Fans mounted too close to the ceiling often lose circulation strength because the blades can’t pull enough surrounding air. A slightly longer downrod sometimes fixes that issue immediately. Those little adjustments create a room that feels cooler without forcing the fan to run at maximum speed all day.
Pay Attention To Noise And Wobble Risks
An old fan that rattles or hums usually leaves people nervous about buying another noisy model. Still, many wobble problems begin with poor measurements rather than bad motors. A fan squeezed too close to walls, beams, or uneven ceilings may vibrate more noticeably over time. Proper spacing supports smoother operation and steadier blade rotation.
Measure the distance between the blade tips and nearby obstacles carefully. Tight spaces can create uneven airflow resistance, especially near angled ceilings or tall furniture. Even if the blades technically clear everything, the fan may still feel visually cramped. A little extra breathing room improves both appearance and performance.
Ceiling boxes deserve another quick inspection before installation starts. Loose mounting hardware can amplify vibration even with a balanced fan. Secure support matters because spinning blades create ongoing movement stress that ordinary light boxes weren’t built to handle. A stable mount helps maintain quiet performance over the long haul.
Motor housing size also changes the overall feel of the fan. Some compact-looking fans hide bulky motor casings that add visual weight and sound. Reading the full dimensions instead of focusing only on blade span helps avoid surprises. A fan should fit the room naturally rather than dominate it the second someone walks in.
Use Room Shape To Guide Fan Placement
Square rooms tend to make fan placement easier because the airflow spreads evenly in all directions. Long or narrow rooms can be trickier. A fan centered perfectly in the ceiling may still leave one end of the room warmer than the other. Measuring the usable space instead of relying only on room dimensions creates better air distribution.
Furniture layout changes fan effectiveness more than people realize. Large shelving units, canopy beds, and sectional sofas can interrupt airflow patterns. A fan positioned directly above oversized furniture sometimes loses circulation strength near the floor. Small placement adjustments can improve comfort without changing fan size.
Open-concept spaces often need separate airflow zones. One oversized fan in the center may not circulate air evenly through connected dining and seating areas. In some layouts, two moderate-size fans perform better than one massive fan. That tradeoff keeps the room feeling balanced instead of visually overloaded.
Decor style matters too. Bulky blades in a compact room can feel heavy even if the airflow works well. For homeowners comparing styles before replacement, explore craftmade ceiling fans good options to see how different housing shapes and blade styles affect room balance. A fan should complement the ceiling instead of stealing all the attention.
Measure Lighting Coverage Alongside Fan Size
Ceiling fans with integrated lights can completely change how a room feels after dark. A replacement fan that hangs lower or uses a larger light kit may cast shadows differently than the old fixture. That’s why measuring the fan alone isn’t enough. The lighting spread matters just as much as airflow.
Dining rooms and bedrooms especially benefit from balanced lighting placement. A fan mounted too low over a table may create harsh glare directly at eye level. In bedrooms, oversized light kits can feel visually cluttered against lower ceilings. Small measurement checks prevent those everyday annoyances.
Light output also changes based on blade size and motor housing depth. Larger blades sometimes block light distribution in subtle ways, particularly with dimmable LED kits. Looking at both blade span and light placement helps maintain a cleaner lighting pattern across the room. Comfort comes from those little details working together.
Seasonal decorating can also interfere with lighting and airflow if space gets tight around the ceiling. During holiday setups, oversized decorations near the fan area may compete for visual space. To simplify outdoor decorating projects separately, compare setups with programmable outdoor christmas lights so indoor fan placement stays uncluttered and practical.
Think About Daily Cleaning And Maintenance
Ceiling fan measurements affect maintenance more than most people expect. Fans mounted too high become difficult to clean regularly, especially in rooms with vaulted ceilings. Dust buildup on blades can reduce efficiency and create balance problems over time. Practical placement helps keep routine maintenance manageable.
Blade finish matters too. Dark blades often show dust faster under direct lighting, while lighter finishes may hide buildup longer. That doesn’t mean one finish is better. It simply changes how often the fan may need attention. A replacement fan should fit the room’s maintenance habits as much as its style.
Flush-mount fans can sometimes make blade cleaning awkward because there’s less space between the ceiling and blades. Taller ceilings may require extension poles or ladders for regular upkeep. Thinking ahead about cleaning access prevents frustration months after installation. Comfort includes the ability to maintain the fan without turning it into a weekend project.
Motor vents should remain easy to access as well. Some decorative fans include deep housings or enclosed details that trap dust faster. Measuring the fan’s hanging depth and surrounding clearance helps maintain proper airflow around the motor. A cleaner motor usually stays quieter and runs more consistently.
Plan For Seasonal Comfort Changes
Ceiling fans don’t work only during hot weather. Reversible motors help circulate warm air during colder months, especially in rooms with tall ceilings where heat rises quickly. Measuring the replacement fan carefully helps maintain year-round comfort instead of focusing only on summer cooling.
Rooms with strong sunlight exposure may need more airflow support during warmer months. South-facing bedrooms and upper-floor spaces often trap heat longer into the evening. A properly sized fan helps move warm air without forcing the HVAC system to work harder than necessary. That balance creates a more stable indoor feel.
Winter airflow works differently. A fan mounted too high may struggle to redistribute warm air effectively near the ceiling. The correct downrod length improves circulation without creating uncomfortable drafts below. Small placement details influence comfort through every season, not just the hottest weeks of the year.
Humidity also changes how airflow feels inside a room. Bathrooms, laundry rooms, and covered patios may benefit from moisture-resistant fan designs with carefully measured clearance. A replacement fan should support the environment it lives in rather than simply matching the previous model’s dimensions.
Avoid Style Trends That Ignore Room Scale
Some ceiling fan trends look great online but feel awkward once installed in a real room. Ultra-wide blades, oversized housings, or dramatic industrial finishes can overwhelm smaller spaces quickly. Measuring the room carefully keeps style decisions grounded in practical reality. A fan should feel intentional, not oversized for the sake of appearance.
Minimalist fans often hide their true size because the blades appear thinner in product photos. Meanwhile, heavily decorative fans may occupy more visual space than expected even with smaller spans. Looking at both physical measurements and visual weight helps create a better fit. Balance matters more than trend-chasing.
Blade color affects perception too. Dark finishes can make blades appear larger against white ceilings, while lighter finishes blend in more softly. In compact rooms, that visual difference changes how open the ceiling feels. The right replacement fan should support the room’s proportions instead of shrinking the space visually.
Motor housing shape deserves attention as well. Rounded housings often feel softer and less bulky than square industrial designs. Measuring carefully before installation reduces the risk of ending up with a fan that dominates the room visually even if the airflow performs well. Comfort and appearance should support each other naturally.
Double Check Measurements Before Installation Day
The final measurement review saves more frustration than almost any other step in the process. Recheck the room dimensions, blade clearance, ceiling height, and mounting depth before ordering the replacement fan. One quick review can catch mistakes that would otherwise lead to returns or delayed installation. Those last-minute checks protect both time and money.
Keep a simple measurement list nearby during shopping. Product pages often include detailed dimensions for blade span, motor housing width, canopy diameter, and hanging depth. Comparing those numbers against the room helps eliminate assumptions. A fan that “looks close enough” online may still fit very differently in person.
Packaging dimensions can be misleading too. Some boxes advertise blade span prominently while hiding the total hanging depth deeper in the specifications. Reading the full measurements helps avoid surprises once the fan arrives. That extra minute of checking prevents a lot of ladder-climbing frustration later.
Accurate measurements create a smoother replacement from start to finish. Better airflow, quieter operation, cleaner ceiling proportions, and safer clearance all begin with a tape measure and a little patience. A carefully measured ceiling fan doesn’t just cool the room better. It makes the entire space feel more comfortable every single day.


Best Small Flush Mount Ceiling Fans 2026 Ultimate Picks

Best Smart Ceiling Fan India 2026 For Effortless Comfort

Best Smart Ceiling Fans with Lights for 2026: Top Picks

Best Smart Home Non Ceiling Fans 2026 For Ultimate Comfort

Best Outdoor Misting Ceiling Fan 2026 For Ultimate Comfort

Best Ceiling Fans With Lights For Vaulted Ceilings 2026 Top Picks

Best Outdoor Ceiling Fans For Porch 2026 With Style And Breeze

Best WiFi Enabled Ceiling Fan 2026 For Effortless Comfort





