
How to Open a Table Fan Without Breaking It
How to open a table fan sounds simple at first, right? Then the screws won’t budge, the front grill feels stuck, and suddenly that “quick cleanup” turns into a sweaty guessing game. Plenty of people end up forcing plastic clips or tugging at the blades too hard, only to hear that awful crack nobody wants to hear. A little patience and the right sequence make a huge difference.
Dust buildup inside a fan isn’t just ugly. It slows airflow, creates rattling noises, and makes the motor work harder than it should. That stale smell floating through the room usually comes from dirt packed around the blades and motor housing. Opening the fan the proper way helps restore better airflow, quieter performance, and smoother spinning without unnecessary headaches.
Some table fans come apart easily, while others hide screws beneath stickers, caps, or decorative panels. That’s where frustration creeps in. One wrong twist can bend the grill frame or damage blade locks that are surprisingly delicate. Careful handling matters because those small plastic parts don’t always snap back into place once broken.
Another thing people often overlook is blade direction and lock positioning. A fan may look straightforward on the outside, but manufacturers use different mounting systems depending on the model. Some blades loosen clockwise while others release the opposite way, and honestly, that catches many people off guard. Paying attention to those little details saves time and avoids unnecessary force.
Safety plays a bigger role than most expect. Fans store dust around the motor vents, wiring, and oscillation mechanism, so unplugging the unit and letting it sit briefly before opening is a smart move. Nobody wants accidental blade movement or exposed electrical parts causing trouble halfway through cleaning. Simple precautions go a long way.
Then there’s the reassembly part, which trips people up more often than opening the fan itself. Misaligned grills can create wobbling noises, and loose blade caps may reduce spinning efficiency. Keeping screws organized during disassembly prevents that annoying final moment where one mystery screw sits on the table with nowhere obvious to go. Little habits make repairs and cleaning much smoother.
How to open a table fan becomes much less stressful once the process feels familiar. A soft cloth, basic screwdriver, and steady hands usually handle the job just fine. No fancy toolbox needed. The real trick lies in slowing down, spotting hidden fasteners, and avoiding the urge to pry things apart too aggressively.
Fans used daily collect more grime than most people realize, especially near kitchens, windows, or humid rooms. Sticky dust clings to the blades and restricts airflow over time. Regular maintenance helps reduce motor strain and keeps the fan running more evenly during hot nights when dependable cooling matters most. A clean fan simply feels better to use.
How To Open A Table Fan
A weak breeze, a rattling grill, and a blade coated with gray fuzz can make a table fan feel older than it really is. The tricky part isn’t cleaning the dust you can see, it’s getting inside without snapping a clip, stripping a screw, or pulling on the wrong plastic ring. That’s where how to open a table fan becomes less of a quick guess and more of a careful little routine. Done slowly, the job feels simple, safe, and honestly pretty satisfying.
Table Fan Opening Basics
How to open a table fan starts with one boring move that saves a lot of trouble: unplug the fan. Not switch it off. Not move it to low speed. Fully unplug it, because the blade area, speed switch, and motor housing all sit close enough together that basic safety can’t be treated like background noise.
Set the fan on a flat table with enough room for screws, caps, and the front grill. A towel underneath helps keep the plastic from sliding around and protects the table from dusty smears. This tiny setup step matters because loose parts love to roll away the second you stop paying attention. Nobody wants to crawl under a cabinet for one missing screw.
Most table fans open from the front, but the locking style changes by brand and age. Some use side clips around the grill, some use a center ring, and some hide small screws behind the grill frame. Before pushing anything, scan the outer rim and center cap because hidden fasteners are the usual reason people crack plastic parts.
A basic screwdriver, soft cloth, small bowl, and old toothbrush usually cover the job. Fancy tools aren’t needed for most household table fans. The real tool is patience, and yeah, that sounds cheesy, but it keeps the fan from becoming a pile of bent plastic. Slow pressure beats brute force every single time.
Check The Grill First
The front grill is the first barrier, and it often tells you how the fan was built. Look around the edge for clips, screws, or a locking band. If clips are present, open them one by one instead of pulling the entire grill forward at once. That keeps the frame from twisting and helps preserve clip strength.
Older fans may have metal grills with small latches that feel stiff after years of dust and humidity. Don’t yank them. Wiggle each latch gently, then support the opposite side with your other hand so the frame doesn’t flex too far. A bent grill can rub against the blade later, creating annoying scraping sounds.
Plastic grills need even more care. Sunlight, heat, and age can make plastic brittle, especially near the hinge points. If a clip feels stuck, press inward slightly before lifting it, because many clips lock under tension. That tiny movement often releases stubborn plastic tabs without drama.
Some fans use a circular retaining ring around the outside of the grill. Find the small screw or latch on that ring before trying to remove it. Once the ring loosens, keep one hand on the front grill so it doesn’t fall forward. That simple habit protects the blade and saves the grill from hitting the floor.
Small household fixes can overlap in weird ways, especially with terms that sound unrelated. For a separate quick read on slang meanings, compare the phrase through what is a flashlight slang before mixing repair language with casual online wording.
Remove The Blade Cap Carefully
After the front grill comes off, the blade cap sits in the center like it’s daring you to turn it the wrong way. Many table fans use a reverse-threaded cap, which means the direction may feel backward. Check for tiny arrows, words like “lock” and “loosen,” or molded markings on the cap. Those markings are small, but blade cap direction matters a lot.
Hold the blade gently near the center, not at the tips. The tips flex more easily, and too much pressure can throw the blade off balance. A wobbly blade doesn’t just look bad, it can make the fan shake across the table. Blade balance keeps the fan quieter after reassembly.
If the cap feels stuck, don’t grab pliers right away. Wrap the cap with a cloth and try turning again with steady pressure. Pliers can chew up soft plastic and leave ugly grooves that make the cap harder to use later. A cloth gives better grip while protecting the plastic lock nut.
Once the cap comes off, slide the blade forward slowly. Some blades sit snugly on a flat-sided shaft, so they may need a small wiggle. Pull straight forward instead of bending the blade side to side. This keeps the motor shaft from taking unnecessary stress.
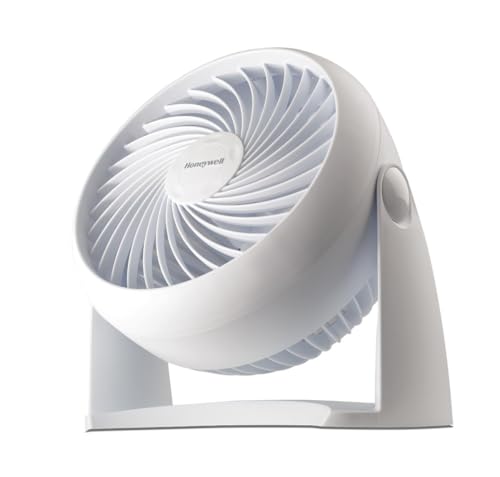
Handle Screws And Small Parts
Screws look harmless until three different sizes land in the same pile. Use a small bowl, jar lid, or folded paper to separate grill screws, rear cover screws, and base screws. This sounds fussy, but organized screws make reassembly faster and cleaner. One misplaced screw can leave the housing loose or misaligned.
Some table fans hide screws beneath stickers, rubber caps, or decorative badges. Press around the back housing and look for circular covers that don’t match the surrounding plastic. If a panel refuses to move after visible screws are removed, assume another screw is hiding somewhere. Forced panels usually lead to broken tabs.
A magnetic screwdriver helps, but a regular one works fine if you move slowly. Press firmly into the screw head before turning so the tip doesn’t slip and strip the groove. Stripped screws are a pain because they turn a simple cleaning job into a repair problem. Good pressure is better than fast twisting.
Take a quick photo before removing parts from the back housing. That one photo can answer where a washer sat, which direction a bracket faced, or how a cord guide was routed. No shame in using your phone as a memory backup. Visual reference beats guessing after the parts are already scattered.
Open The Rear Housing
The rear housing protects the motor, switch wiring, and oscillation parts. Open it only if the fan needs deeper cleaning, the speed switch feels gritty, or the motor vents are packed with dust. For a basic blade wash, you may not need to go this far. Deeper access should match the actual problem.
Remove the visible rear screws and place them in a separate group. Then check whether the housing halves use plastic tabs along the seam. Press near the seam with your fingers before using any tool, because many covers loosen with gentle pressure. Metal tools can leave marks, so finger pressure is the safer first move.
If the cover starts to open on one side but not the other, stop and inspect the stuck area. A hidden screw near the handle or oscillation knob may still be holding the cover. Pulling harder can snap an internal post, and those posts are what keep the motor housing tight. Housing alignment depends on those small supports.
Watch the power cord as the rear cover loosens. Some models route the cord through a molded channel, and pulling the cover too far can tug on the wiring. You don’t need to disconnect wires for normal cleaning. Keeping wires undisturbed reduces the chance of electrical connection issues later.
Sound in a room changes how noticeable a fan feels, especially if the fan sits near a desk or bed. For a separate home setup upgrade, explore best wireless speakers with remote control to keep entertainment controls away from dusty fan work areas.
Clean Inside Without Causing Damage
Dust inside a table fan usually gathers around the blade hub, rear grill, motor vents, and oscillation neck. Use a dry brush first before wiping anything damp. Dry dust comes off easier, while wet dust can turn into gray paste. Dry cleaning first keeps the mess under control.
A slightly damp cloth works for blade surfaces and outer plastic, but keep moisture away from the motor and switch. Motors don’t need a bath. They need airflow and clean vents. Wipe the housing carefully and leave the electrical area dry because moisture control is non-negotiable.
For stubborn grime on blades, remove the blade fully and wash it separately if the design allows. Dry it completely before reinstalling it. Even a small amount of leftover water near the hub can drip toward the motor once the fan spins. Full drying helps protect the internal parts.
Use an old toothbrush to loosen dust from grill gaps and vent openings. Brush outward so dirt falls away from the motor instead of deeper inside. A handheld vacuum nearby can catch loose dust, but avoid pressing the nozzle against delicate wiring or foam pieces. Gentle cleaning keeps the fan intact.
Avoid Common Opening Mistakes
The biggest mistake is forcing the front grill before every latch is open. That move bends metal grills and cracks plastic ones. If the grill doesn’t release evenly, one clip is probably still locked. Even release prevents warped frames and blade rubbing.
Another common mistake is twisting the blade cap in panic mode. Some caps loosen clockwise, which feels wrong if you’re used to regular screws. Look for arrows before applying more force. Direction marks exist for a reason, even if they’re annoyingly tiny.
People also forget that the rear grill often stays attached to the motor housing with its own nut or screws. Pulling it forward without removing those fasteners can stress the motor shaft area. Take one step at a time and let each part tell you what still holds it. Controlled disassembly keeps the job simple.
A table fan isn’t built like a ceiling fan, and the hardware should never be treated the same way. Still, airflow planning around larger rooms can point to different cooling choices, so upgrade the room setup through best high end ceiling fans if a small table fan can’t keep up.
Last, don’t open the motor casing unless there’s a real reason. Cleaning dust from the outside vents is usually enough for routine maintenance. Motor internals can include small washers, bearings, and wiring paths that aren’t friendly to guesswork. Know the limit before turning a cleaning session into a repair project.
Prepare For Smooth Reassembly
Reassembly starts before you remove the first screw. That sounds backward, but it’s true. Laying parts in order helps you reverse the process without confusion. Step-by-step placement turns the final rebuild into a calm routine instead of a guessing game.
Check the blade before sliding it back onto the shaft. Dust near the hub can keep it from seating fully, which may cause wobbling once the fan runs. Align the blade with the shaft shape and push it back gently until it sits flat. Proper blade seating keeps rotation smoother.
Tighten the blade cap snugly, not aggressively. Overtightening can damage threads or make the next cleaning session miserable. The cap should hold the blade securely without crushing the plastic hub. Firm but gentle is the sweet spot.
Attach the front grill only after the blade spins freely by hand. Give it a slow manual turn and listen for scraping. If the blade touches the grill, stop and realign the grill or blade before powering the fan. Free movement is the final check before electricity enters the picture.
Once the grill is locked, plug the fan in and test it on the lowest speed first. Low speed reveals wobble, rubbing, or loose parts without putting much stress on the fan. Then test oscillation if the model has it. Careful testing helps catch small issues before they become noisy problems.
How To Open A Table Fan For Deep Cleaning
Dust has a sneaky way of coming back right after the outside looks clean, especially around the rear grill, blade hub, and motor vents. A fan can look decent from across the room while the inside is packed with lint, pet hair, and sticky grime. After the basic opening steps, how to open a table fan for deeper cleaning comes down to careful inspection, smart cleaning, and putting every part back without creating new noise. The goal isn’t to tear the whole thing apart, it’s to reach the dirty spots without stressing the plastic, wiring, or motor.
Inspect Before Going Deeper
Start by checking what actually needs attention before removing more parts. A dirty blade and front grill don’t always mean the motor housing has to come apart. If the fan spins smoothly and only looks dusty, surface cleaning may be enough. Pushing deeper than needed can turn a simple job into a fiddly repair.
Look through the rear grill with a flashlight and check the motor vents. Thick dust around those openings can trap heat and reduce airflow. A small beam of light makes clogged vents easier to spot, especially on dark plastic housings. Motor ventilation matters because heat is one reason older fans start smelling warm or running weak.
Listen to the fan before opening more sections, if it’s safe to test after the front cleaning. A steady hum usually points to normal operation, while scraping, ticking, or wobbling suggests alignment trouble. Noisy movement often comes from a blade seated poorly or a grill sitting slightly off-center. Sound clues can tell you where to focus next.
Check the oscillation neck too, because dust and old grease often gather where the fan head moves side to side. If the fan jerks during oscillation, the issue may sit in the neck mechanism rather than the blade area. Don’t flood that area with oil or cleaner. Targeted cleaning beats spraying random liquids into moving parts.
Protect The Motor Area
The motor is the one place where a gentle hand really earns its keep. Keep damp cloths away from vents, switches, exposed wires, and the rear housing interior. Water and electricity don’t need a dramatic introduction to cause trouble. Dry motor care should stay at the top of the list.
A soft brush works better than a wet wipe around the motor cover. Brush outward from the vents so dust moves away instead of deeper inside. A vacuum can help catch loose debris, but don’t press hard against the vents. Light suction is safer than aggressive cleaning.
Some people reach for compressed air, and that can help in small bursts. Use short sprays from a reasonable distance, then let dust settle before brushing again. Long blasts can push debris farther into the housing or spin internal parts too fast. Controlled airflow keeps cleaning practical.
If the fan has a burning smell, melted plastic marks, or a switch that sparks, stop cleaning and don’t keep testing it. That moves beyond normal maintenance. A damaged cord, hot switch, or noisy motor bearing needs repair judgment, not more scrubbing. Safety limits matter more than squeezing one more season out of a tired fan.
Clean Blades Without Warping Them
Fan blades look tough, but many are made from light plastic that flexes easily. Wash them with mild soap and a soft cloth instead of rough pads. Scrubbing too hard near the blade edges can leave scratches that collect more grime later. Gentle blade cleaning keeps airflow smooth and reduces wobble risk.
Sticky kitchen dust needs patience because grease holds dirt like glue. Let the blade sit with a damp soapy cloth over the dirty area for a minute, then wipe again. Don’t soak the hub if it has labels, inserts, or metal sleeves. Grease removal works better with slow wiping than harsh scraping.
Dry the blade completely before reinstalling it. Water hiding near the center hub can drip toward the shaft after the fan starts spinning. That’s a tiny detail, but tiny details cause big headaches in small appliances. Complete drying protects the motor area and keeps dust from turning into paste.
Place the blade on a flat surface and check for obvious bends or cracks. A cracked blade shouldn’t go back on the fan because it can wobble, split more, or make the fan unsafe. Slight surface scratches aren’t usually a big deal, but cracks around the hub are serious. Blade condition decides whether cleaning is enough.
Keep The Room Setup In Mind
A table fan often works harder in rooms with poor airflow, steamy bathrooms, or corners where dust collects fast. That’s why the same fan may stay clean in a bedroom but get grimy near a vanity or laundry area. If moisture and salt-air styling are part of the room, compare lighting ideas through bathroom sconces coastal feel so fixtures and airflow choices don’t fight the space. Room conditions affect how often the fan needs cleaning.
Small fans also struggle when they’re asked to cool large spaces. They move air around a desk, bedside table, or small reading corner, but they won’t replace proper room circulation. Expecting too much from a compact fan usually leads to longer run times and faster dust buildup. Realistic airflow expectations keep frustration down.
Outdoor patios and semi-open rooms bring another layer of grit. Dust, pollen, and humidity cling to fan grills more quickly outside than indoors. For larger open-air comfort, compare quiet outdoor ceiling fans before relying on a small table unit to cover a wide seating area. Fan placement can reduce cleaning work more than people expect.
Move the fan away from curtains, loose papers, and plant soil if possible. Airflow pulls particles toward the grill, so dusty corners make the fan dirty faster. A few inches of clearance behind the fan helps it breathe better too. Clear intake space supports stronger airflow and cleaner vents.

Reassemble Without Creating Noise
Reassembly deserves the same calm pace as opening. Slide the blade back onto the shaft in the correct direction and make sure it sits fully against the stop. If the blade feels crooked, remove it and reseat it instead of tightening the cap harder. Proper alignment prevents rattling before it starts.
The blade cap should feel snug, not crushed into place. Overtightening can strip plastic threads or make the blade sit unevenly. A cap that’s too loose can wobble during operation, while one that’s too tight may crack over time. Balanced tightening is the quiet middle ground.
Fit the front grill from the bottom or hinge side first if the design uses a fixed hinge. Then work around the rim and lock each clip evenly. Don’t lock one side completely while the other side floats loose, because that can pull the grill out of shape. Even grill pressure helps stop scraping noises.
Spin the blade by hand before plugging the fan back in. The blade should turn freely without touching the front or rear grill. If you hear a scrape, adjust the grill position or check whether the blade is seated too far forward. Manual testing catches problems safely.
Test Speeds And Oscillation
Start testing on the lowest speed after everything is locked. Low speed makes rattles easier to hear and gives you a safer first check. If the fan shakes right away, turn it off and inspect the blade seating. Low-speed testing keeps small mistakes from getting worse.
Move through each speed setting one at a time. A fan may sound fine on low but buzz on medium or high if the grill is slightly loose. That doesn’t always mean the motor is bad. Often, loose clips or uneven screws are the real culprits.
Turn on oscillation only after the blade test sounds normal. Watch the head move from side to side and listen for clicking near the neck. A little mechanical sound can be normal on older fans, but loud snapping or jerking means something isn’t seated correctly. Oscillation movement should look steady, not forced.
Check the power cord while the fan runs. It should sit naturally without being pinched under the base or pulled tight behind the housing. A strained cord can loosen internal connections over time. Cord placement is easy to miss, but it matters for long-term use.
Know What Not To Open
Some fan parts are better left alone unless repair experience is already in your toolkit. The speed switch box, capacitor housing, and motor casing can include delicate wiring and small parts that don’t forgive guesswork. Cleaning around them is fine. Opening them without a clear reason can create electrical risks.
A fan that hums but won’t spin may have a capacitor issue, seized bearing, or damaged winding. Those problems aren’t solved by pulling the grill off and wiping the blade. Forcing the blade by hand again and again can make things worse. Mechanical faults need a different repair path.
Cracked housings also deserve caution. If screw posts inside the rear cover are broken, the fan may not hold together tightly after cleaning. That can lead to vibration, buzzing, or unsafe movement during use. Structural damage changes the decision from cleaning to replacement or proper repair.
Strong chemical cleaners are another bad bet. Harsh solvents can cloud plastic, weaken clips, or erase printed direction marks near the blade cap. Mild soap, dry brushing, and patient wiping usually handle household grime. Plastic-safe cleaning keeps the fan usable after the dust is gone.
Set A Maintenance Rhythm
A table fan used every day needs more than a once-a-year rescue cleaning. Quick grill dusting every couple of weeks keeps buildup from turning sticky. Deep cleaning can happen less often, depending on room dust, pets, cooking residue, and humidity. Regular maintenance is easier than fighting packed grime later.
Bedrooms usually need lighter cleaning than kitchens or workshop spaces. Grease, fabric lint, sawdust, and pet hair all change how quickly the grill clogs. Watch the airflow instead of following a rigid calendar. Weak breeze is often the first sign that cleaning is overdue.
Keep a small cleaning kit near the fan if it’s used often. A microfiber cloth, soft brush, and small screwdriver cover most routine needs. That little setup removes friction from the task, so it doesn’t become a weekend project every time. Simple tools make repeat care less annoying.
Store the fan covered during long off-seasons if it sits unused. Dust settles into vents even when the fan isn’t running, especially in rooms with open windows. A cloth cover or storage bag keeps the grill cleaner and reduces the next cleaning job. Smart storage helps the fan stay ready instead of turning into a dusty surprise.


Best Small Flush Mount Ceiling Fans 2026 Ultimate Picks

Best Smart Ceiling Fan India 2026 For Effortless Comfort

Best Smart Ceiling Fans with Lights for 2026: Top Picks

Best Smart Home Non Ceiling Fans 2026 For Ultimate Comfort

Best Outdoor Misting Ceiling Fan 2026 For Ultimate Comfort

Best Ceiling Fans With Lights For Vaulted Ceilings 2026 Top Picks

Best Outdoor Ceiling Fans For Porch 2026 With Style And Breeze

Best WiFi Enabled Ceiling Fan 2026 For Effortless Comfort





