
How to Remove a Brake Light Bulb Safely at Home
Knowing how to remove a brake light bulb isn’t just a handy skill, it’s one of those small wins that saves money and avoids unnecessary trips to the shop. A burnt-out brake light can sneak up on anyone, and suddenly you’re dealing with safety concerns, traffic tickets, or annoyed drivers behind you. Fortunately, the process is usually simpler than it looks, even if you’re not particularly car-savvy. With a bit of patience and the right approach, this task becomes straightforward instead of intimidating.
Most vehicles are designed so owners can access the brake light bulb without specialized tools, which is a relief. Still, the details matter, because forcing the wrong panel or twisting the bulb the wrong way can cause cracks or broken clips. Understanding the logic behind the housing, socket, and bulb connection makes all the difference. That knowledge helps you move confidently instead of second-guessing every step.
Another important factor is safety, both for you and the car. Handling bulbs correctly prevents oil residue on the glass, which can shorten bulb life or cause uneven heating. Turning off the power and working in good lighting may sound obvious, yet these small habits prevent most common mistakes. It’s the kind of practical awareness that turns a simple fix into a clean, professional result.
Beyond saving time, learning how to remove a brake light bulb gives you more control over basic car maintenance. You’re no longer dependent on quick-fix services for minor issues, and that confidence adds up over time. Once you’ve done it once, the next replacement feels almost automatic. Suddenly, what seemed mechanical and complex becomes familiar territory.
Why Brake Light Bulb Failure Creates Immediate Problems
A brake light going dark isn’t just a cosmetic annoyance, it’s a direct hit to safety and legality. Drivers behind you rely on that signal to react, and without it, reaction times drop fast, especially in heavy traffic. Studies from road safety agencies often note that rear end collisions spike when signaling is unclear, which puts extra pressure on something as small as a bulb. That’s why knowing how to remove a brake light bulb matters more than most people think.
Beyond safety, there’s the issue of fines and inspections. Many regions treat a broken brake light as a fix it ticket, meaning you’ll still pay in time and hassle even if the penalty isn’t huge. The stress usually comes from not knowing how simple the solution actually is. Once you realize that most vehicles are designed for quick access, the fear melts away.
There’s also the psychological side of it, the feeling of being stuck over a tiny mechanical issue. That frustration can snowball, making people delay a fix that takes minutes. Learning how to remove a brake light bulb turns that frustration into control. It’s a small skill that delivers outsized peace of mind.
Finally, fixing it yourself builds confidence for future car tasks. That confidence often spills into other simple maintenance jobs, saving money over time. Instead of guessing or hoping it’ll last another week, you act decisively. And that decisiveness starts with one clear process.
Tools and Preparation Before You Touch the Housing
Preparation is where most mistakes are avoided, even before you reach the bulb. The good news is that removing a brake light bulb rarely demands fancy equipment. Usually, a screwdriver, a clean cloth, and a bit of patience are enough. Having these ready keeps the process smooth instead of rushed.
Turning off the vehicle and lights is a non negotiable step. Heat builds up quickly in brake light assemblies, and touching a hot bulb risks burns or cracked glass. Waiting a few minutes lets everything cool and keeps your hands safe. This simple pause is one of the most overlooked yet important safety habits.
Clean hands or gloves also matter more than people expect. Oils from your skin can shorten bulb life by creating hot spots on the glass. A clean cloth isn’t just for grip, it’s protection for the new bulb too. Small details like this separate a quick fix from a repeat problem.
It’s also wise to confirm the bulb type before removal. Different vehicles use different sizes, and guessing leads to wasted trips. Some drivers check guides like light bulb size references for clarity, even though the application differs. The habit of verifying before acting saves time and frustration.
Accessing the Brake Light Assembly Without Damage
Opening the brake light assembly can feel intimidating the first time. Panels, clips, and screws all look fragile, and no one wants to break trim pieces. The trick is gentle pressure and observation, not force. Most assemblies are designed to come apart logically, not stubbornly.
In many cars, access comes from inside the trunk or rear hatch. Removing a small panel often reveals the bulb socket immediately. Others require loosening screws from the outside lens, which should be done evenly. Rushing here is the fastest way to crack plastic.
Once exposed, take a second to look before twisting anything. Identifying how the socket locks in place prevents accidental damage to wiring. Usually, a simple quarter turn releases it cleanly. This moment of awareness is key when learning how to remove a brake light bulb properly.
Lighting conditions also play a role in success. Working in a dim garage invites mistakes and dropped parts. A portable light makes everything clearer and calmer. Good visibility reduces stress and keeps small components from disappearing.
Removing the Old Bulb Safely and Cleanly
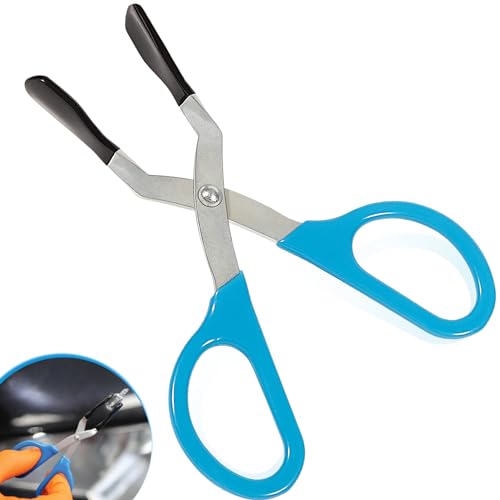
With the socket out, the bulb itself is usually the easiest part. Most brake light bulbs pull straight out or twist gently to release. Resistance often means it needs a slight adjustment, not more strength. Forcing it risks shattered glass.
Using a cloth for grip protects both your fingers and the bulb. If the bulb breaks, shards can linger in the socket, creating a new problem. Slow, controlled movement keeps everything intact. This step defines whether the task feels smooth or stressful.
It’s also smart to inspect the socket once the bulb is out. Corrosion or discoloration can hint at moisture issues. Catching that early prevents future failures. This habit transforms a simple removal into preventative care.
Comparisons help here too. Just like people evaluate indoor lighting options through guides such as affordable grow lights, assessing the condition of components informs better decisions. Awareness leads to smarter fixes, not just quick ones.
Common Mistakes That Cause Repeat Failures
One of the biggest mistakes is rushing the installation of the new bulb, even though removal went fine. Touching the glass with bare hands is a frequent culprit behind early burnout. That invisible oil layer creates uneven heat distribution. Avoiding it extends bulb life significantly.
Another issue comes from not seating the bulb fully. A loose bulb may work briefly, then fail when vibrations kick in. Ensuring a snug fit prevents intermittent lighting issues. This detail often separates a lasting fix from a temporary one.
Ignoring moisture is another silent problem. If water enters the housing, bulbs fail faster and wiring corrodes. Seals should be checked during removal, not after problems appear. Prevention always costs less than repair.
Environmental factors matter too. Just as people seek ways to reduce glare using tips like block fluorescent lights, managing exposure inside your vehicle lighting system improves longevity. Awareness of surroundings and conditions keeps fixes durable.
Confidence Gained From Doing It Yourself
Completing this task builds more than mechanical skill, it builds confidence. The first successful attempt changes how you view car maintenance altogether. Suddenly, small issues don’t feel overwhelming anymore. That shift in mindset is powerful.
Knowing how to remove a brake light bulb also sharpens problem solving habits. You begin observing before acting, planning instead of guessing. Those habits transfer to other areas of vehicle care. It’s a ripple effect of competence.
Financial benefits show up over time too. Avoiding service fees for minor fixes adds up, especially when bulbs fail periodically. That saved money can go toward preventative maintenance instead. Smart choices compound quietly.
Most importantly, there’s peace of mind on the road. You drive knowing your signals work and your car communicates clearly. That assurance reduces stress and improves focus. And it all starts with mastering one straightforward process.
Installing the New Brake Light Bulb With Precision
Once the old bulb is out, installing the replacement is where attention really pays off. Even a brand new bulb can fail early if it’s seated incorrectly or handled carelessly. Using a clean cloth or gloves prevents skin oils from shortening the bulb’s lifespan. This small habit protects the key performance factor most drivers overlook.
Alignment matters more than force at this stage. The bulb should slide or twist into place smoothly, matching the socket’s design without resistance. If it doesn’t feel right, pulling back and realigning is smarter than pushing harder. Precision here reduces flickering and intermittent failures later.
After insertion, gently tug the bulb to confirm it’s secure. A loose connection may light up briefly, then fail once the car hits bumps or vibration. That kind of issue can be frustrating because it looks fixed at first glance. Taking an extra second now avoids repeating the process later.
Finally, double-check that the bulb matches the original specifications. Mixing wattage or type can affect brightness and heat output. Consistency ensures the brake light communicates clearly to other drivers. Clear signaling is the primary safety benefit of doing this job right.
Reassembling the Housing Without Stress
Putting the housing back together is where patience pays dividends. Rushing this step often leads to misaligned panels or stripped screws. Each clip or screw should return to its original position without forcing. Smooth reassembly protects the housing’s structural integrity.
Pay attention to seals and gaskets during this stage. These components keep moisture out, which directly impacts bulb longevity. A pinched seal can invite condensation and corrosion over time. Preventing water intrusion is a long-term reliability factor worth focusing on.
When tightening screws, snug is enough. Over-tightening can crack plastic or warp the lens. Even pressure across all fasteners keeps the assembly secure without damage. Balanced tightening is one of those quiet skills that makes repairs last.
Before closing everything fully, take a moment to inspect alignment from the outside. The lens should sit flush with the body, no gaps or uneven edges. Visual confirmation saves reopening the housing later. That extra glance adds confidence to the finish.
Testing the Brake Light Before Driving
Testing is not optional, it’s the final confirmation that your work succeeded. Turning the ignition on and pressing the brake pedal verifies both installation and connection. Reflections from a wall or garage door make it easy to see the light without assistance. This quick check reinforces the core safety outcome.
If the light doesn’t activate, resist the urge to panic. Most issues come from a loose socket or misaligned bulb. Revisiting the previous steps calmly usually solves the problem fast. Methodical troubleshooting beats guesswork every time.
Brightness consistency is another thing to observe. A noticeably dim light may indicate an incompatible bulb or electrical issue. Addressing it immediately prevents confusion for drivers behind you. Visibility is the entire point of the brake light.
Once confirmed, you can drive knowing your signal is reliable. That assurance reduces mental load in traffic. Confidence on the road often comes from handling small details correctly. Testing seals the process with certainty.
Situations Where Extra Care Is Needed
Some vehicles require more finesse due to compact designs or advanced lighting systems. LED brake lights, for example, may involve entire modules rather than single bulbs. Treating these systems gently avoids expensive mistakes. Knowing when complexity increases is a critical judgment skill.
Cold weather can also affect plastic components, making them brittle. In these conditions, warming the area slightly before removal helps prevent cracks. Temperature awareness is an underrated factor in successful maintenance. Conditions matter as much as technique.
Vehicles exposed to humidity or road salt often show corrosion in sockets. Cleaning contacts carefully improves conductivity and bulb life. Ignoring corrosion leads to repeat failures that feel mysterious later. Proactive cleaning keeps systems dependable.
Context matters too, just as lighting choices vary in other spaces like kid-friendly bathrooms where people research wall sconces for safety and comfort. Matching the solution to the environment ensures better outcomes. Adaptability makes maintenance smarter, not harder.
Recognizing When the Issue Is Not the Bulb
Sometimes replacing the bulb doesn’t solve the problem, and that’s important to recognize early. Blown fuses, wiring issues, or faulty switches can mimic bulb failure. Assuming the bulb is always the culprit delays real fixes. Awareness here saves time and frustration.
A quick fuse check often reveals the answer. Many vehicles label fuse boxes clearly, making inspection straightforward. Replacing a fuse is usually even simpler than changing a bulb. This step expands your diagnostic confidence.
Wiring issues tend to show as intermittent lighting or complete failure across multiple lights. In such cases, professional inspection may be necessary. Knowing your limits is also a form of expertise. Smart maintenance includes recognizing when to escalate.
Just as people differentiate between normal cycles by learning light period definitions in other contexts, distinguishing symptoms helps target the real issue. Clarity prevents unnecessary repetition. Accurate diagnosis protects both time and components.
Long-Term Benefits of Handling Brake Light Maintenance Yourself
Handling this task yourself creates lasting benefits beyond the immediate fix. Over time, familiarity with your vehicle’s systems grows naturally. That familiarity reduces anxiety around future issues. Confidence compounds with each successful repair.
There’s also a financial upside that quietly adds up. Avoiding service charges for minor tasks preserves budget for bigger priorities. That efficiency feels empowering rather than restrictive. Small savings accumulate into meaningful value.
More importantly, safety remains consistently high. Regular checks and quick responses keep your signals reliable. Other drivers can react appropriately, reducing risk on the road. Safety isn’t dramatic, it’s consistent.
Knowing how to remove a brake light bulb ultimately shifts your relationship with car ownership. You move from reactive to proactive. That shift brings control, calm, and competence into everyday driving. And that’s a benefit that lasts far longer than the bulb itself.


Best Outdoor Light Bulb Reviews: Top-Rated Picks for 2026

Best Yellow Fog Light Bulb 2026 For Clearer Night Drives

Best Z Wave Light Bulb 2026 Top Picks For Smart Control

Best Vintage Light Bulb 2026 With Style And Glow

Best LED Reading Light Bulb Reviews - Top Picks for 2026

Best Light Bulb to Mimic Sunlight - Top Picks 2026

7 best light bulb to heat dog house picks that work

Best Bluetooth Speaker Light Bulb 2026 With Style And Power





